Cake Smash Portrait Session | Baby O | Kelowna, BC

We weren’t sure how Baby O would react to the cake smash but oooooh my goodness he was very into smashing and playing with it! I feel the key was the fruit - blueberries are Baby O’s favourite and the layers made it something fun to pick up and put down.


Kelowna Family Photographer

I’m a Kelowna Family Photographer. My mission to you is to document your motherhood and create treasurable memories for yourself and your kids. To get in touch about all things motherhood and family photography head to my contact page!

Color OR Black and White in Portraits

Color in photography can have a profound impact on your photo. It’s not new that color can evoke emotion and even a sense of time. When you think of Valentines Day what color do you think of? When you think of Easter what colors do you think of? When you think of Christmas what colors do you think of? When you want to convey happiness you probably think of brighter colors. When you think of cool, calming emotions you probably think of maybe something blue. When you think of peacefulness, serenity maybe some greens pop in your mind. 

I love including color in my photography! I’m just selective in how and where I introduce color to create the best expression in the photo. Because sometimes color can be too distracting and instead of adding value to a photograph, it pulls focus away from what really matters in the photo. 

Within the scheme of color you have ‘pops of color’ within the photo. For example, an all white backdrop with the subject wearing a pop of color. You then have a photo where the whole image was turned black and white. 

I love, love, love a classic black and white photo. I find with black and white it strips away all non-essential details in the photo and you just focus on the subject, the tones within the frame. 

Let’s look at some examples!

This photo was taken in our bedroom. Three of the four walls in our bedroom are white with this back wall a light blue. As you can see in the photo to the left, the wall is blue, Max is wearing grey, I’m wearing a pattern white robe, Victoria is in pink, etc., The photo to the right is the same photo but post-processed as black and white. I prefer the black and white edit because it strips the photo down to the core more - us. In the photo to the left there is color not necessarily super clashing but it’s not complimenting each other and it doesn’t give a harmonious vibe. 

Next example! This photo was taken at Christmas time. I personally prefer the color edit because the ambiance, the color adds to the feeling I want to achieve in the photo. 

In my home, if I’m seasonally decorating I will print color for my walls but generally throughout the year I prefer to print black and white. It looks timeless and I don’t have to worry about colors clashing with each other or other pieces in my home. I also just love black and white. This is why I also deliver my galleries to clients in black and white as well as color.

A part of me would love to be a strict black and white photographer because I think it looks so timeless and classic but I love color. Color can elevate a portrait, portray a feeling, make the expression of the photo.


Kelowna Family Photographer

I’m a Kelowna Family Photographer. My mission to you is to document your motherhood and create treasurable memories for yourself and your kids. To get in touch about all things motherhood and family photography head to my contact page!

Valentine Portrait Session | Baby V

I LOVED this sweater set at Old Navy and I knew I wanted to create a cute heart set to take valentine photos of my girl V. I literally could not narrow down my favourites. V is so expressive and mobile which makes for such cute photos. I originally was going to make these hearts out of paper but I ended up using foam because my local store didn’t have the colored paper I was looking for and it ended up being the best because it withstood little hands and teeth. I’m just soooooo in love with how her valentine portraits turned out!

DETAILS

Outfit: Old Navy

Donut Smash Portrait Session | Baby M | Kelowna, BC

Baby M turned one and the W Family decided to do a fun donut smash! We took these photos inside a studio with the giant donut from 350 Bakehouse and Cafe here in Kelowna, BC.

Photographing celebratory cake smashes like these are probably my favourite to photograph! Yes, it is totally messy but I love seeing their little faces light up when they taste the sweetness. Your tiny human only turns one once so celebrate and treasure it with these cute cake smash sessions.

VENDORS

Studio: Tides Wellness Collective | Donut: 350 Bakehouse and Cafe

KELOWNA FAMILY PHOTOGRAPHER

I’m a Kelowna Family Photographer. My mission to you is to document your motherhood and create treasurable memories for yourself and your kids. To get in touch about all things motherhood and family photography head to my contact page!

What to Do With Your Family Photos | 6 Ways to Get Them Off Your Phone and Into Your Hands

Imagine this, you book a family photo session to have beautiful photos of your family. You spend hours planning out everyone’s outfits and getting everyone ready. You go to your photo session and you can’t wait to get the photos back. When the photographer does give you your photos back you eagerly download them to your phone, post a few on Facebook, show a few to friends and family in person and then because life happens they stay on your phone. 

You invest time, money and let’s be honest mental energy into having beautiful photos of your family captured so don’t let them sit on your phone or computer - here are six ways you can get those photos off your phone and into your hands!

Print & Hang Them

The first is to print and hang them on display in your home. You can go as big or small as you want here. 

In my hallway on the way to the kitchen I have a white frame that I keep my baby girl's newborn photo in. On either side is a print of her foot and hand when she was itty bitty. I love these frames because when I have more kids I can do the same for them and it’ll result in a beautiful sentimental collection. 

In my living room I have larger wood frames that lean on a shelf behind my couch.

How you display them is completely up to you and your preference - you can do a gallery wall, one extra large print, maybe three or four in a line, or a picture ledge like the one I have. 

However you print and hang your photos, it’s a great way to relive those beautiful moments.

Create a Photobook

Another popular option is to print and display your photos in your baby book, family yearbook or special photo book you create for just the occasion. 

I have two baby books I keep for my daughter, Victoria. This first one is a simple one I was gifted from my husband from Indigo. It captures more of the highlights of her first year. This second one is one I created myself to capture everything from finding out we were pregnant to now. It captures all of her milestone photos and more. 

If you’re not much of a scrapbooker then so many shops make beautiful baby books that you just have to fill in. Alternatively, you can put all the photos into a Blurb photobook and it will generate everything for you. 

Create a Family Newsletter

Often when we receive our family photos back from the photographer we post to Facebook or Instagram. The problem is often times not all our friends and family are on social media. For example, my grandparents are in their 80’s and 90’s and although they have family near them that are on social media they aren’t and so they often miss out on seeing the photos. 

I tried to do a monthly newsletter for our little family back in the fall but the upkeep was difficult with so many other priorities happening in the month that in 2023 I’m moving to a quarterly system. So every quarter I’ll gather photos, notes, etc., and package it into a newsletter that my friends and family can look at that aren’t on Facebook. This is a way to help some of the older generations in my family keep in touch. 

It’s also a nice document to look back on at the end of the year. 

Turn it Into Jewellery

If you have a favorite photo from your session you can turn it into jewellery. A simple locket is a beautiful sentimental piece that you can treasure forever. 

Alternatively you can find lots of brands online that do cool and unique jewellery designs with your photo. This is a bracelet that I have, gifted from my husband. It has a photo from our wedding inside when you look through the glass. 

Create a Gift Out of Them

When a special occasion or holiday rolls around you can create a gift out of your family photos to give to your friends and family. 

Fathers Day is quite a few months away (at the time I am writing this) but I have my eye on a photo keychain as a gift to my husband.

Places like Etsy has so many options if you’re looking for a personalized gift to give a loved one.

Make it Your Phone and/or Computer Background

A simple way you can continue to relive your family photo session is to make the photos your phone and computer background. 

If you’re into making mood or vision boards then add some of your own family photos to it that capture a feeling you want to continue or create in your future.

Cake Smash Portrait Session | Baby M | Kelowna, BC

Will Baby M dive and smash into the cake or gingerly enjoy? The M Family made this gorgeous homemade cake for Baby M’s birthday topped with her favourite fruit. It looked absolutely delicious and fun to smash into.

KELOWNA FAMILY PHOTOGRAPHER

I’m a Kelowna Family Photographer. My mission to you is to document your motherhood and create treasurable memories for yourself and your kids. To get in touch about all things motherhood and family photography head to my contact page!

How to Take Your Own Maternity Photos - DIY Maternity Photos

Hello friends! Today I’m going to share with you how you can take your own maternity photos. There are numerous reasons why you decide to take your own maternity photos - perhaps money is tight, the date snuck up on you, you’re self conscious, or you just have your own creative itch to tackle the challenge.

For our pregnancy I could have opted to hire a maternity photographer, however, I was on the fence about taking maternity photos AT ALL because I was self conscious. I’ve always been slightly self conscious about my picture being taken, there’s parts of my body that I like and don’t and with pregnancy you gain weight. I gained about 20-25 pounds throughout the course of my pregnancy and towards the middle of the third trimester I started seeing stretch marks (despite applying cream every night to try and avoid it).

However, this is an important time in my life and I wanted to document this moment, despite how uncomfortable I was. So I took a set of maternity photos and I ended up loving the process and the photos themselves that I kept on taking them. To see a full gallery of the maternity photos I took, check out this gallery.

Determining The Style & Feel

Before you take your camera equipment out and start snapping away, I suggest first determining the style and feel of the photos that you want. Understanding this helps to inform other decisions down the road - the clothes you’re going to wear, your backdrop, use of color, indoor or outdoor, etc.,

To get an understanding of the style and feel that you want I suggest creating a mood board. You can do this on Pinterest or via another software like Milanote. The idea is to gather inspiration and ideas for your own maternity photoshoot. As you gather you’ll start to see some re-occurring patterns of what you like that you can emulate in your own photos.

I preferred clean and consistent with my maternity photos, with a natural edit. I also loved the idea of taking indoor maternity photos because I had the forethought in mind that I would re-create them after we have the baby.

Snapshot of my maternity photoshoot Pinterest board.

Setting the Scene

After you have an understanding of what style you want you can start planning and setting the scene for your photoshoot.

Background/Backdrop

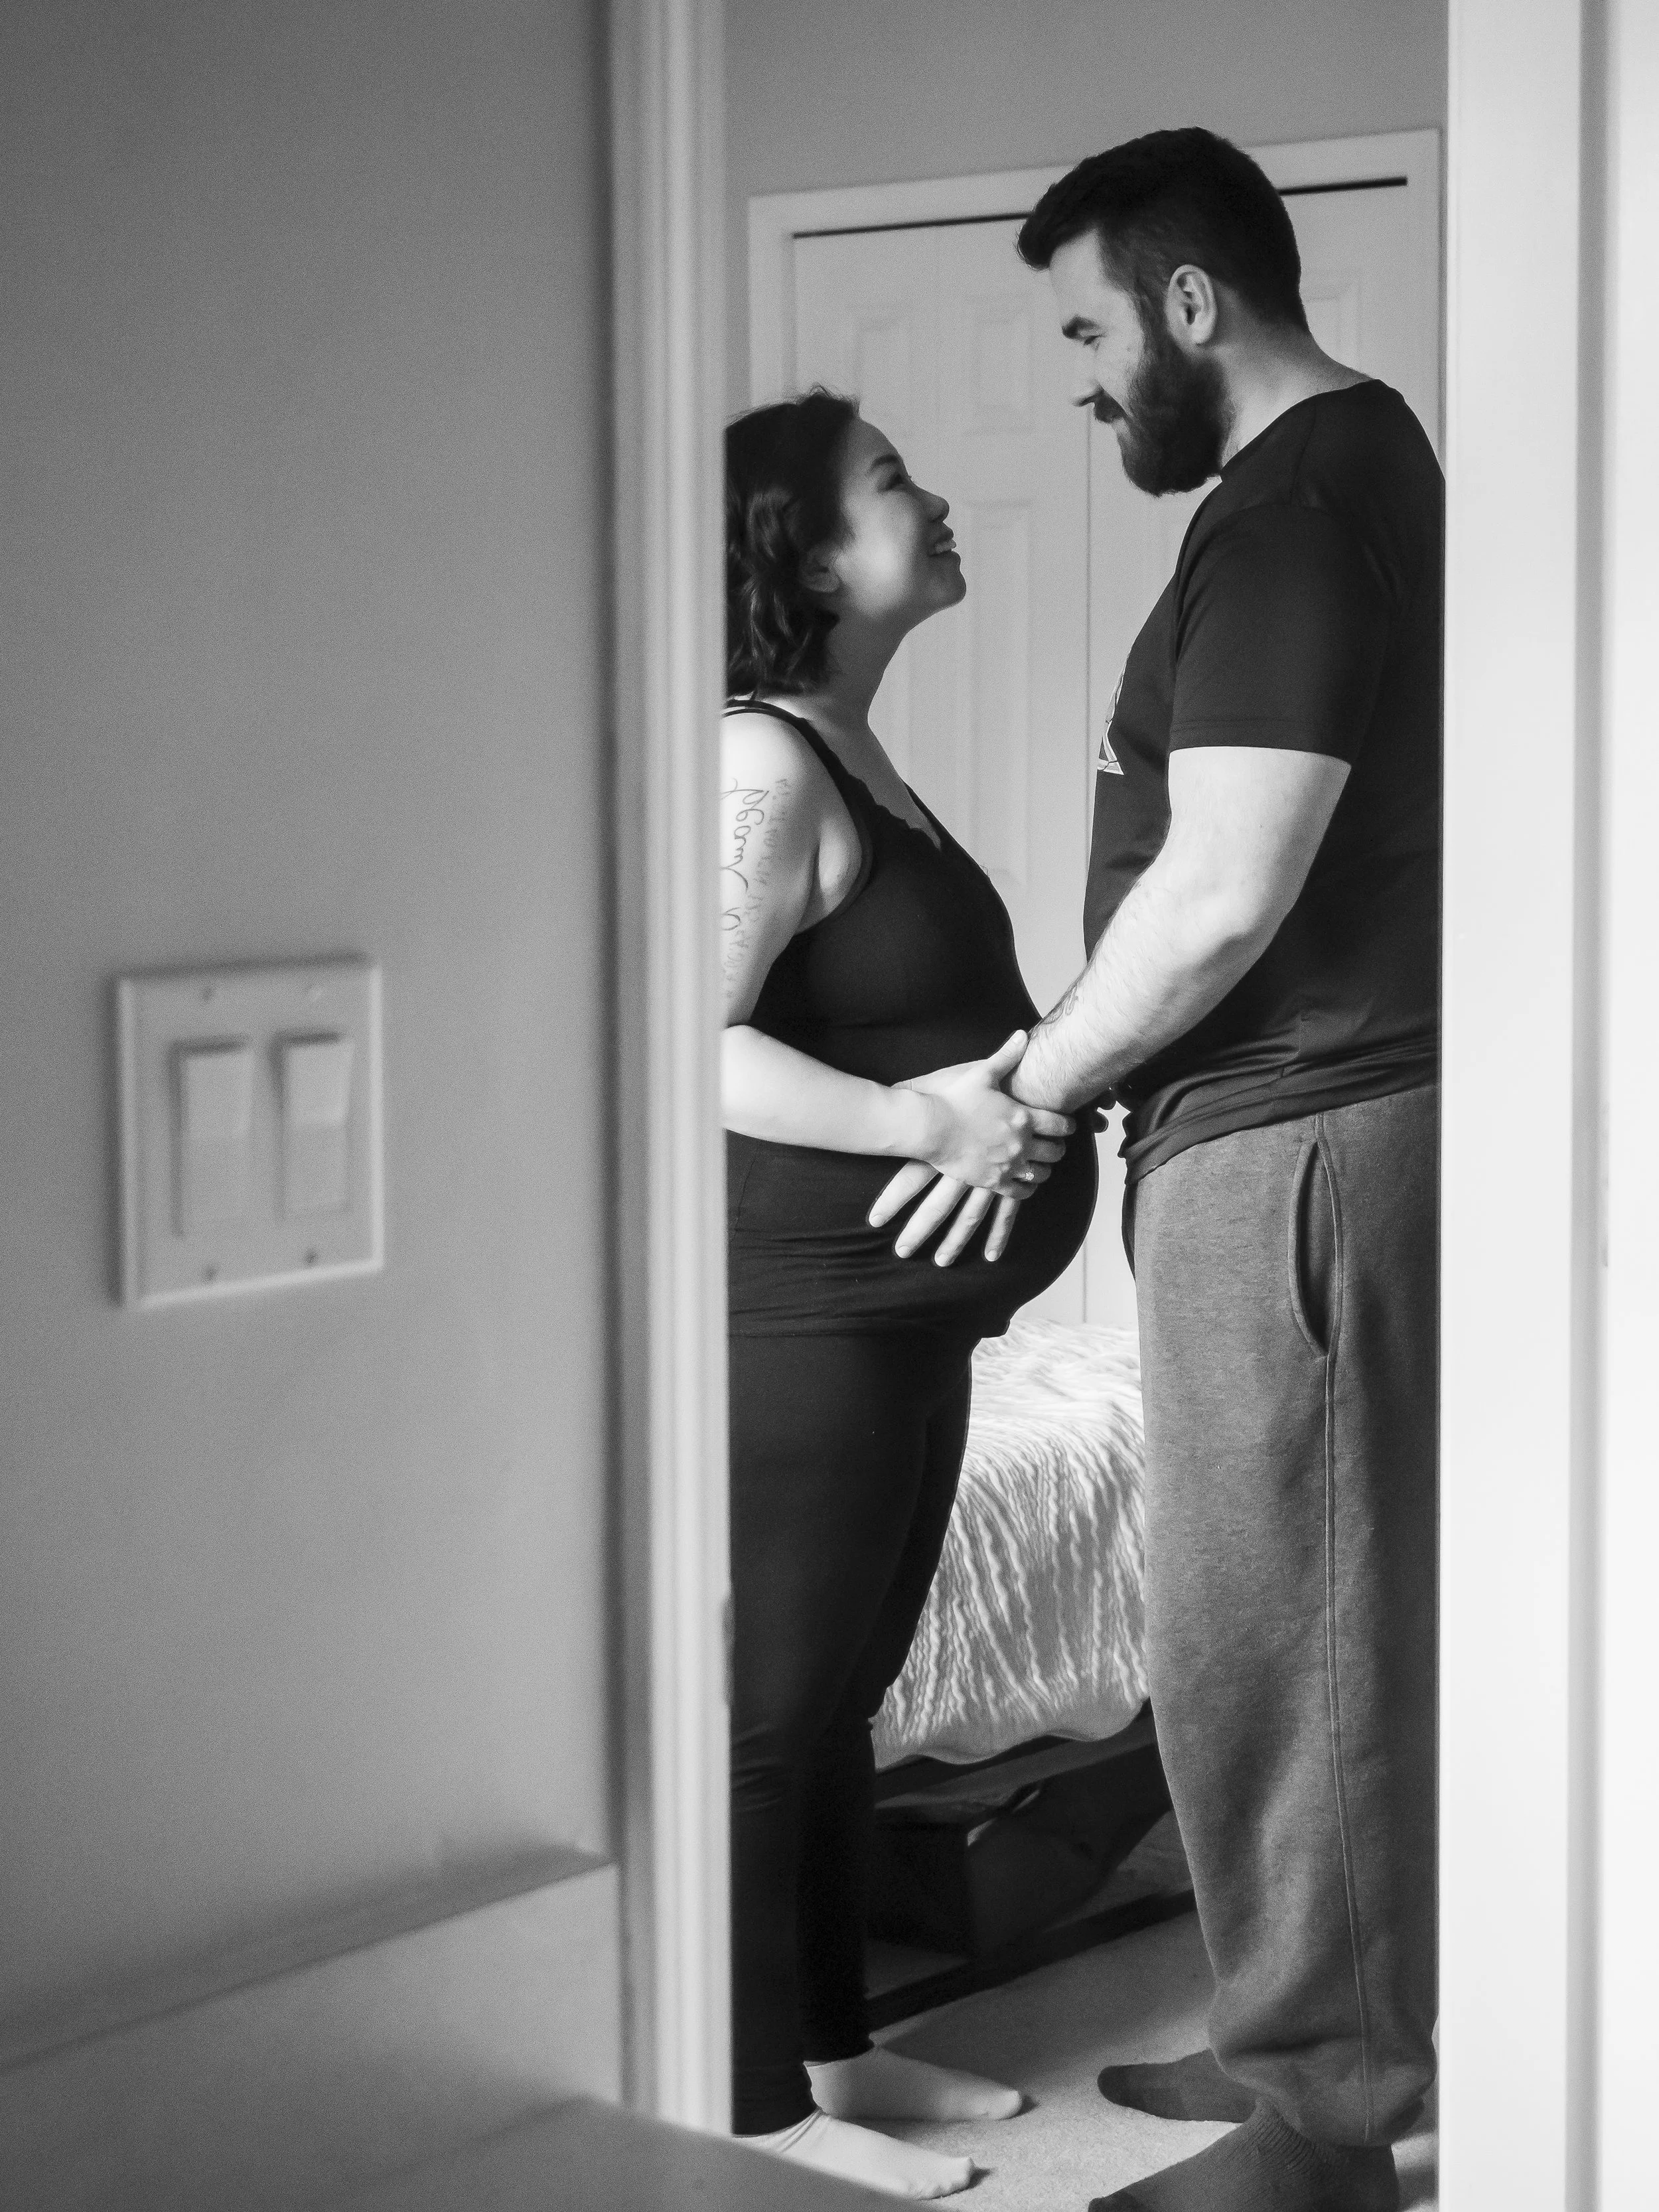
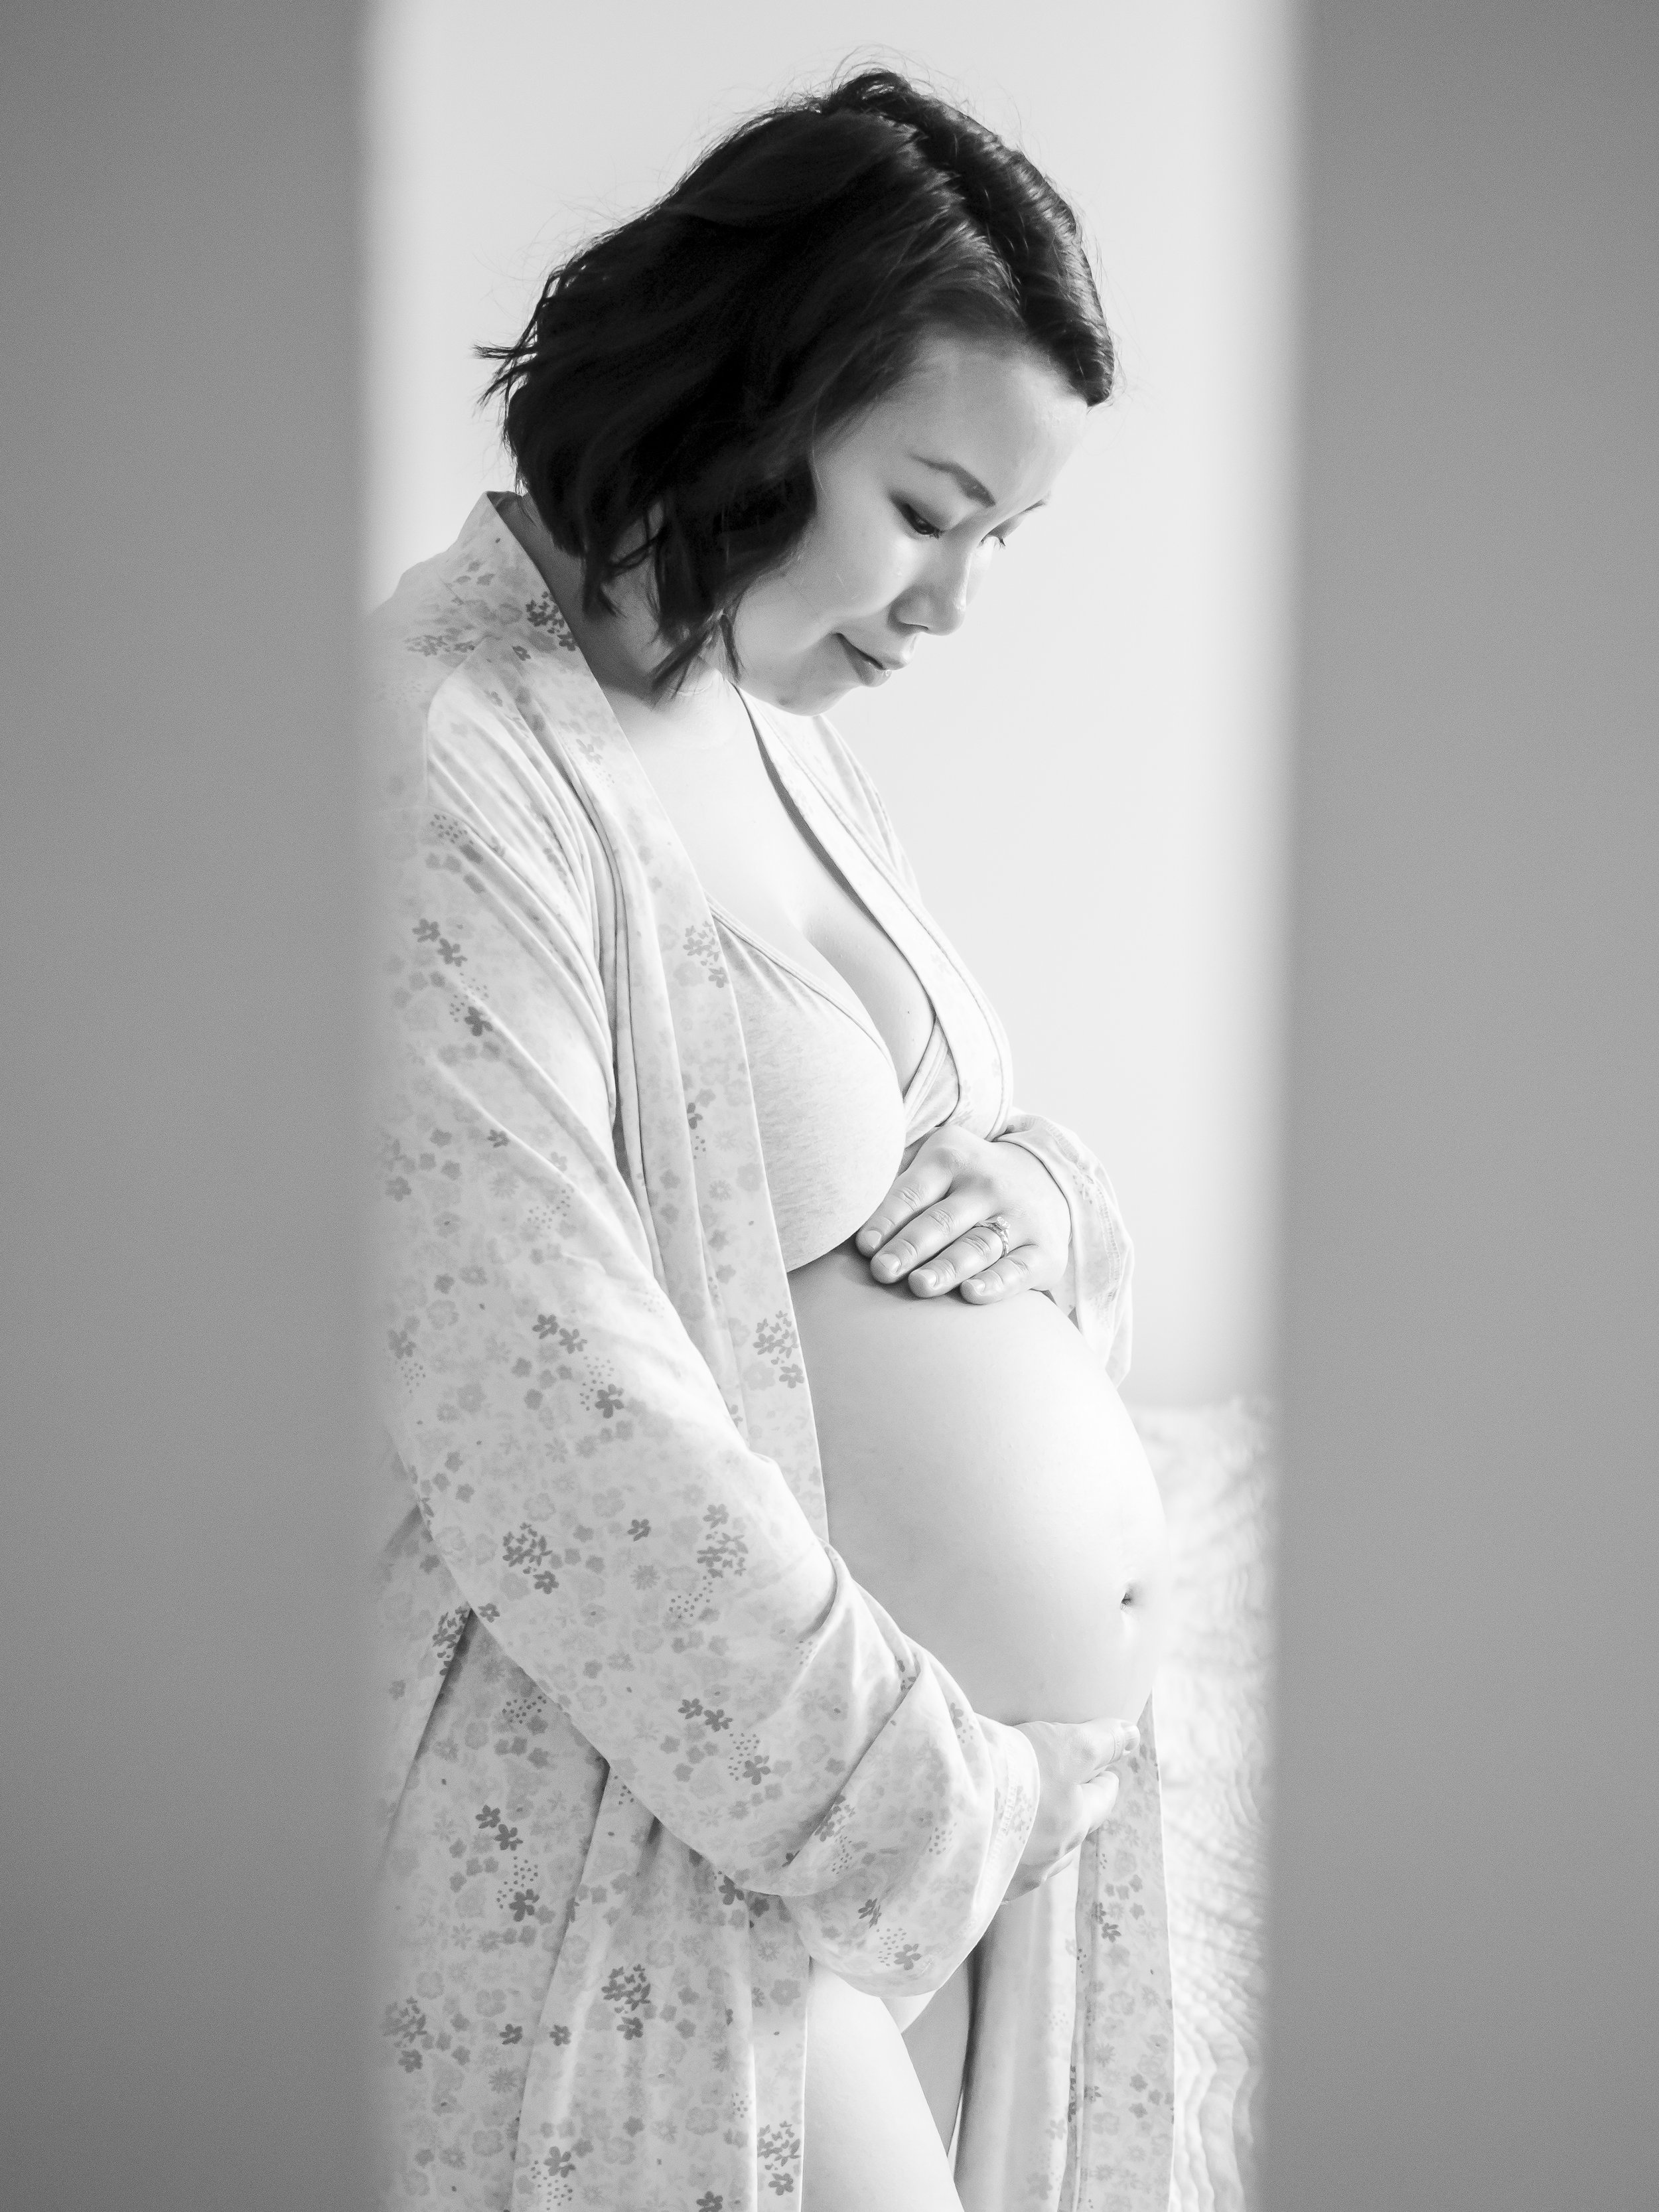
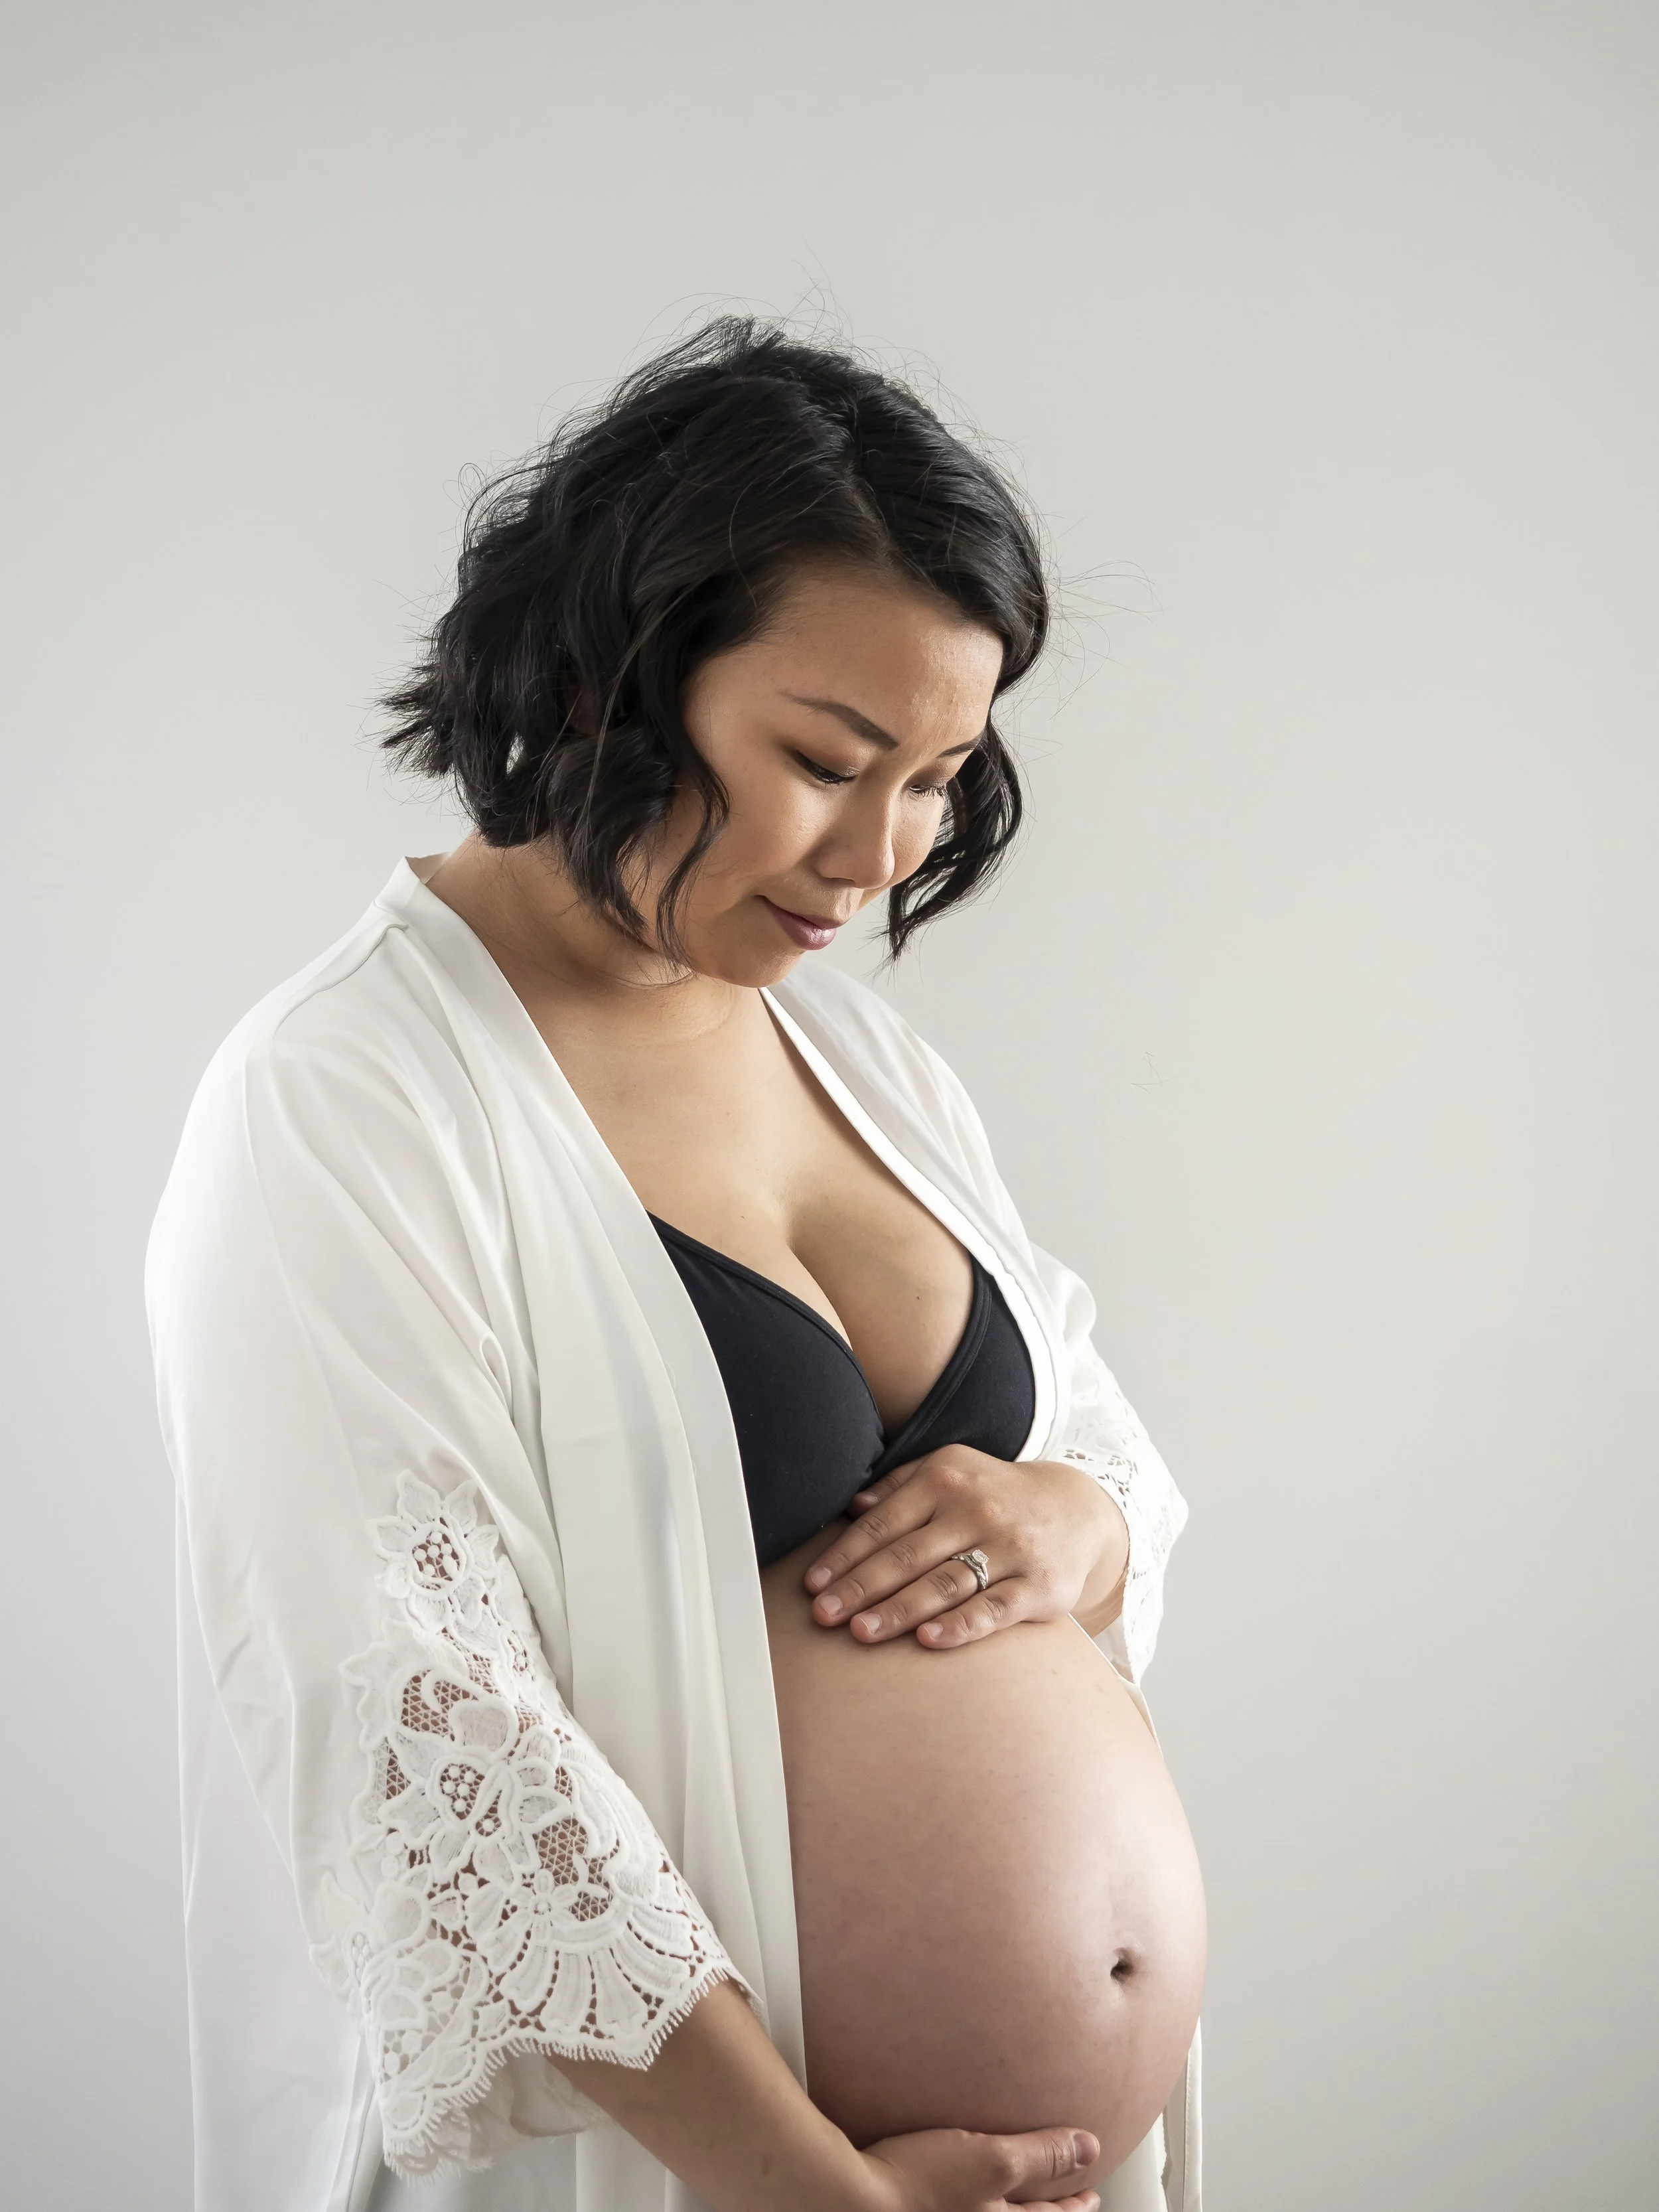
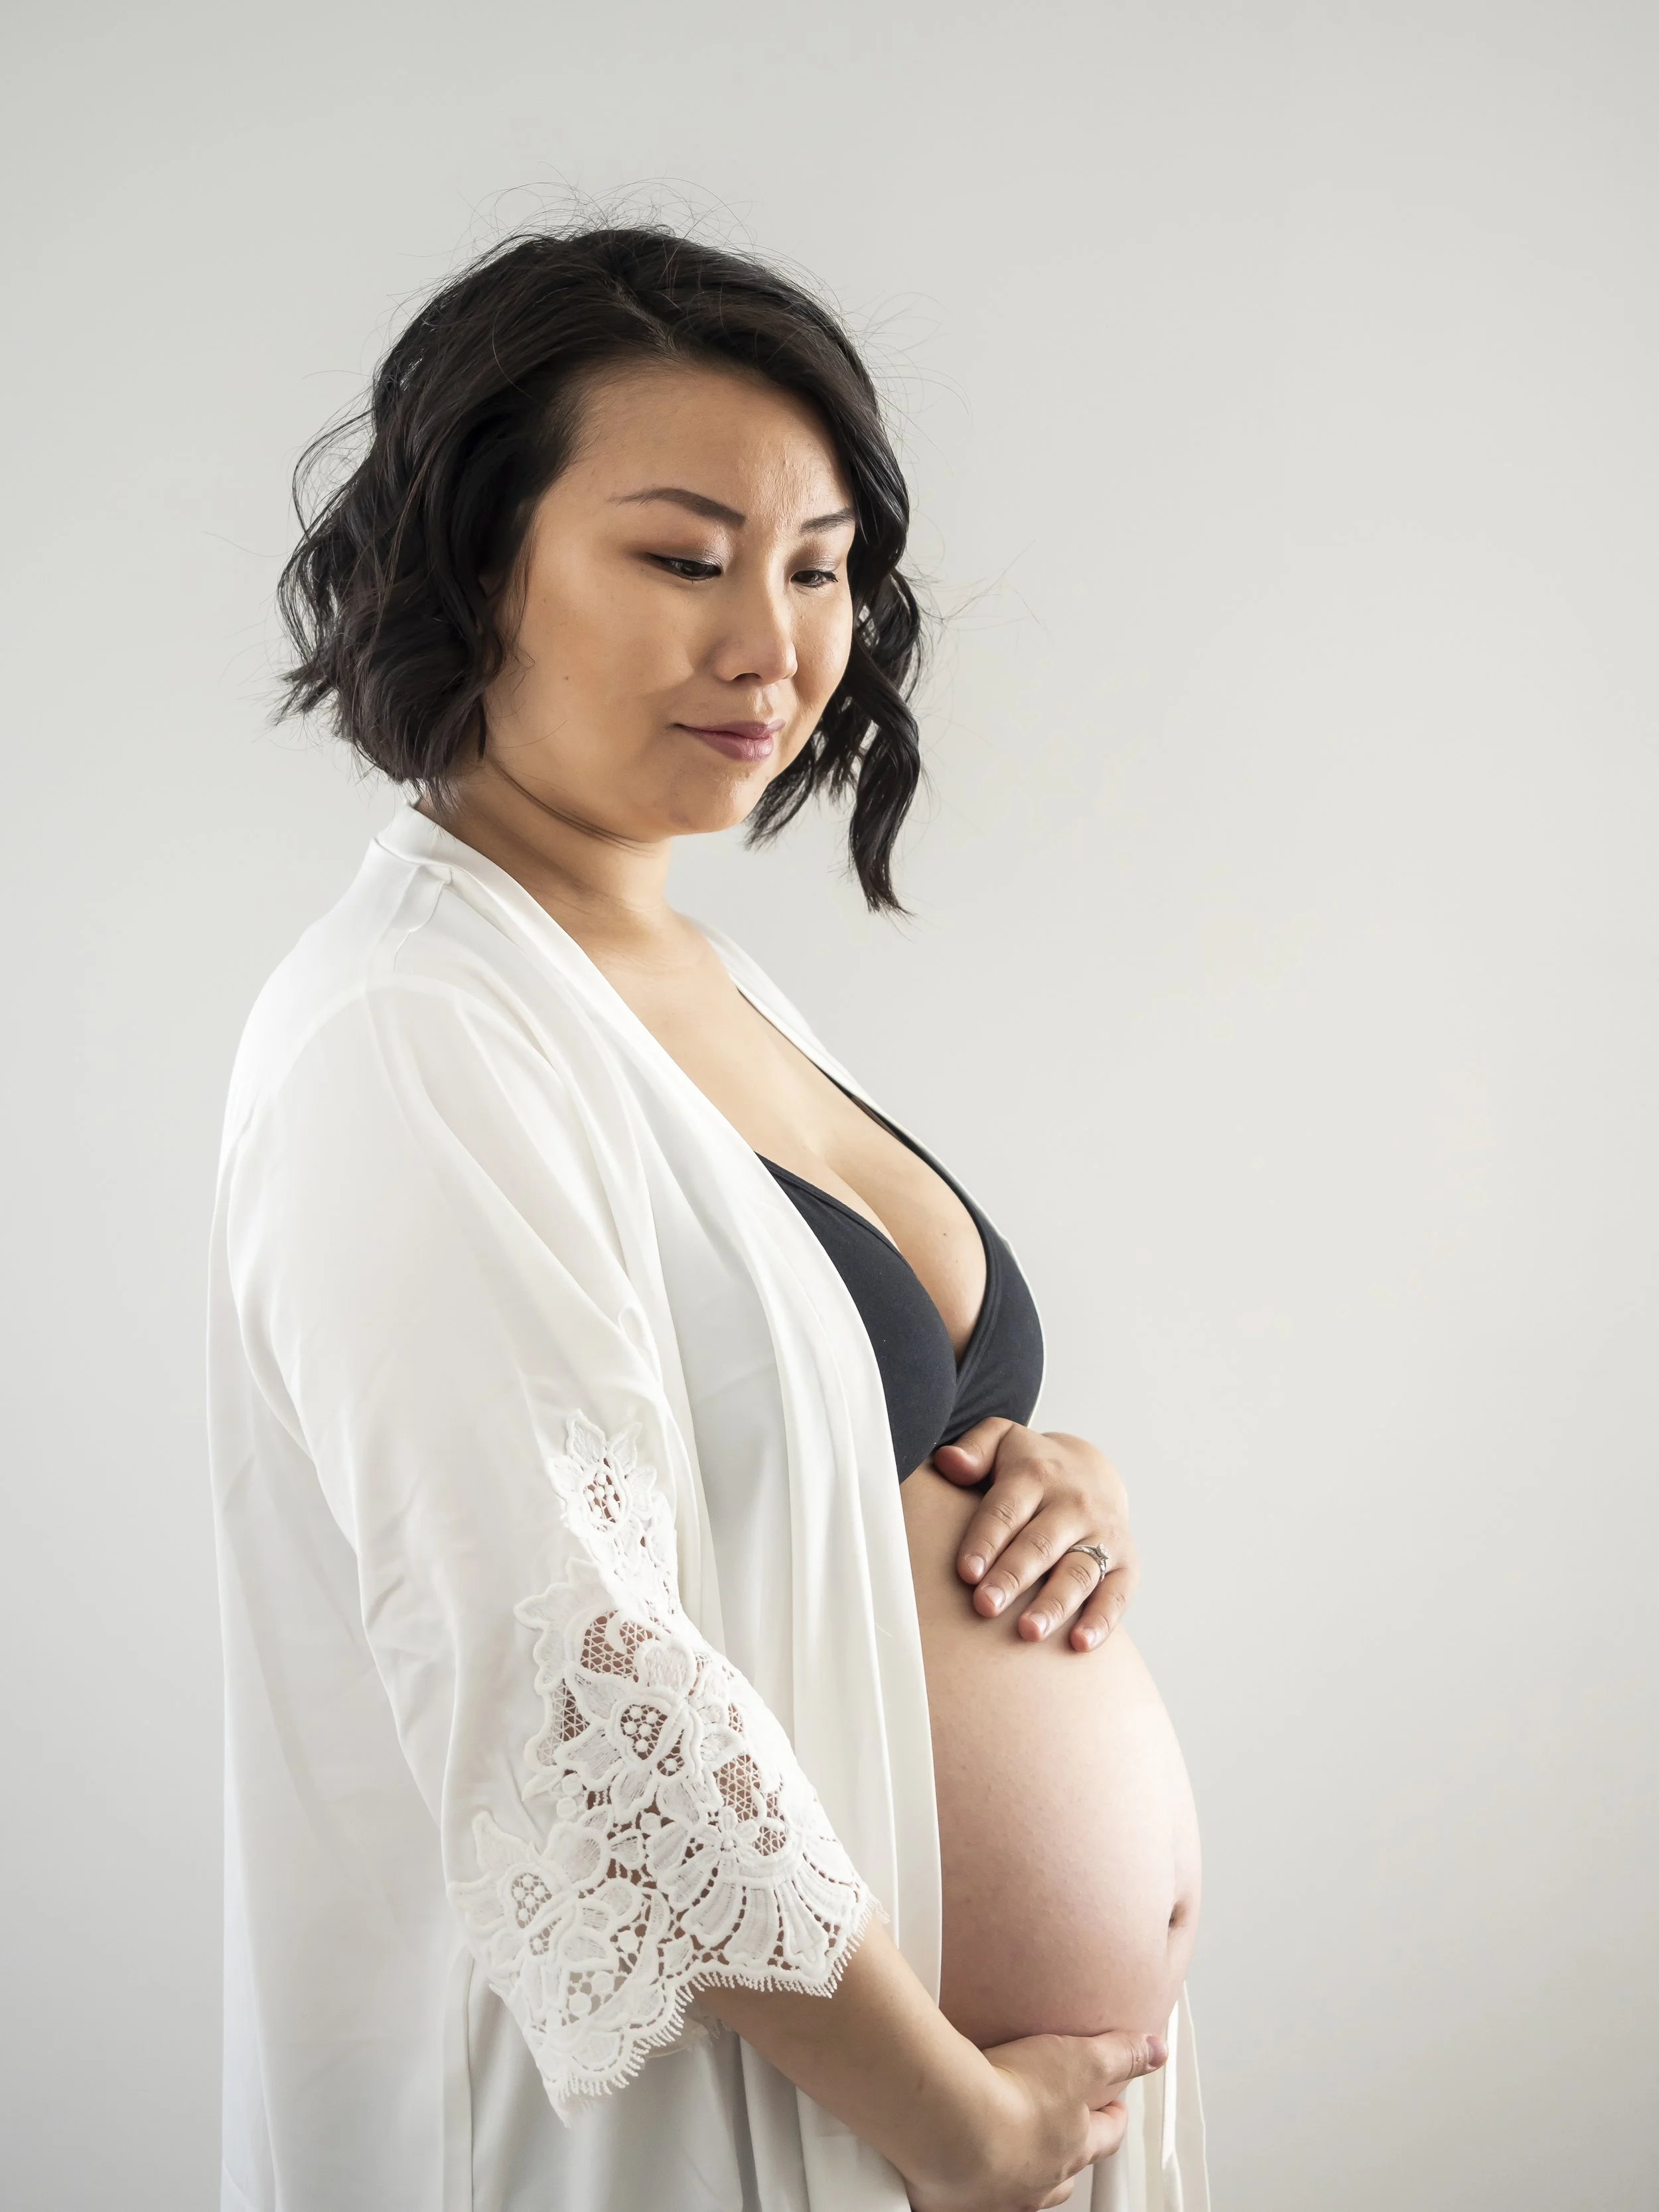
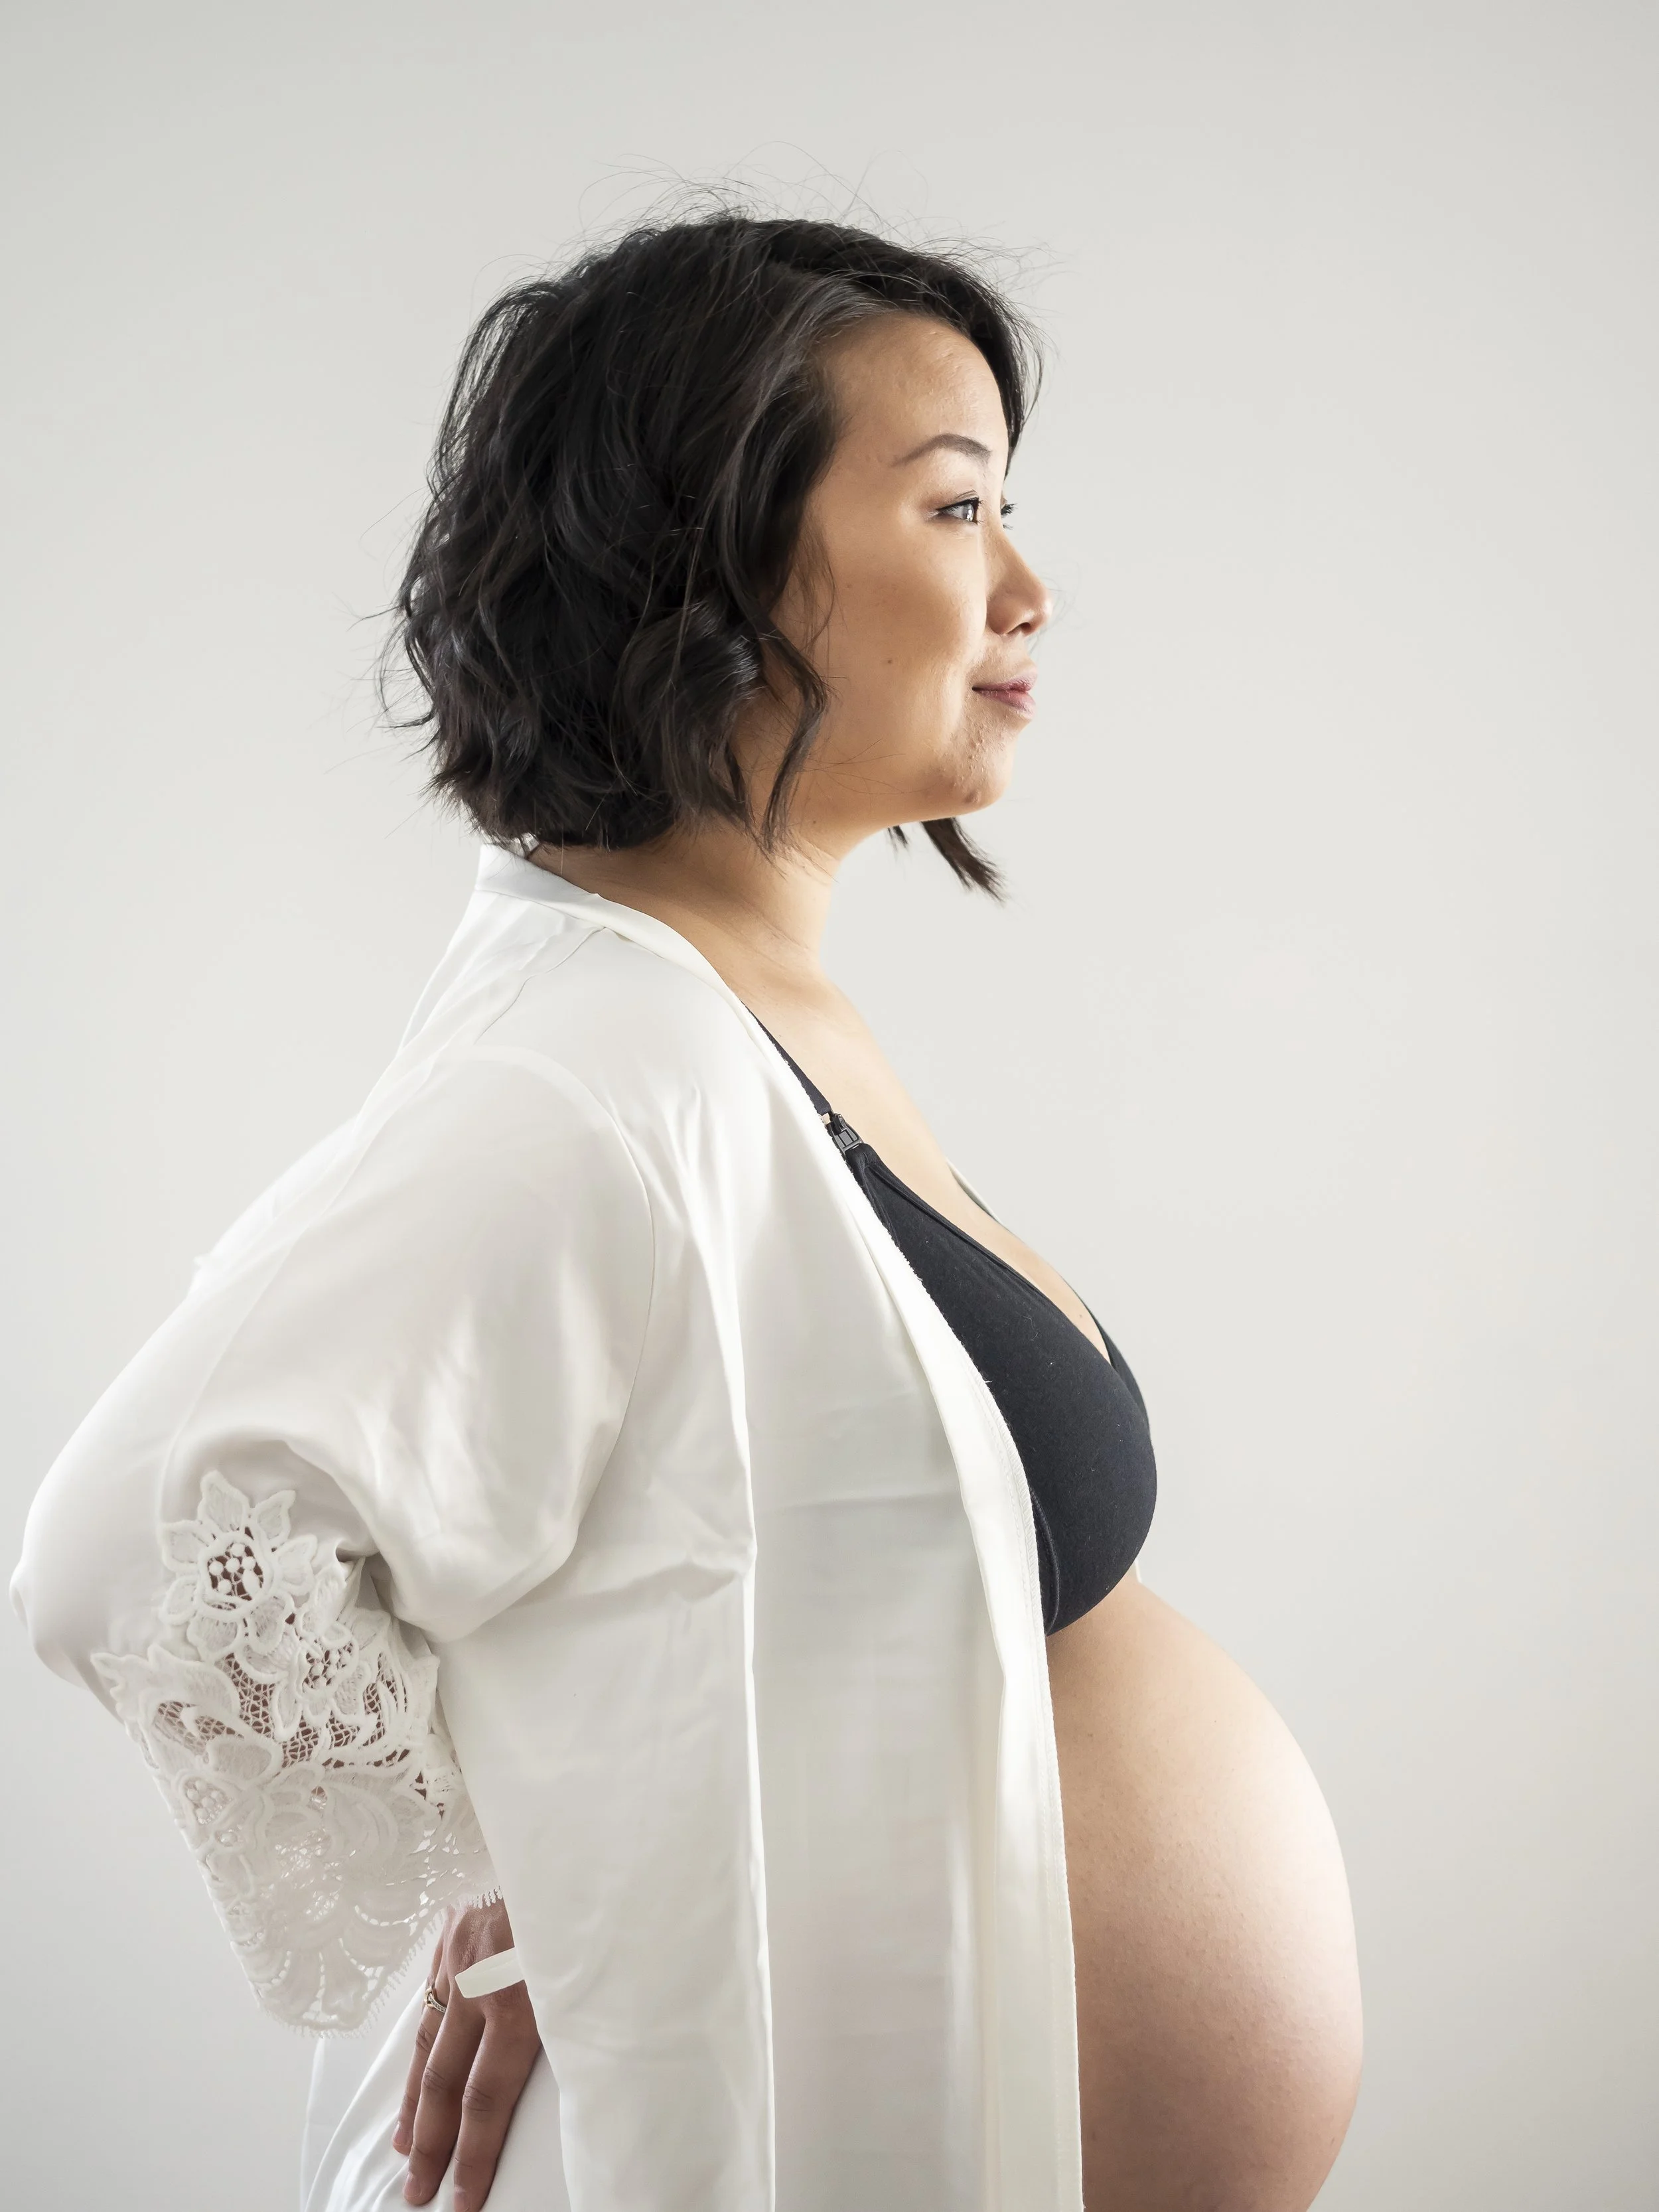
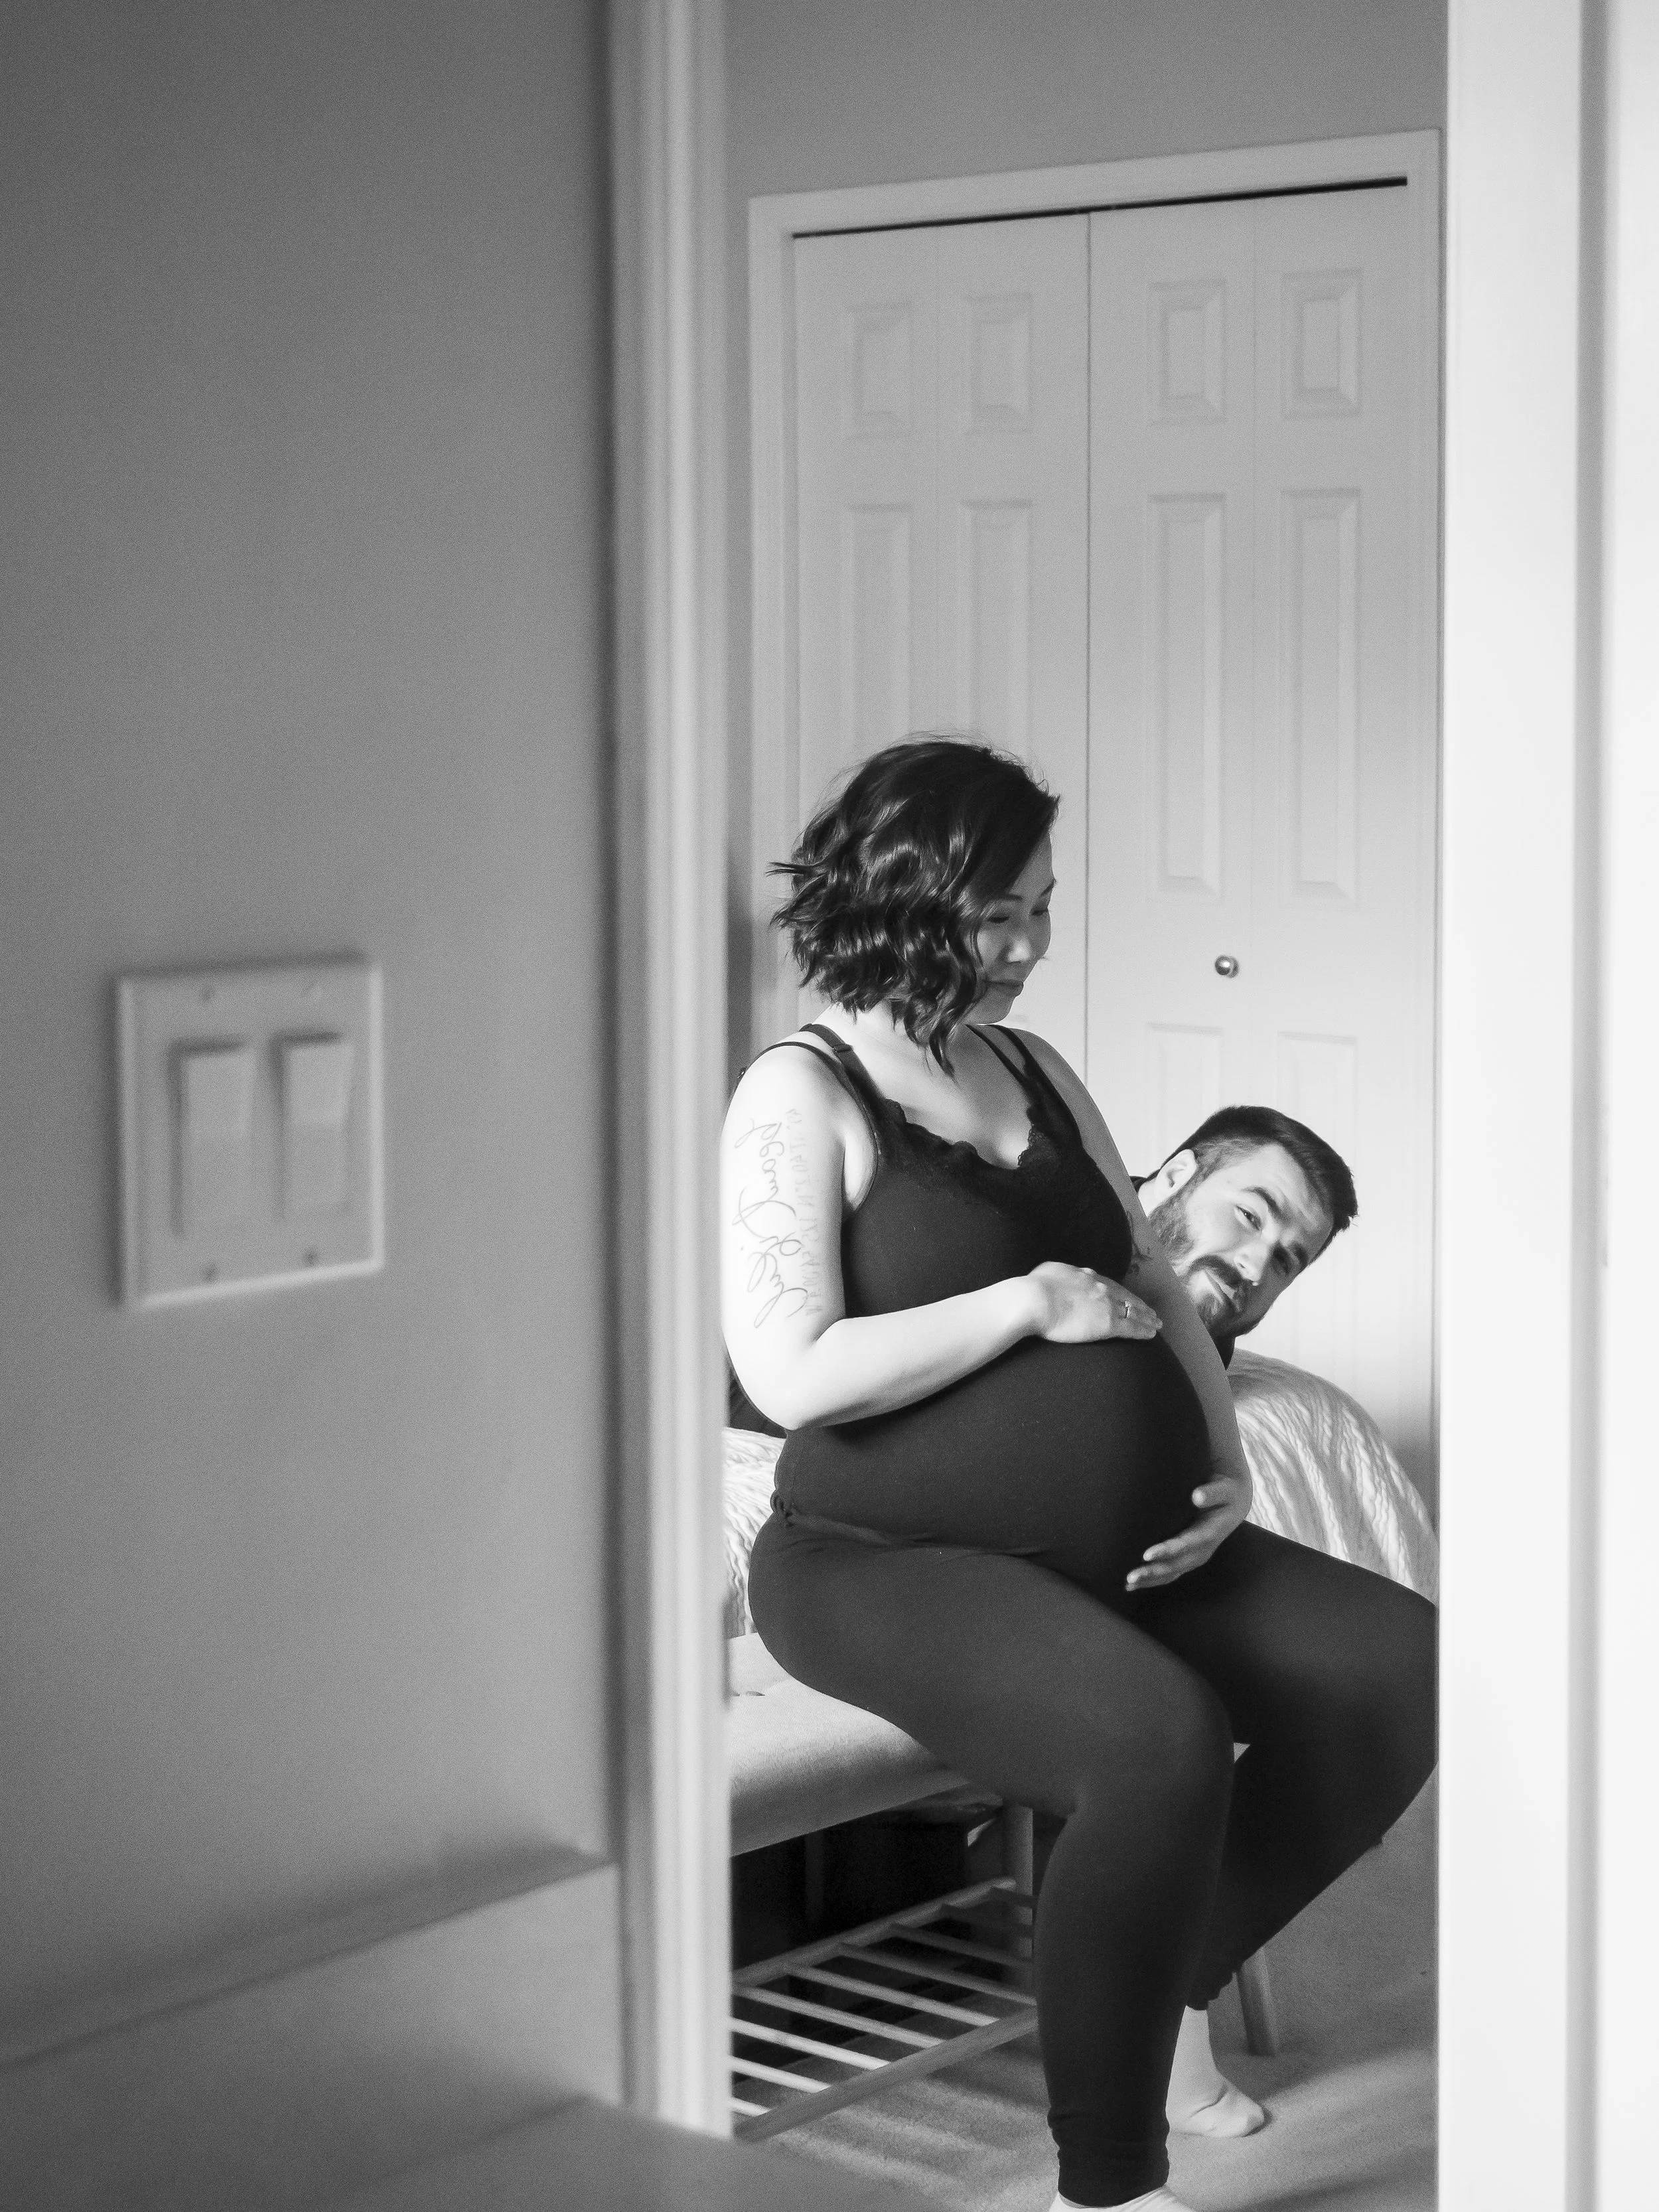
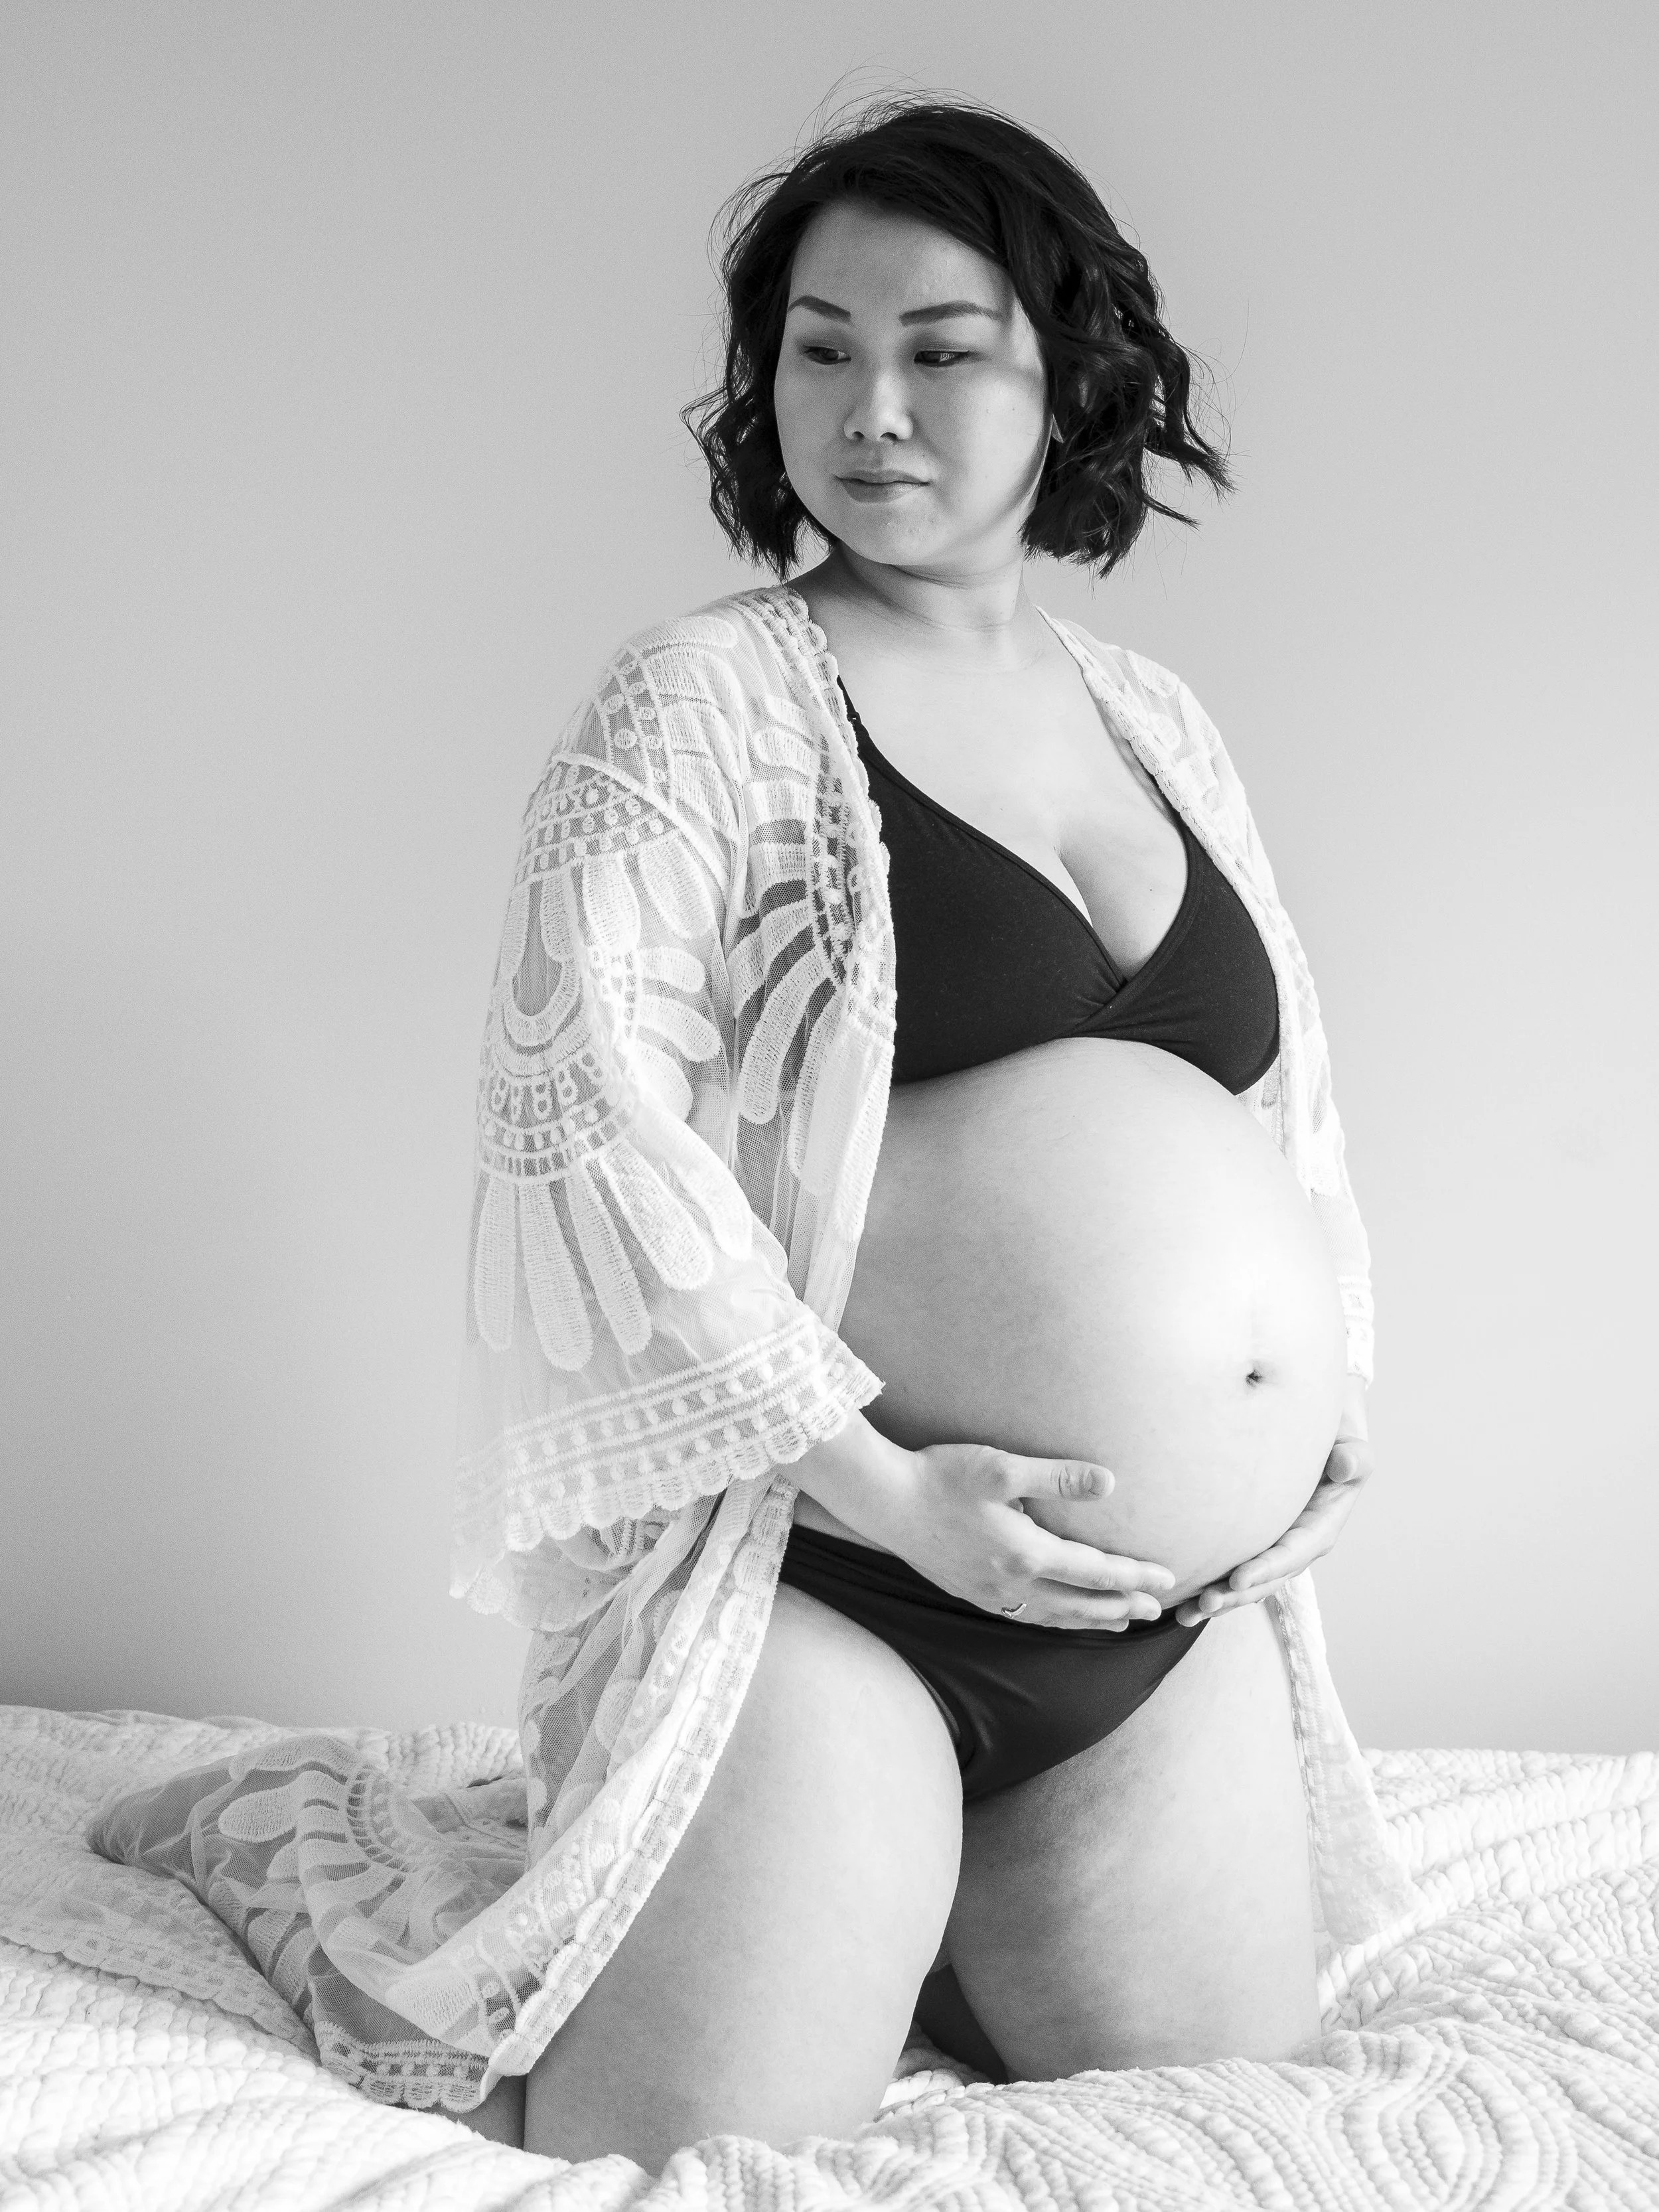
Since I was going for clean and consistent maternity photos I purposely chose backgrounds/backdrops that were simple and clean. I tracked down walls and areas of my home that I could create a clean backdrop with.

Light

Along with carefully choosing my backgrounds/backdrops to achieve that clean look I also had to think about lighting. Was I going to use natural light or create my own light?

I chose to use natural light for my maternity photos. For this reason, only certain walls in my home were suited for my maternity photos.

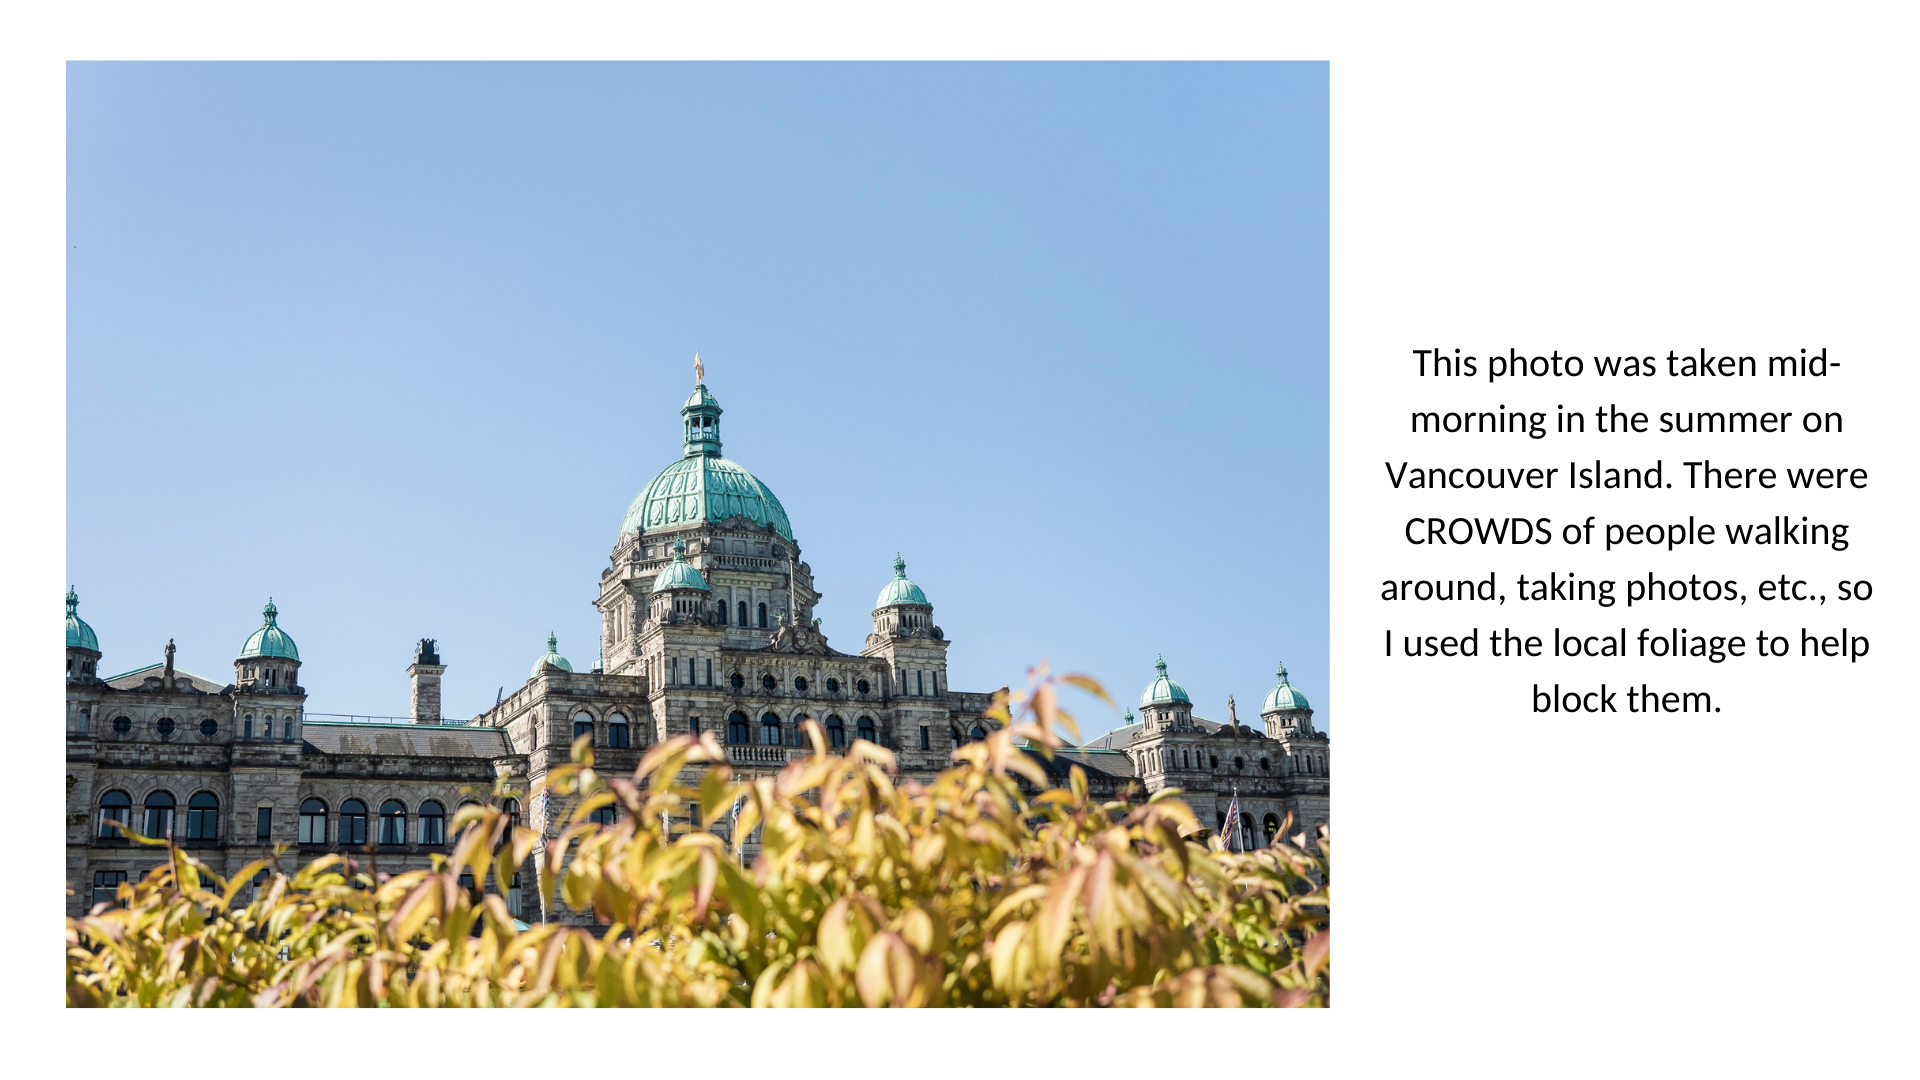
I also chose to take majority of them in the afternoon because the natural light was better.

You can of course choose to create your own light. I have a set of two Neewer softboxes that I use to light my YouTube videos. However, I hate setting them up and taking them down and there’s never a convenient wall socket to plug the lights in. So I find myself getting less frustrated using natural light than using artificial.

Choosing your Outfit(s)

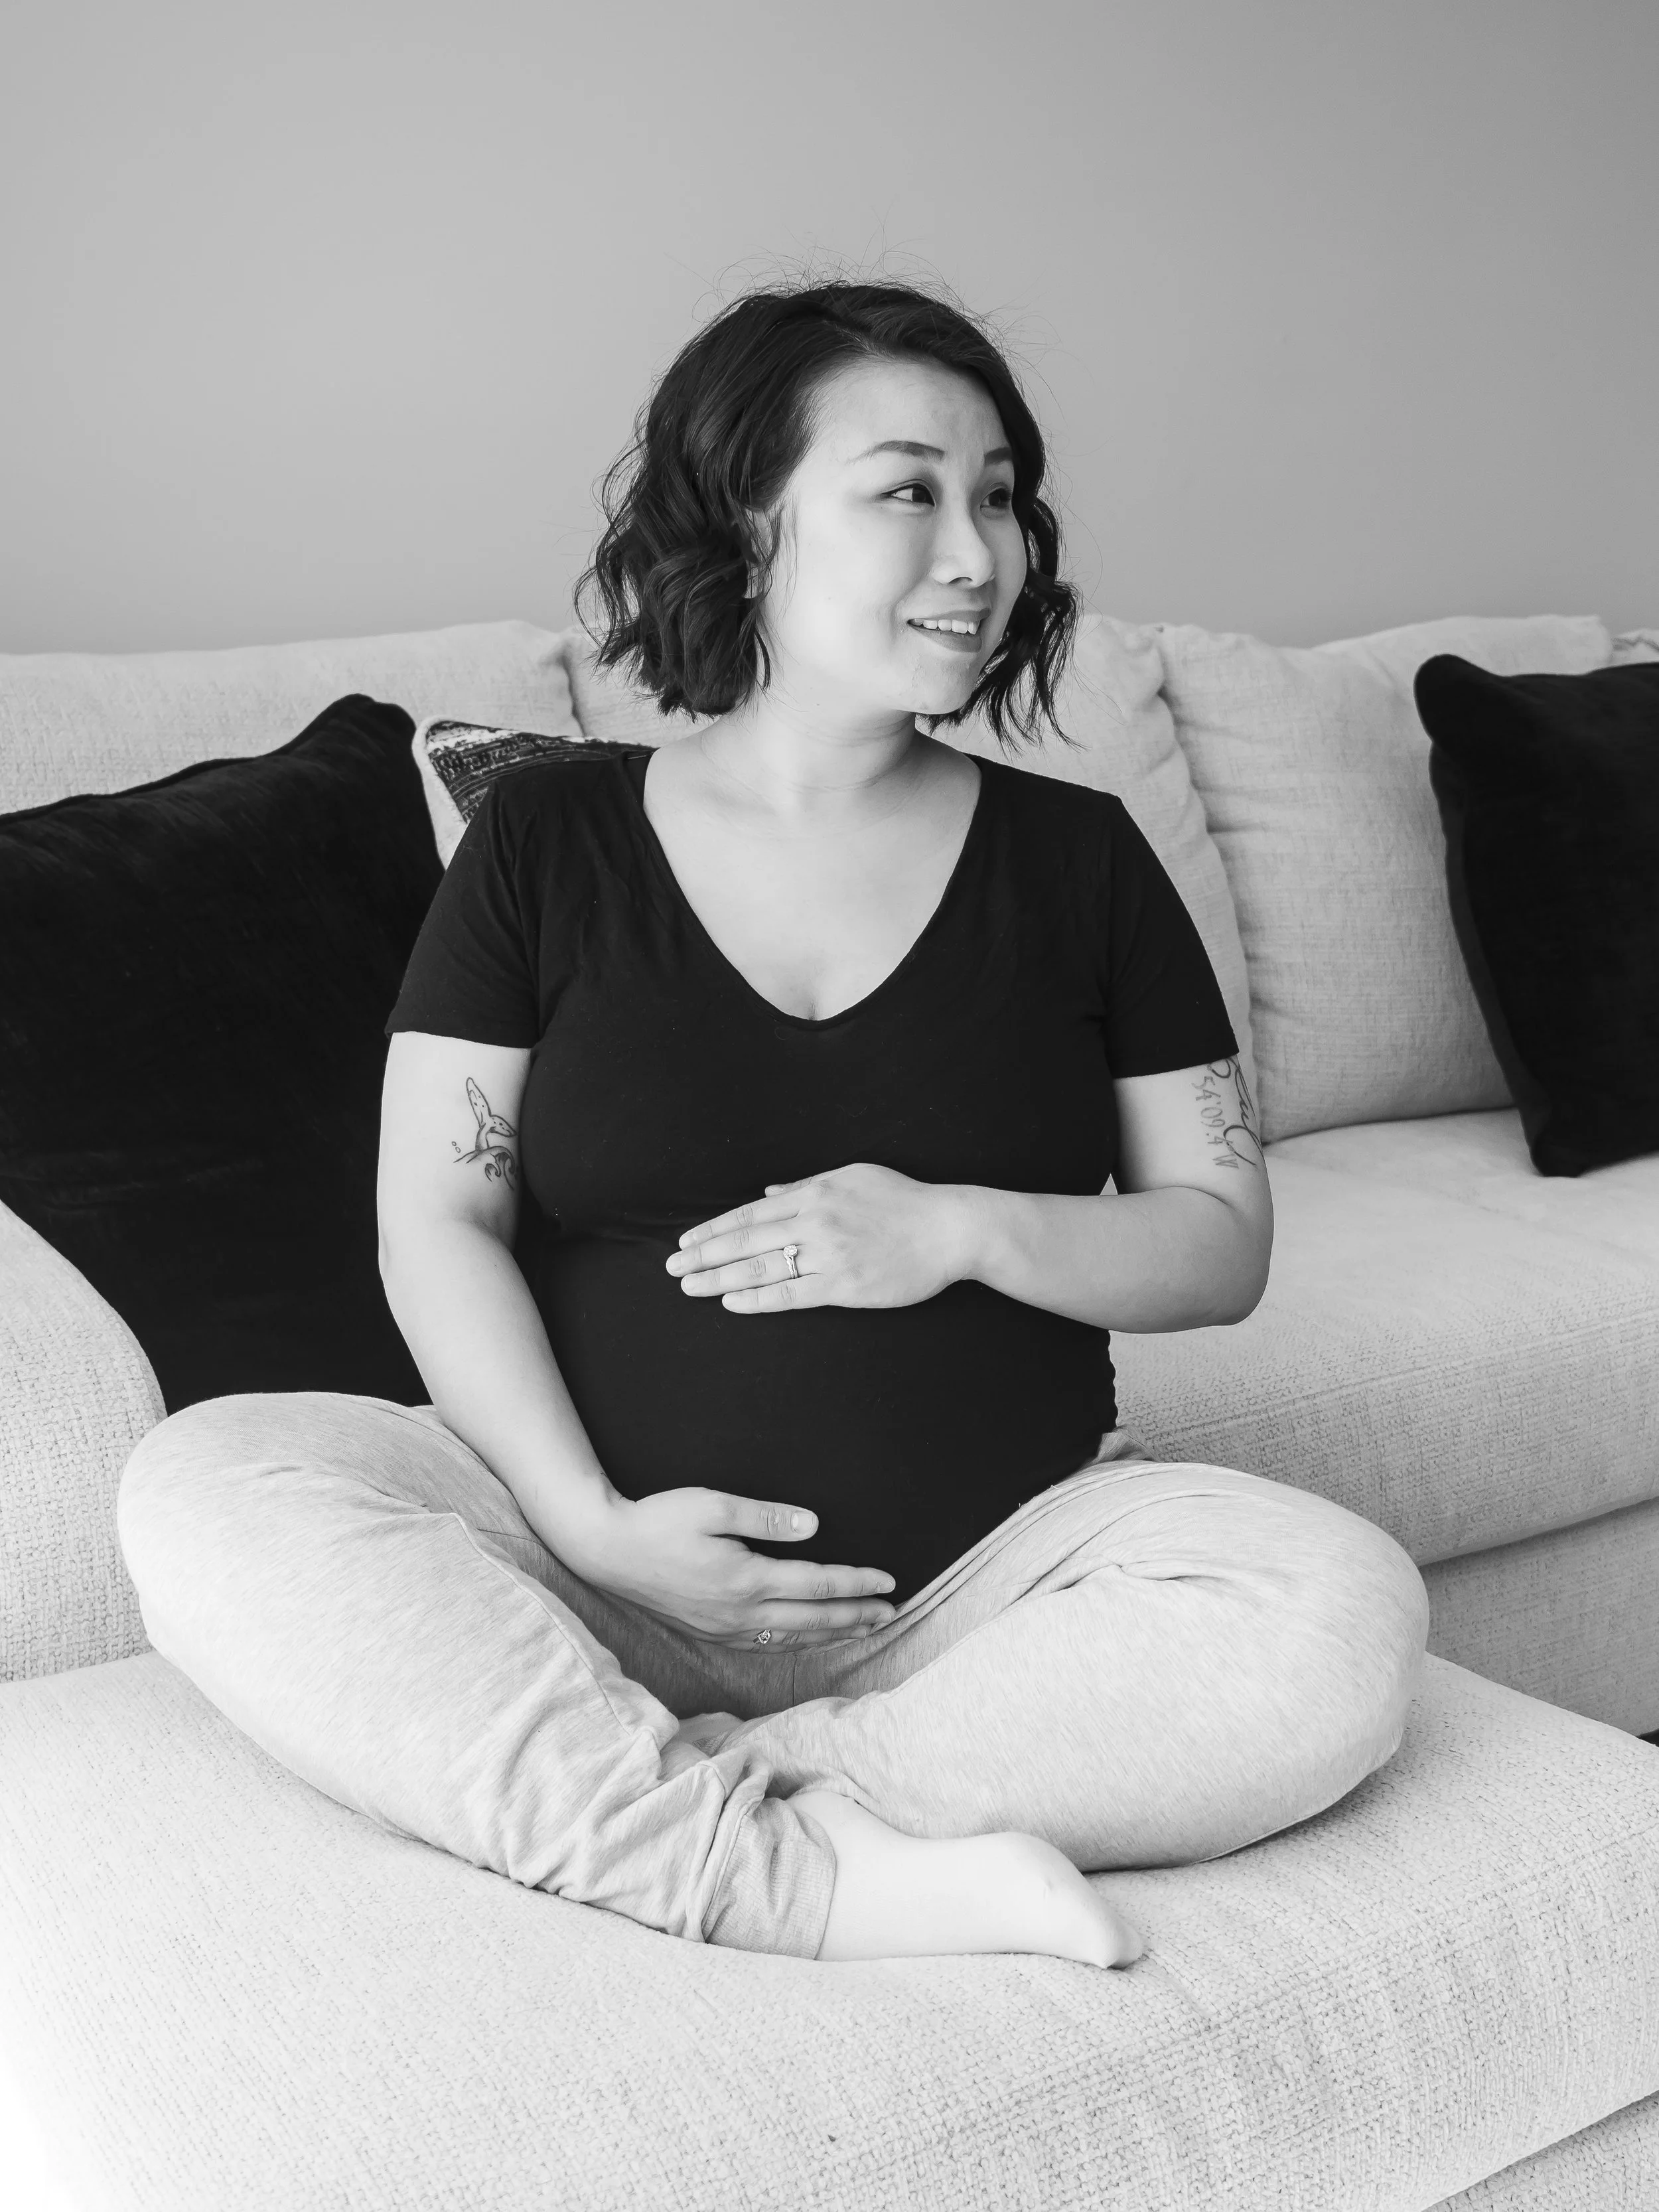
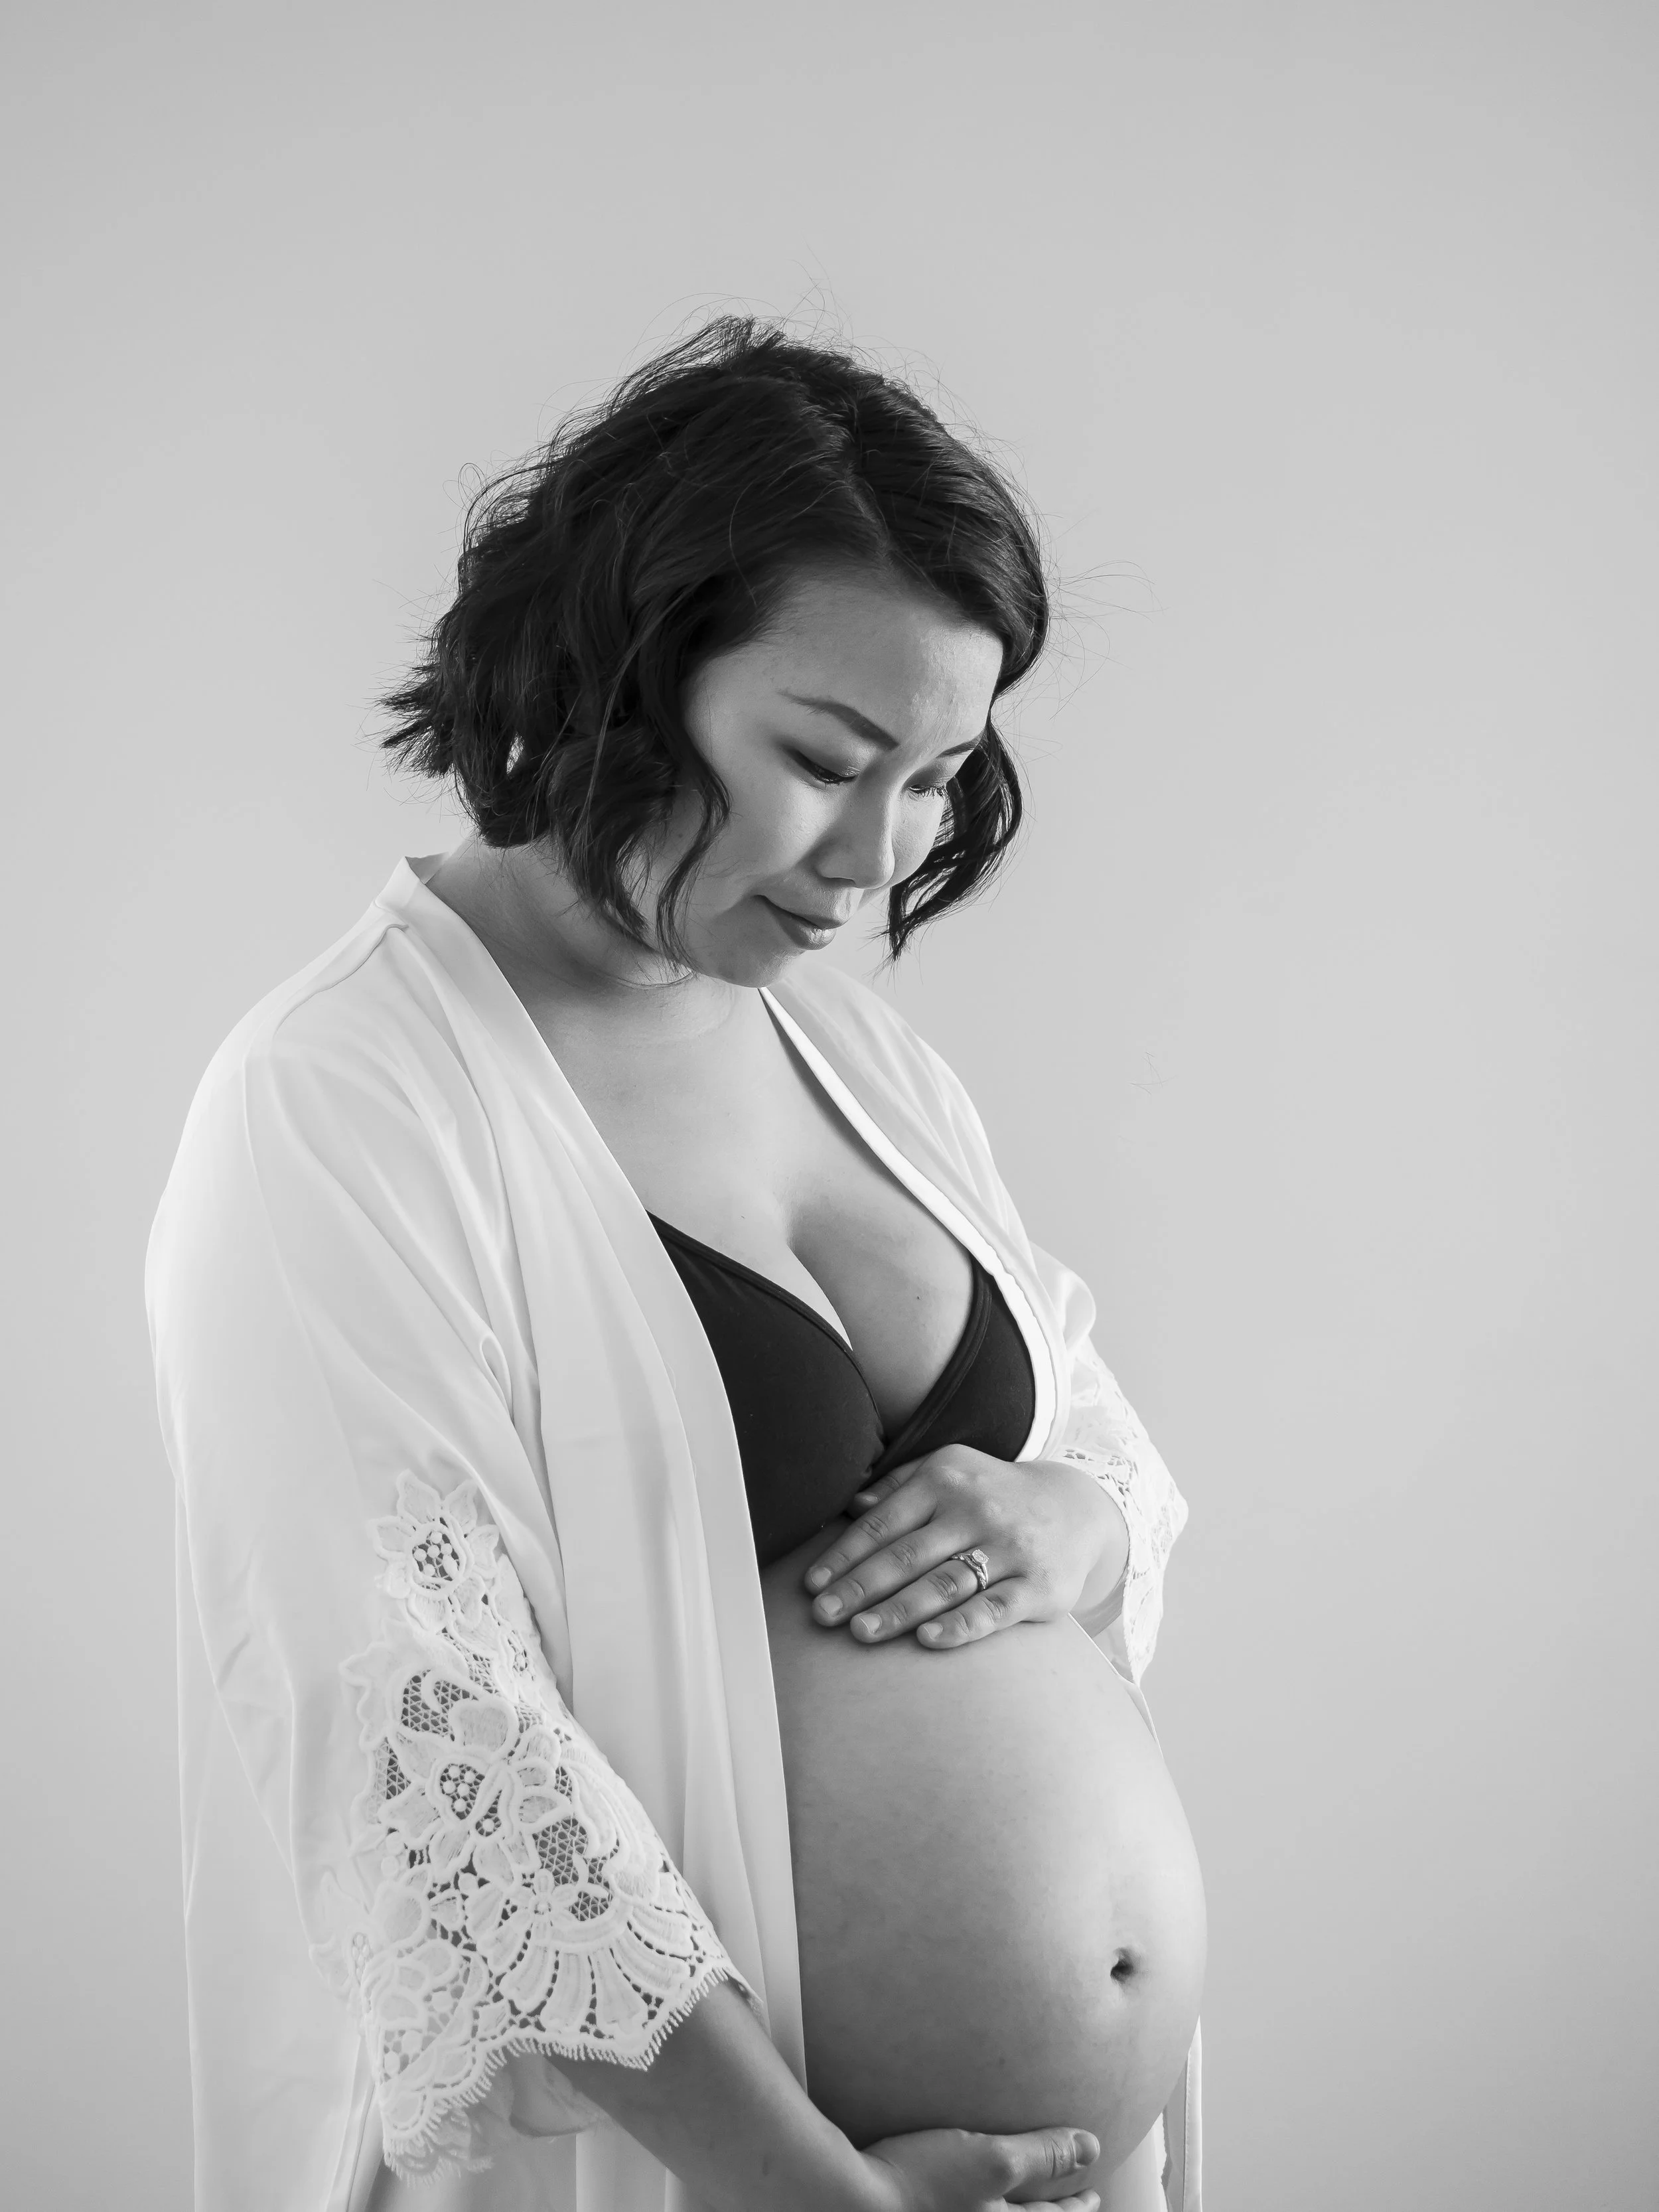
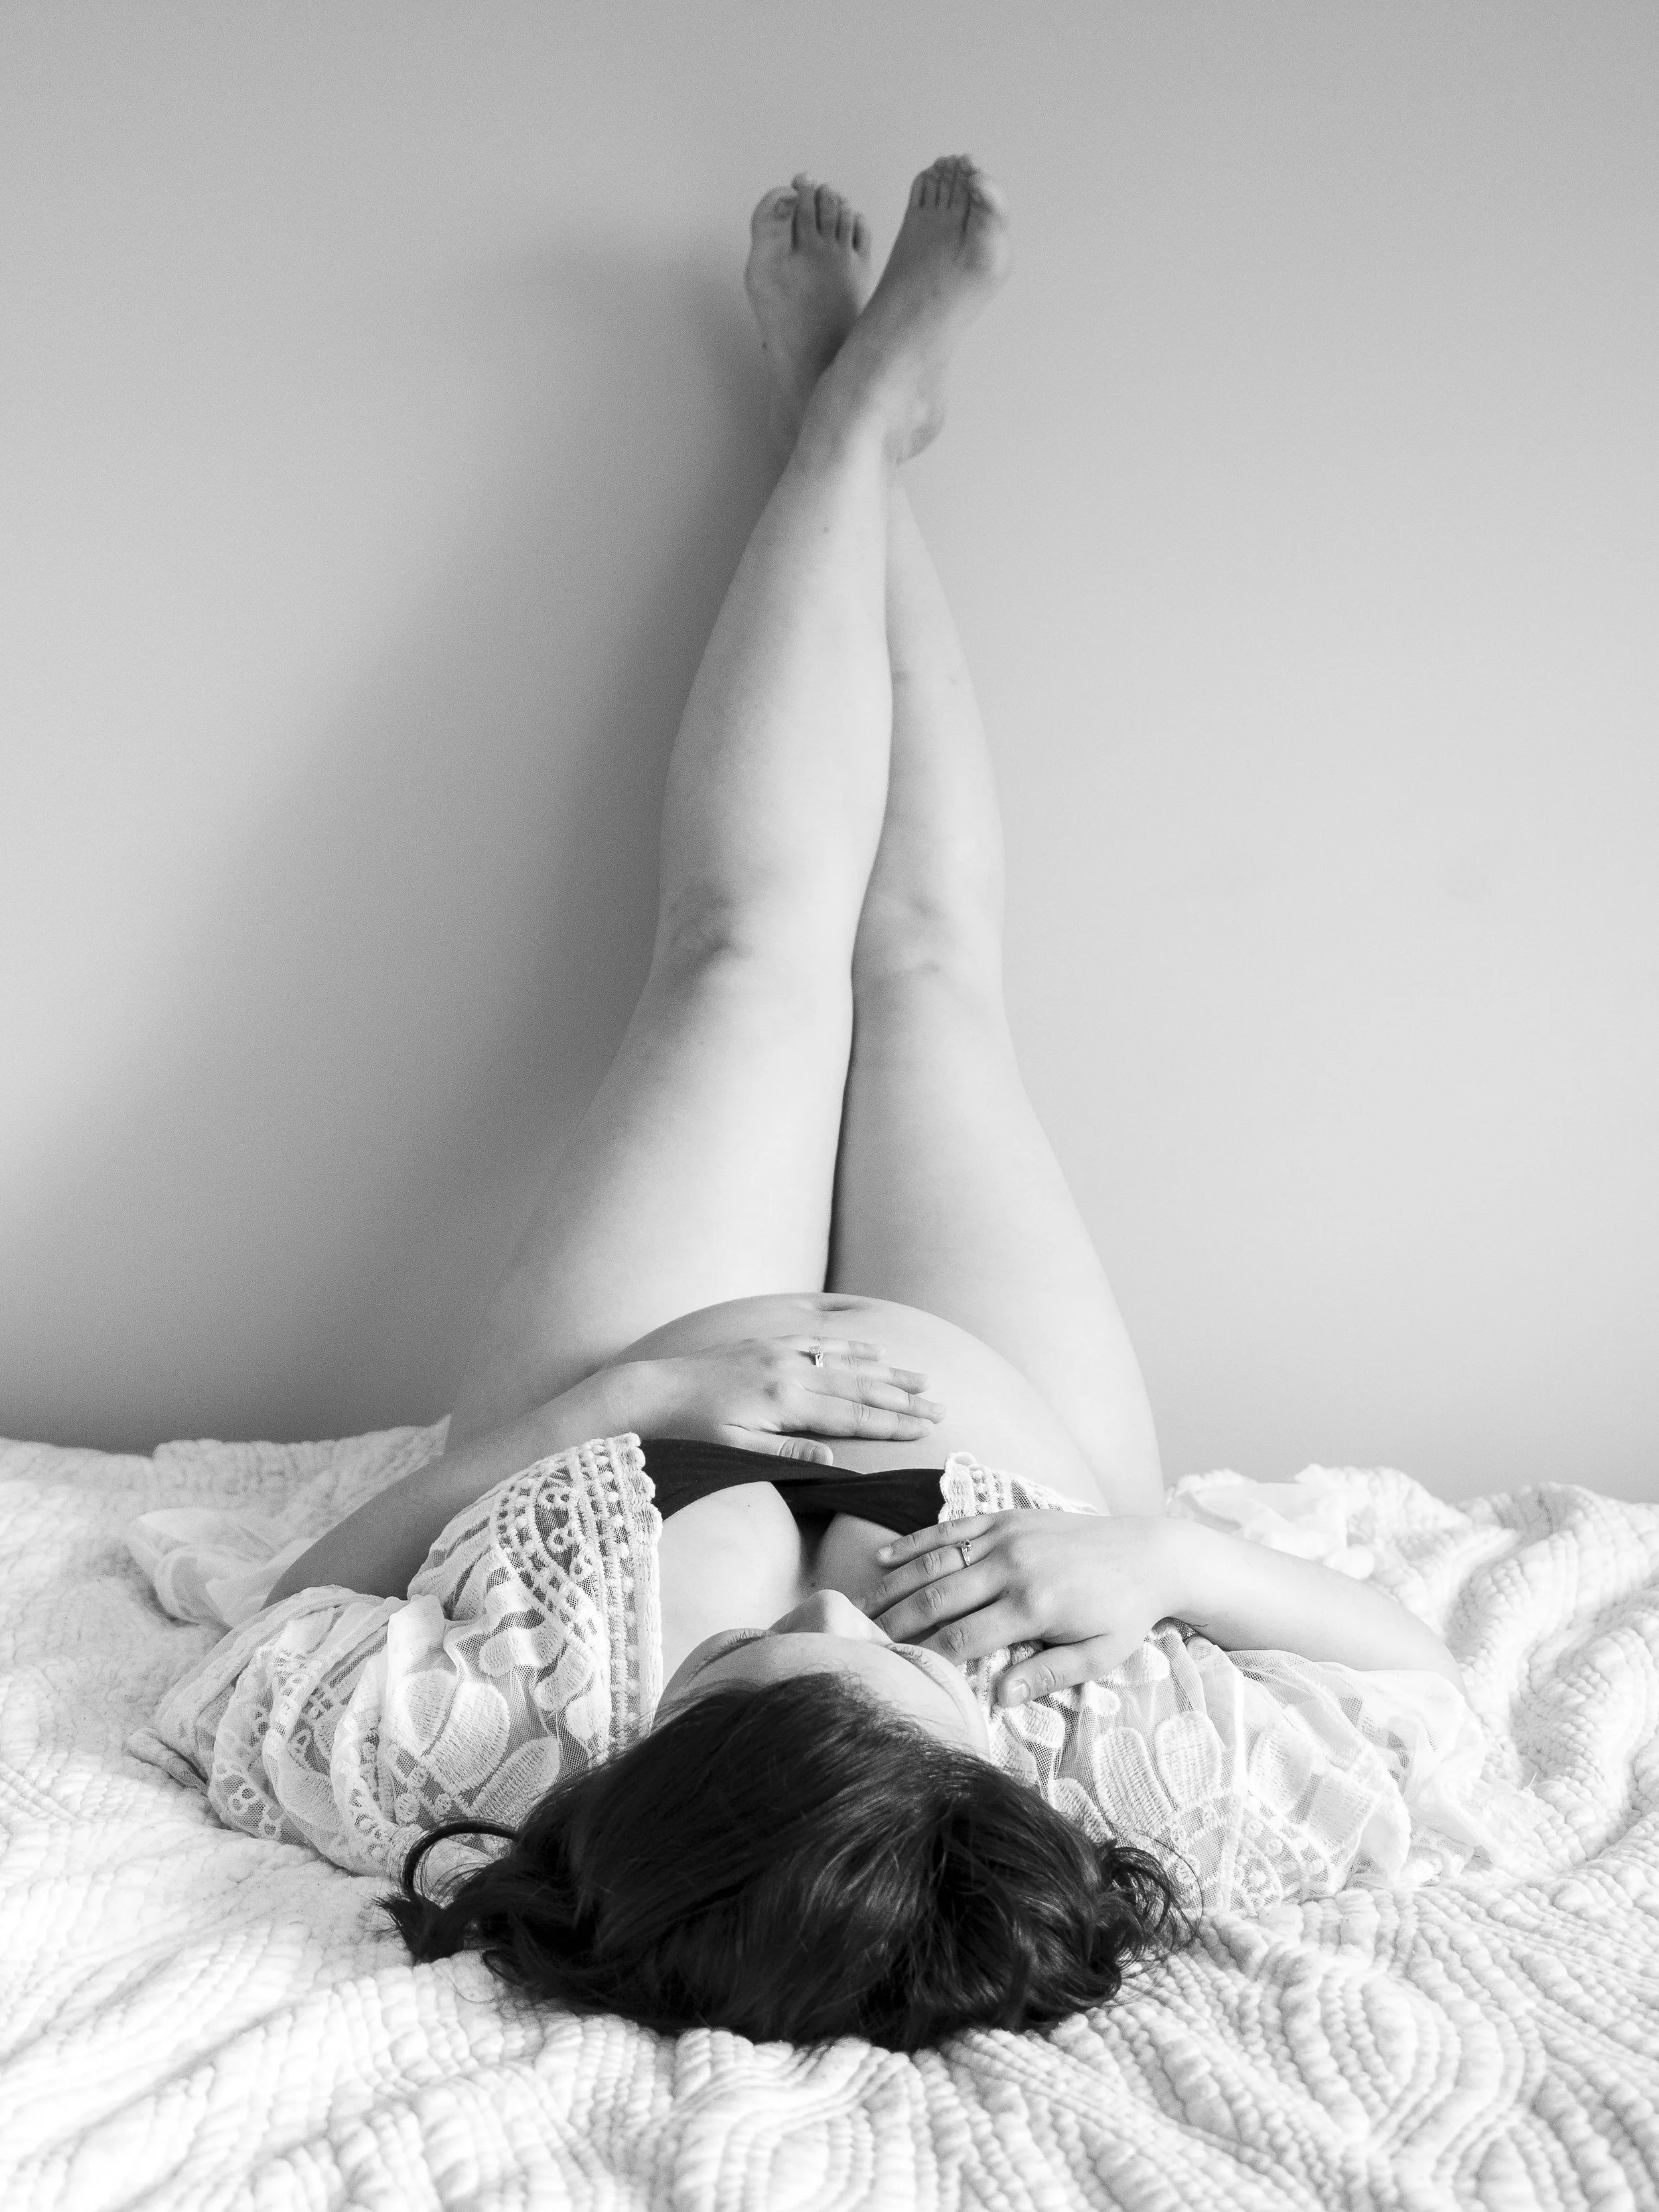
After you’ve decided where you’re going to take your photos you’ll need to think about what you’re going to wear. I did multiple maternity photoshoots each with a different intent. In some I wanted a more intimate feel. In others I wanted something slightly more casual.

For the photos that I wanted to portray confidence, vulnerability but also intimacy I chose to wear similar color undergarments and robes with delicate details, in the others that I wanted a more casual feel I chose pieces that I would find myself lounging in.

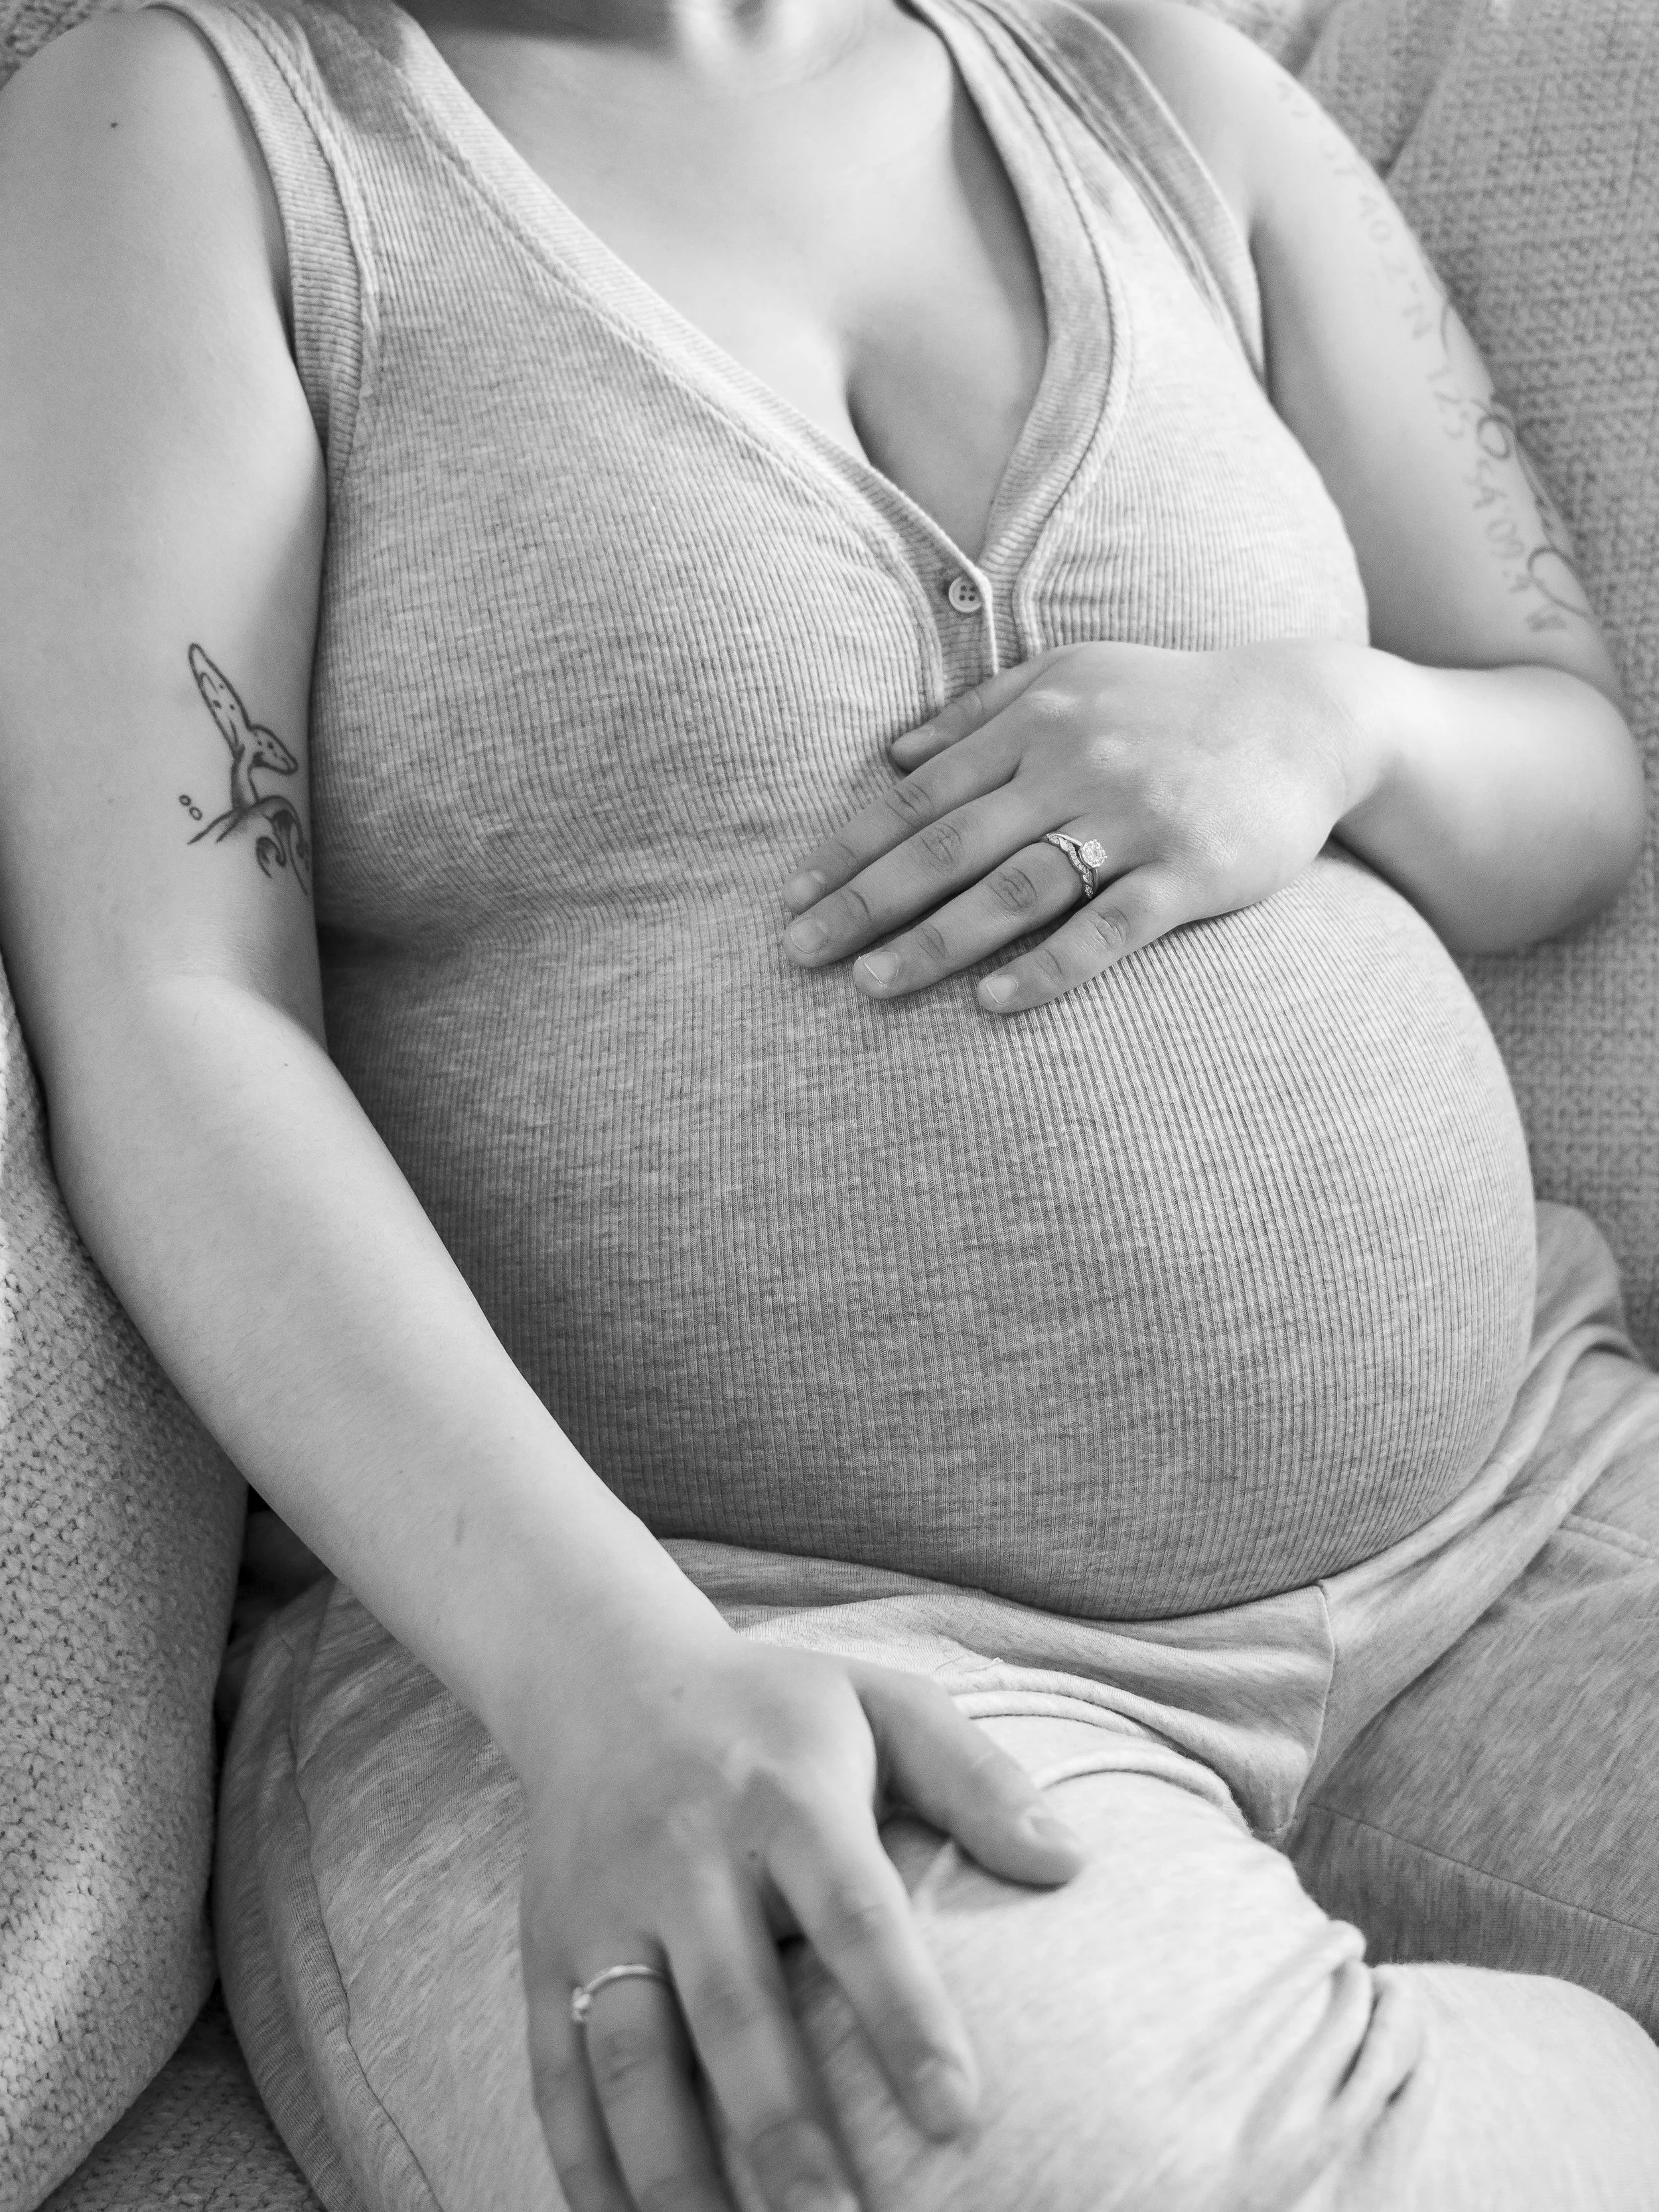
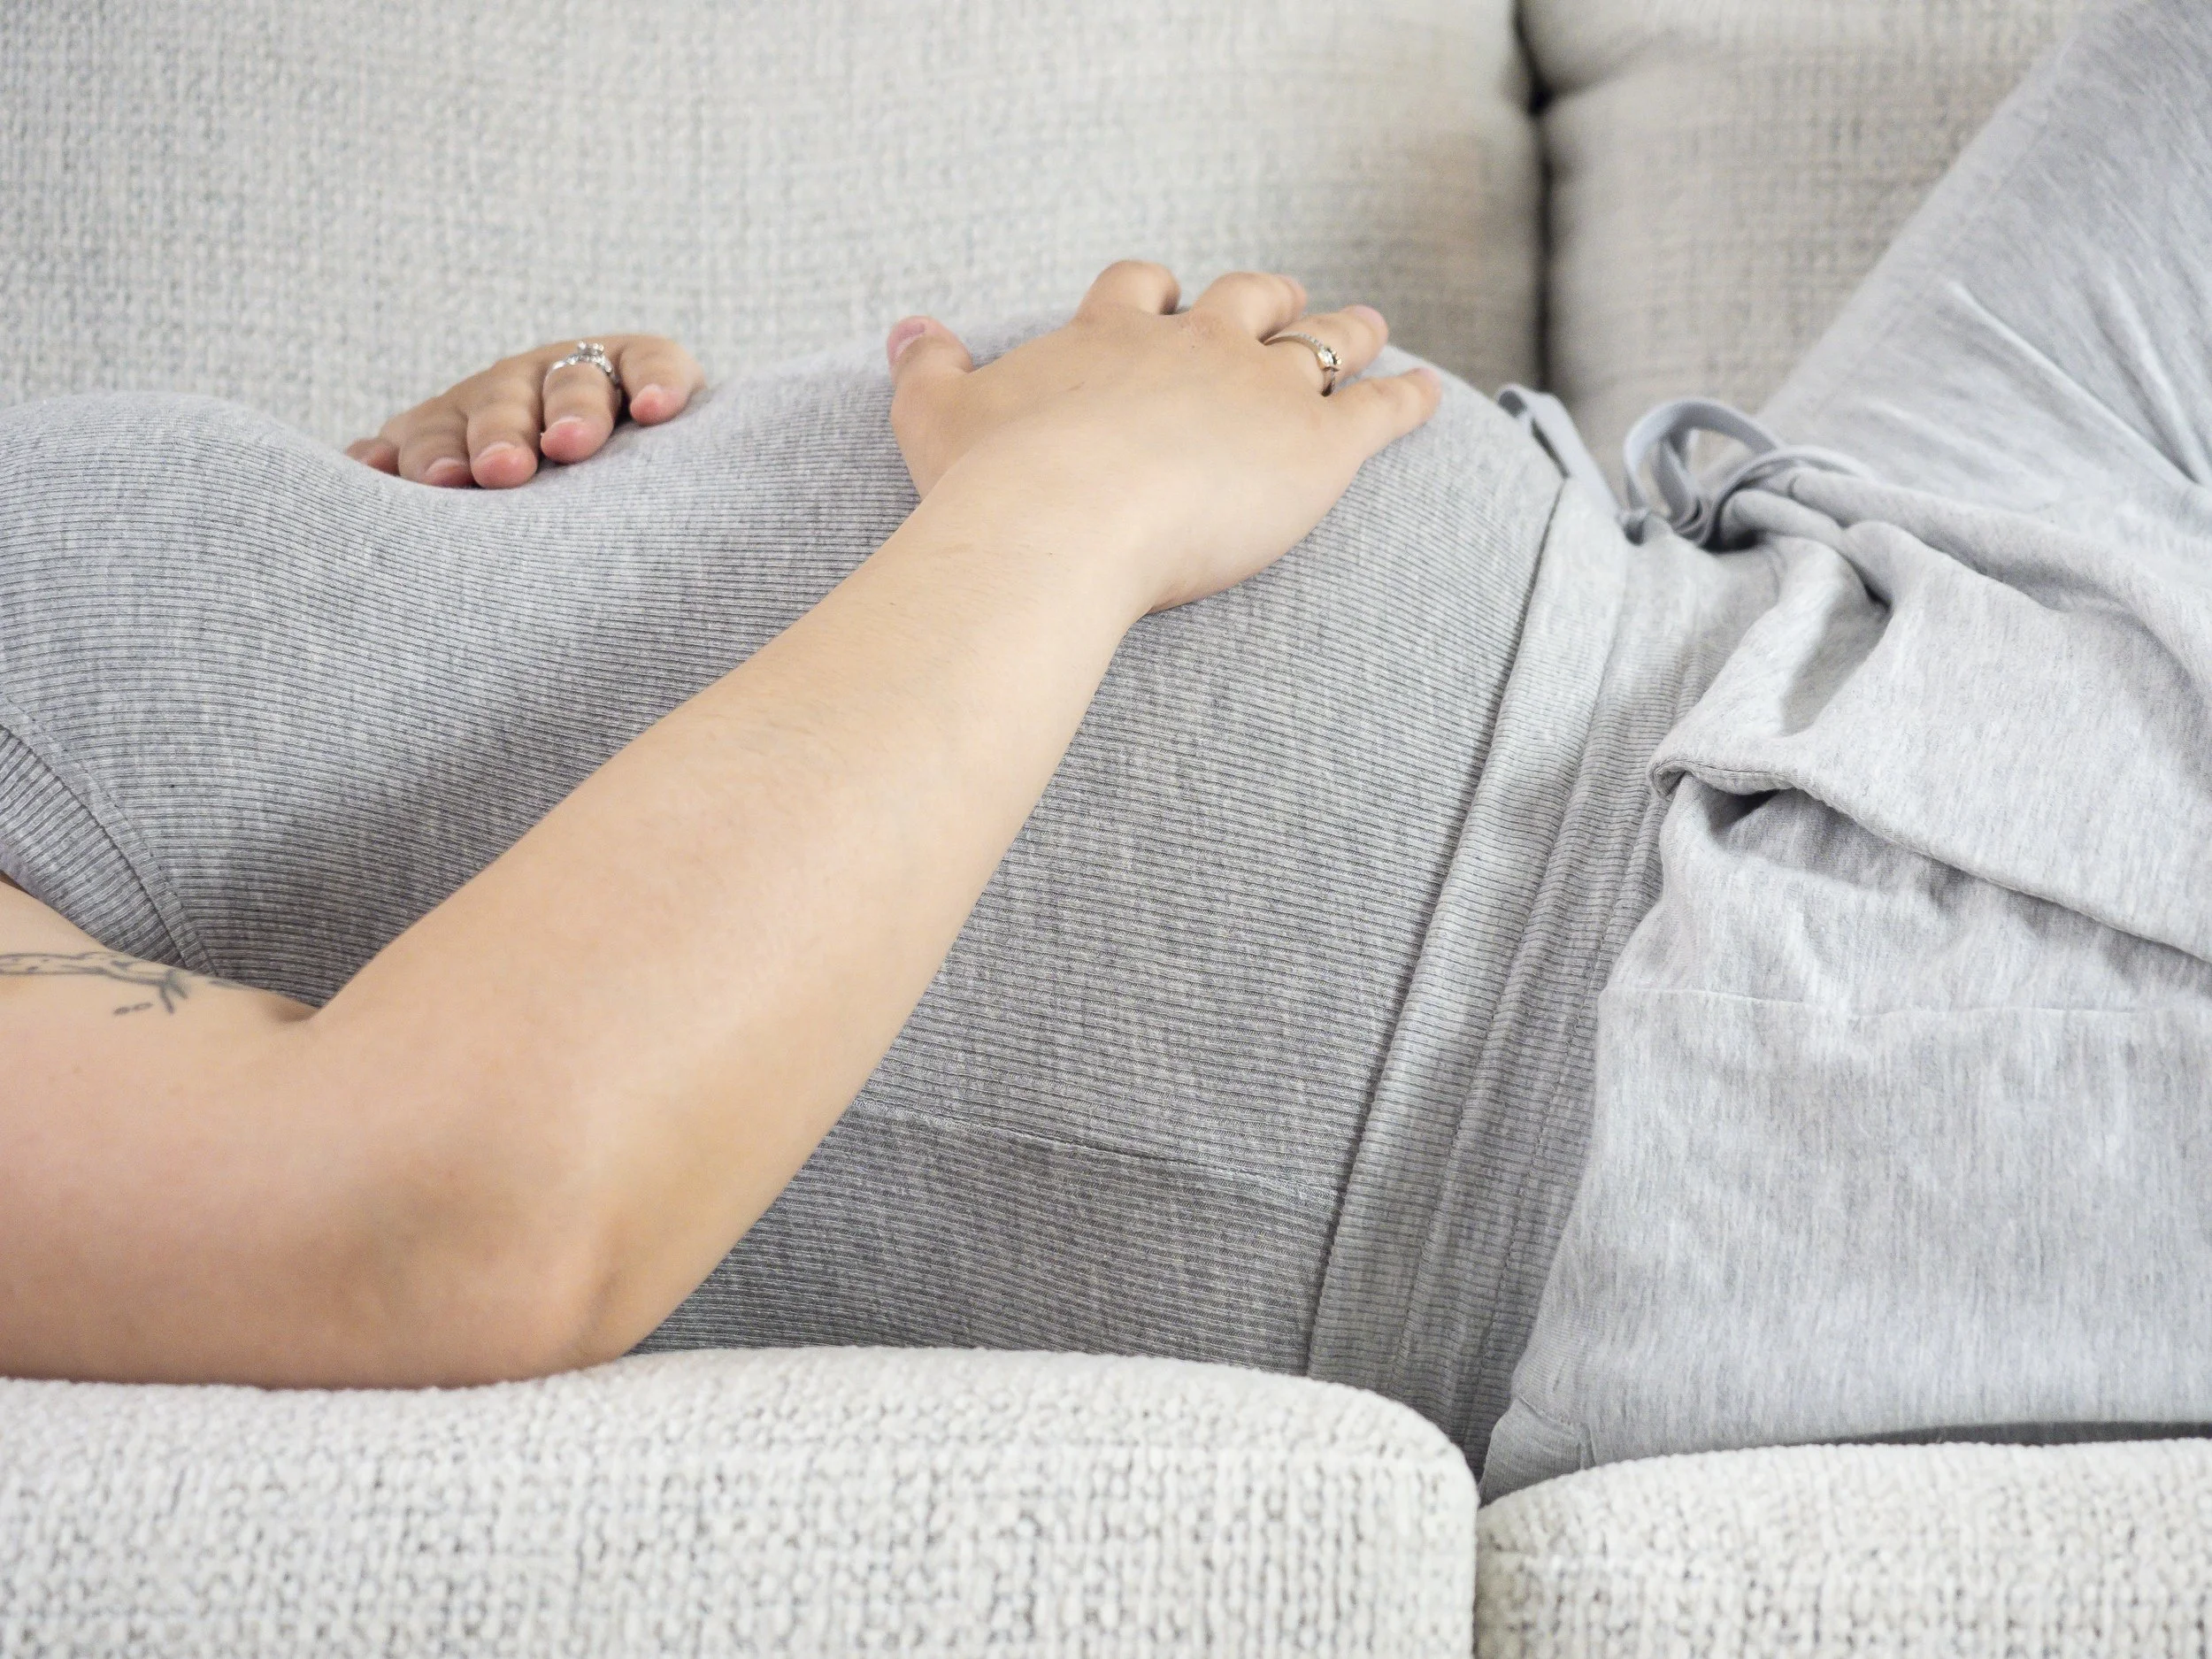
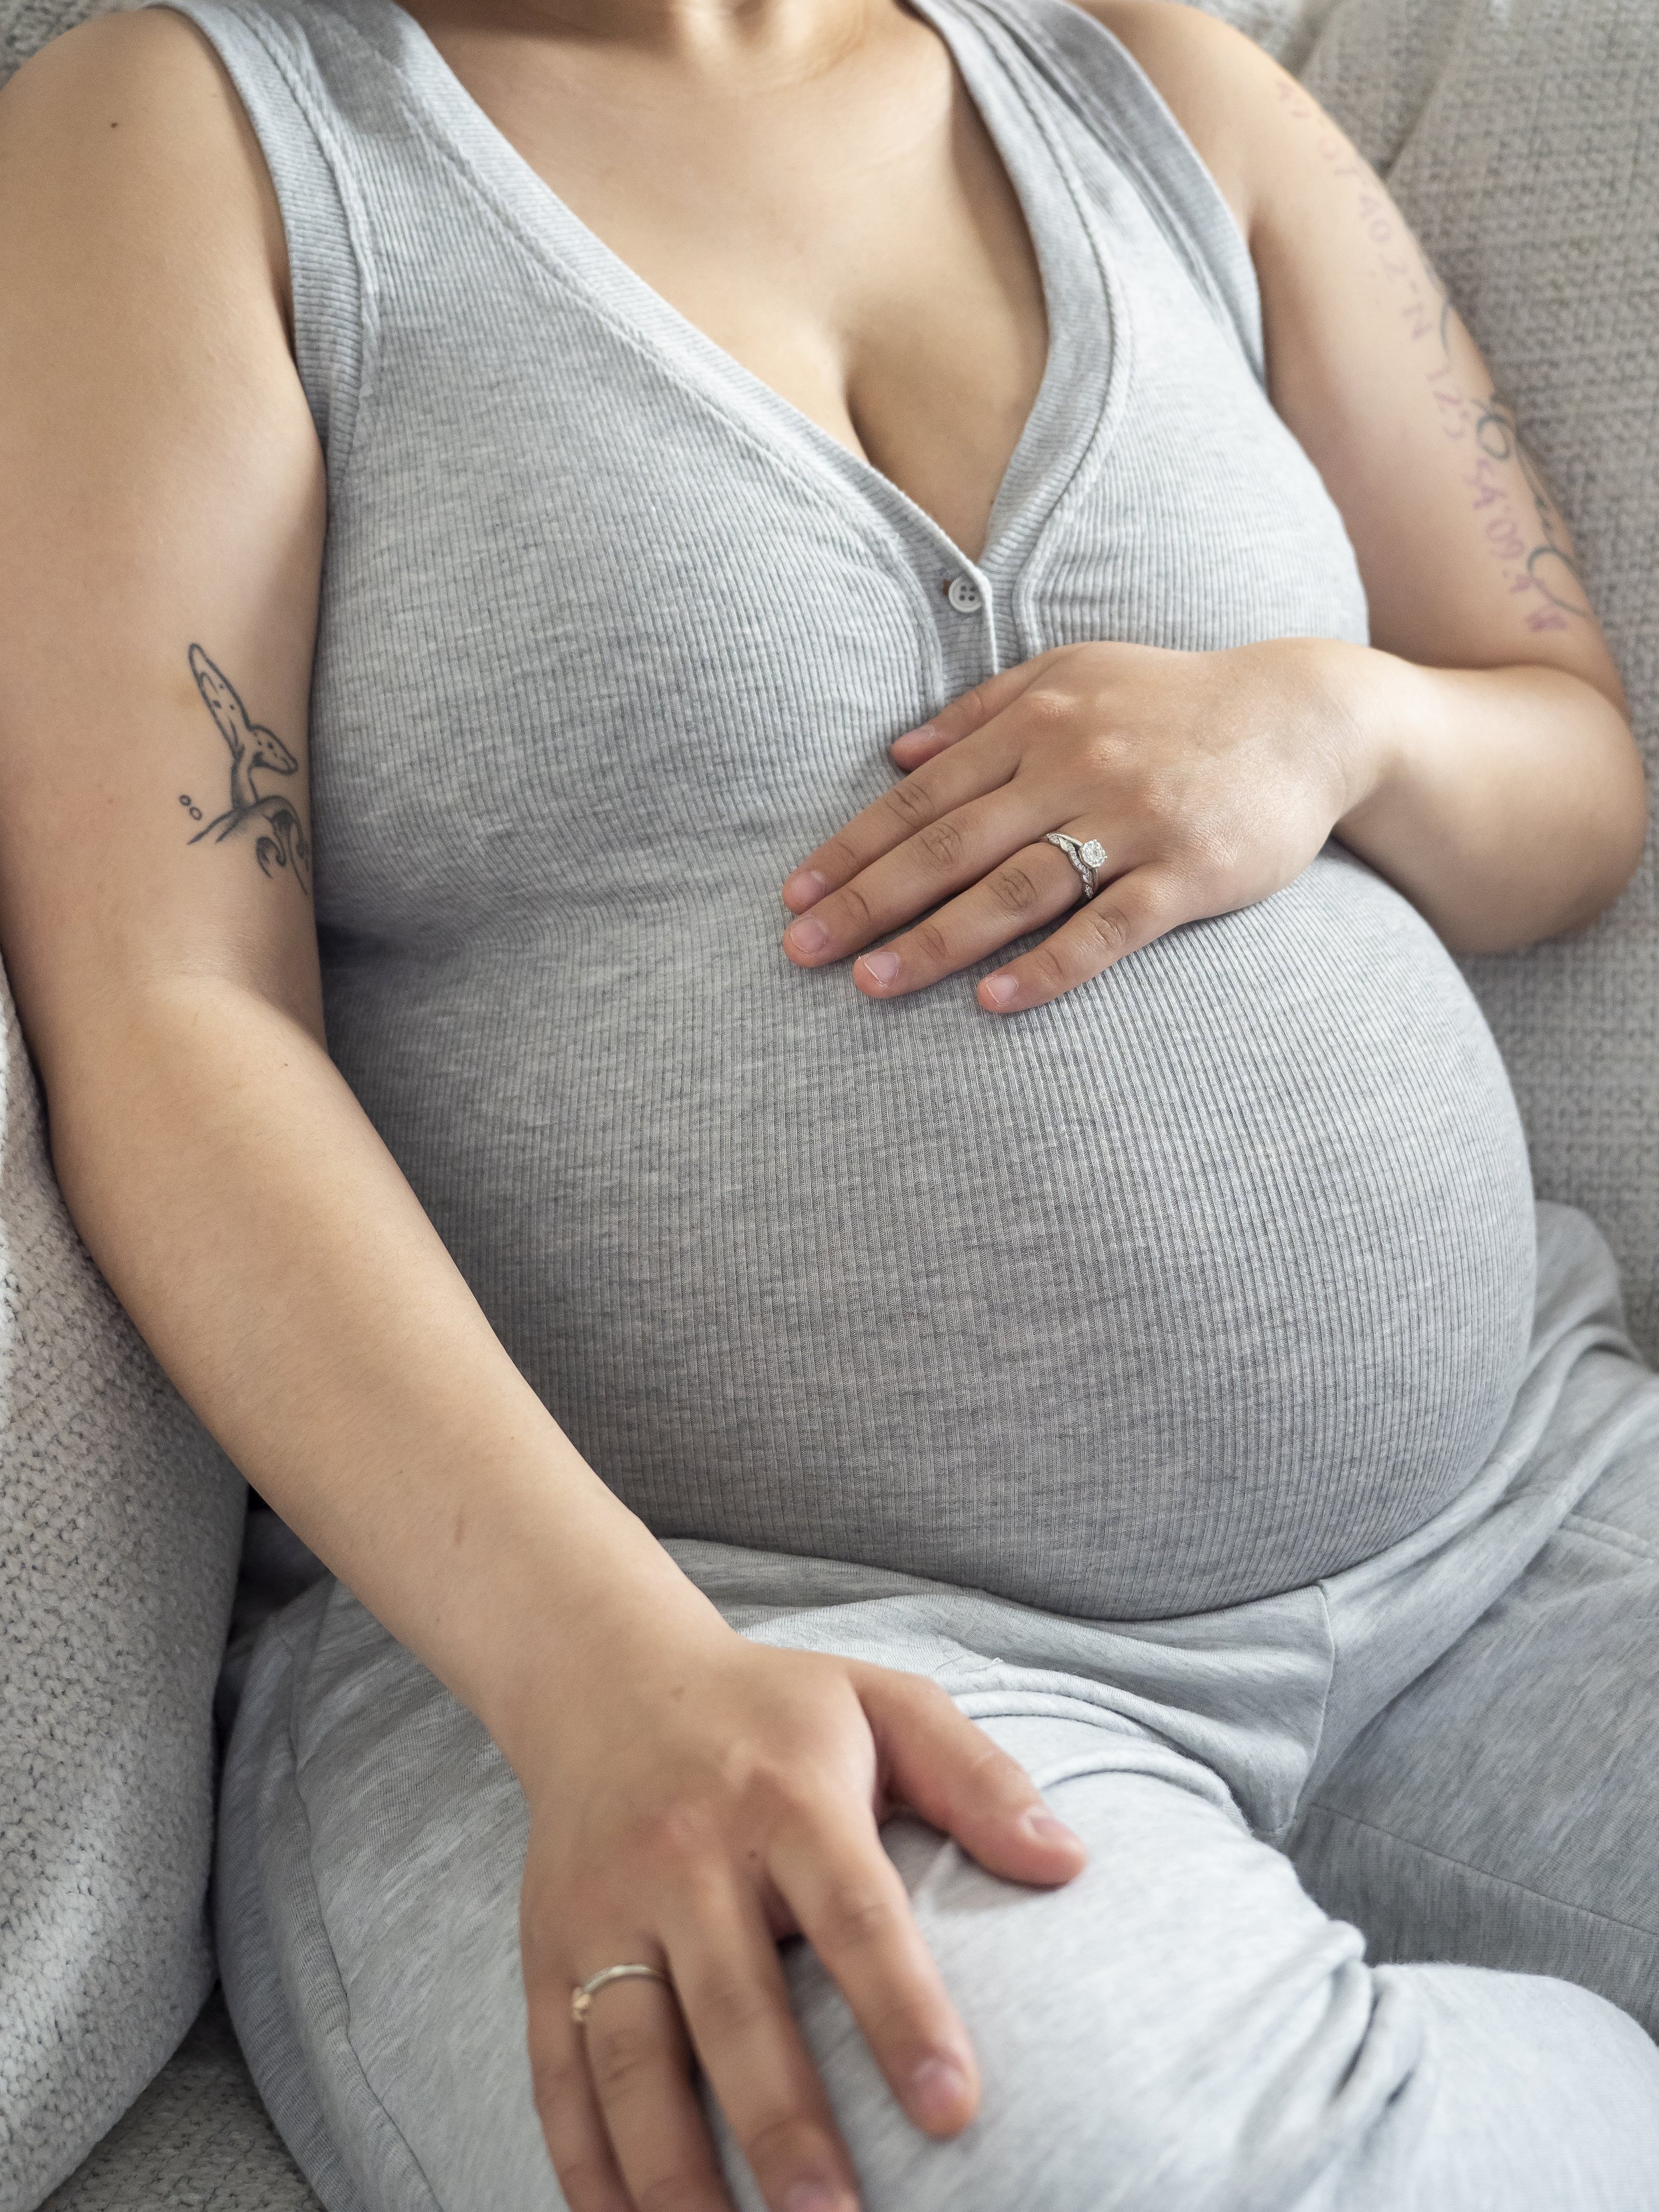
This might take some experimenting with. One set of maternity photos I took I wore a t-shirt and sweatpants but I found the t-shirt was too casual. So the next time I did a more casual photoshoot I chose a monochrome look with a grey bodysuit that I preferred more.

I believe the biggest thing with choosing your outfit is choosing something you feel comfortable and confident in. If you’re not, it’s going to show in your photos.
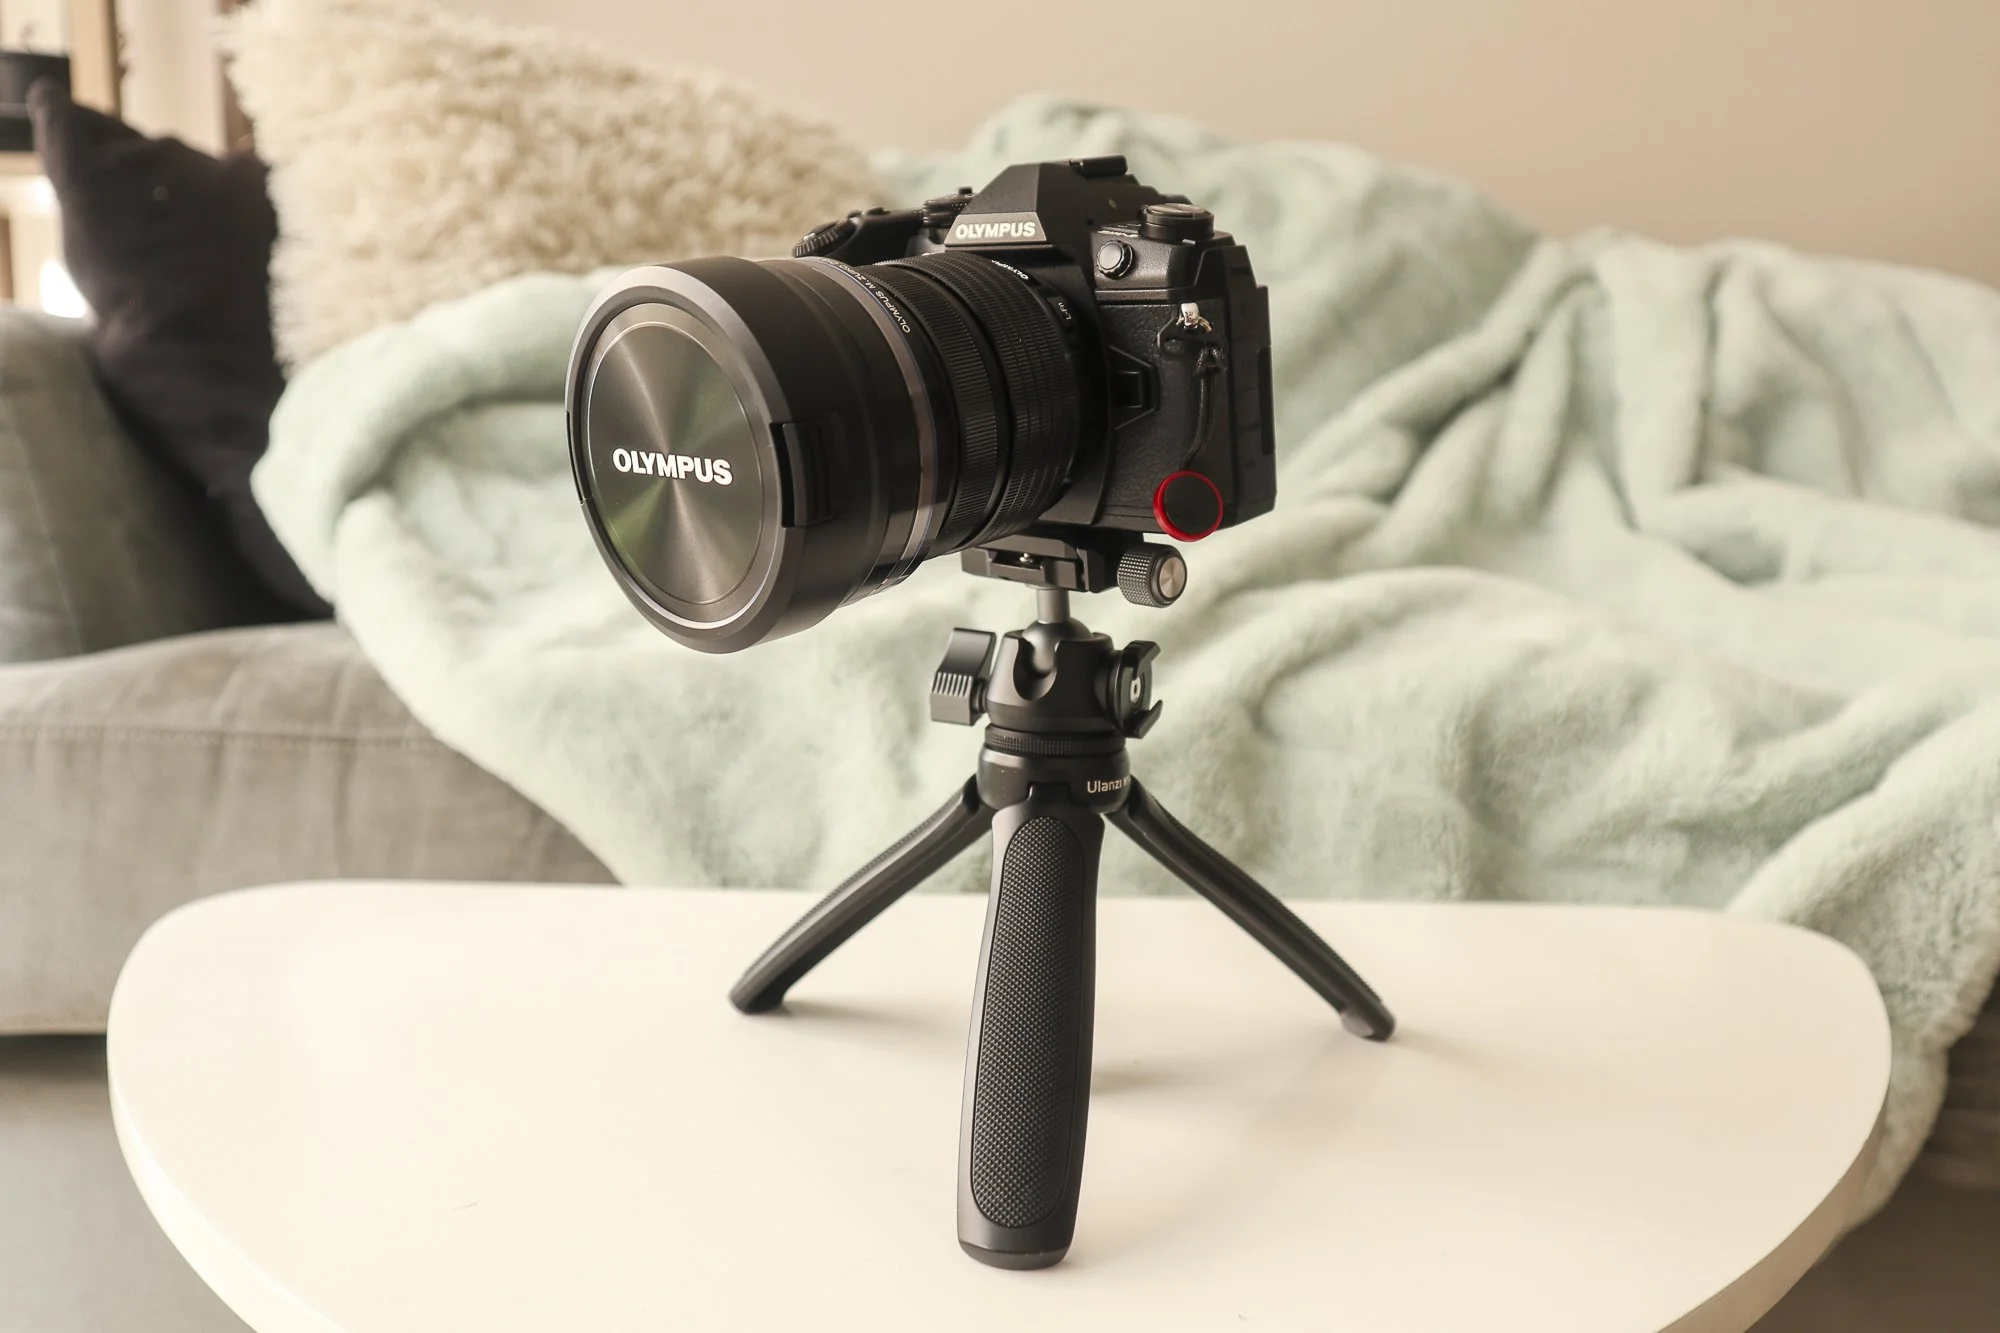
Camera Equipment

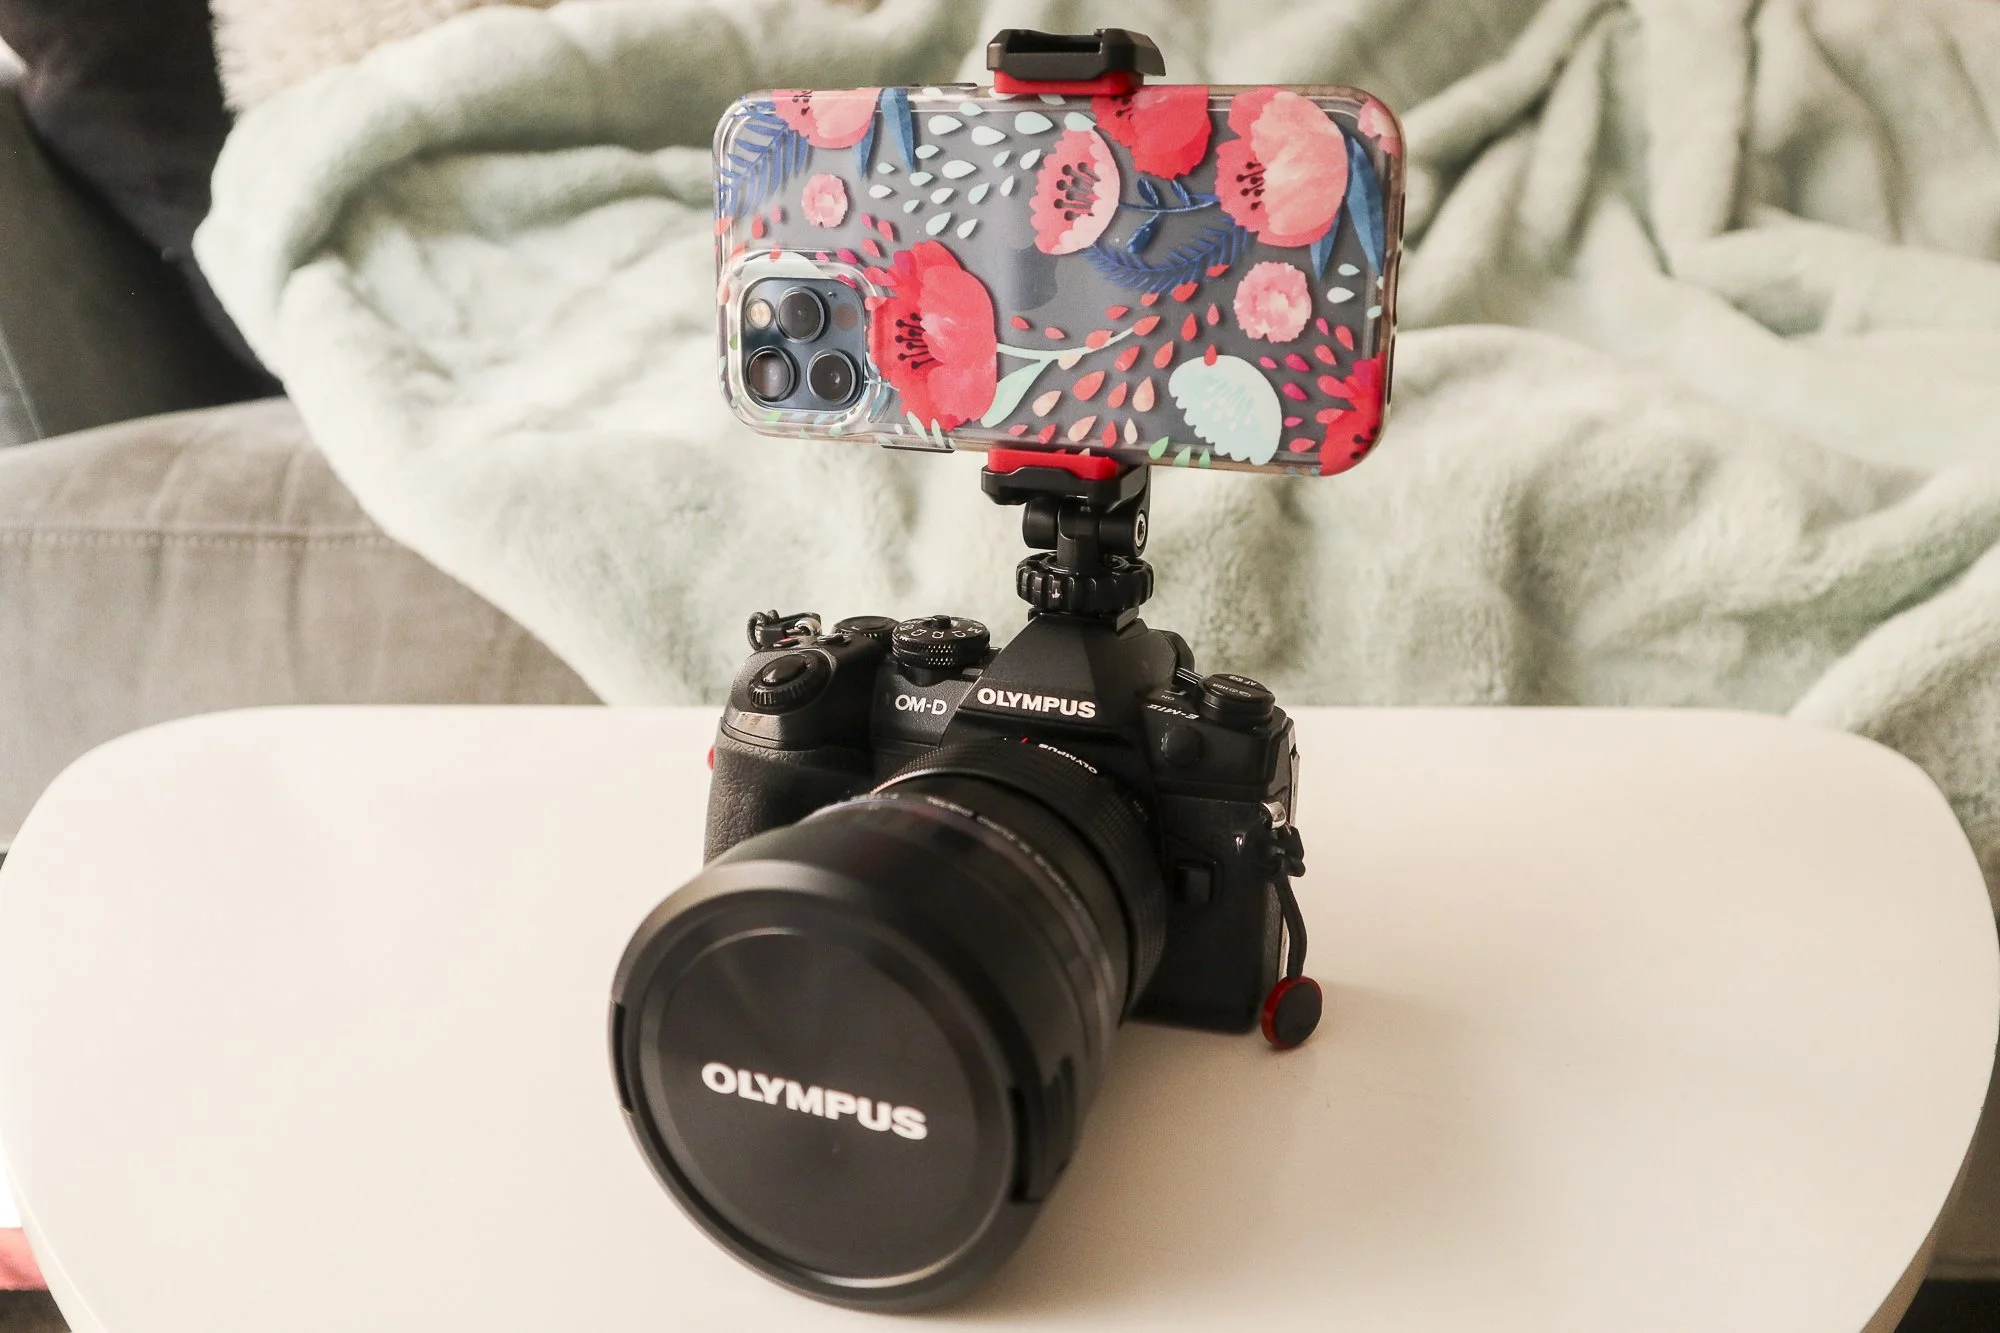
For my maternity photos I used my OM System EM1 Mark II with the M.Zuiko 12-40mm F2.8 PRO lens. You can take your maternity photos with any camera using different techniques:

Connecting with Your Phone

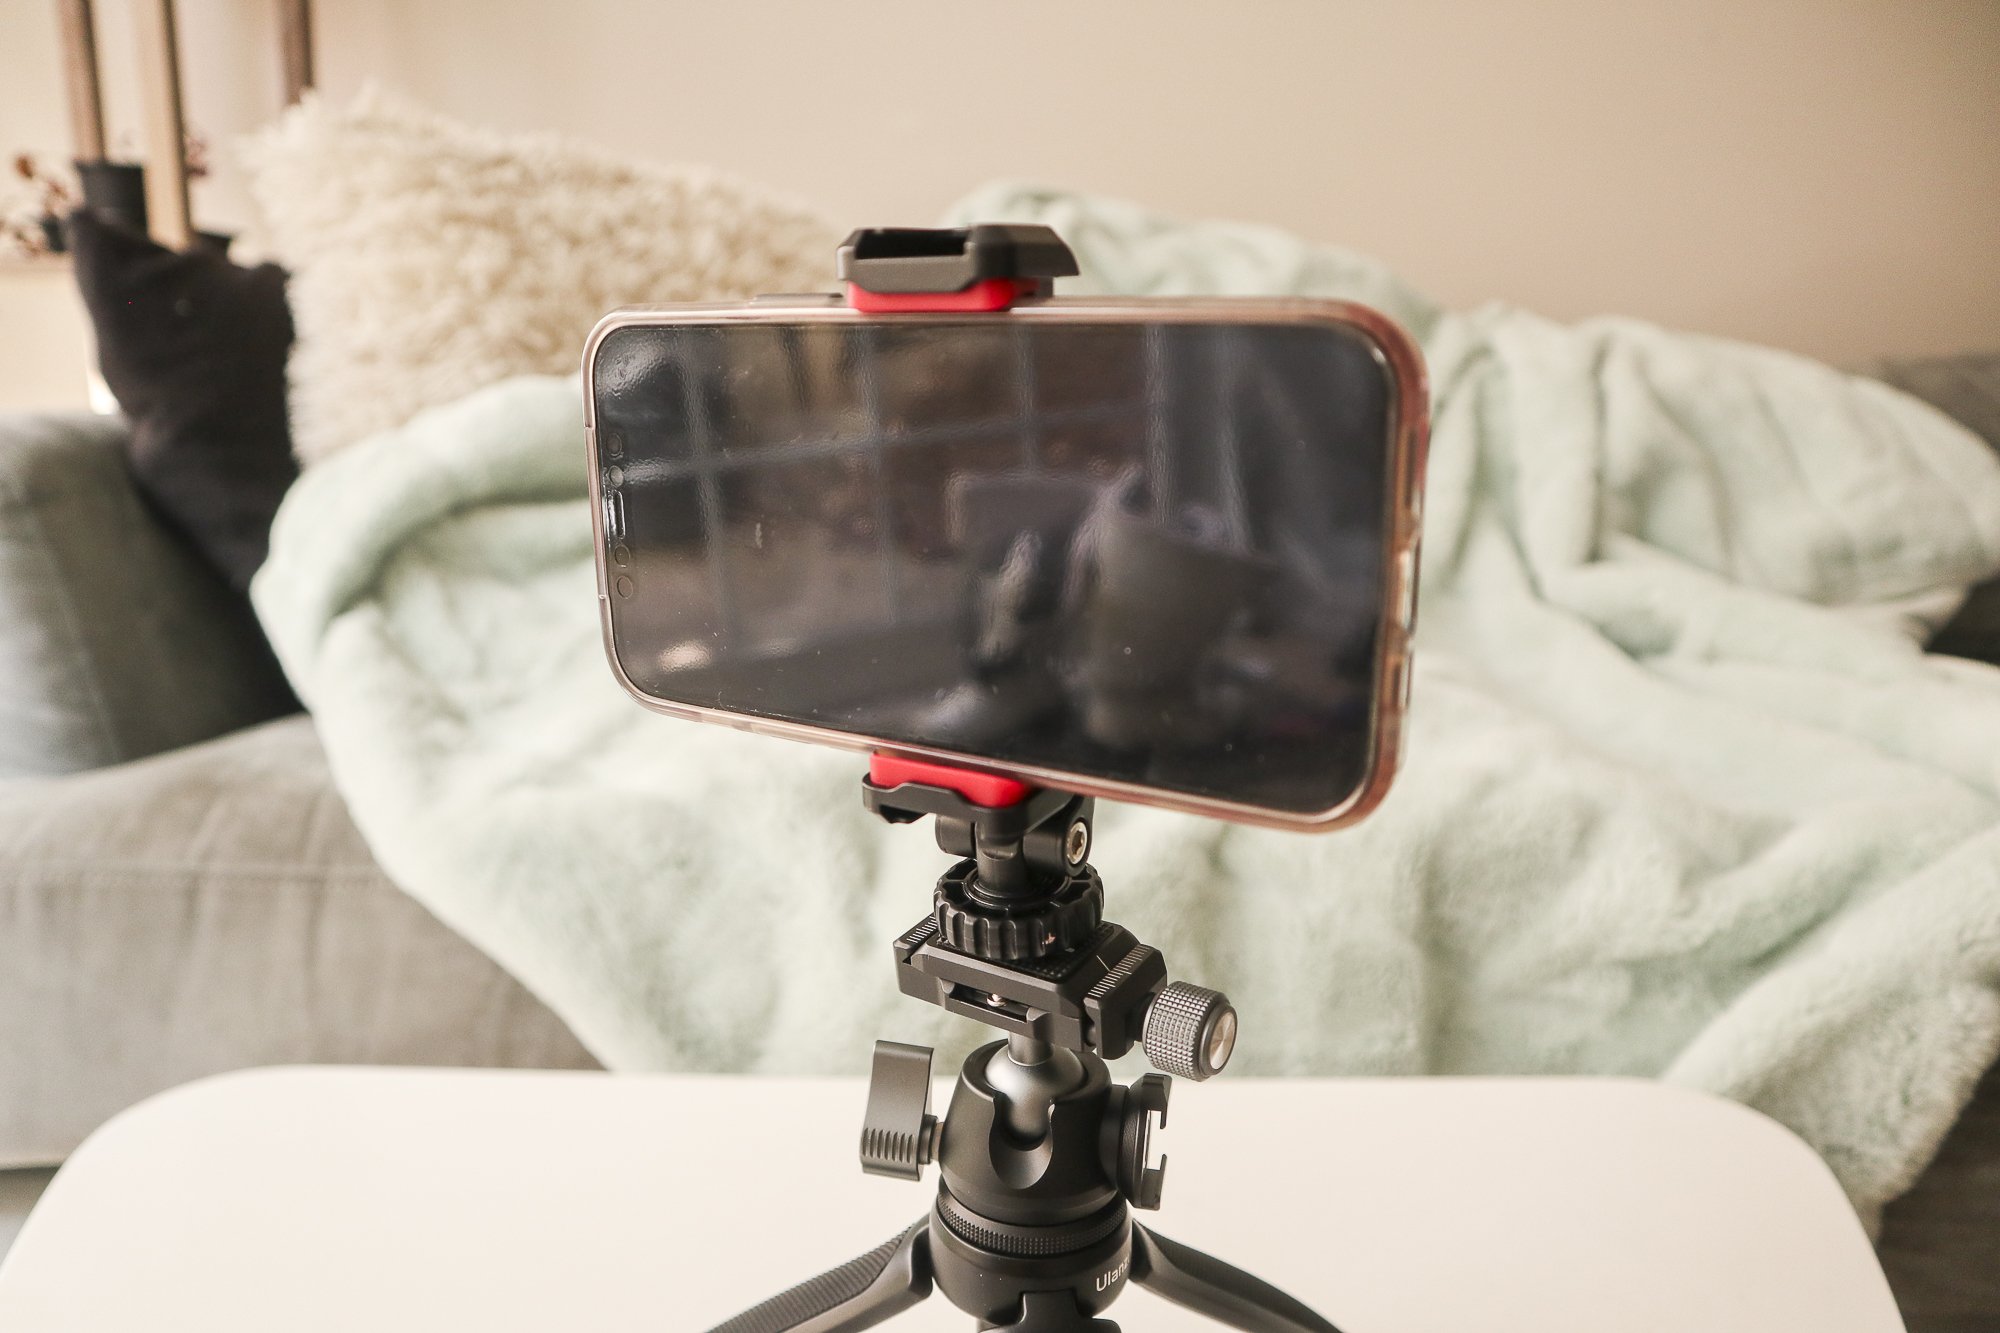
My preferred way to take my maternity photos was using the camera connect app. This is because you can get into position, see yourself, fix your clothes, fix your hair, etc., without having to take a photo and constantly adjust afterwards.

I also like using the connect app because I can fix my camera settings and change how I’m shooting (single shots, timer shot, continuous shots) without having to get up from position either.

Using a Remote

If your camera doesn’t have the ability to connect with your phone you can use a remote that you connect with your camera or phone. This has its drawbacks because you have to get into position, take a photo and constantly adjust afterward.

Setting up a Timed or Interval Shot

A third option is to set up a timed or interval shot. Most cameras (even phone cameras) can do a timed shot. Some camera’s can do an interval shot, where it takes X many photos, every X many seconds. This option too has the same drawbacks as using the remote.

Taking the Maternity Photo

You’ve planned your photoshoot and gathered your camera equipment, it’s time to get shooting! My process for shooting indoors and outdoors is slightly different.
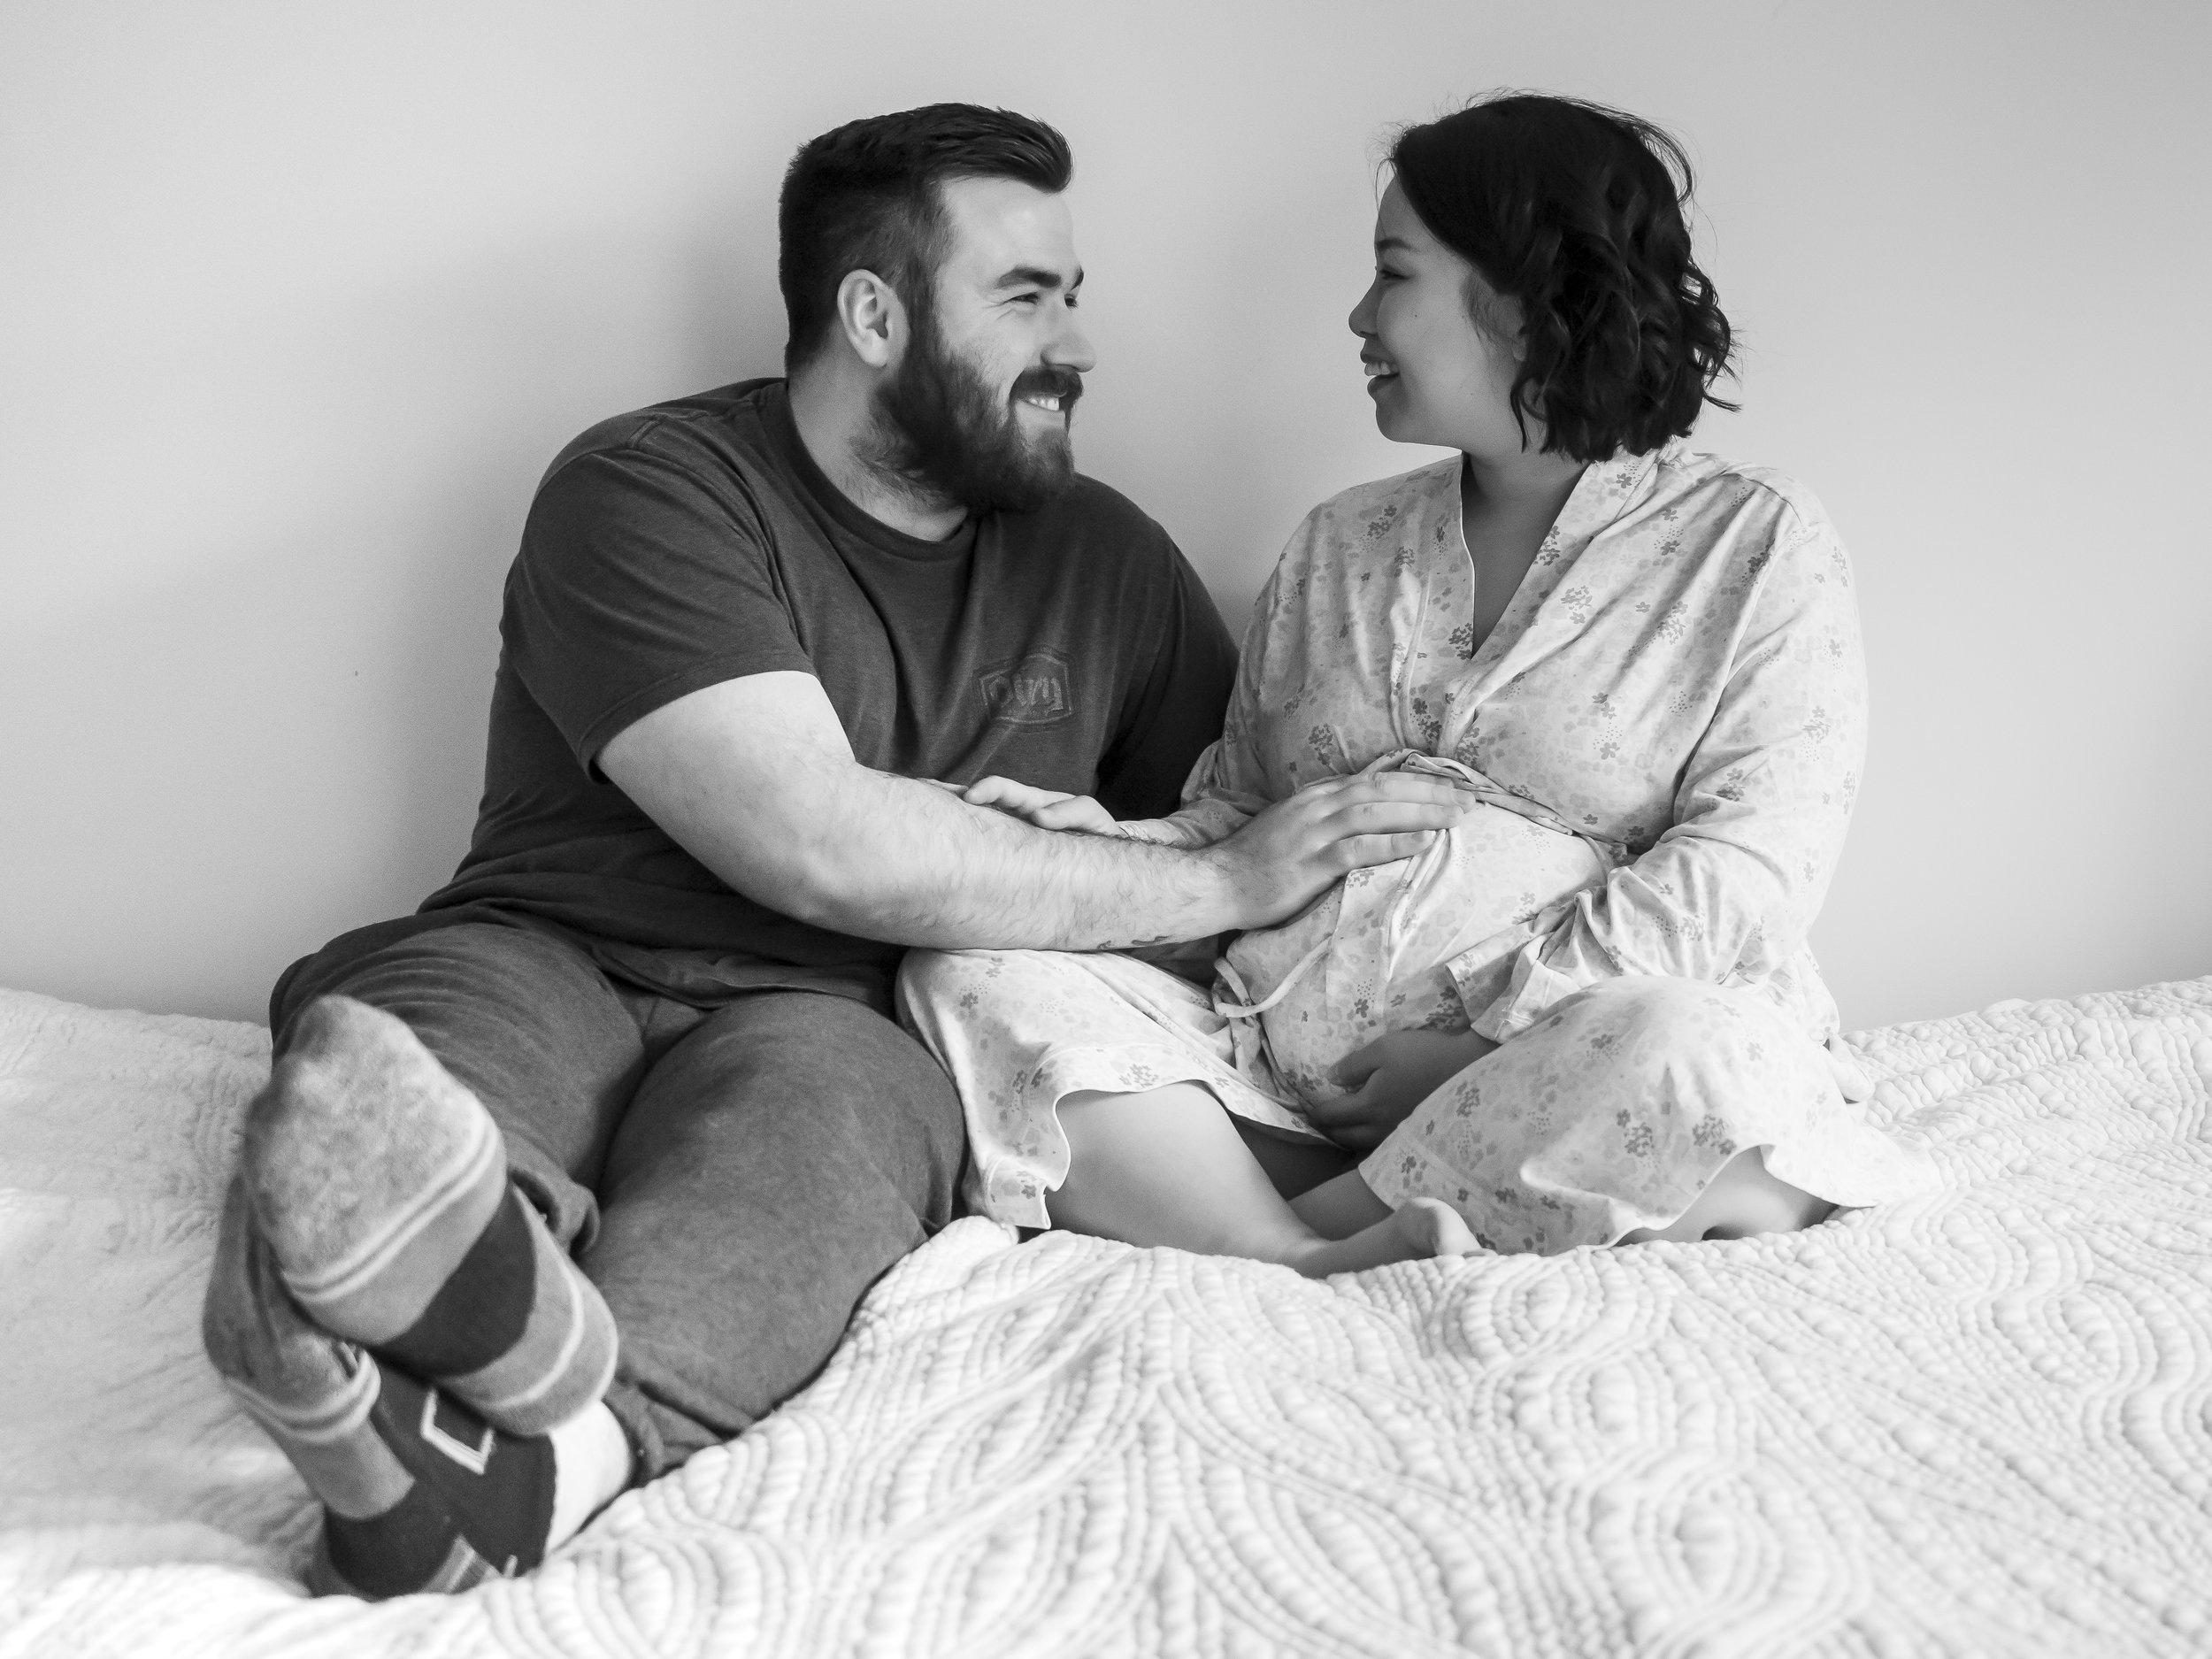
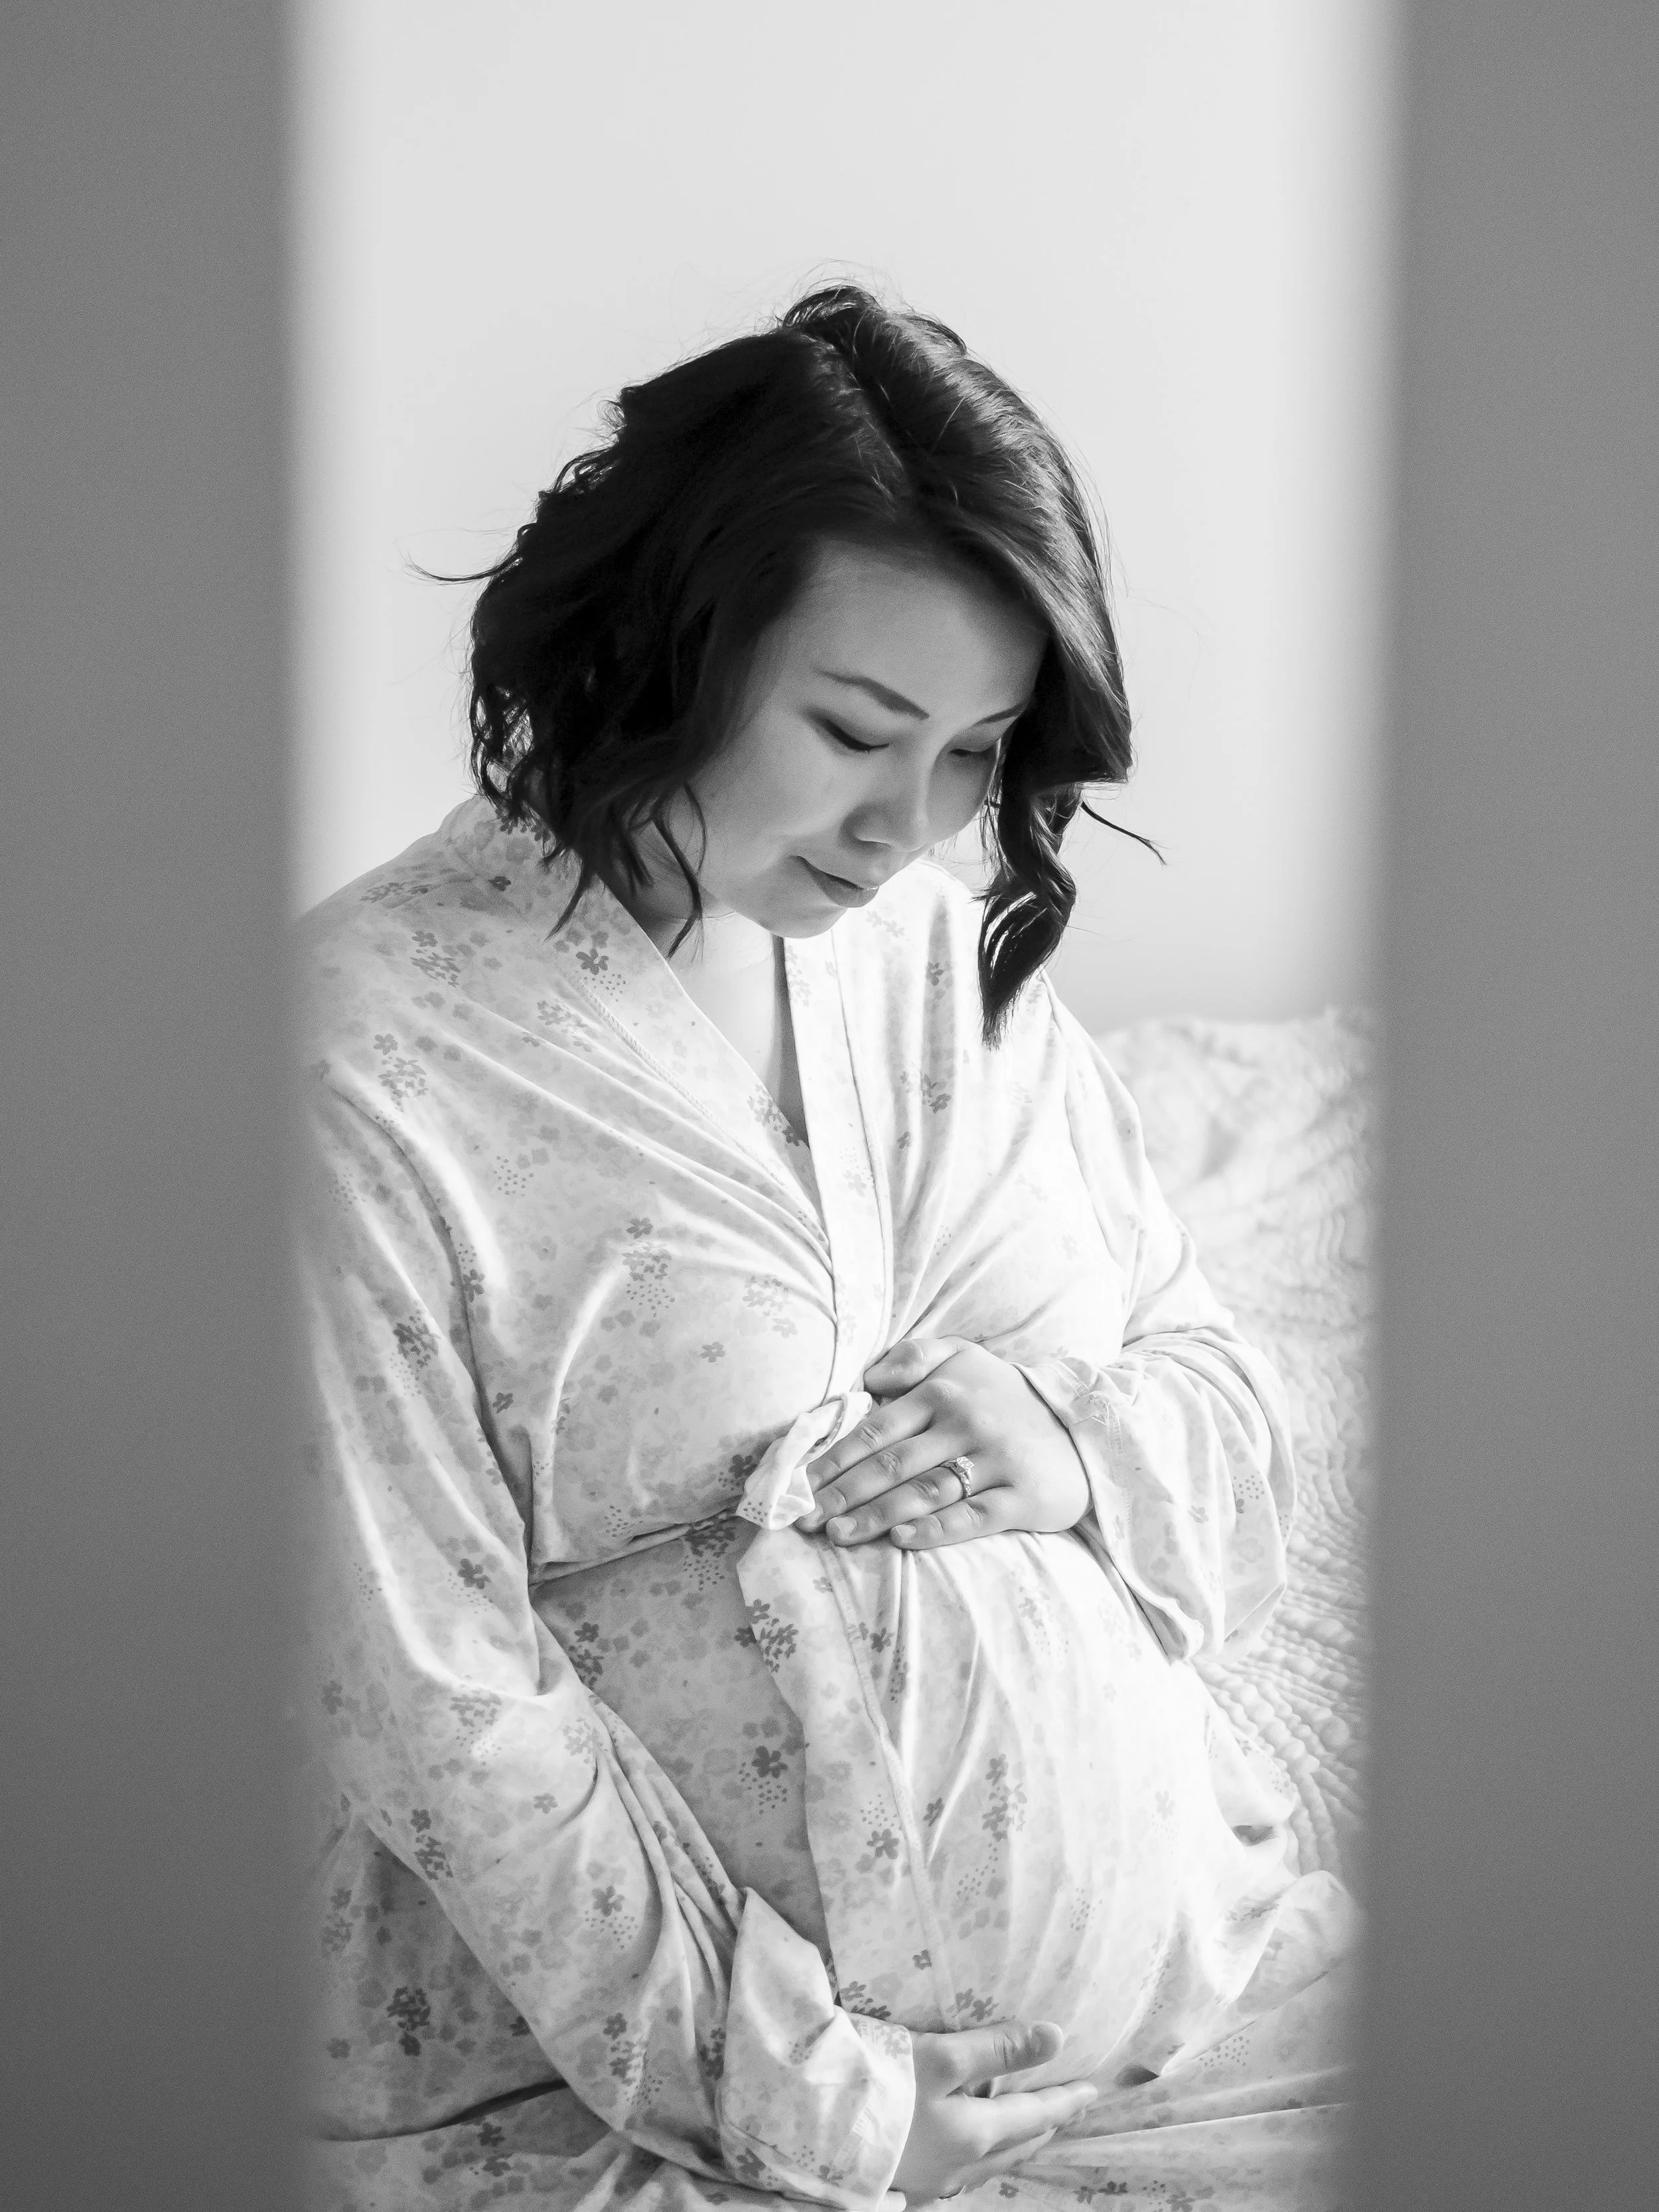
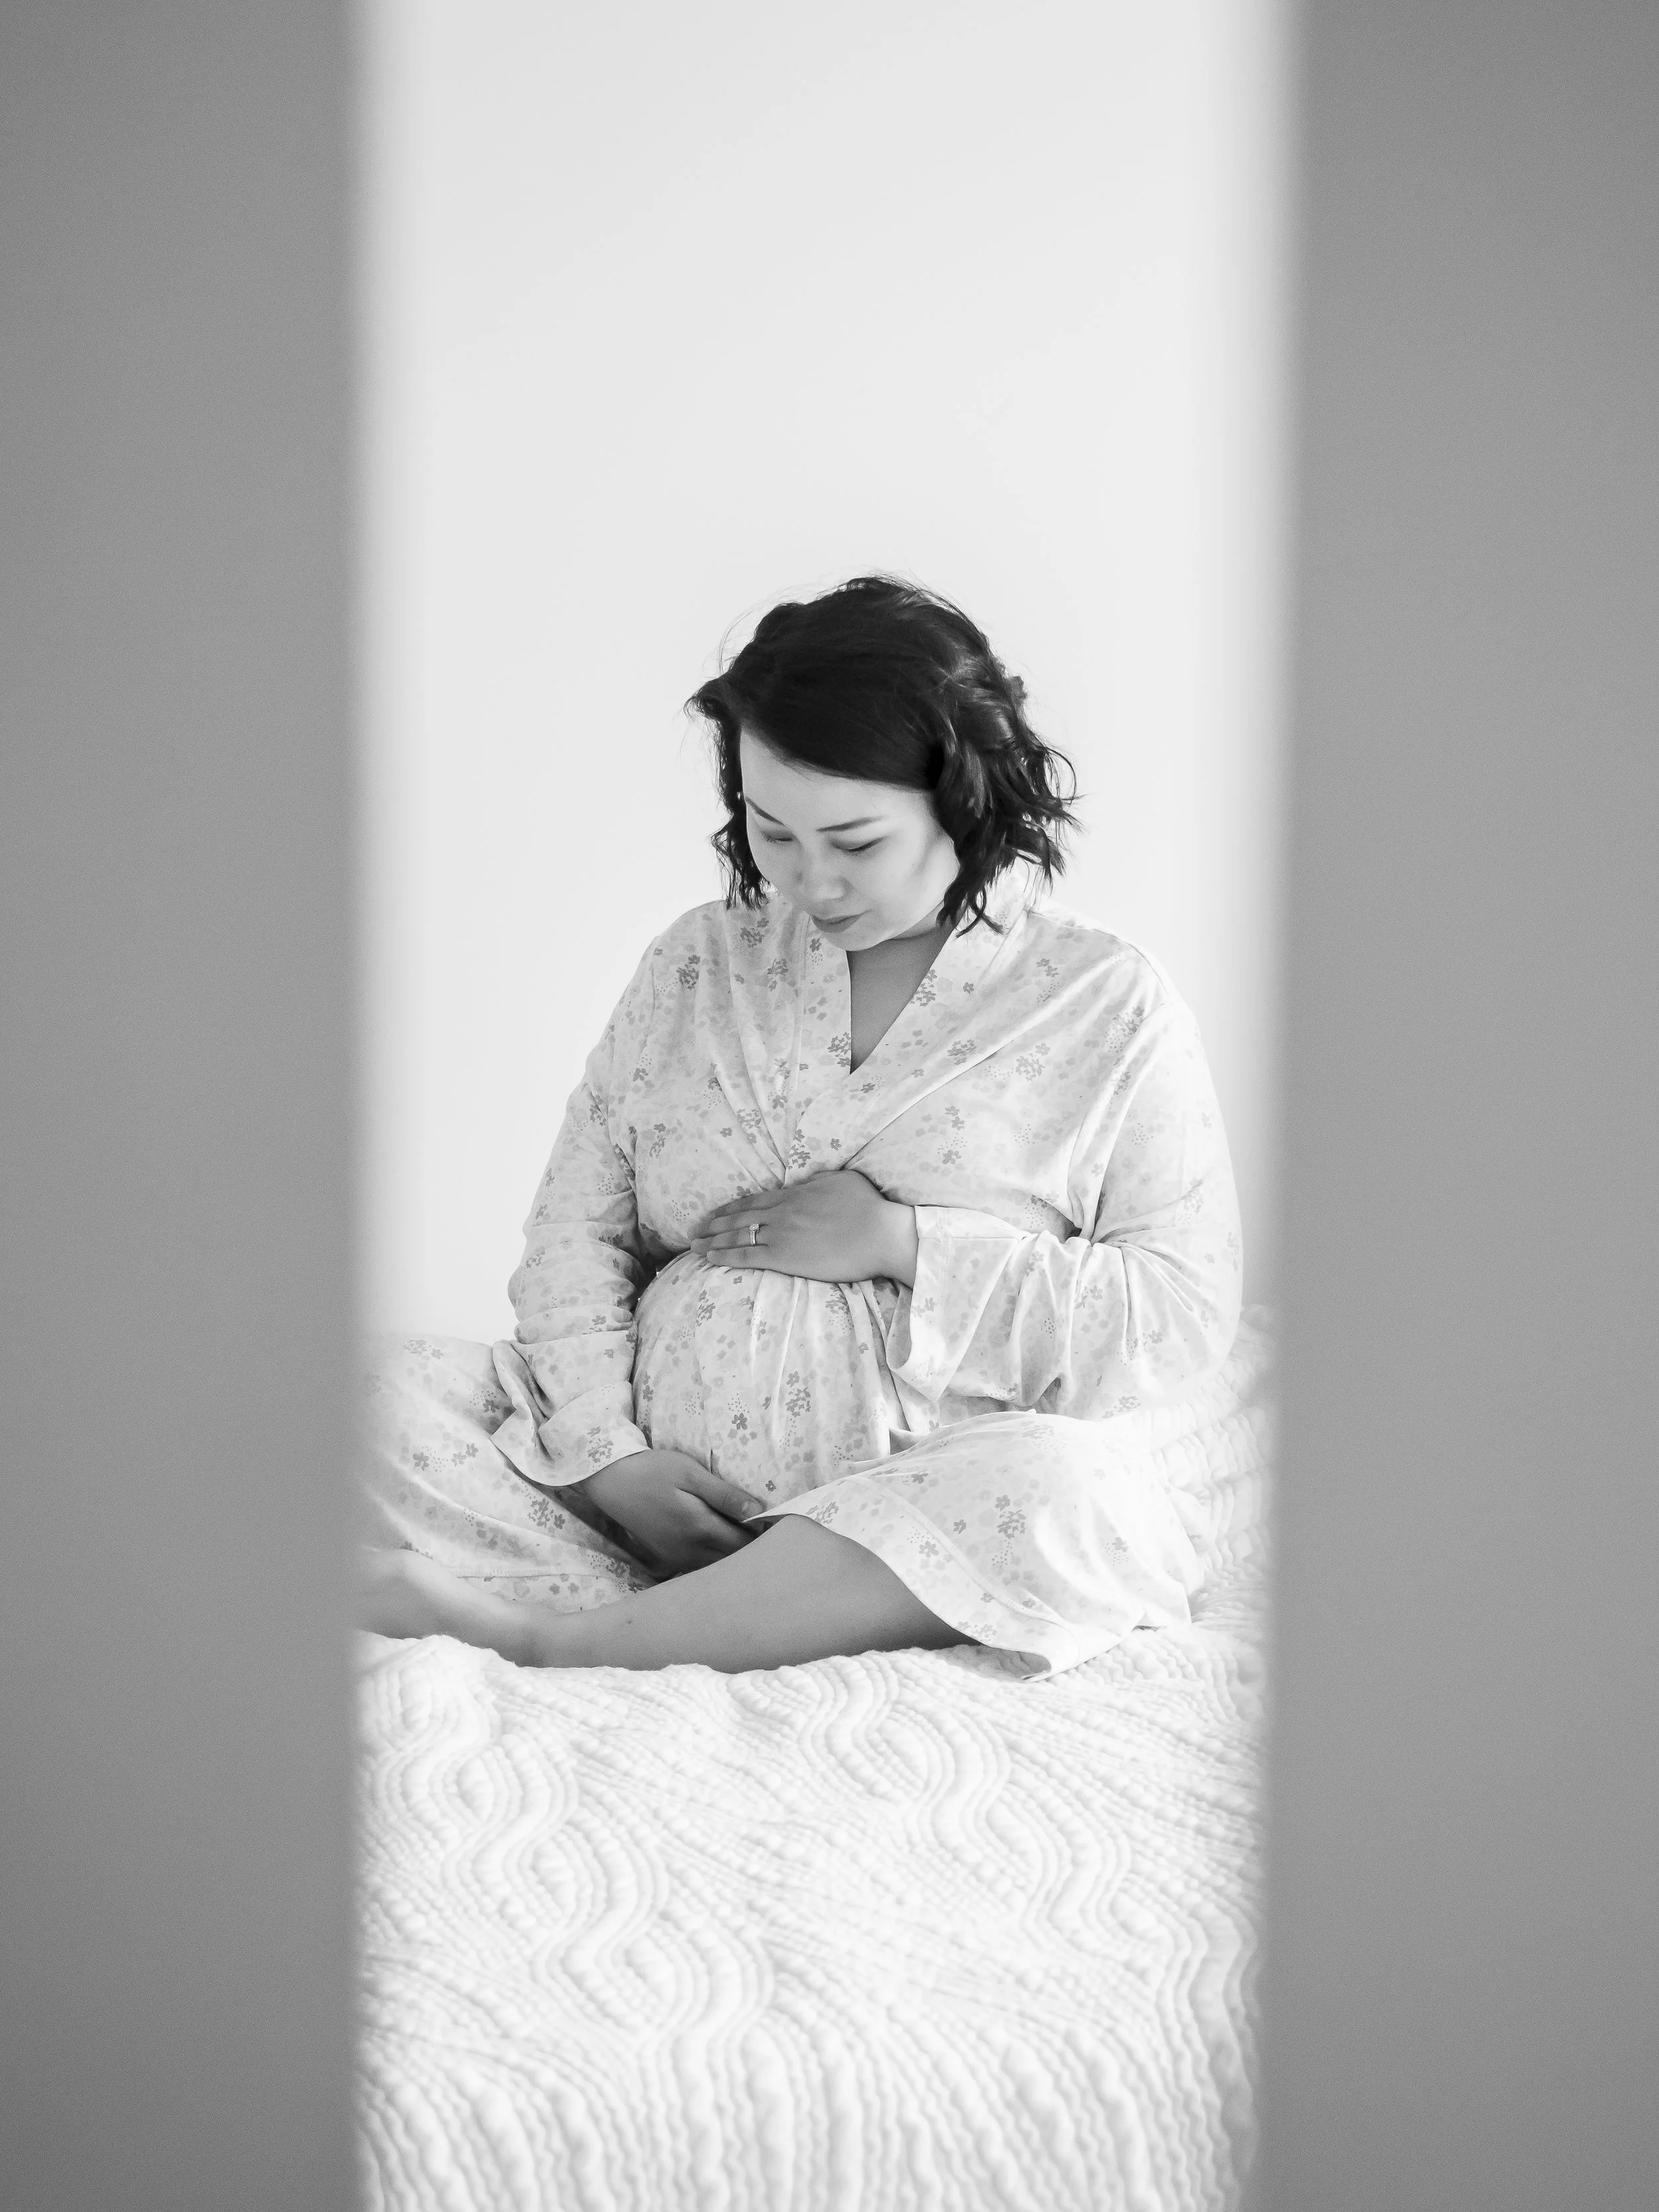
Indoor Photoshoots

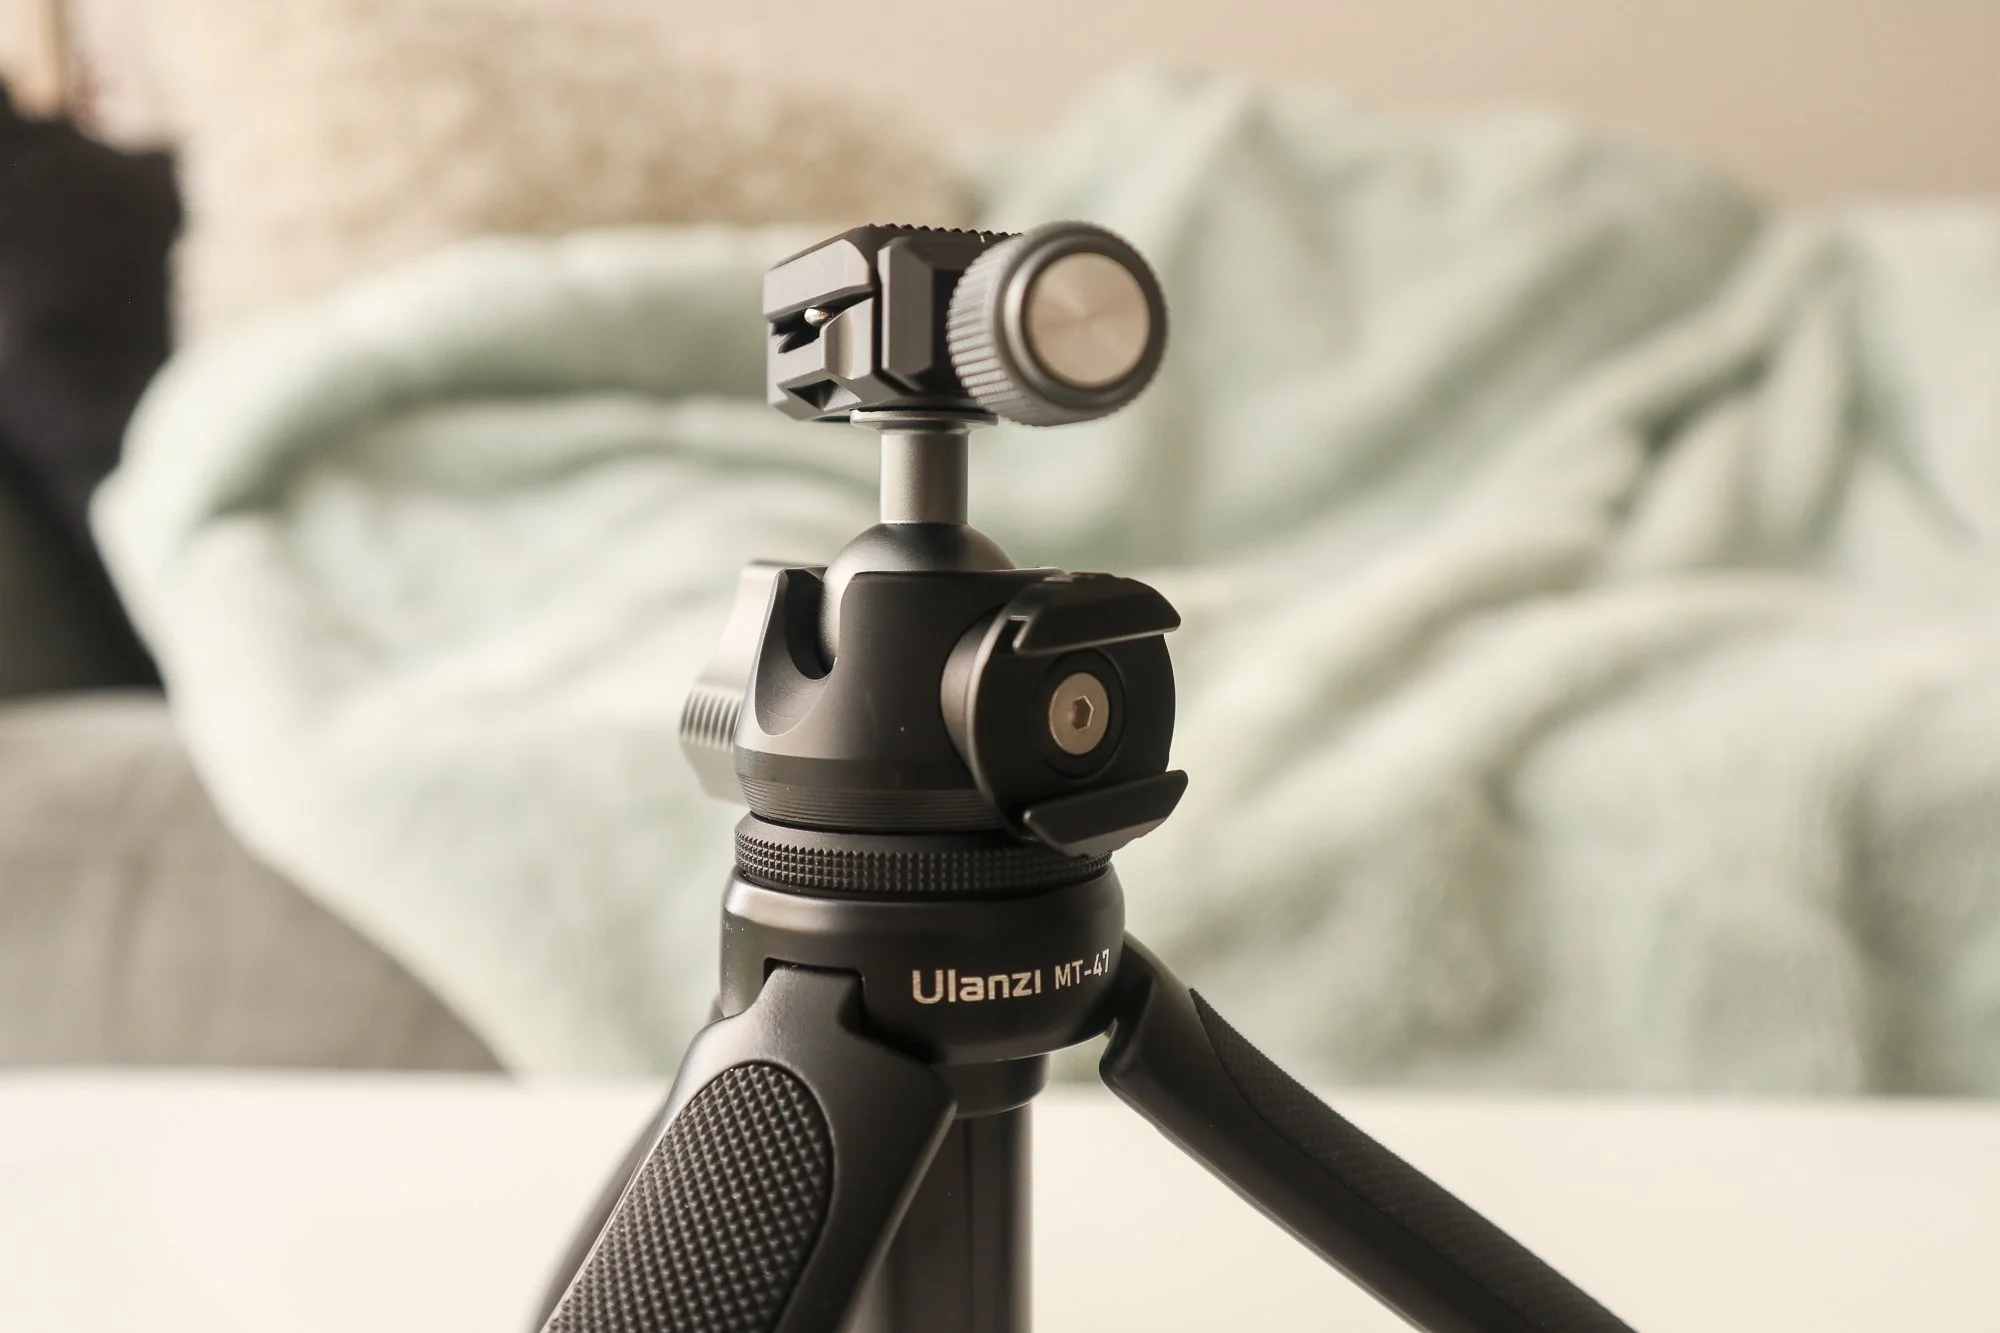
  • Set up the Camera: The trickiest part is setting up the camera at the right height and angle. Usually my first attempt at the composition was off. I often times would setup the camera, connect it to my phone, get into position and then readjust (height of the tripod, distance from me, focal length, and angle) until I was happy with the composition.

  • Get into Position: Once I was happy with the composition and my phone was connected to the camera I would get into my base position.

  • Change the Type of Shot: By default my camera would shoot single shots when it connects to the app. For my indoor photoshoots I changed the type of shot from single to a timed shot. I found 6-8 seconds was a good time for me. It allowed me to click the shutter, fix my position and get my phone out of the frame before the picture was taken.

  • Review: After each photo I would review the shot to see what micro adjustments I needed to make. Perhaps I needed to look down more, turn my body slightly more, fix my robe, move my hand, change a setting on my camera.

  • Repeat: I repeated this process over and over again for each pose until I felt I got the right shot.
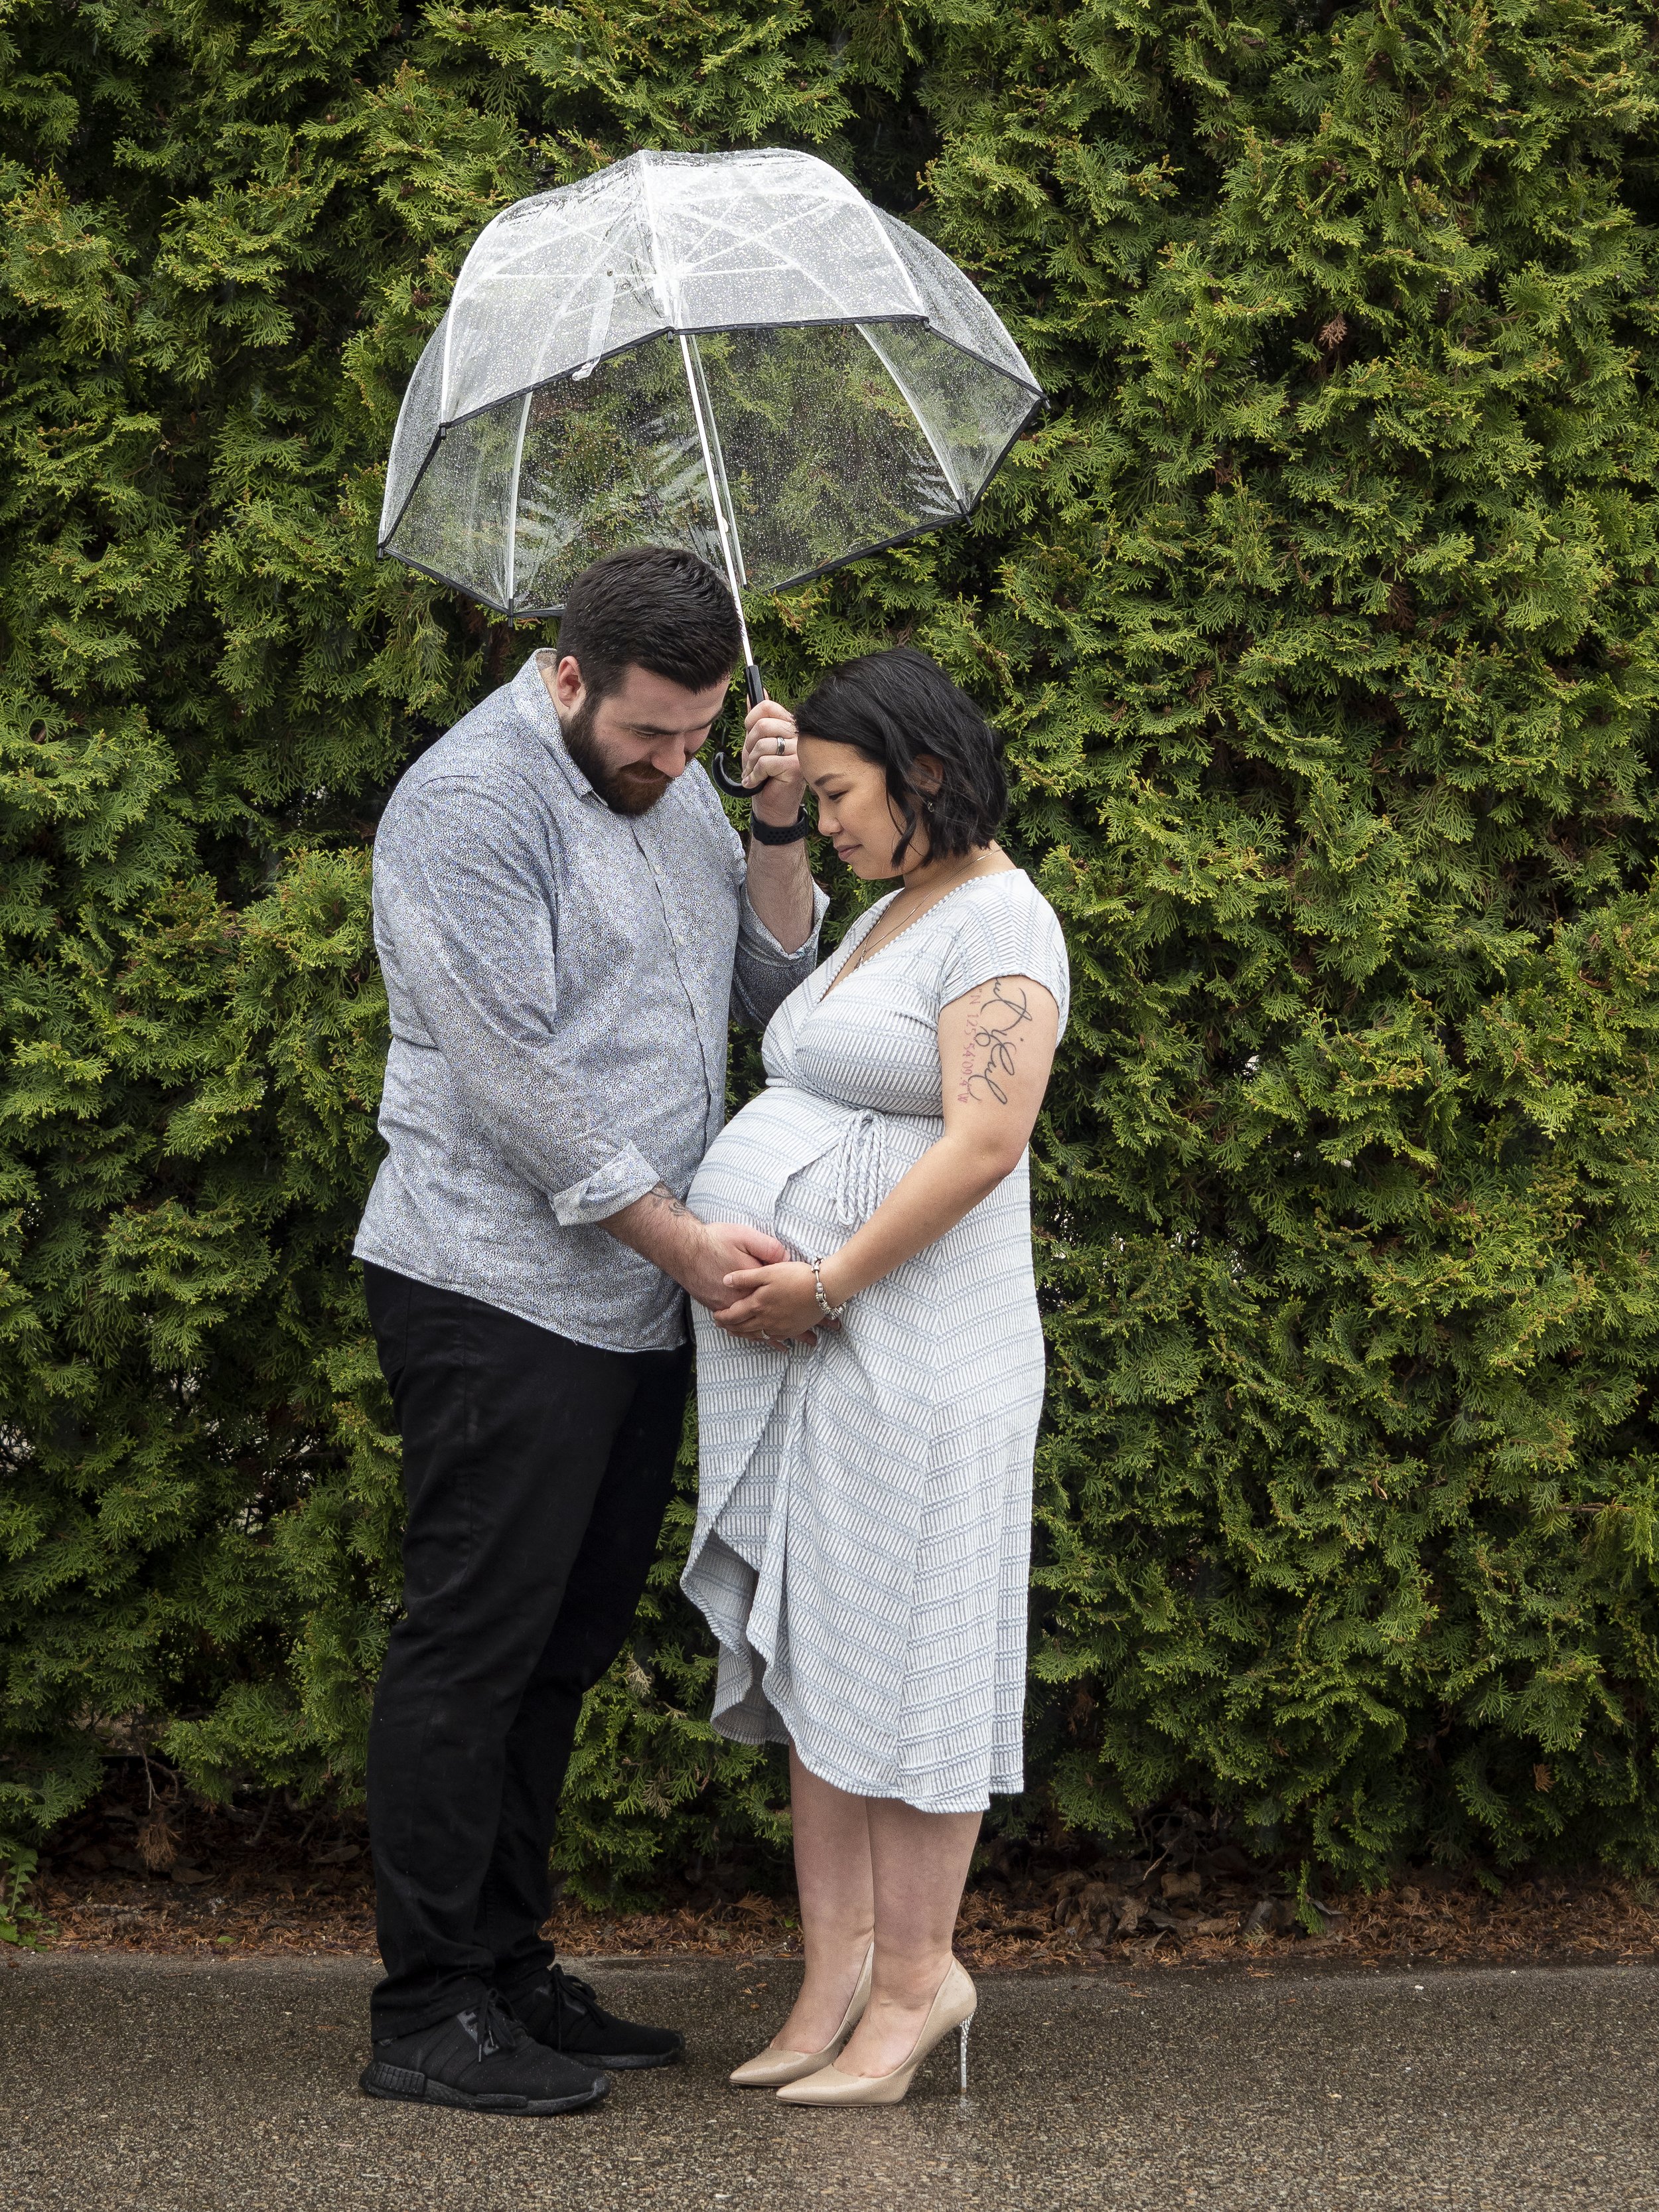
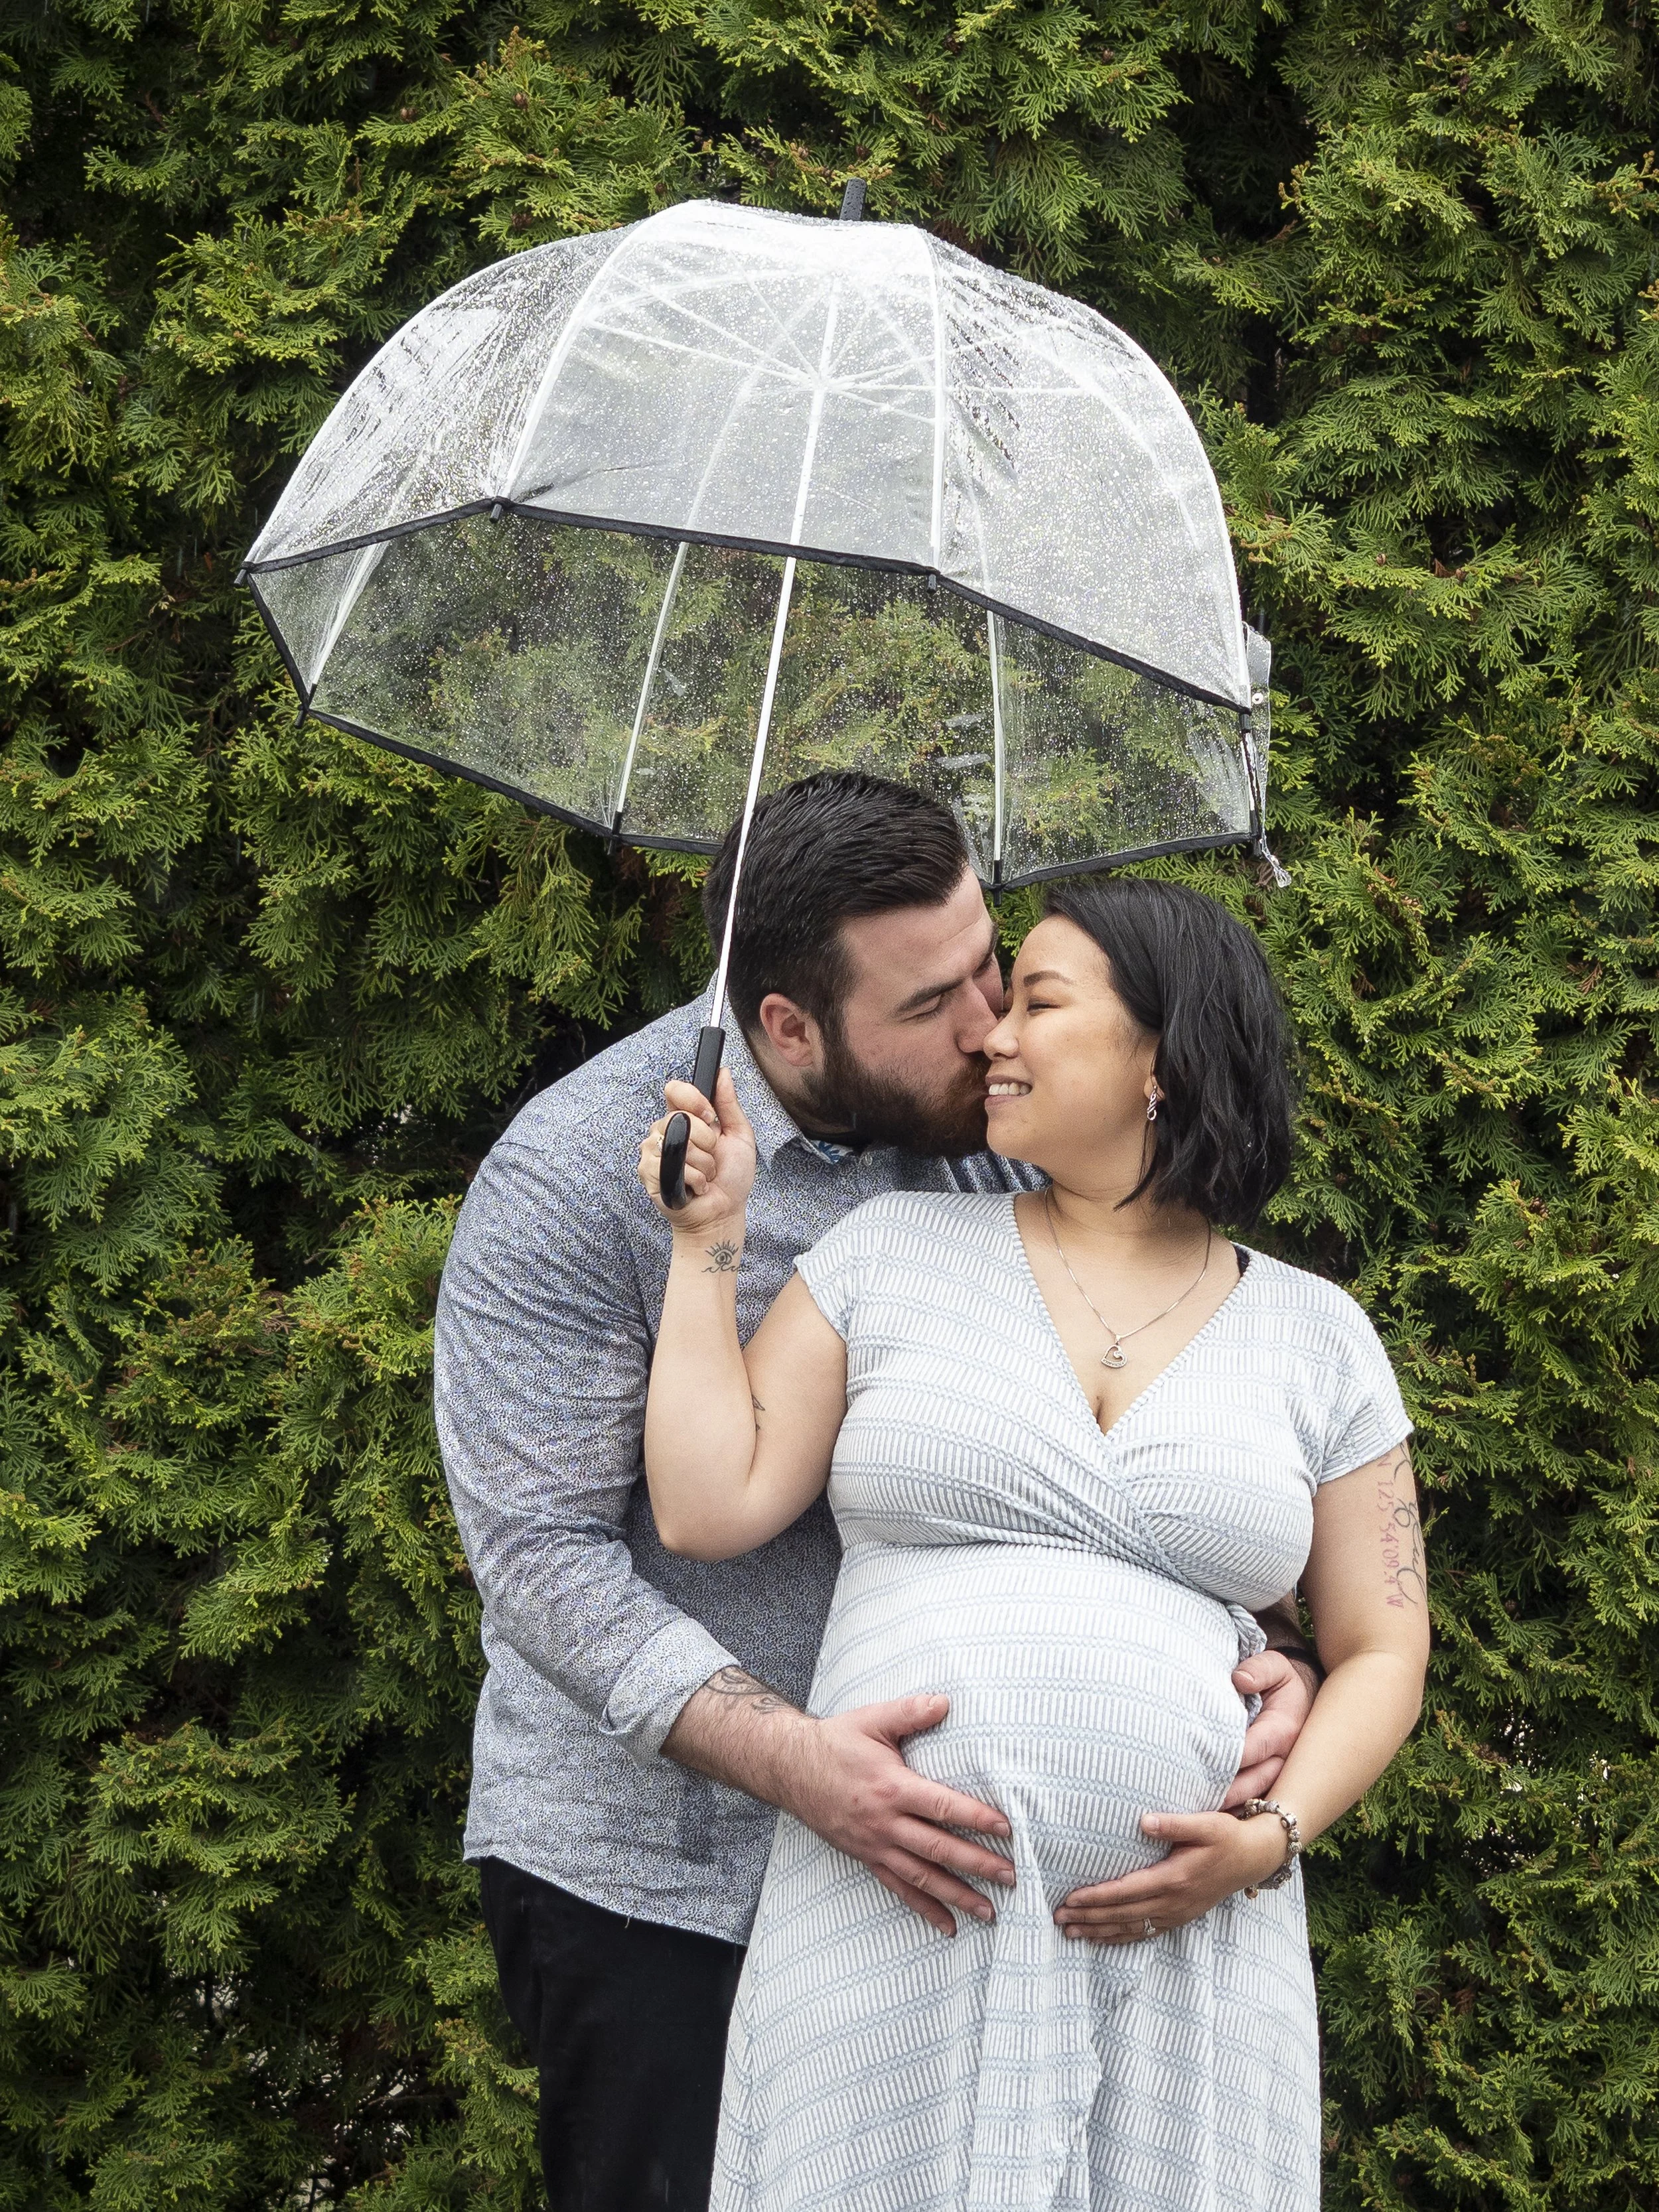
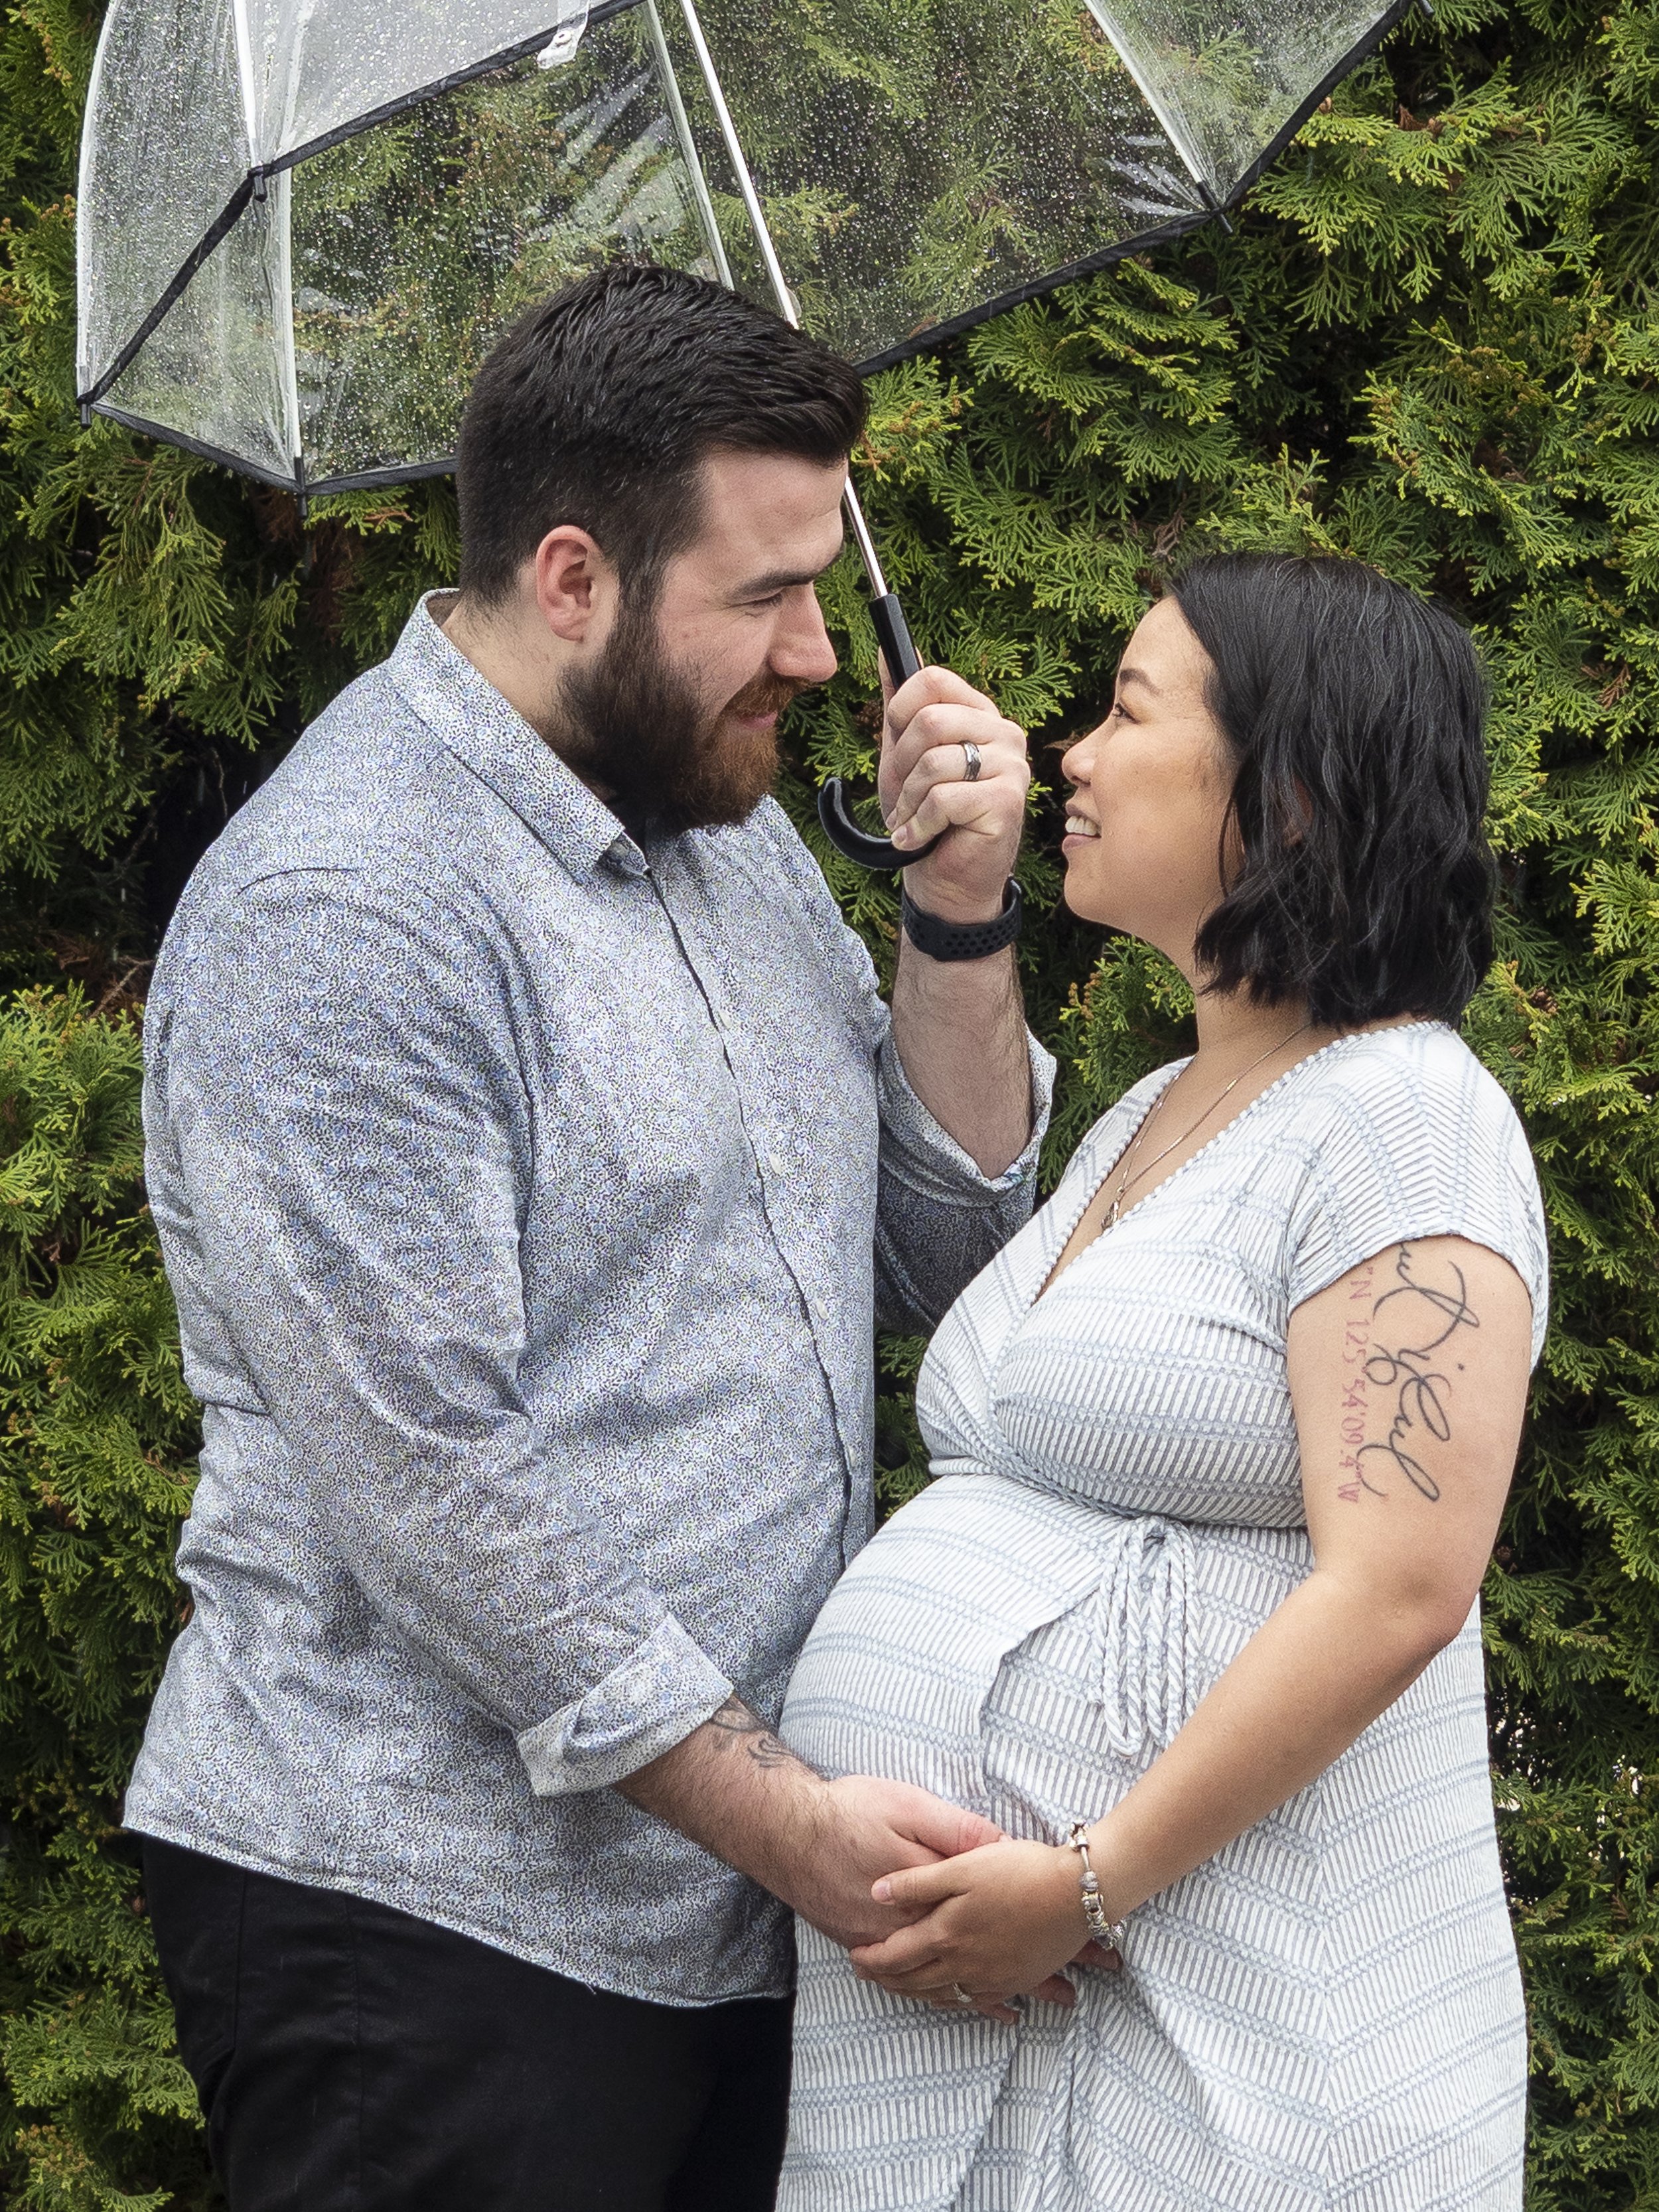
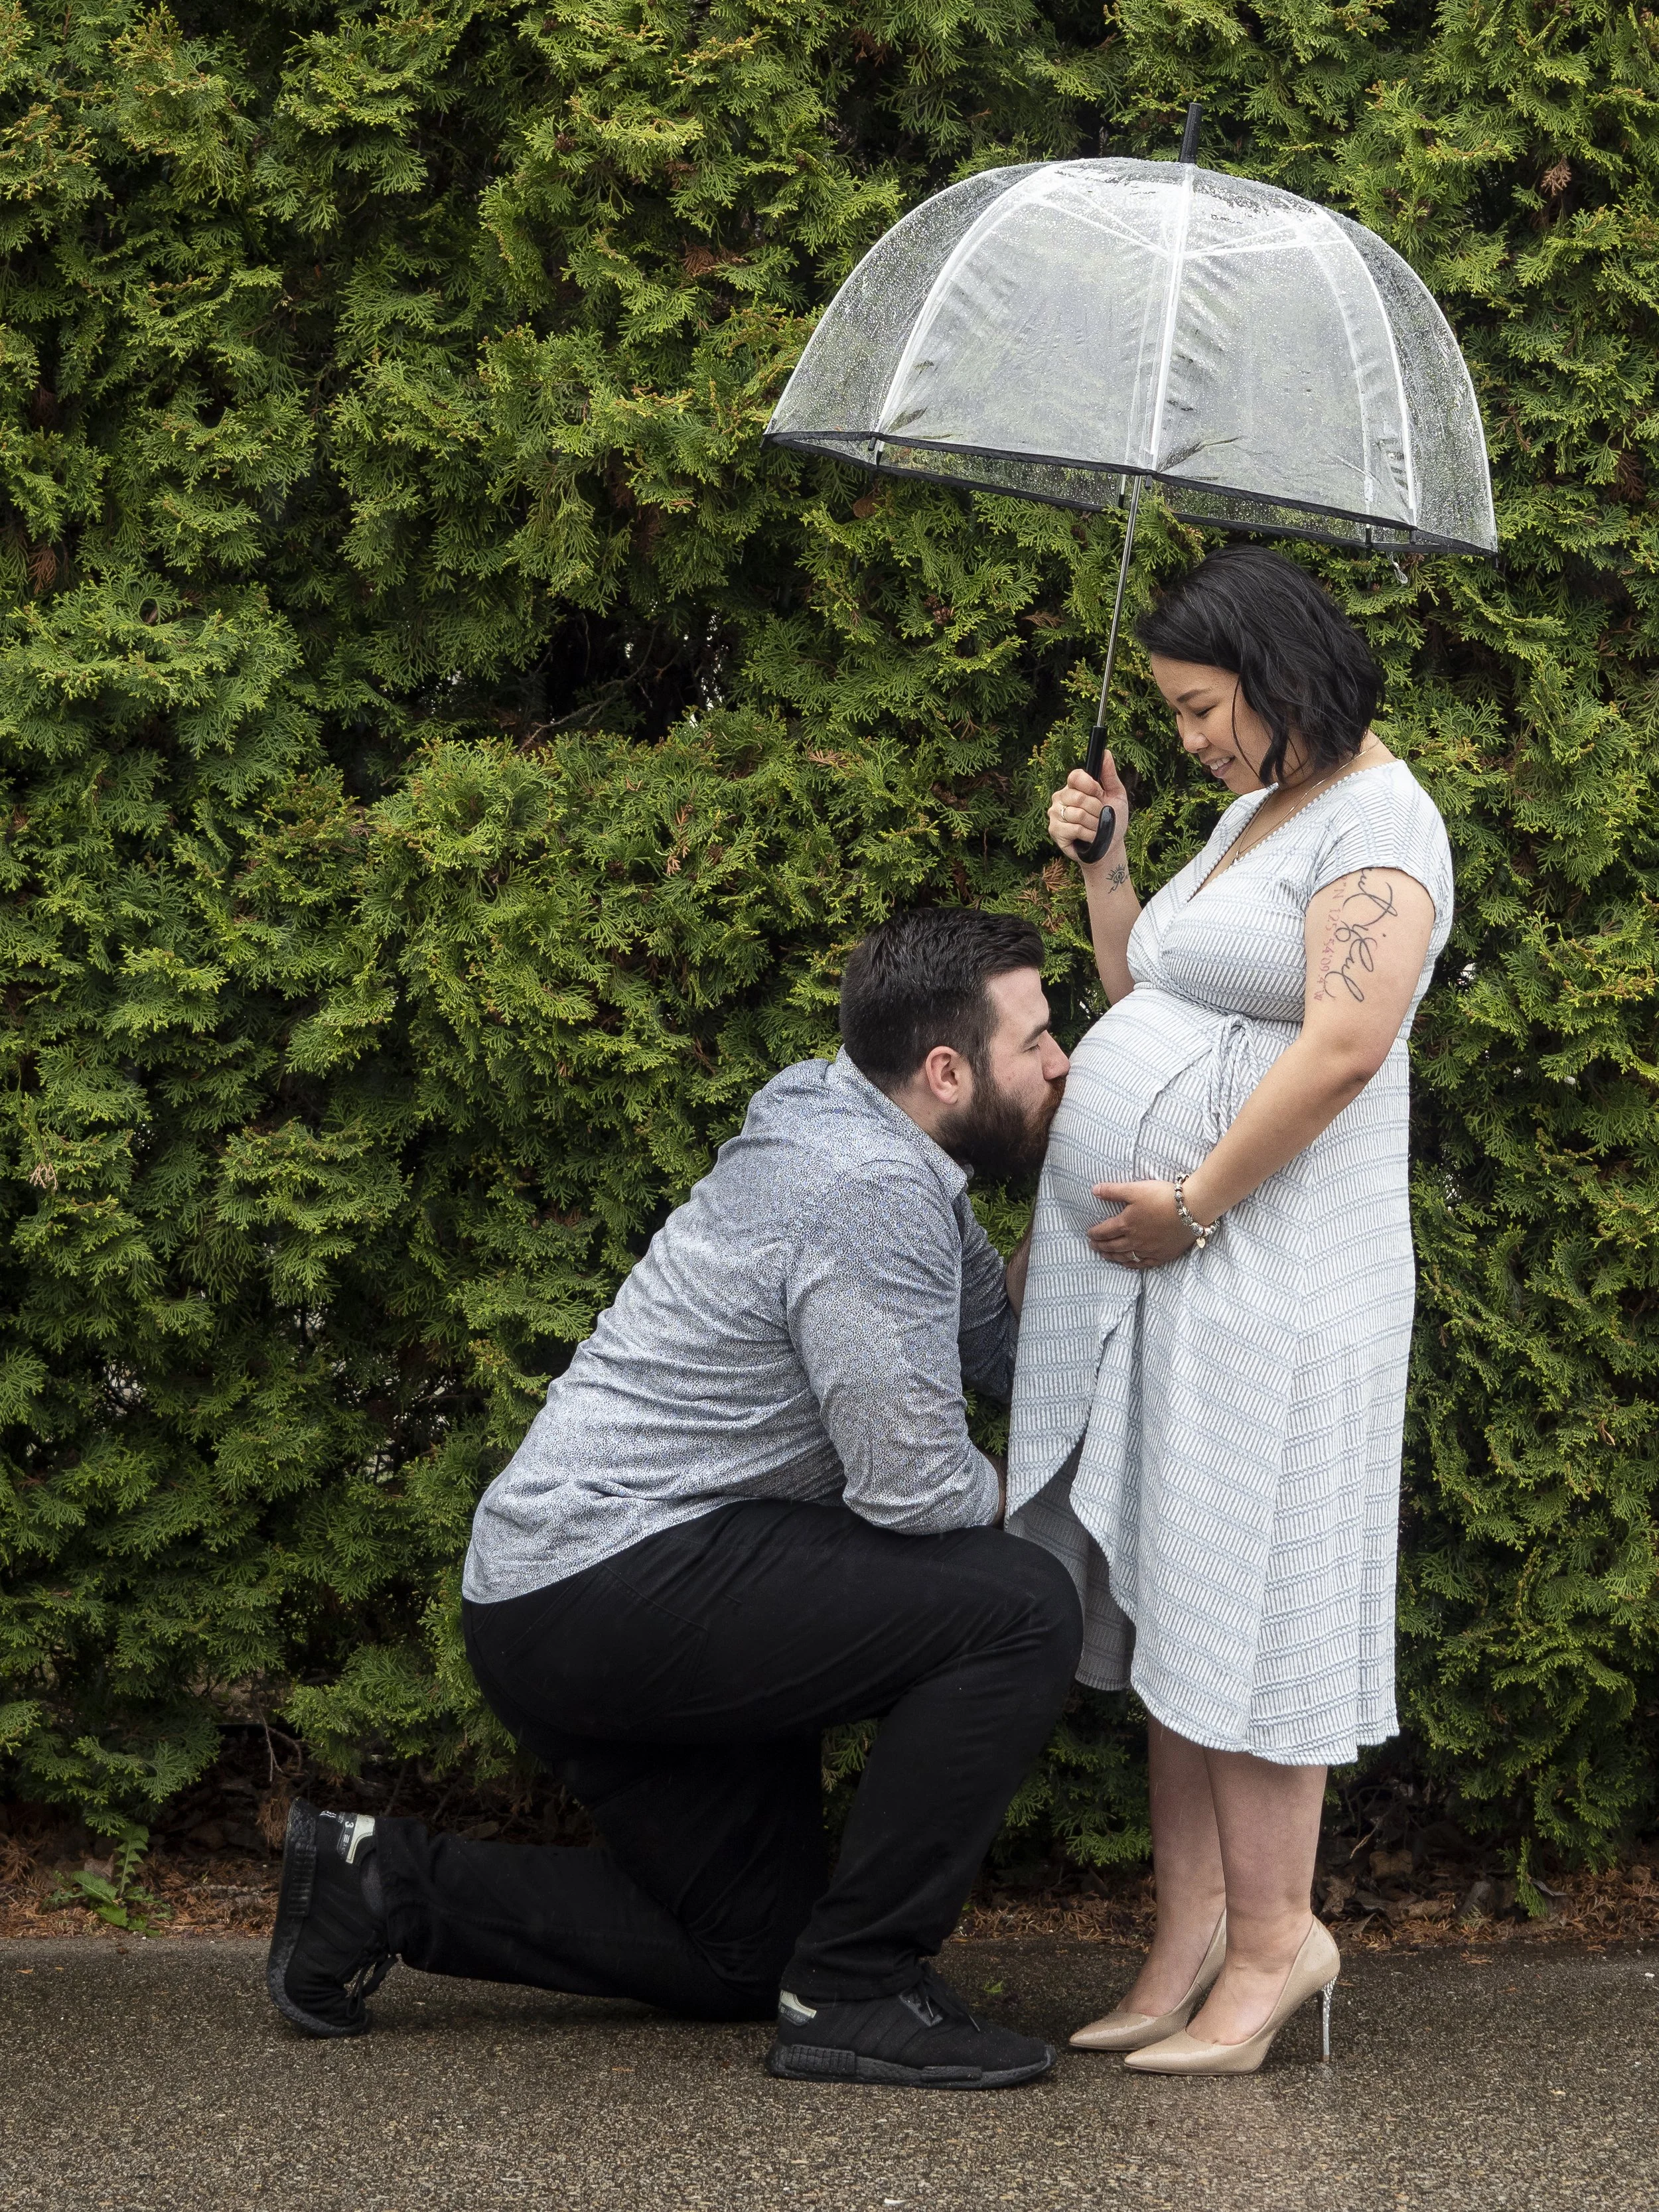
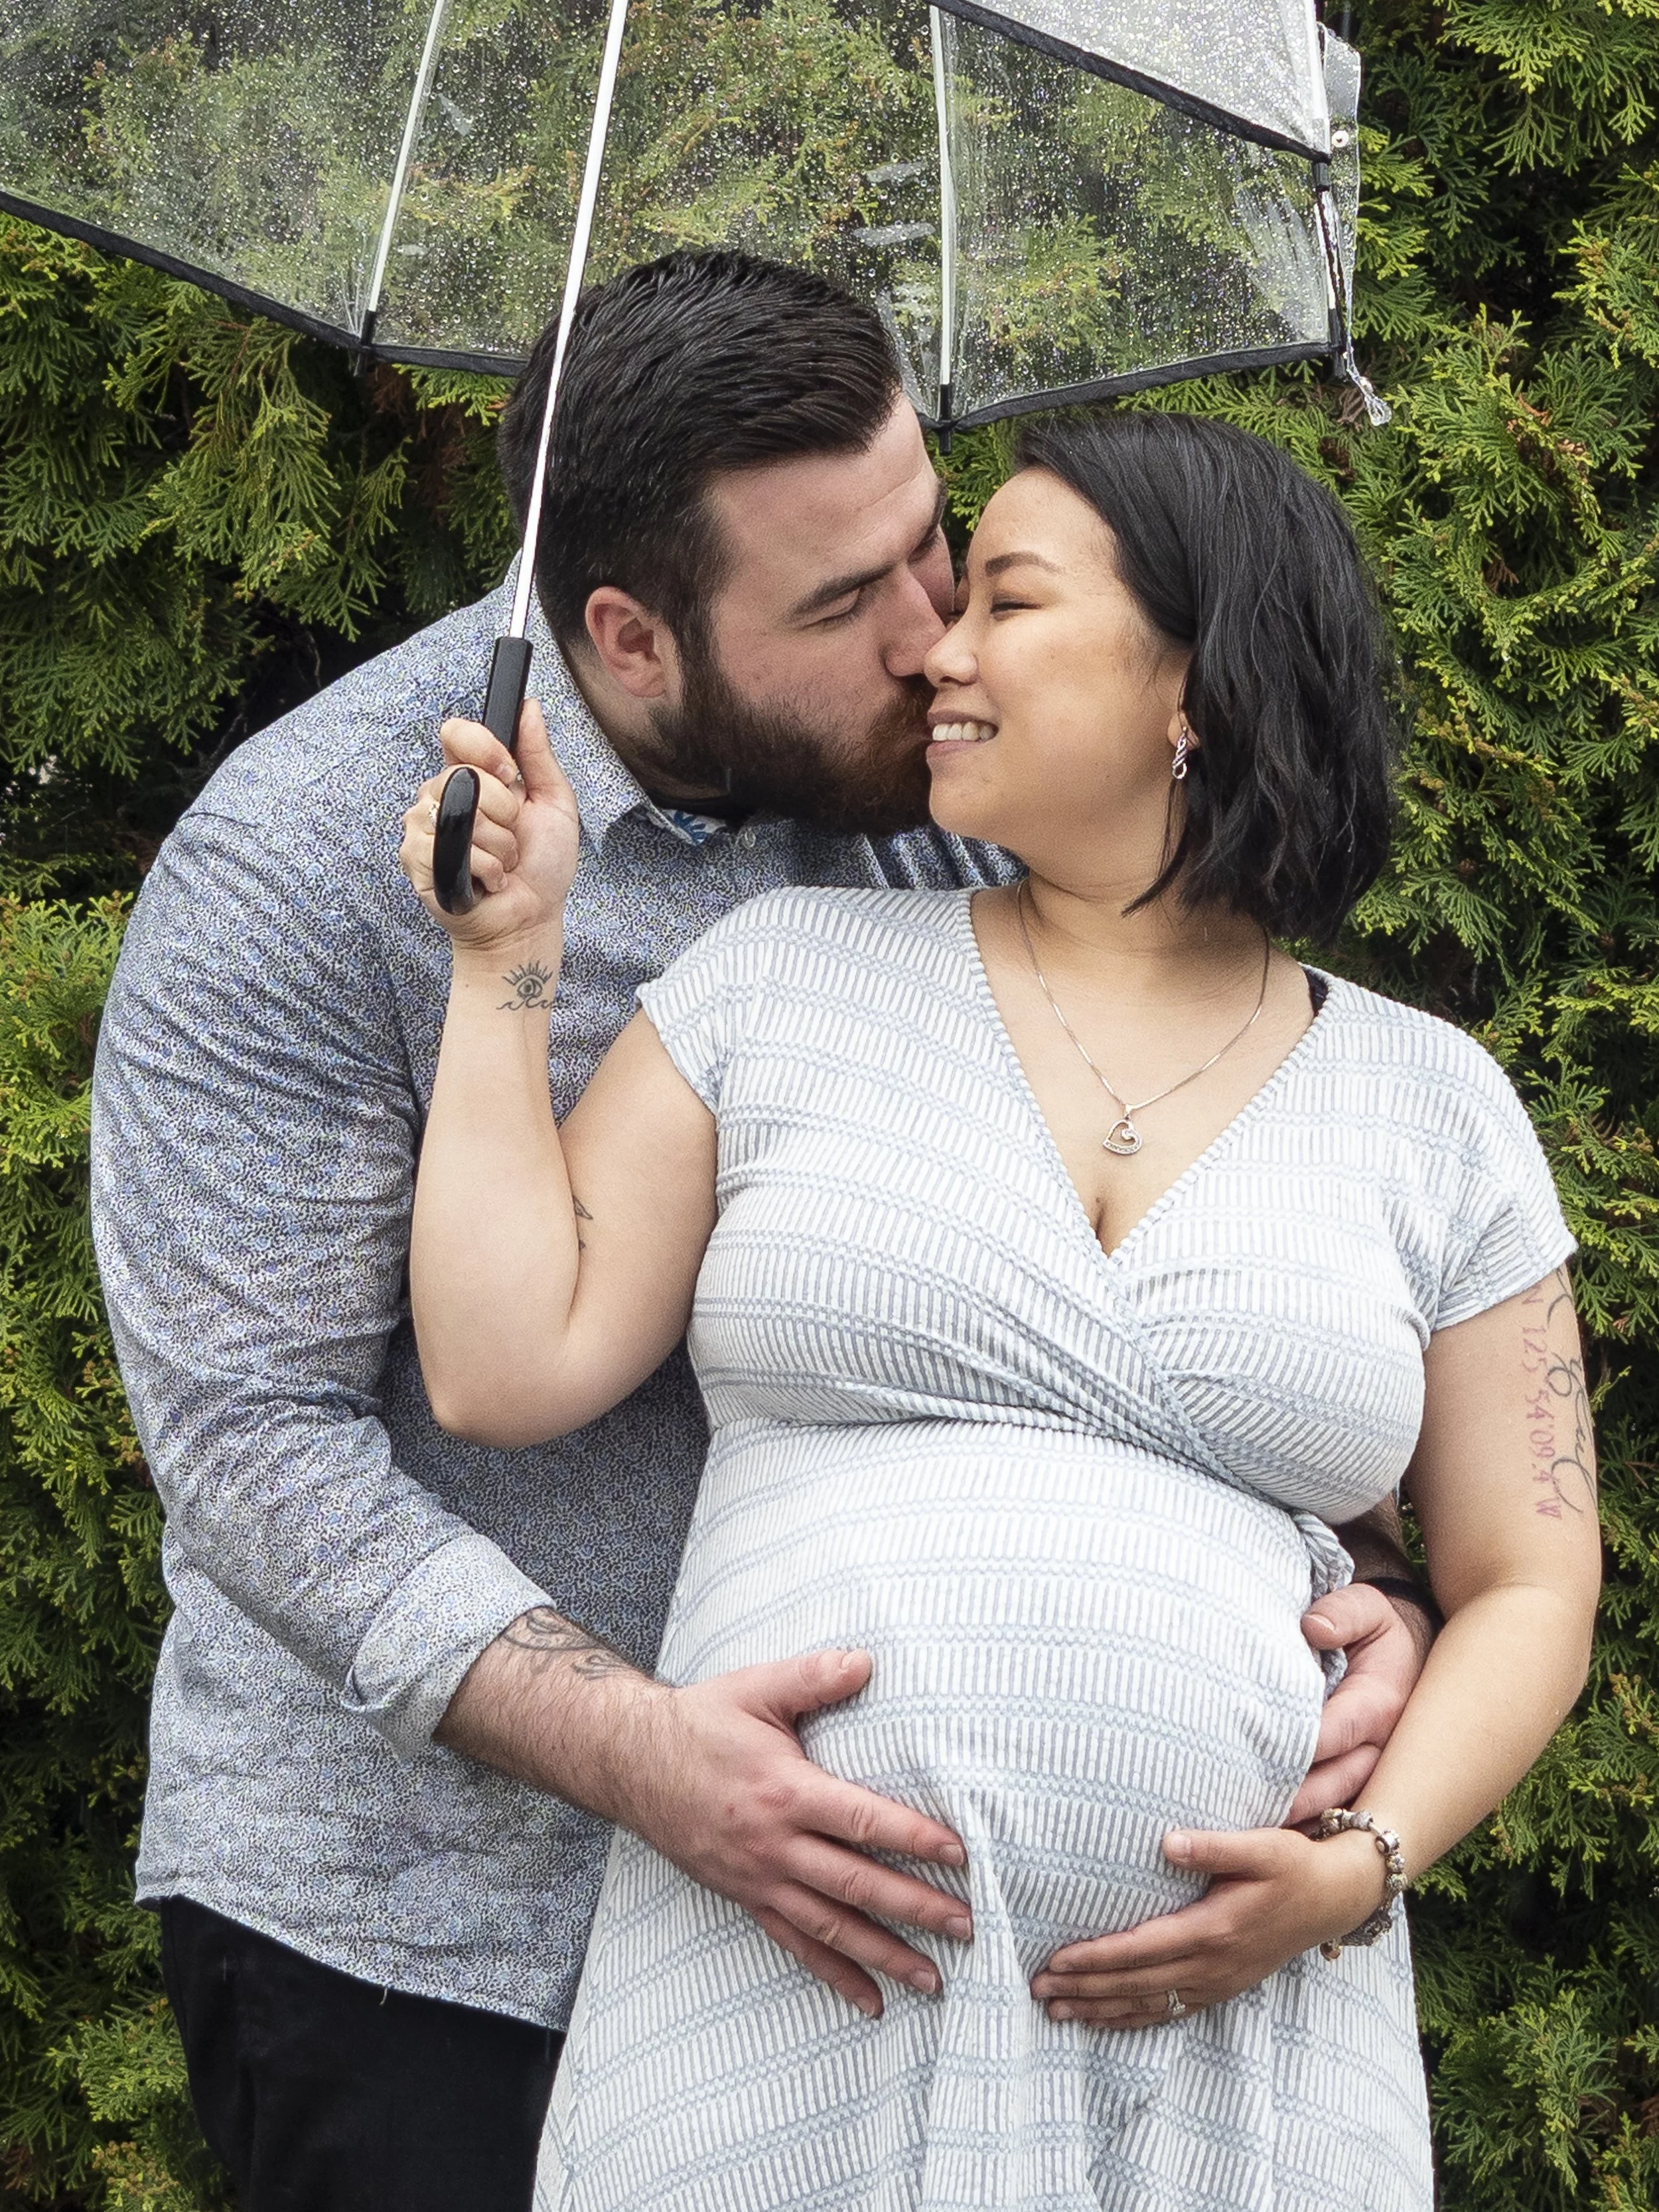
Outdoor Photoshoots

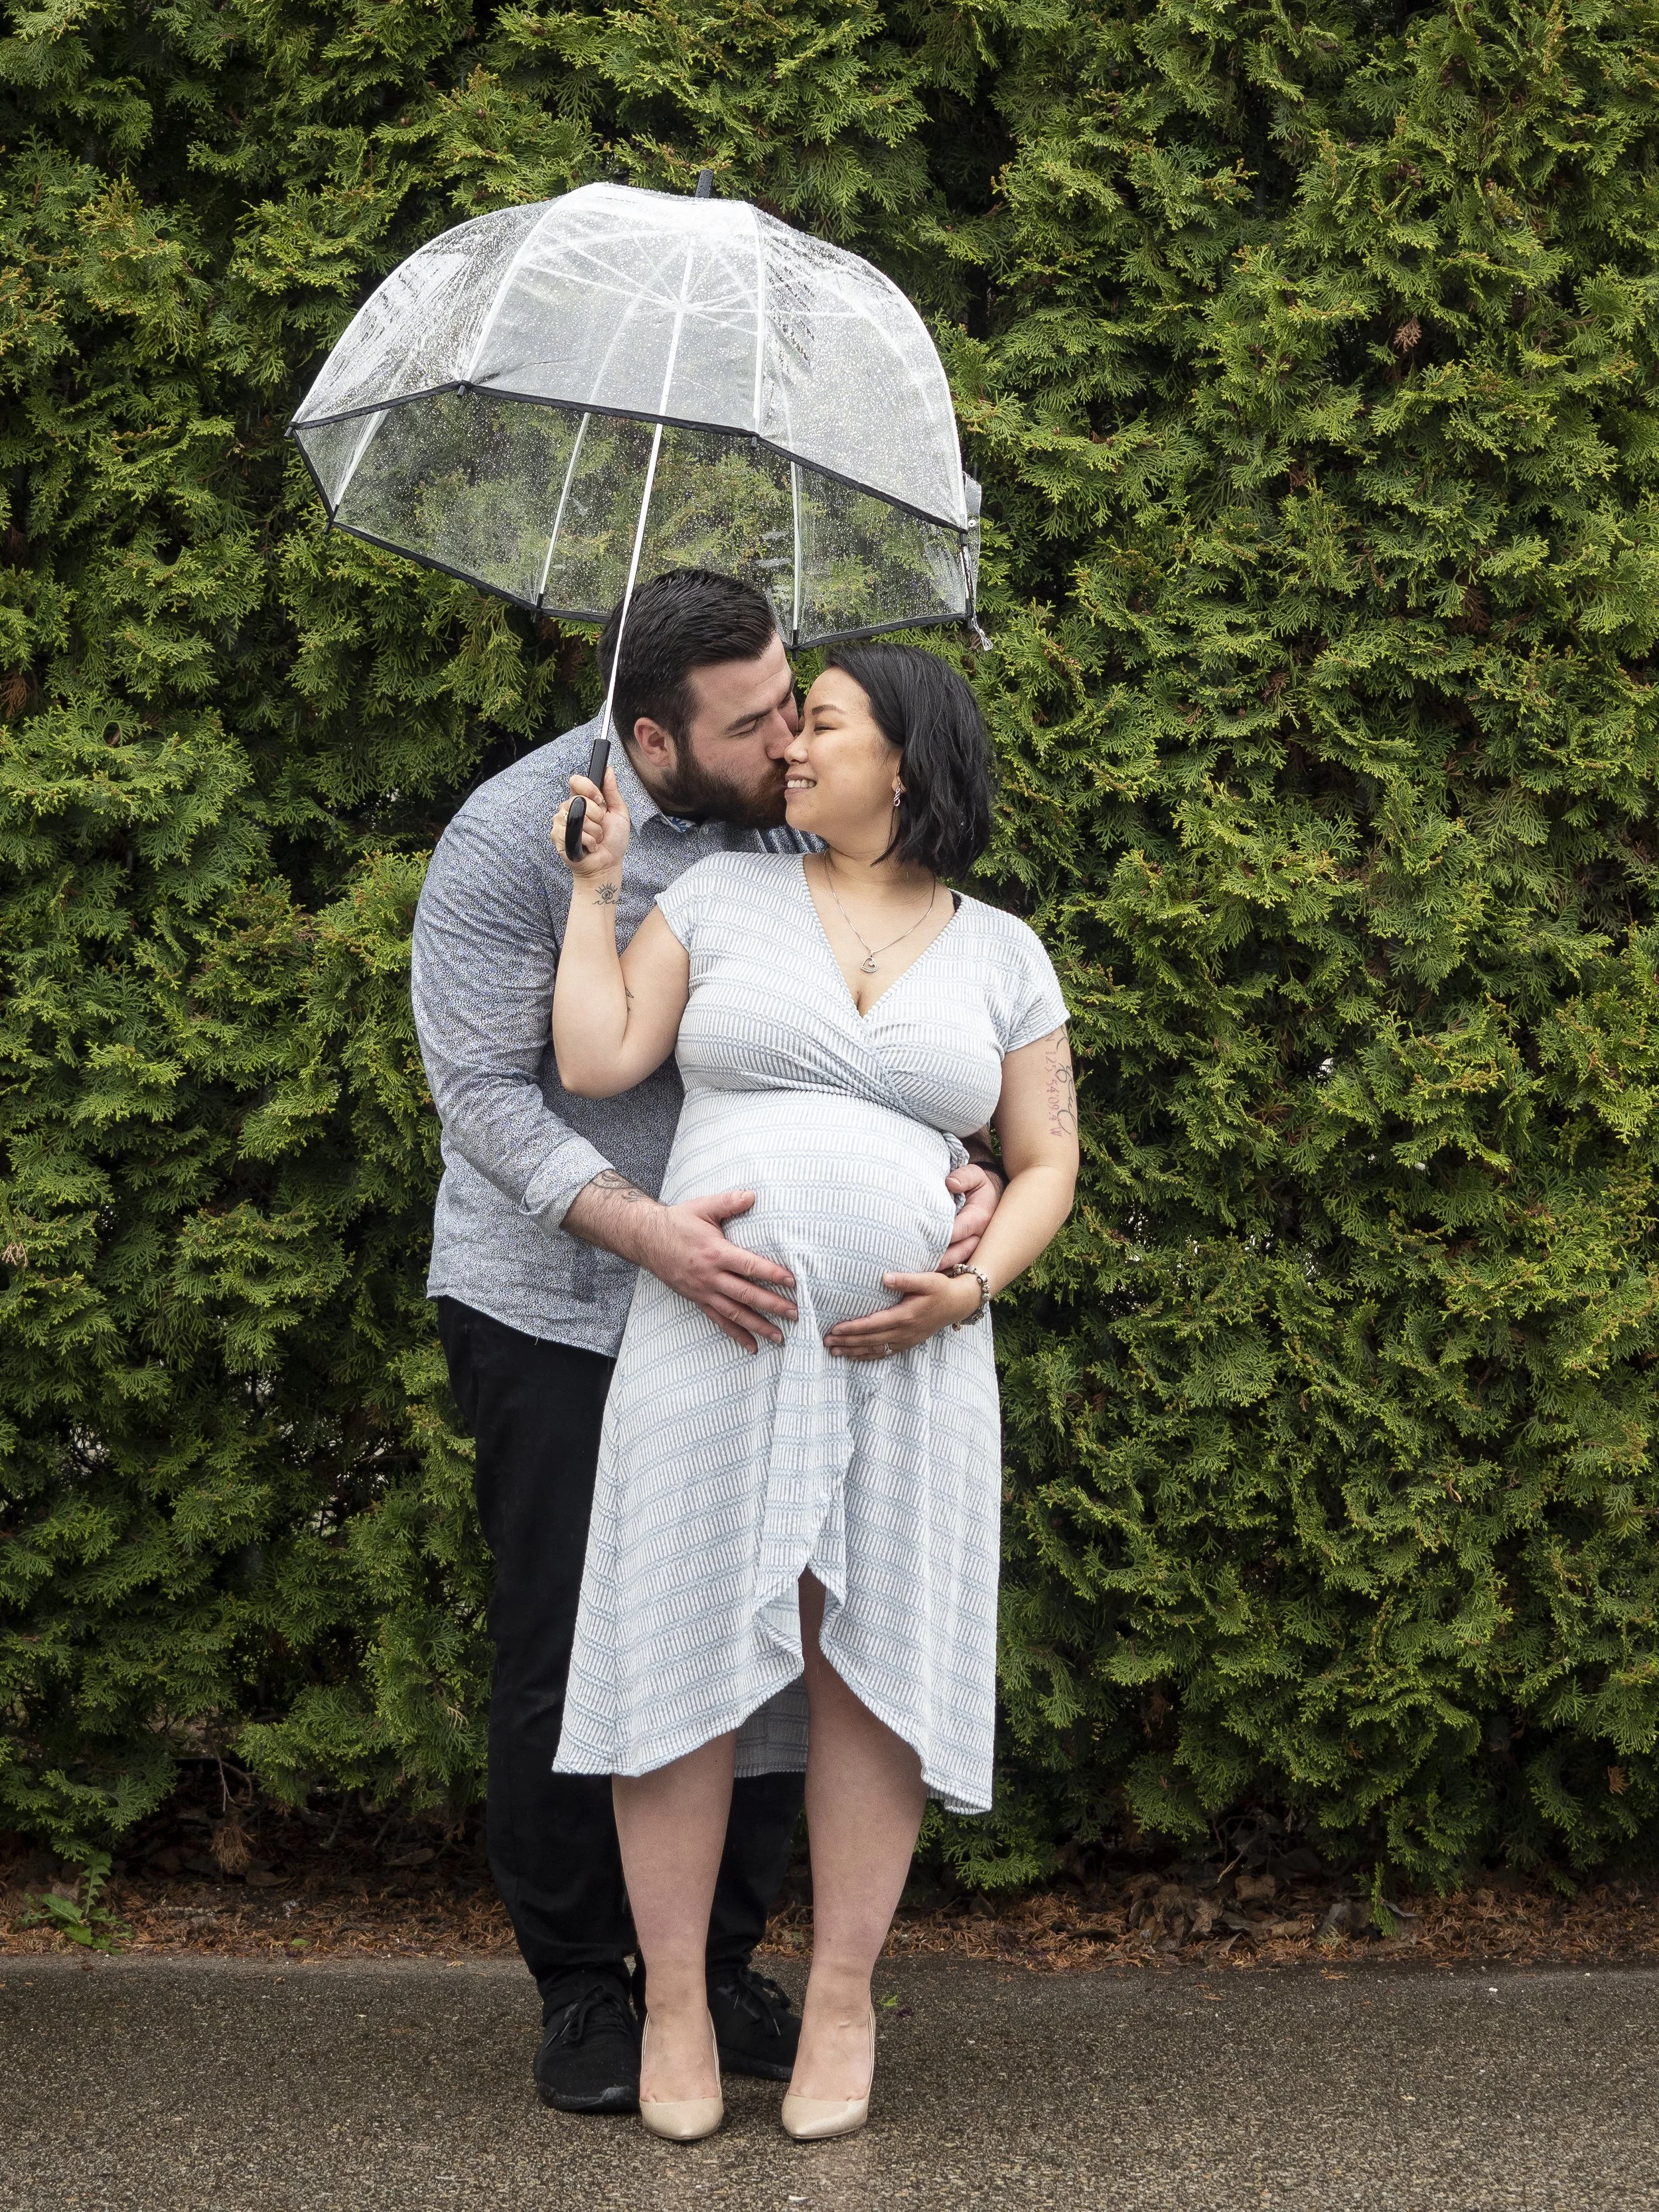
  • Setup the Camera: For my outdoor maternity photos they were with my husband which made setting up the camera slightly easier. I would get him into position so I could readjust my tripod and camera without having to go back and forth so many times. Once I was happy with my composition I would adjust my camera settings and choose my focus point.

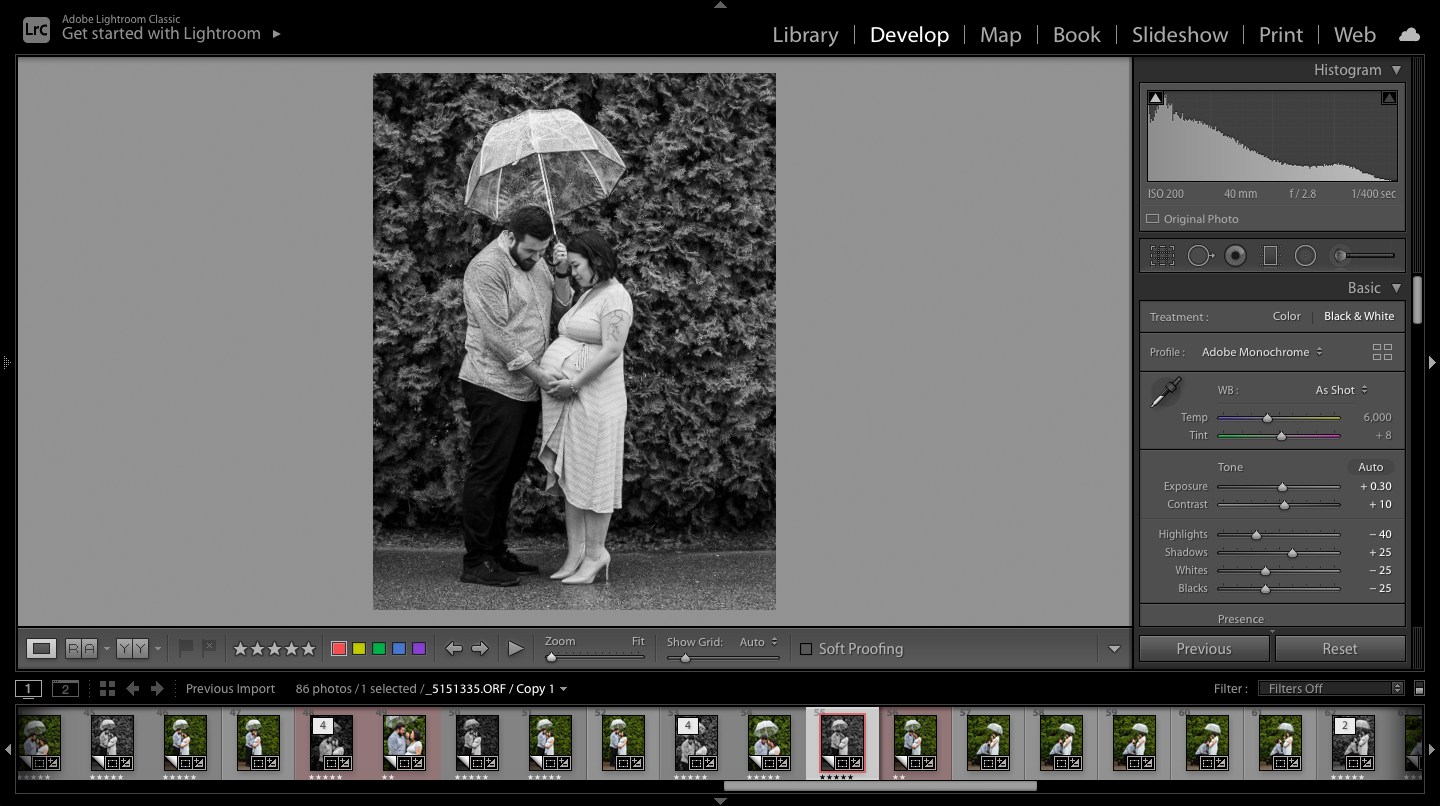
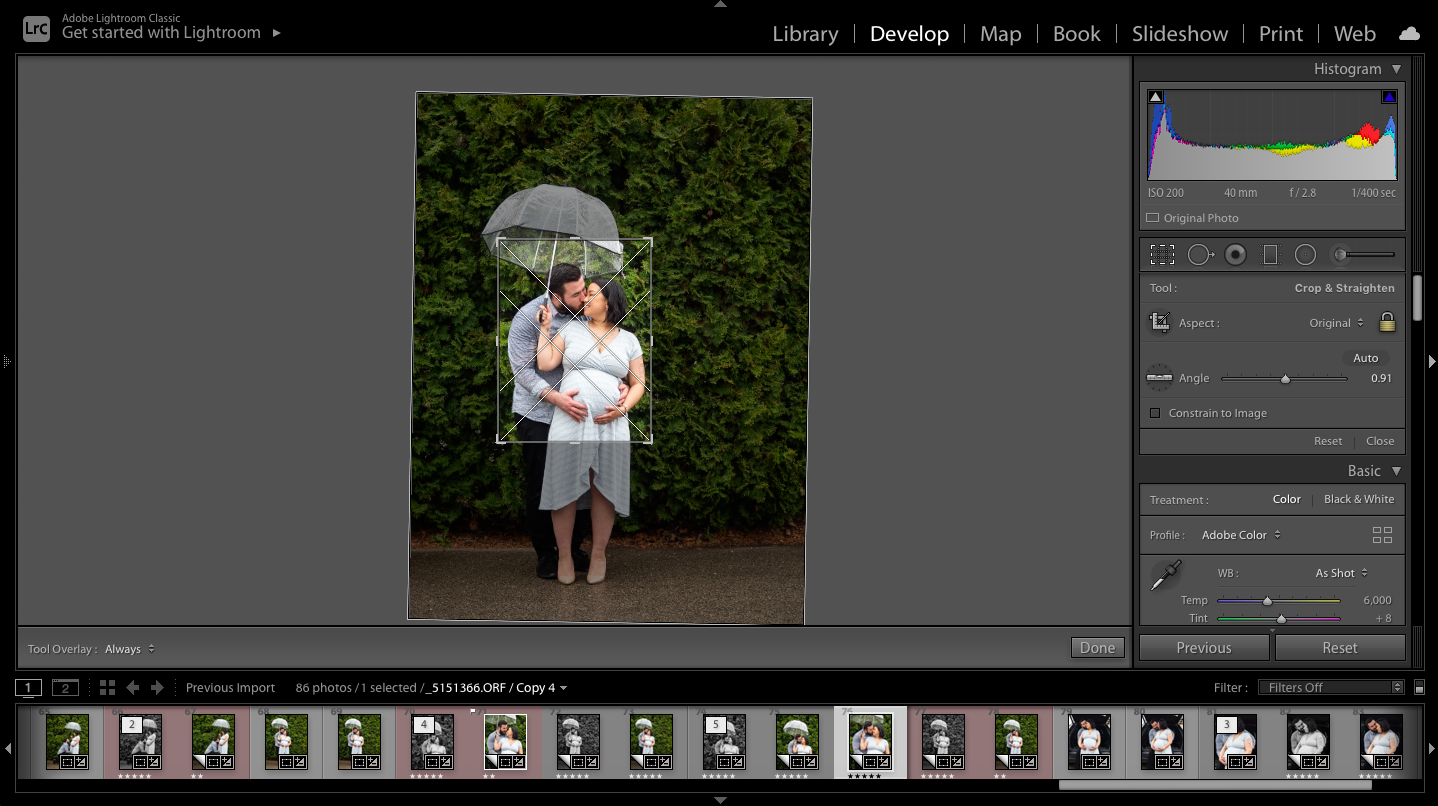
  • Change the Type of Shot: With my outdoor maternity photos I couldn’t use the camera connect app because there was no where to put my phone when we were taking the photos so I changed my type of shot to shooting continuously. I set my camera up to take it’s first photo in 12 seconds after clicking the shutter, it would then take a total of 8 photos every 5 seconds. This method allowed me to click the shutter, get into position without having to sprint, and change our positioning slightly in-between photos being taken.

  • Review: After each set of photos I would review in camera to see what micro adjustments I needed to make. Because it was raining on the day of our outdoor maternity shoot it was often the placement of the umbrella so it wasn’t sticking out of my head at a weird angle.

  • Repeat: I repeated this process for every pose I wanted to get until I felt we got the right shot.

Posing

I’m not an expert on posing so I stuck with simple poses that I liked and thought I could emulate.

Once I had my base pose down. I experimented with my body angles, where I was looking, smile or not to smile, where to place my hands. A simple thing to. remember is placing the arm/hand closest to the camera at the bottom of your belly to elongate your arms.

After every photo I would make micro adjustments until I was satisfied.

In this photoshoot I wore a black t-shirt and grey sweatpants. I found the look a little too casual and I found the throw pillows on the couch distracting.

In this photoshoot I wore a white robe that had delicate lace detailing on the sleeve with black undergarments. For the background I used a blank wall that I had in my home. Originally there is a light switch in the frame that I remove during post-processing.

In this photoshoot I wore the same grey sweatpants as the first photo but a grey bodysuit. Still on the casual side but a little less.

In this photoshoot I wore a cream cardigan that I had with similar delicate lace detailing and black undergarments. I removed all the pillows on our bed to create as clean of a look as possible.

Playing with Creativity

Don’t be afraid to play with your own creativity and different angles. One set of photos that I really loved was taken from outside the bedroom with the door partially cracked so you’re peaking into the room.

Another set that I did was taken using a similar technique but from the bathroom. I set the camera up so it captures our reflections from the bedroom.

Playing with angles and compositions like this changes the perspective and adds visual interest.

This photo was taken from outside our bedroom door. I set my camera up on the outside and partially closed the door.

This photo was taken from inside the bathroom using the mirror to reflect us in the bedroom.

Editing

The finishing touch with your maternity photos is editing the photos. There are free softwares like VSCO that you can download on your phone and edit your images, or you can use paid softwares like Adobe Lightroom Classic. For all my photography needs I edit using Lightroom.

As I mentioned when we were determining the style for our photoshoot, I prefer a natural editing style. There’s also light and airy to dark and moody. To achieve a natural editing style I make simple adjustments to exposure, contrast, highlights and shadows.

I also love black and white photography. I find with black and white, combined with the simpleness of the portrait it strips everything away just leaving you. So for every maternity photo I took I also edited it in black and white.

With self-portraits your camera is typically stationary so you’re getting the same crop every time, unless you move your camera in-between. To create some variety in my maternity portraits I played around with cropping in Lightroom. In the photos you see below they’re taken at the same height and angle but with the cropping in Lightroom I created some variety.


I loved taking my own maternity photos that I can look back on now. It not only changed the perspective on how I saw myself and my pregnancy but it was also a creative challenge that I needed.

If you’re looking to create your own maternity self-portraits I hope you found this article helpful!


I post weekly to my YouTube Channel so if you found this helpful please consider subscribing to the channel or buying me a coffee.

Beautifully Wander | Robynne MacLeod

What Camera Equipment I'm Packing in My Hospital Bag

Hello friends! I am 37 weeks pregnant which means she can come any week or any day now. While we are in the hospital my intent is to take my own set of Fresh 48 photos. If you don’t know what a Fresh 48 photoshoot is, it’s a set of photos you take of your family, of your baby in the first 48 hours after they’re born.

So today I’m going to share with you what camera equipment I’m bringing with me in my hospital bag.

Camera Body + Lens

For camera body and lens I am bringing with me my OM Solutions EM1 Mark II with the M.Zuiko 12-40mm F2.8 PRO lens. I chose this lens because it’s my most versatile lens. With this lens I can take portraits of us and our baby, as well take close up shots.

The aperture of this lens is also F2.8 so it does a good job in low light situations which might be handy, considering hospital lighting can be tricky.

Fully Charged Batter

I always have a fully charged battery in my camera right now. I don’t imagine the Fresh 48 photos taking a whole battery but I don’t want to run into the same situation with my outdoor maternity photos where I only have a 15% charge.

Mini Tripod

I’m not bringing a full size tripod to the hospital. Instead I am bringing my mini Ulanzi Tripod. With this tripod it can extend a little higher and it can hold the weight of my Olympus.

Most hospital rooms have a tray by the bed that you can move around so my idea is to set the mini tripod up on the tray and move it where I need it, thus eliminating the need for a full size tripod.

Reflector Set

I’m also packing a reflector set. The reflector set I bought on Amazon is really small and weighs nothing but I thought it would help when I am trying to take portraits of our baby in the hospital room. Like I said earlier hospital room lighting is tricky so my idea is to turn off the overhead lights and use the natural lighting and the reflector set to create some beautiful soft natural light.

Clothes

For clothes, I am packing only a couple of outfits. Something to wear home and something simple to wear at the hospital after giving birth that I can wear in photos but is also functional for nursing.

For her I am packing a variety of swaddles and onesies in different sizes and patterns. I’m not 100% sure on what she’s going to wear for her Fresh 48 photos so I’m packing some options.


I post weekly to my YouTube Channel so if you found this helpful please consider subscribing to the channel or buying me a coffee.

Beautifully Wander | Robynne MacLeod

Olympus 7-14mm F2.8 PRO | Primary Lens for Travel Photography & Videography

If you watched last weeks video you know that my primary lens on my recent trip to the Rocky Mountains was the M.Zuiko 7-14mm F2.8 PRO. So today I'm sharing with you how I found using the Olympus 7-14mm F2.8 PRO as my primary travel lens went on this recent trip.

I am going to be comparing the 7-14mm to the 12-40mm but this isn't a true comparison video because I didn't equally test both on this trip.


I post weekly to my YouTube Channel so if you found this helpful please consider subscribing to the channel or buying me a coffee.

Beautifully Wander | Robynne MacLeod

What's in My Bag for Travel Photography & Videography | *what I actually used on my trip*

Recently I got back from our babymoon to the Rocky Mountains and I thought I’d share the camera gear I brought with me (and what I actually ended up using)!

*None of the links below are affiliate or sponsored

My Camera Bag

The camera bag I was originally going to bring was my 6L Peak Design Sling. I brought the Sling with me on our trip to Vancouver Island last summer and it was able to fit all of my camera gear, and it’s versatile.

However, I realized when I was packing for this trip that I had extra essentials that I needed to bring with me because I’m pregnant, such as my belly belt, glucose kit, etc., So I switched to packing all my stuff into a backpack that I bought for the purpose of using as my babies diaper bag!

I used this bag on the first day and it was horrendous on my back (not the backpacks fault) so on the evening of the first day I bought the Lululemon Clean Lines Belt Bag.

For the rest of the trip I pretty much only carried my camera and the belt bag.

Camera Gear

For camera gear I’m bringing the following:

Normally, the M.Zuiko 12-40mm F2.8 PRO is my primary lens for travel photography because it’s very versatile for all types of photography. However, since I’ve been exploring more into videography I find due to the crop factor of the Olympus EM1 Mark II, the M.Zuiko 12-40mm F2.8 PRO isn’t wide enough. Thus, on this trip I’m making the M.Zuiko 7-14mm F2.8 PRO my primary lens and the M.Zuiko 12-40mm F2.8 as my backup.

Ever since I bought my Olympus I don’t often use my Canon M100. However, on this trip I decided to bring it for two reasons: (1) I had never filmed a trip on my Olympus so I brought the Canon as a backup, (2) we were going to a hockey game that has limitations on the length of lens that you can bring in with you (I might have been able to get into the hockey game with the M.Zuiko 12-40mm F2.8 PRO but I wasn’t in a position to run my camera back to the hotel if I wasn’t allowed in so I ended up opting to using my phone to photograph and film the hockey game).

I’ve also included my iPhone 12 PRO in the camera gear mix because I love creating films on my phone. It’s very convenient and easy to use and edit! I try to remember that although quality is important, what’s more important to me is the story and why I’m documenting what I’m documenting.

Camera Accessories

Some camera accessories I’m bringing on this trip:

Out of all the camera accessories I brought with me I only used the Rode Video Micro, battery pack, Peak Design Leash Strap, and extra battery.

Day-to-Day

My original plan was to carry the backpack with all my camera gear and essentials in it. However, what actually ended up happening was very different. I pretty much only carried my camera (using the Peak Design Leash Strap) and my belt bag that had the microphone, extra battery, extra memory card, wallet, phone and sometimes my glucose kit.

I pretty much left everything else back at the hotel room or car.

Extra’s in the Luggage

The following items are accessories that I brought with me but stayed back at the hotel room:


That’s it! That is all the camera gear I brought with me on this trip. Stay tuned because in the following weeks I’ll likely post a vlog or video with photos and footage from the trip.


I post weekly to my YouTube Channel so if you found this helpful please consider subscribing to the channel or buying me a coffee.

Beautifully Wander | Robynne MacLeod

Easy Way to Document Small Moments | iPhone Films & CapCut

Life is full of these small moments! Moments that may be silly or insignificant to others but are important to you. I’ve found over the past few months that my favourite way to document these small moments that is fun and creative is by creating these small films.

Some of these films are more complex, longer in length, and require more planning like my cinematic gender reveal video. While other’s I create on the go, they’re short at 30 seconds long and I make it up as I go along.

No matter their length, complexity, or the gear that I use what’s important is that they document the moment and tell a story.

In todays post I want to share with you how I create these small films on my phone!

What is the film about?

Before I even create the film I take a minute to think about what the film is even about. For example, in my cinematic gender reveal film it was about revealing our baby’s gender to our friends and family.

In the film we are creating today it was about attending our prenatal class!

Getting the clips

As I said earlier, some films I spend more time planning what clips I want to get, and really think through the sequence of the story. However, with this film I was creating it on the go.

I do find if I am travelling somewhere I like to get two types of shots: (1) transportation shot and (2) establishing shot.

  • Transportation shot: This kind of shot in the storyline shows that I’m travelling somewhere. It could be a shot showing that I’m getting in the car, driving somewhere, walking somewhere, etc.,

  • Establishing shot: This kind of shot shows my surroundings (where I am) once I arrive.

Because I was filming this story on the go, once I arrive I’ll get whatever small clips I see that I feel will add to the story (this is where having a clear definition of your film comes in handy, especially if you’re creating without a plan).

When I’m filming these clips a few things I consider:

  • Frame Rate: I film these clips in 60 FPS so I can slow any of them down by 50% in post

  • Movement: I’ll add as much movement as I can (moving the camera side to side, up and down, moving into the subject and back, etc.,)

  • Horizontal vs. Vertical: If I know I want to post the film to Instagram Reels I will film the clips vertically. However, every other time I’ll film horizontally.

Culling & Color Correction

After I have all my clips, my next step is to cull - select the shots that I want to edit and insert in the film. If I filmed the videos on my phone I’ll favourite the clips that I want to edit.

After I have my clips selected I’ll color correct. Again, if I am filming and editing on my phone then I’ll color correct using either the software in my photos app or within the editing app.

Editing in CapCut

Once color correction is done I’ll start editing in CapCut. CapCut is the editing app on my phone that I prefer to use for editing phone films because it’s got a lot of functionality and it’s easy to use.

Step 1: Importing the Clips

The first step is importing the clips into the app. I prefer to import the clips in the order that I would like to see the film. This way I don’t have to spend a chunk of time re-arranging the clips afterward.

Step 2: Rough Cut

After all the clips are imported and in the correct order I’ll rough cut the clips. I’m essentially, shortening each clip to the most important part and slowing down any clips by 50%. Doing this step makes the film more manageable to work with.

Step 3: Add Music

By preference I like to sync the clips to the beat of the music. I’ve really been liking the online source Uppbeat for my copyright free music needs. After I know what soundtrack I want I’ll add the track to the app and cut the clips down to the beat of the music. This step normally takes the longest!

Step 4: Add Text

This is optional. Many films don’t have text overlaid, however, I find if there are no talking or voiceovers I like to add some text for context as to what is going on in the film.

Exporting

Once I’m happy with the edits I’ll export the film!


Creating these small films has been my favourite way lately to document small and big moments! If you’re looking for a way to document moments without taking away from them in a creative format I highly suggest giving this a try!


I post weekly to my YouTube Channel so if you found this helpful please consider subscribing to the channel or buying me a coffee.

Beautifully Wander | Robynne MacLeod

Photography Haul for an Upcoming Trip ft. Peak Design & Ulanzi

Our babymoon is just around the corner and I’ve picked up some photography accessories to help me capture our memories and hopefully make my photography easier!

Ulanzi MT-47 Tripod

I purchased this mini tripod because I was looking for a mini tripod that was small, compact but sturdy enough to hold my Olympus camera and phone, so I can vlog, take better selfies and setup self-portraits with on this trip.

I ended up coming across the Ulanzi lineup which has several mini tripod’s to choose from. I liked the MT-47 because it:

  • Can setup like a tripod

  • Extend 6.5 inches

  • Ball head can move (even go vertical)

  • Has a detachable plate that you can screw onto the bottom of your camera for easy attaching

  • Shoe on the side so you can attach a microphone or light onto it

  • Has a load capacity of 4.4 pounds (my Olympus EM1 Mark II with the M.Zuiko 7-14mm lens as pictured weighs 2.44 lb)

For its versatility and features I found this accessory was a steal at $55 on Amazon.

Ulanzi ST-06S Phone Tripod Mount

The second accessory I purchased was the Ulanzi phone tripod mount. I bought this accessory for the pure purpose that I wanted to mount my phone onto my camera and take video at the same time I am taking photos. I liked this one in particular because:

  • It has a screw hole at the bottom so you can screw it onto a mini tripod

  • Shoe fitting at the bottom so you can mount it onto your camera

  • You can rotate and hold your phone vertical or horizontal

  • Also has a cold shoe mount at the top for a microphone or a light

This small and mighty accessory came in at $25 on Amazon.

Peak Design Leash

The last accessory I bought for this trip was the Peak Design Leash Strap. Up until this point I had been using my Olympus camera strap that came with my camera, however, the problem with these straps that typically come with the camera is they are short and you have to manually tie it onto the camera which makes taking the strap off a pain.

I wanted a strap that was longer so I can sling my camera across my body when I’m not using it, instead of constantly putting it in my bag. As well, a strap that had a better detachable system making it faster and easier to detach and attach the camera strap.

Thus, I picked up at my local camera store the Peak Design Leash. This strap extends quite a bit so I can wear it across the body and over the shoulder. As well, the Peak Design brand is known for its anchor system. They provide you with toggles in the box that you attach to the camera and then when you want to attach or detach the strap you simply clip the strap on!

I was able to pick up this accessory at my local camera store for $50, but it’s also widely available online.


Let me know over on the channel if you have any of these accessories and if you like them!


I post weekly to my YouTube Channel so if you found this helpful please consider subscribing to the channel or buying me a coffee.

Beautifully Wander | Robynne MacLeod

5 Tips for Photographing Your Families Vacation | Story Behind my Most Hated Photo + Lessons From My Past Trips

I love to travel, I love travel photography and documenting our travel adventures! With Spring upon us I have been doing a lot of reminiscing over past trips and strategizing for the future because Spring and Summer is when I tend to travel the most.

With all this reminiscing and strategizing I’ve been discovering a lot of things and in todays article I wanted to boil down five lessons that I’ve learned from documenting past trips so hopefully you can learn from my mistakes.

Lesson #1 : Learning to be Flexible

When I’m on vacation I don’t have 2+ hours to be at a location. I’m also not always there at the right time for lighting or without crowds. Thus, learning to be flexible is vital.

I like to have a few tips and tricks in my back pocket to help me work with the current conditions and make the best of the situation.

For example, if I’m at a landmark that has tons of crowds around. Learning to be flexible means maybe using some foreground interest to block out the crowds, slowing down the shutter speed to showcase the movement of people, or leaving the crowds as documenting what the scene truly looks like.

Lesson #2 : Understanding What is Important, Why You’re Photographing the Trip and Your Mindset Before the Trip

I have definitely found that understanding what is important, why I’m photographing the trip, and my mindset before the trip influences how I photograph the trip.

Back when I visited Greece in 2019 and Denver in 2020 I wasn’t super into photography. I of course loved photographing my travels but I didn’t pay close attention to things like composition and settings. So, why I photographed those trips were to have memories, keepsakes for afterwards.

Greece 2019

Denver 2020

As I got more into photography my “why” for photographing trips did change so my “how” changed too.

My Vancouver Island trip last summer for my honeymoon was a trip that I found where my “why” and “how” had changed. I loved my trip to the Island, and I love how many of the photos turned out. However, I don’t fully love how the story feels because I don’t think it accurately paints our experience and joy on that trip.

Lesson #3 : Photograph in a Story Format

This could come down to personal preference but I love photographing in a story format (having a mix of environmental photos, context photos, details and portraits of us) because I think it tells a more powerful story of our trip - where we were, what we did and our experience there.

Photographing in this way allows me to have front-facing photos that I can post to Instagram and Facebook. But also comes in handy when I try to create a photo book afterwards of our adventure.

Lesson #4 : Get in Front of the Camera

It’s important to get in front of the camera because you were there, this is your story this is your experience.

I know it can be awkward, I don’t always love my photo being taken because I’m self-conscious too of what I look like and what others think. However, I have found that I regret after a trip not getting in front of the camera because I’ll come back with zero photos of us or me there.

It can feel like we weren’t even on the trip because the story is missing the characters.

Lesson #5 : Put the Camera Down

This is the most important lesson that I’ve learned from past trips and might sound counterintuitive to what we’ve been talking about. However, it’s important to put the camera down.

The photo you see below is a photo that I visually love but emotionally hate. It was taken on my trip to Vancouver Island with my husband and I was so consumed with getting the perfect sunset photo that I missed the gorgeous sunset with my husband.

It’s a painful reminder to me on the mistakes I made on that trip, but also a driver for me to be better at putting down the camera, being in the moment, spending time with the one’s I love and finding that balance between documenting moments that matter without taking away from them.


Let me know over on the channel if you found something helpful or meaningful in todays article!


I post weekly to my YouTube Channel so if you found this helpful please consider subscribing to the channel or buying me a coffee.

Beautifully Wander | Robynne MacLeod

What is the Best Camera Bag? Shoulder Bags vs. Backpacks for your Gear & My Hunt for the Perfect Camera Bag

Hello friends!

I’m always on the hunt for the “perfect camera bag”! So today I wanted to chat about what is the best camera bag for you, taking you through shoulders bags, backpacks and hybrids.

As well, share with you what I have found has been the closest to the “perfect bag” for me.

Camera Bags I Own

Amazon BagSmart Camera Backpack : The first camera bag I ever bought was the Amazon BagSmart Camera Backpack for about $100 CAD.

Ona Bowery Bag : My shoulder bag, this was the second camera bag I’ve ever owned. It was more on the expensive side sitting at $300 CAD.

Peak Design Sling 6L : My hybrid bag, I bought this bag last summer for outdoor excursions that didn’t require a large backpack for about $150 CAD.

Pro’s and Con’s of Each

Camera Backpack

Camera Backpack - Con’s

  • Overpacking : The con with camera backpack’s is you tend to overpack, because you have extra room to work with. I do this all the time! I pack more accessories and lenses than I need because I have the room and don’t even end up using them.

  • Not very versatile : Camera backpack’s aren’t the most versatile. They’re great for outdoor excursions like landscape photography, wildlife photography, nature photography, etc., However, I hate bringing my camera backpack into restaurants or nice places. They’re big, bulky and often dirty.

  • More likely to leave the camera behind : If a camera backpack is the only means I have to carry my equipment then sometimes I am more likely to leave my camera behind because it’s big and bulky.

Camera Backpack - Pro’s

  • Weight distribution : With a camera backpack the weight of the bag is distributed between the two shoulder straps (some camera backpacks have a third waist strap to help distribute weight to your hips). This is great for long durations or if you’re carrying a heavier load.

  • You can carry a lot more : Having a camera backpack means you can pack not only your camera gear but other necessities you might need. In the Spring and Summer my husband and I love hiking. Having a backpack is great because I can carry my camera gear, our water bottles, towels, snacks, and anything else we might need.

  • Hands-free (with a few accessories) : The other pro with using a camera backpack is with a few accessories you can easily go hands-free. One option is to use a camera strap and sling it over your neck. I don’t love this option for long durations because it just puts weight on my neck. I prefer to use the Peak Design Capture Clip - with this accessory attached to your backpack strap you can hook your camera onto it and quickly release when you want to take a photo.

Overall, I find camera backpacks are best if you want to carry lots of gear (or all of your gear) or for outdoor excursions.

Shoulder Bags

Shoulder Bag - Con’s

  • A lot of weight on one shoulder : Unfortunately, with shoulder bags it can be a lot of weight on your one shoulder (no matter how you wear it).

  • Difficult to carry extra’s : Due to the nature of a shoulder bag it’s more difficult to carry extra’s like a water bottle or tripod.

  • Get in the way more : Lastly, I find shoulder bags get in the way more based off of how they hang off your body.

Shoulder Bag - Pro’s

  • Packing less : There are a variety of size shoulder bags that are on the market. The Ona Bowery I own can comfortably fit one camera body and a maximum of two lenses. The best part of shoulder bags is you pack less (because you have to). So this is a great option if you want to go minimal with your gear.

  • More Discreet : Shoulder bags are more discreet. You can keep it on your lap, tuck it under the table, hang it off a chair. In the Summer of 2020 I went on a wine tasting trip to Osoyoos, BC and this bag was perfect for what I needed.

  • Allowed More : If you’re spending time outdoors this isn’t a big problem but when you’re travelling certain restaurants, shops, arena’s, etc., might have a “no backpack” rule. Thus, having a shoulder bag is perfect for these situations.

Overall, I find shoulder bags are best for day trips, shorter excursions into the city or nice places.

Hybrid

Hybrid - Con’s

  • Limited on what you can carry : Hybrid’s aren’t full size backpack’s so you still have to be selective on what gear you are bringing.

  • Difficult to carry extra’s : With hybrid’s it’s still difficult to carry extra’s. It’s not as difficult because some hybrid’s have additional features like the Peak Design Sling with straps on the bottom so you can carry a water bottle, jacket, tripod on the bottom.

  • Weight on one shoulder : You are also still putting weight on one shoulder, unlike you wear it like a waist bag.

Hybrid - Pro’s

  • Multi-wear : With hybrid’s like the Peak Design 6L Sling you can wear it as a backpack, shoulder bag or waist bag.

  • Fit quite a bit : Depending on the brand and size you can fit quite a bit of stuff. In this video I show you exactly how much you can fit!

  • Fairly discreet/versatile : The low-profile nature of a hybrid is more discreet than a backpack (similar to a shoulder bag). I personally feel more comfortable walking into a restaurant or nice place using this.

  • Allowed More : Due to the multi-wear ability of a hybrid, if the location doesn’t allow backpacks you can simply wear it as a shoulder bag!

Perfect Camera Bag

Out of my camera backpack, shoulder bag, and hybrid I find the closest to the “perfect camera bag” is my 6L Peak Design Sling. It can fit what it needs to, it’s comfortable and it’s versatile. When we went to Vancouver Island last summer we were hiking, in and out of restaurants, on boats, and in museums and the bag was perfect for everything we were doing.

Things to Consider

So if you’re looking for a new camera bag, here are some things to consider:

  • Budget? Camera bags can be expensive! The most expensive one I own is $300 CAD but they can easily climb to $600 CAD.

  • What are you going to be doing? How do you see yourself using this bag? What are you likely photographing? These questions help me figure out what gear I actually need on the trip and thus, what the bag needs to be able to fit.


Let me know over on the channel if you have found your perfect camera bag!


I post weekly to my YouTube Channel so if you found this helpful please consider subscribing to the channel or buying me a coffee.

Beautifully Wander | Robynne MacLeod

How I CREATED my Cinematic Gender Reveal Film | Planning, Equipment, Filming, and Editing

A few weeks ago we found out the gender of our baby and I shared online my cinematic gender reveal video that I created to remember the moment!

I received a lot of comments from friends and family afterward that liked the video. So today I wanted to show you how I created it taking you all the way through planning to editing.

I specifically talk about how I created my recent video but a lot of the info can be applied to other types of films!

I hope you find it useful or interesting!

Beautifully Wander | Robynne MacLeod

Gender Reveal Vlog | setup, how we're doing it, camera equipment and setup

Last weekend we celebrated our babies gender reveal! I don't know when "gender reveals" became a thing but I knew long before we decided to have a child that I wanted to do a gender reveal because they looked like fun...and it was!

We didn't have a preference on boy or girl. We are going to love our baby so much! We purely wanted to know for planning purposes - painting the second room, buying clothes, etc.,

My husband makes a special appearance in todays video because it's a memory that we will get to cherish forever and I wanted him to be a part of it! :)