My Creative and Personal Focuses for This Year | 2022

In todays video I'm revealing my two creative focuses for 2022! When I was brainstorming what I wanted my 2022 to look like I had two thoughts that wouldn't leave my mind and I knew these two thoughts would guide what I wanted my year to look like. Normally, I have tons of professional and personal goals but this year it's different.

Comment over on the channel if you have any creative goals or focuses for this year?!

2021 Recap | My Year in 100 Photos

Happy New Year!! In todays video I wanted to do a 2021 in 100 photos (credit goes to Julia Trotti for the idea!). Many people like to do their top 10 photos of the year but I found looking at my year this way (the good photos and the bad) I got to see my entire journey, how my photography changed, what my interests were depending on the season, and personal milestones.

I wish everyone a happy and healthy 2022!

Holiday Inspired Photography Ideas to Try | Getting into the Festive Spirit

In todays episode we cover some holiday inspired photography ideas to try this season! Tag @beautifullywander on Instagram if you try any of them!


Mentioned in the Video


Happy Festive Photography!

Beautifully Wander | Robynne MacLeod

Holiday Gift Ideas for Photographers | Holiday Gift Guide 2021

Happy Holidays! With the season upon us I was excited to film my first holiday gift for photographers! In this video we cover some small, medium and larger gifts that would be perfect for your photographer friend or family member!

Items Mentioned in the Video

Cleaning Kit: https://www.amazon.ca/Professional-Camera-Cleaning-Kit-Cameras/dp/B00MHGOGUK/ref=sr_1_5?keywords=cleaning+kit+camera&qid=1638323605&sr=8-5

SD Card Holder: https://www.amazon.ca/Skoloo-Waterproof-Memory-Holder-Storage/dp/B07MLH88DY/ref=sr_1_2_sspa?keywords=sd%2Bcard%2Bholder&qid=1638323618&sr=8-2-spons&spLa=ZW5jcnlwdGVkUXVhbGlmaWVyPUFaODI3TkQwRlZBRUUmZW5jcnlwdGVkSWQ9QTAxMTQzOTExRU8xWFlMUzY1WlA4JmVuY3J5cHRlZEFkSWQ9QTA4ODg5NTYzRE4xSENRNEowVzdKJndpZGdldE5hbWU9c3BfYXRmJmFjdGlvbj1jbGlja1JlZGlyZWN0JmRvTm90TG9nQ2xpY2s9dHJ1ZQ&th=1

Extra Camera Battery: https://www.getolympus.com/ca/en/e-m1-mark-ii.html

The Heart of the Photograph by David Duchemin: https://www.amazon.ca/Heart-Photograph-Questions-Expressive-Photographs/dp/1681985454/ref=sr_1_1?keywords=the+heart+of+the+photograph&qid=1638323717&sr=8-1

Winter Gloves: https://www.bhphotovideo.com/c/product/811770-REG/Freehands_11121LM_Women_s_Stretch_Gloves_Medium.html

Peak Design Capture Clip: https://www.amazon.ca/Peak-Design-Capture-Camera-Black/dp/B07818Z4Q5/ref=sr_1_1_sspa?keywords=peak+design+capture+clip&qid=1638323766&sr=8-1-spons&psc=1&spLa=ZW5jcnlwdGVkUXVhbGlmaWVyPUEzQUZKMUxOV1ZDMlRWJmVuY3J5cHRlZElkPUEwNDg5ODUxMzY5UkoyTFEzN05CTCZlbmNyeXB0ZWRBZElkPUEwMDYwNzY1MzlHMkM5TjdJMlgxRiZ3aWRnZXROYW1lPXNwX2F0ZiZhY3Rpb249Y2xpY2tSZWRpcmVjdCZkb05vdExvZ0NsaWNrPXRydWU=

External Hard Drive: https://www.amazon.ca/LaCie-Rugged-External-Drive-9000298/dp/B00IRV005E/ref=sxts_rp_s1_0?cv_ct_cx=lacie+hard+drive&keywords=lacie+hard+drive&pd_rd_i=B00IRV005E&pd_rd_r=bf2de6cc-b255-4f8d-a551-f758ef58dbe6&pd_rd_w=58j5T&pd_rd_wg=waJZD&pf_rd_p=372505a5-6a58-475a-86d4-6ef2cad8c79f&pf_rd_r=93EBQ30CRT3MPRS5V80G&psc=1&qid=1638323831&sr=1-1-f0029781-b79b-4b60-9cb0-eeda4dea34d6

Winter Boots: https://www.toms.com/ca/women/shoes/boots-and-booties/black-smooth-waxy-leather-womens-reese-booties/10015796.html

Winter Jacket: https://www.patagonia.ca/product/womens-down-sweater-hoody/84711.html?dwvar_84711_color=BCW&cgid=root

Ona Bowery Bag: https://onabags.com/products/the-bowery

Olympus EM1 Mark II Body: https://www.getolympus.com/ca/en/e-m1-mark-ii.html

Olympus 12-40mm F2.8 PRO: https://www.getolympus.com/ca/en/m-zuiko-digital-ed-12-40mm-f2-8-pro.html

Olympus 40-150mm F2.8 PRO: https://www.getolympus.com/ca/en/m-zuiko-ed-40-150mm-f2-8-pro.html


I hope you found a gift idea in todays video!

Beautifully Wander | Robynne MacLeod

Capturing Autumns End | Photography Vlog, Nature Photography, Olympus 40-150 and 25mm

Fall might be coming to an end! The days continue to get darker, the nights are cooler, the leaves are falling from the trees and soon we'll get our first snowfall. Today, I take you to one of my favourite parks to capture what's left of autumn!

Captured on Our Trip

ISO 200 | F2.8 | 1/100

ISO 200 | F2.8 | 1/100

ISO 200 | F2.8 | 1/125

ISO 200 | F2.8 | 1/125

ISO 200 | F2.8 | 1/20

ISO 200 | F2.8 | 1/100

ISO 200 | F2.8 | 1/40

ISO 200 | F2.8 | 1/80

ISO 200 | F2.8 | 1/25

ISO 200 | F2.8 | 1/125

ISO 200 | F2.8 | 1/20

Autumn Photography Vlog | Getting Outdoors, Fall Photography with Olympus 40-150, Create with Me

Welcome to WEEK FOUR of our Autumn/Halloween Create with Me Series! In todays episode we’re getting outside to do some autumn photography at one of my favourite local beaches in Kelowna.

Captured on our Trip

For this photo I tried to find a single leaf in the gap of autumn leaves on a tree at Gyro Beach.

One of my favourite parts of Gyro Beach is the beach rental hut. In this particular photo I picked up a brand full of autumn leaves off the ground, held it up to my camera and shot through the leaves to create this beautiful foreground blur.

To given your autumn photography a twist you could try some panning or Intentional Camera Movement. For this I slowed my shutter speed, and panned vertical with the grain of the wood tree and autumn leaves to create this vertical pan.

The beautiful part of autumn that I always find interesting is when the sun peaks from behind the clouds and spotlights a part of the landscape in a beautiful glow. I loved the hints of red and orange in the landscape when this happened.

I found these sand bars at Rotary Beach interesting. Both Rotary and Gyro are fairly low beaches in that in the summer you can walk for a long time before it gets deep. I loved how the sunset radiated against the lake. For this photo I slowed my shutter speed to create a more buttery lake vibe.

This is the exact same sand bar at Rotary Beach. However, this photo was taken shortly after the sun had set and we were entering into blue hour.


I hope you’re out enjoying some autumn photography!

Beautifully Wander | Robynne Ikesaka

Adding Motion to Your Photograph ft. Cinemagraphs | Autumn/Halloween Inspired Create with Me

Welcome to WEEK THREE of the Autumn/Halloween Create with Me Series! Today we are creating a cinemagraph for the first time!

What is a Cinemagraph?

A cinemagraph is a still photograph where a minor and repeated movement occurs. It’s a wonderful way to add a little movement to your still photos!

What Interested Me About Cinemagraphs

What initially interested me about cinemagraphs was the creativity behind it - cinemagraph makes a still image more interesting and eye catching and it was a photography technique that I hadn’t tried yet!

Taking the Video

To create a cinemagraph you need to first take a short video clip. For my first cinemagraph I did a simple tea pouring one. I knew beforehand that getting a consistent tea pour would make the post-processing easier so I made sure to keep the tea pour consistent at one point and to hold the kettle as still but as natural as I could.

Once I was happy with a clip I brought the clips onto my computer and did the next step - video post processing in Lightroom.

Video Post-Processing in Lightroom

This step of post-processing in Lightroom is optional after you have filmed your clips but I prefer to give a few adjustments to my clip. However, within Lightroom Classic you can’t edit a video but there’s a hack that I’ve used in the past:

  1. Load your video clip into Lightroom

  2. Scrub through the video and find a frame that captures majority of what you’re looking to edit (for me it was a frame that had me pouring the tea)

Screen Shot 2021-10-15 at 6.06.13 PM.png

4. Hit the ‘Capture Frame’ button at the bottom (this will create a screenshot of your video that you can edit in Lightroom)

Screen Shot 2021-10-15 at 6.06.27 PM.png

5. Edit your screenshot photo

Screen Shot 2021-10-15 at 6.06.57 PM.png

6. Sync your photo to the video file (note: not all your edits will sync only a few minor adjustments)

Screen Shot 2021-10-15 at 6.07.14 PM.png

7. Export to your desired location

Pulling Together in Photoshop

The final step is pulling your cinemagraph together in Photoshop:

  1. Pull your edited video clip into Photoshop

Screen Shot 2021-10-15 at 6.13.20 PM.png

2. Cut your clip down to make it more manageable to work with

3. Scrub through the video to find a short area of the clip that is consistent and cut it down (for me it was part of the clip where my tea spout wasn’t rising or lowering and my tea stream was consistent)

Screen Shot 2021-10-15 at 6.14.59 PM.png

4. Hit the gear icon and make sure that “Loop Playback” is on

Screen Shot 2021-10-15 at 6.15.16 PM.png

5. Open your layer tab and create another layer of the clip by dragging ‘Video Group 1’ over the ‘Add Layer’ button at the bottom (square with the plus sign in the middle)

6. Drag the second clip over so the beginning of the second clip begins at the end of the first clip

Screen Shot 2021-10-15 at 6.16.09 PM.png

7. Drag the beginning of the clip over to the left

8. Drag the end of the second clip over to the left so the both ends match

Screen Shot 2021-10-15 at 6.16.29 PM.png

9. Over by your clips hit the down arrow and hit “opacity”

Screen Shot 2021-10-15 at 6.16.43 PM.png
Screen Shot 2021-10-15 at 6.16.54 PM.png

10. Select another part of your clip and hit “opacity” again

Screen Shot 2021-10-15 at 6.17.07 PM.png

11. In your layers tab make sure the “opacity” is set to 0%

Screen Shot 2021-10-15 at 6.17.27 PM.png

12. Then move the second opacity marker to the end of the clip

Screen Shot 2021-10-15 at 6.18.28 PM.png

13. To eliminate any slight movement you or your subject is making create another layer on top of your video files by hitting ctrl + option + shift + e

Screen Shot 2021-10-15 at 6.19.12 PM.png

14. Select the layer you just created in the layer tab and create a mask (square icon at the bottom with a circle in the middle)

Screen Shot 2021-10-15 at 6.19.34 PM.png

15. Making sure your brush and color black is on and brush over your movement area (for this one it’s my tea stream)

  • To see what you are brushing hit the slash key under your delete key on your keyboard

Screen Shot 2021-10-15 at 6.19.55 PM.png

16. Rewatch a few times to make sure you’re happy with the cinemagraph

Screen Shot 2021-10-15 at 6.20.58 PM.png

Your Final Product

Voila, we just created a cinemagraph! I hope this inspires you to create a cinemagraph of your own!

cinemagraph-1 2.gif

Halloween Stop Motion | Autumn/Halloween Create with Me Series, Create with Olympus, Halloween Cupcakes

Welcome to WEEK TWO of the Autumn/Halloween Create with Me Series! Today we are doing a halloween inspired cupcake stop motion!

For this stop motion I went all out - I made chocolate cupcakes, crushed up oreos to imitate "dirt", bought gummy worms and made these RIP tombstones.

Stop motion doesn't have to be complex, long or difficult. Sometimes sweet, and simple is the best!

Happy Photographing!

Beautifully Wander | Robynne MacLeod

Clone Yourself Photography | Autumn Bucketlist, Fall/Halloween Create with Me Series, Olympus 7-14mm

For the month of October I’m excited to bring to you every Saturday an autumn/halloween inspired Create with Me series! This week we’re featuring a technique I’ve shown you before Clone Yourself Photography!

Step 1: Prep Work

To prep for your clone yourself photo write down what you want each of your clones in the photo to be doing. For my photo I was trying to string together a series of poses that illustrated what was on my autumn bucketlist.

Step 2: Cloning Yourself

Situate your camera on a tripod and don’t move after finding the right position, you want every photo to be the same.

Step 3: Edit in Lightroom (optional)

After you’ve taken your photos, pull your photos into your editing software and post-process how you like then export.

Screen Shot 2021-09-30 at 4.45.50 PM.png

Step 4: Pull Together (Photoshop)

To pull your cloned portrait together:

  • Open a blank canvas in photoshop

  • Go to File -> Scripts -> Load Files into Stack

  • Select each photo and create a Mask

  • Select the layer mask for the first photo and use the brush tool along with the black and white squares at the bottom to brush over your first clone (make sure you are using the black color)

  • Before moving onto the next hit CTRL + I

  • Select your next layer mask and repeat the process (use the brush tool along with the black and white squares at the bottom to brush over your first clone)

  • If you have a clone that overlaps with another clone play around with the black and white color to hide and reveal until you get what you want

Alternative to Photoshop (Snapseed)

If you don’t have Photoshop then you can alternatively use Snapseed that is free!

  • Open your first photo in Snapseed

  • Select Double Exposure

  • Add your second photo

  • Change the opacity to 100%

  • Select the layer button at the top

  • Select the middle paint brush icon under Double Exposure

  • Repeat the process for your other clones

IMG_2019.PNG
IMG_2021.PNG
IMG_2027.PNG

Be aware that with Snapseed you can’t have any of your clones overlapping each other. Because I had clone 1 and clone 4 overlapping I could only add three clones in snapseed. This is where Photoshop has a better advantage.


Have fun cloning yourself!

Beautifully Wander | Robynne MacLeod

Photography Ideas for Your Next Trip or Weekend Around Town | Working with Crowds, Creatively Document Moments, Context Photos

I was lucky enough to do some travelling in the past few months and in reflection of my summer I wanted to give you some photography composition and technique ideas to give a try on your next trip or casual weekend outing!

Hiding the Crowds

It’s very difficult to photograph a popular location without a lot of crowds or people. You could wake up early and get to location before sunrise, however, for those of you that can’t wake up early or it’s very difficult to, you just have to find a way to hide the crowds.

To give you an example, below is a photograph I took of the BC Parliament Building in Victoria around mid-morning.

What you can’t see is that there is quite a bit of crowds around the building and there was a family just on the other side of the foliage taking a photo in front of the building. To creatively hide the crowds I used the surrounding elements, in this case the planter/flower boxes in front of the building.

Frame within a Frame

One of my favourite ways to photograph travelling from place to place is to frame within a frame. You literally frame your composition around an existing frame. I tend to use windows of the transportation vessel - ferry, vehicle, boat, etc.,

For example, in the photo to the left is a capture of travelling on the ferry from Vancouver to Vancouver Island, in the middle is a photo of travelling around Osoyoos for wine tastings, and in the last photo to the right is a photo from a casual weekend outing to Penticton, BC.

I like taking these kinds of photos to show context of our trip.

victoria-59.jpg
osoyoos-75.jpg
brunch-munson-2.jpg

Self-Reflection to Show Place

As I mentioned in my previous idea I like to capture images that show context of our trip. These are photos that aren’t the ‘final view’ but really bring the story together. As a way to document where we eat on a trip I love using self-reflections - I stand in front of the restaurant window, incorporate the sign into the composition and it’s a creative way to document those moments.

In the photo to the left we were eating at a little restaurant in Chinatown called Little Yunnan and in the photo to the right we were hunting for a place to eat Nanaimo Bars in Nanaimo!

victoria-81.jpg
victoria-98.jpg

Phone Reflection

Using my phone to create a reflection is a technique that I picked up from Lisa at The Wandering Lens. I’ve used it create a unique photo of Canada Place, used it locally, and on this recent trip to Victoria I used it to photograph the BC Parliament Building at night all lit up.

To do this you hold your phone up to your lens and carefully fiddle with your position and phone angle to create the reflection.

This process can be tedious, in the night time reflection of the BC Parliament building it took me 30-minutes or more to get the right reflection. I had to fiddle with my position and angle for a long time before I got it right.

In my experience I have found that horizontal and simple structures work best and are easier to photograph.

Vancouver.jpg
victoria-219.jpg

Timelapse

Timelapses are a great way to show movement and time passing. I wish I had created time on my Victoria trip to create a timelapse of the Inner Harbour at golden hour or the sunset at the Ogden Breakwater.

If you don’t know what a timelapse is or how to create one I have a blog post created already that I’ll link here.

victoria-85.jpg
victoria-307.jpg

Stop Motion

My last idea is to create a stop motion. I’ve played around with stop motion before but never in a travel or outdoor capacity. It’s a fun technique to play with but it will require time and a tripod. I also have a blog post on creating a stop motion that I’ll link here or you can read the article I wrote for Olympus here.


I hope you found some inspiration or ideas for your next trip or weekend outing, happy photographing!

Beautifully Wander | Robynne MacLeod

My Experience Photographing Whales | Whale Photography for the First Time, Gear, Where to Stand

While we were on Vancouver Island for a week one of the highlights was going on a whale watching tour! In todays episode I wanted to chat with you about my experience photographing whales for the first time - covering the gear I used, how I liked using the Olympus MC-20 Converter, where to stand on the boat and other tips.

GEAR

Use Water-Resistant/Waterproof Gear

While we were on our whale watching tour it rained. Thus, I suggest either have a waterproof/water-resistant camera bag to keep your contents dry or have a cover for your bag. I was using the Peak Design Everyday Sling 6L, it has a nice durable shell and ultra-zips that keeps the inside dry.

The second weatherproof item I suggest having is your camera gear in general. The great thing about Olympus camera’s and lenses is that they are splash proof, dust proof, and freeze proof so when it was raining while on the boat I wasn’t worried about my gear while using it because I knew it could handle the weather! If your camera doesn’t have great weather sealing then I suggest bringing a cover for your camera system.

The last item is your clothes. I suggest if you’re visiting a west-coast city that rains a lot to dress in layers and bring a rain jacket. Alternatively, if you don’t mind getting wet and you don’t have a camera cover then you can use your rain jacket.

Keep In Mind the Boat You Are On

When we booked our tour we booked a Catamaran so I wasn’t worried about ocean water because we were sitting higher on the water. However, many whale watching tours take you out on a zodiac which of course is a little sketchier with the salt water. So you might find the type of boat you are on will change the camera gear and the accessories you bring.

Pack Light

This of course is based on personal preference but I suggest you pack light. If you’re on a catamaran you’re sharing the boat with 50 to 100 people sometimes and if you’re on a Zodiac it’s even smaller and tighter in space. You also want the freedom to maneuver on the boat without being in the way of other people and their experience so I suggest packing light because I feel lugging around a huge camera backpack will just get in the way.

On this tour all I brought with me was my Olympus M.Zuiko 40-150mm F2.8 PRO lens, the MC-20 Converter, the M.Zuiko 12-40mm F2.8 PRO, an extra battery and SD card. Realistically, all I ended up using was the M.Zuiko 40-150mm F2.8 PRO and MC-20 Converter. There was one point on the tour that I could have switched to using the M.Zuiko 12-40mm F2.8 PRO for some landscape photos but I opted not to.

Have Lots of Memory (and then more)

I was really worried the night before our tour that I didn’t have enough memory. Before the trip I cleared two memory cards so I had room to take approx. 6000 photos. Before the tour I had room for 4000 on one memory card and then I had a secondary memory card with room for around 1500 just in case.

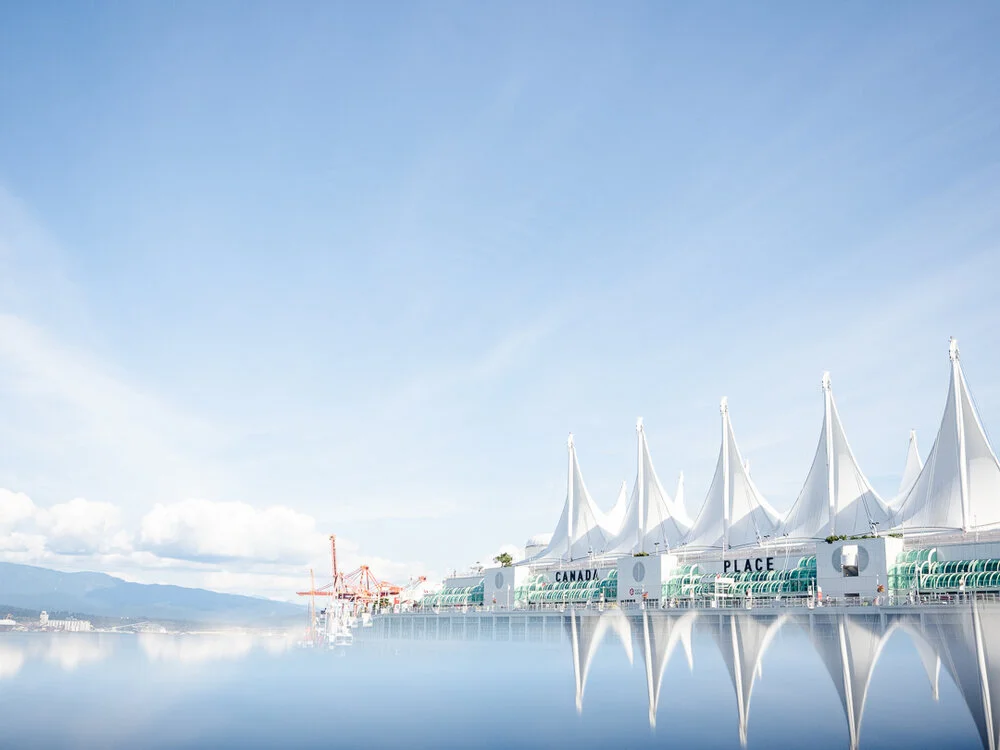
I didn’t want to run out of room like I did in Vancouver and I had to delete on the go.

Our whale watching tour was about 4 hours in length, I was photographing majority of the time and I took approx. 2000 photos.

Bring an Extra Battery

I knew from my time photographing Eagles in the Thompson Okanagan that my battery tends to run out faster when I’m using Sequential High a lot. Thus, I made sure that I had two fully charged batteries when I got on the boat. The whole trip took one battery and if we did a sunset tour the same day I would have required the second.

Bring a Pair of Binoculars

If you are going with friends or family then I suggest bringing them a pair of binoculars! I wish I had brought a pair of binoculars for my husband because the whales are pretty far away.

I don’t think you need to buy something very expensive (I know binoculars can get pretty expensive) but something would be nice to have for the people joining you.

Using the MC-20 Converter

This whale watching tour was the first opportunity I had a good chance to use the converter. I had taken it out before briefly to photograph the Eagles back at home but not to this extent.

I was a little nervous about auto-focus, my settings, the range of the M.Zuiko 40-150 and the MC-20 Converter and if it was going to be enough.

It was perfect for me. Auto-focus was great, after some adjusting I settled on the approximate settings of F5.6, ISO 500-600 and a shutter speed around 1/1000.

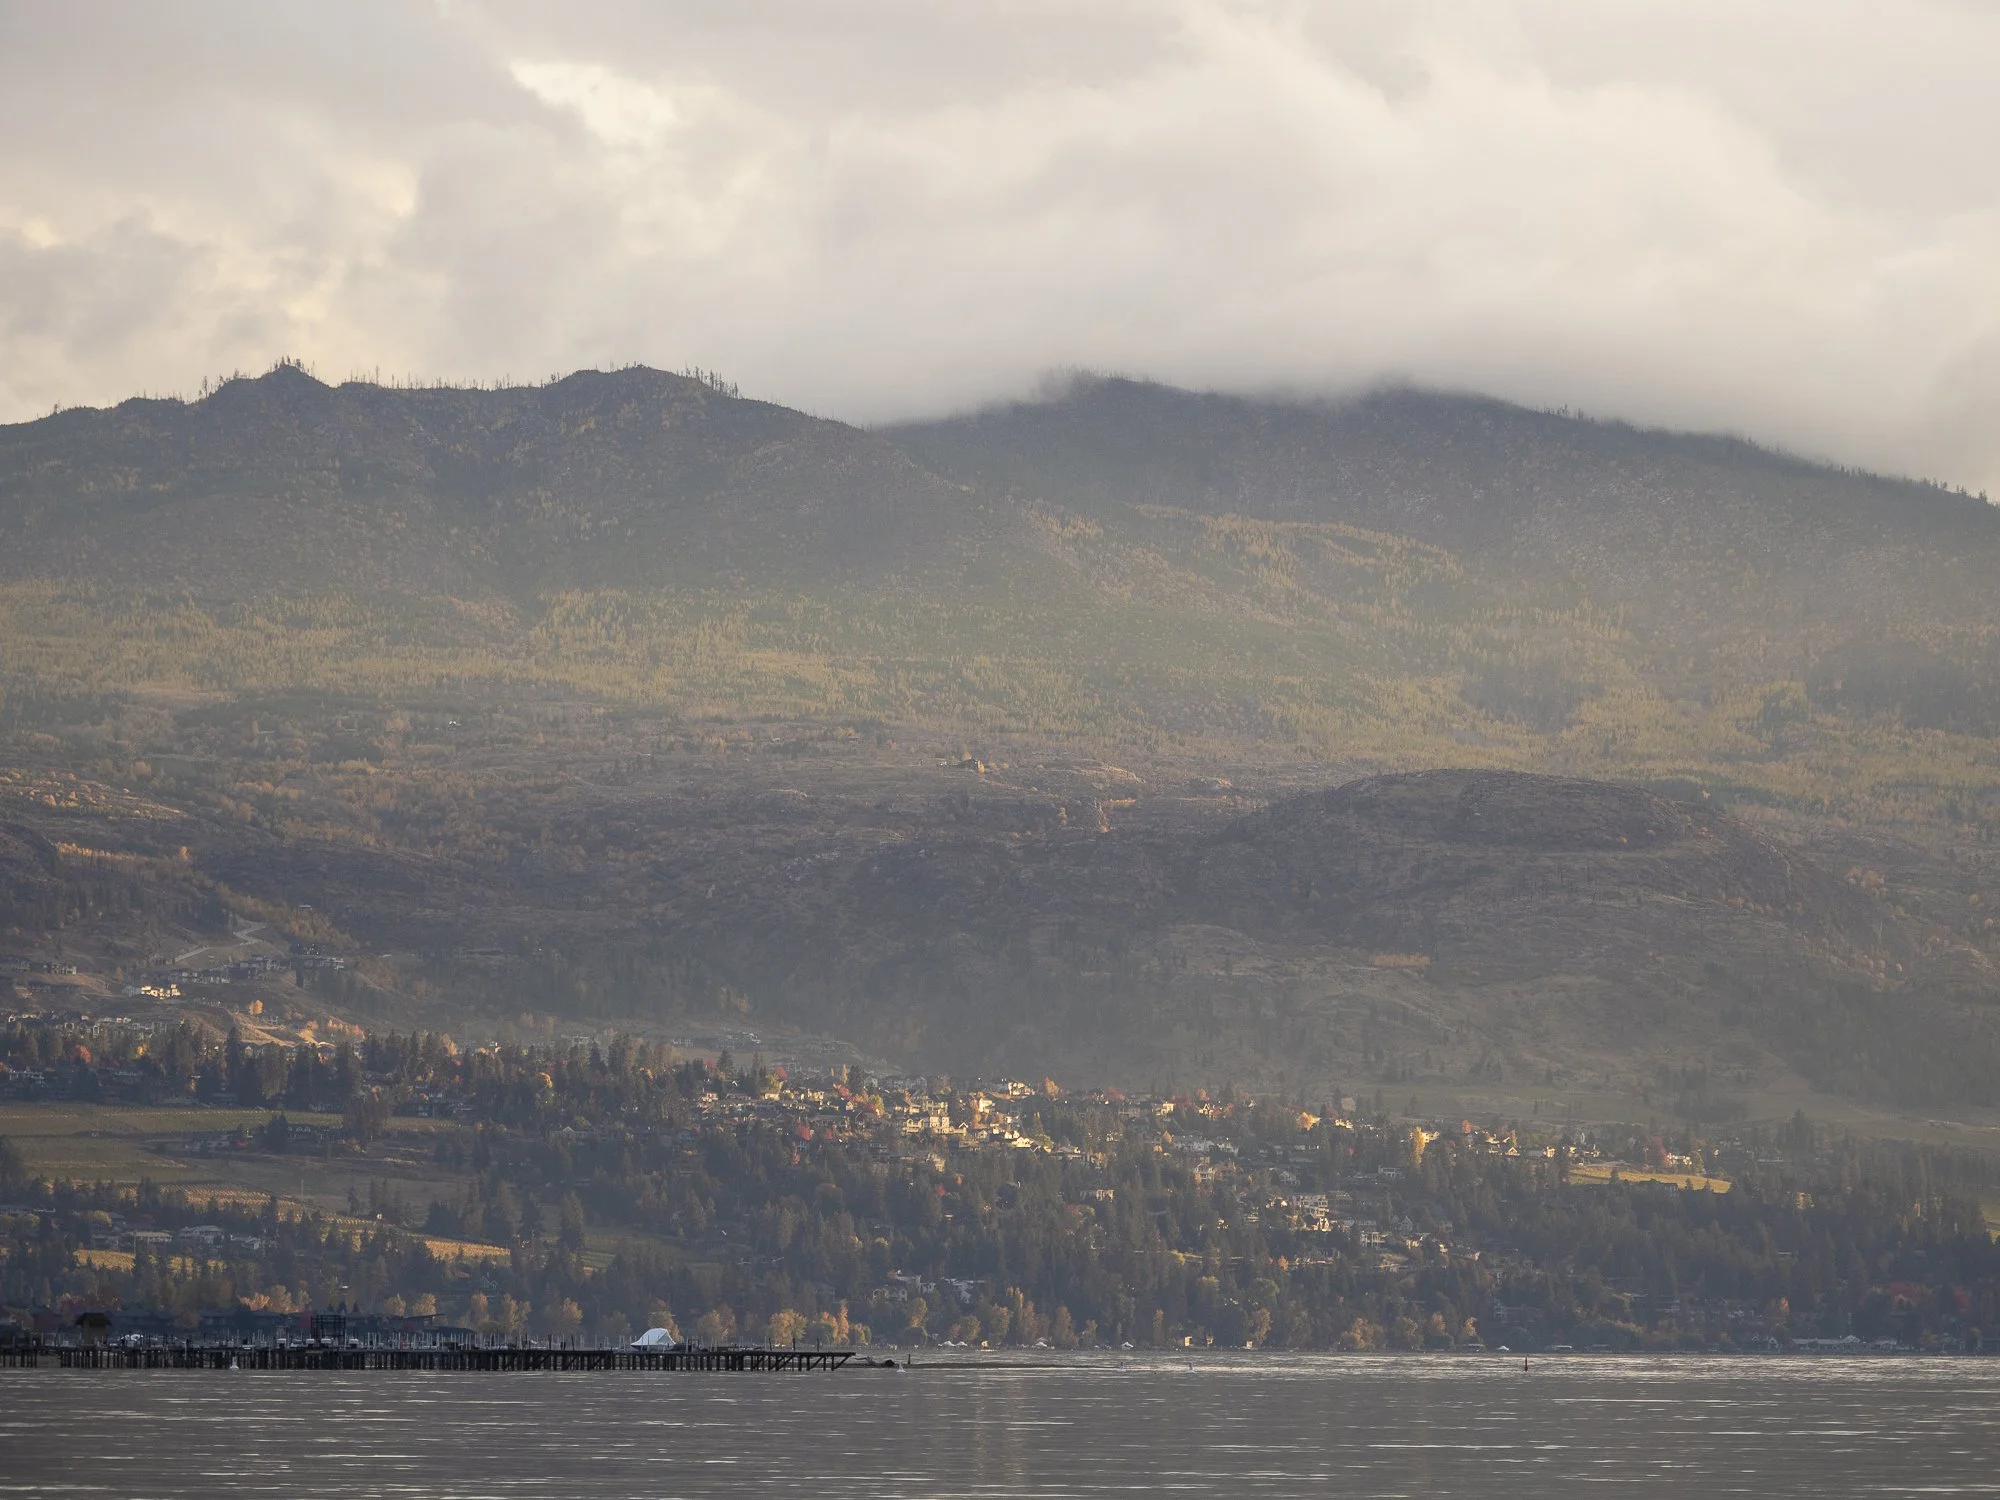
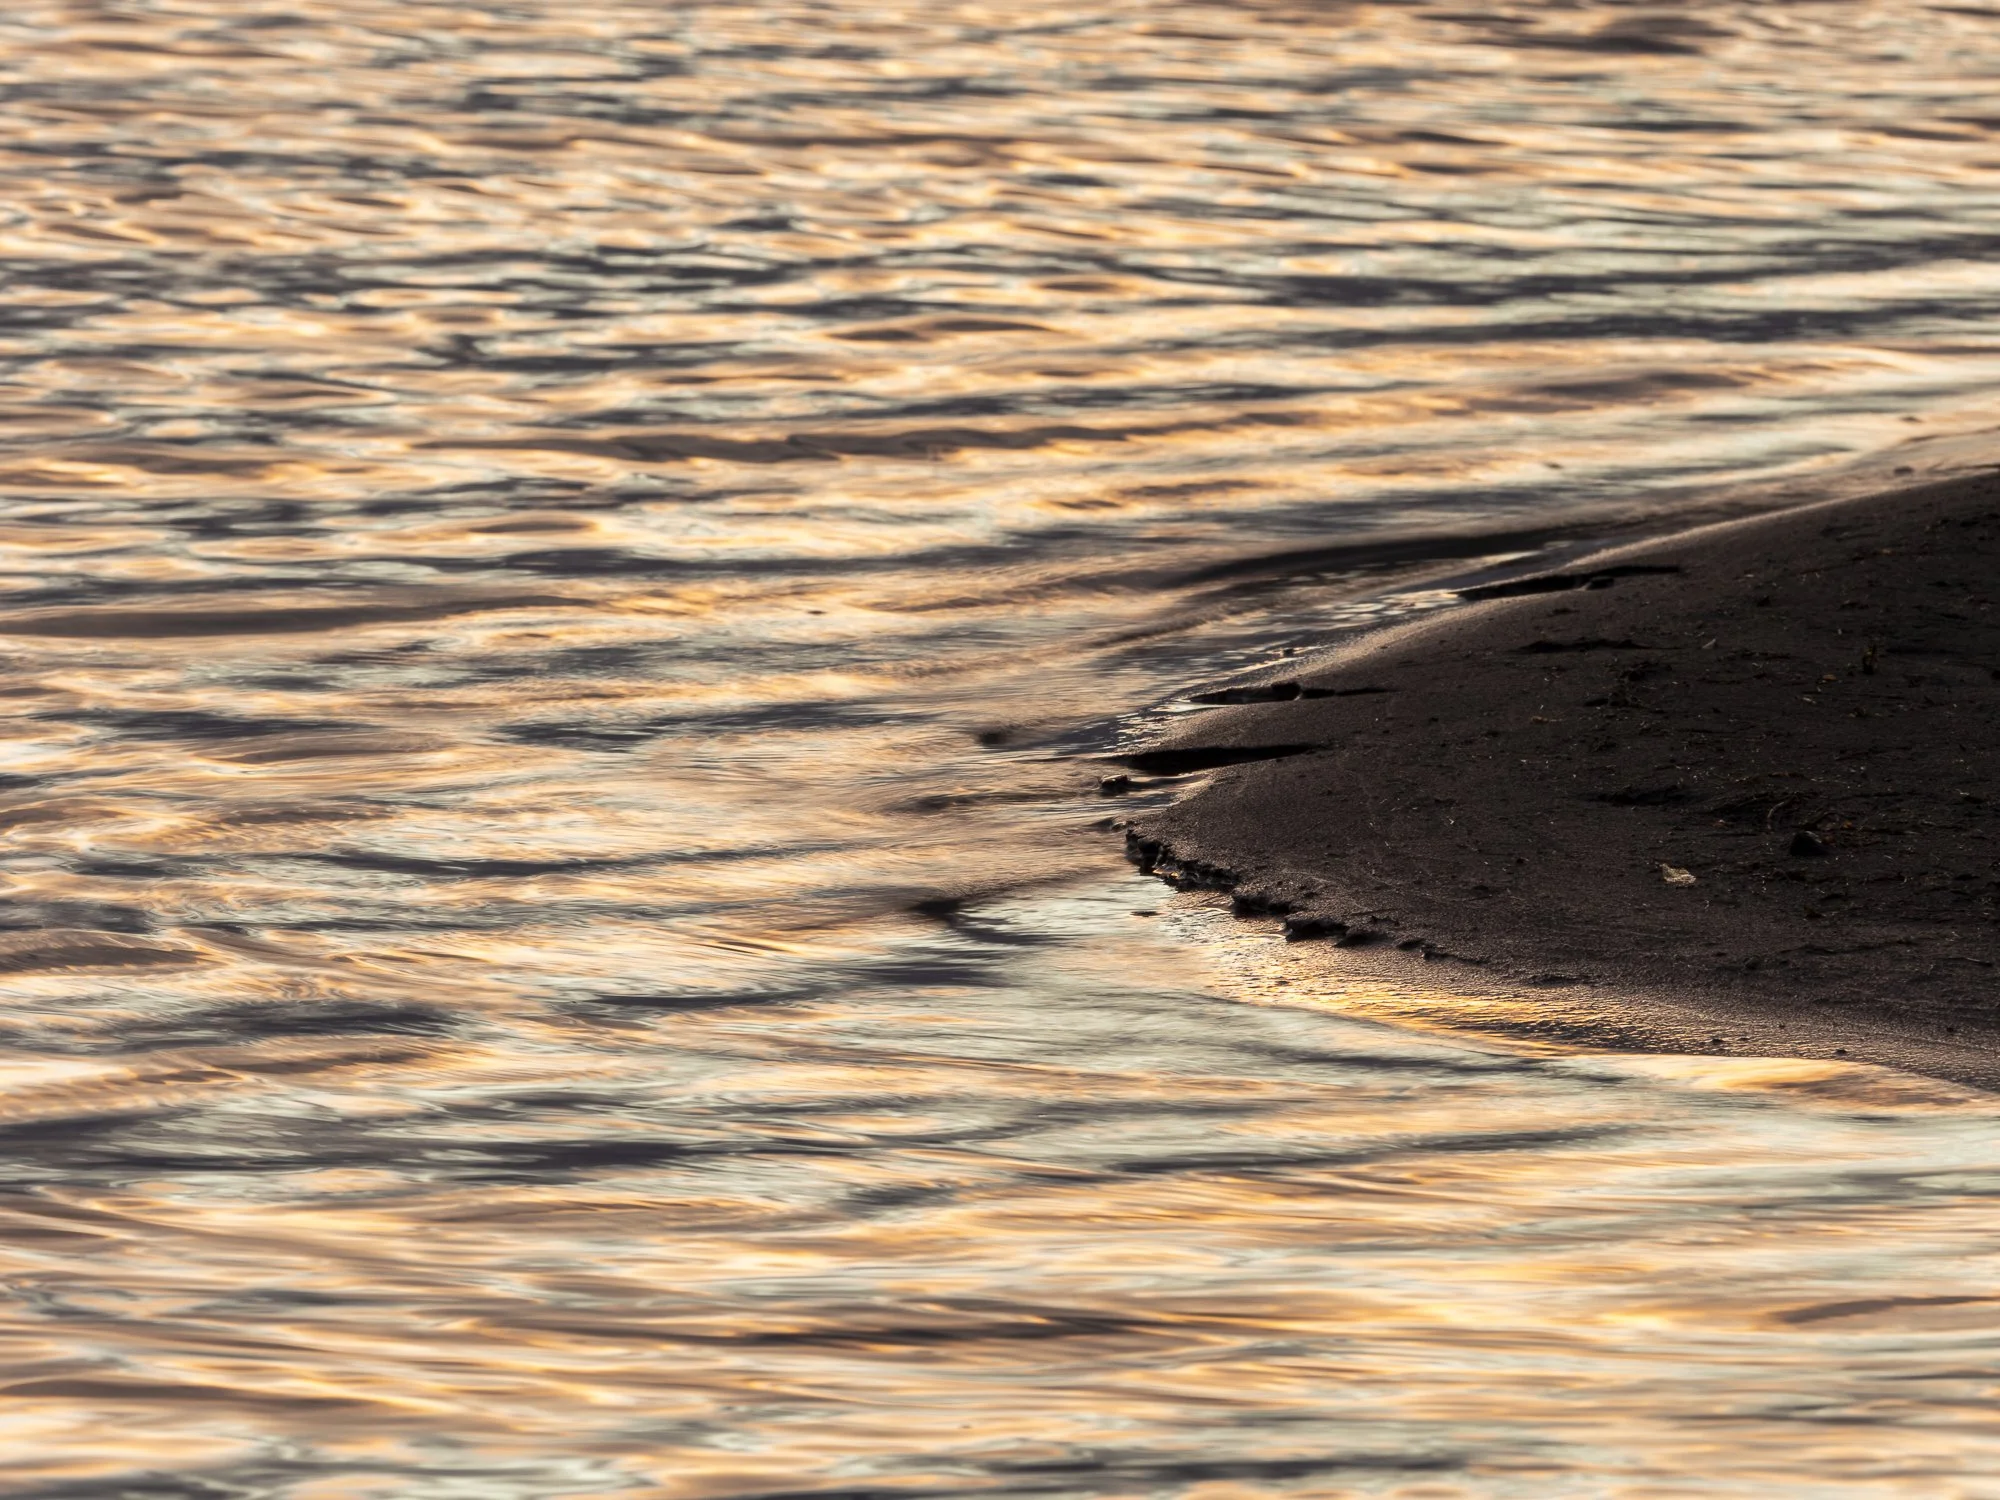
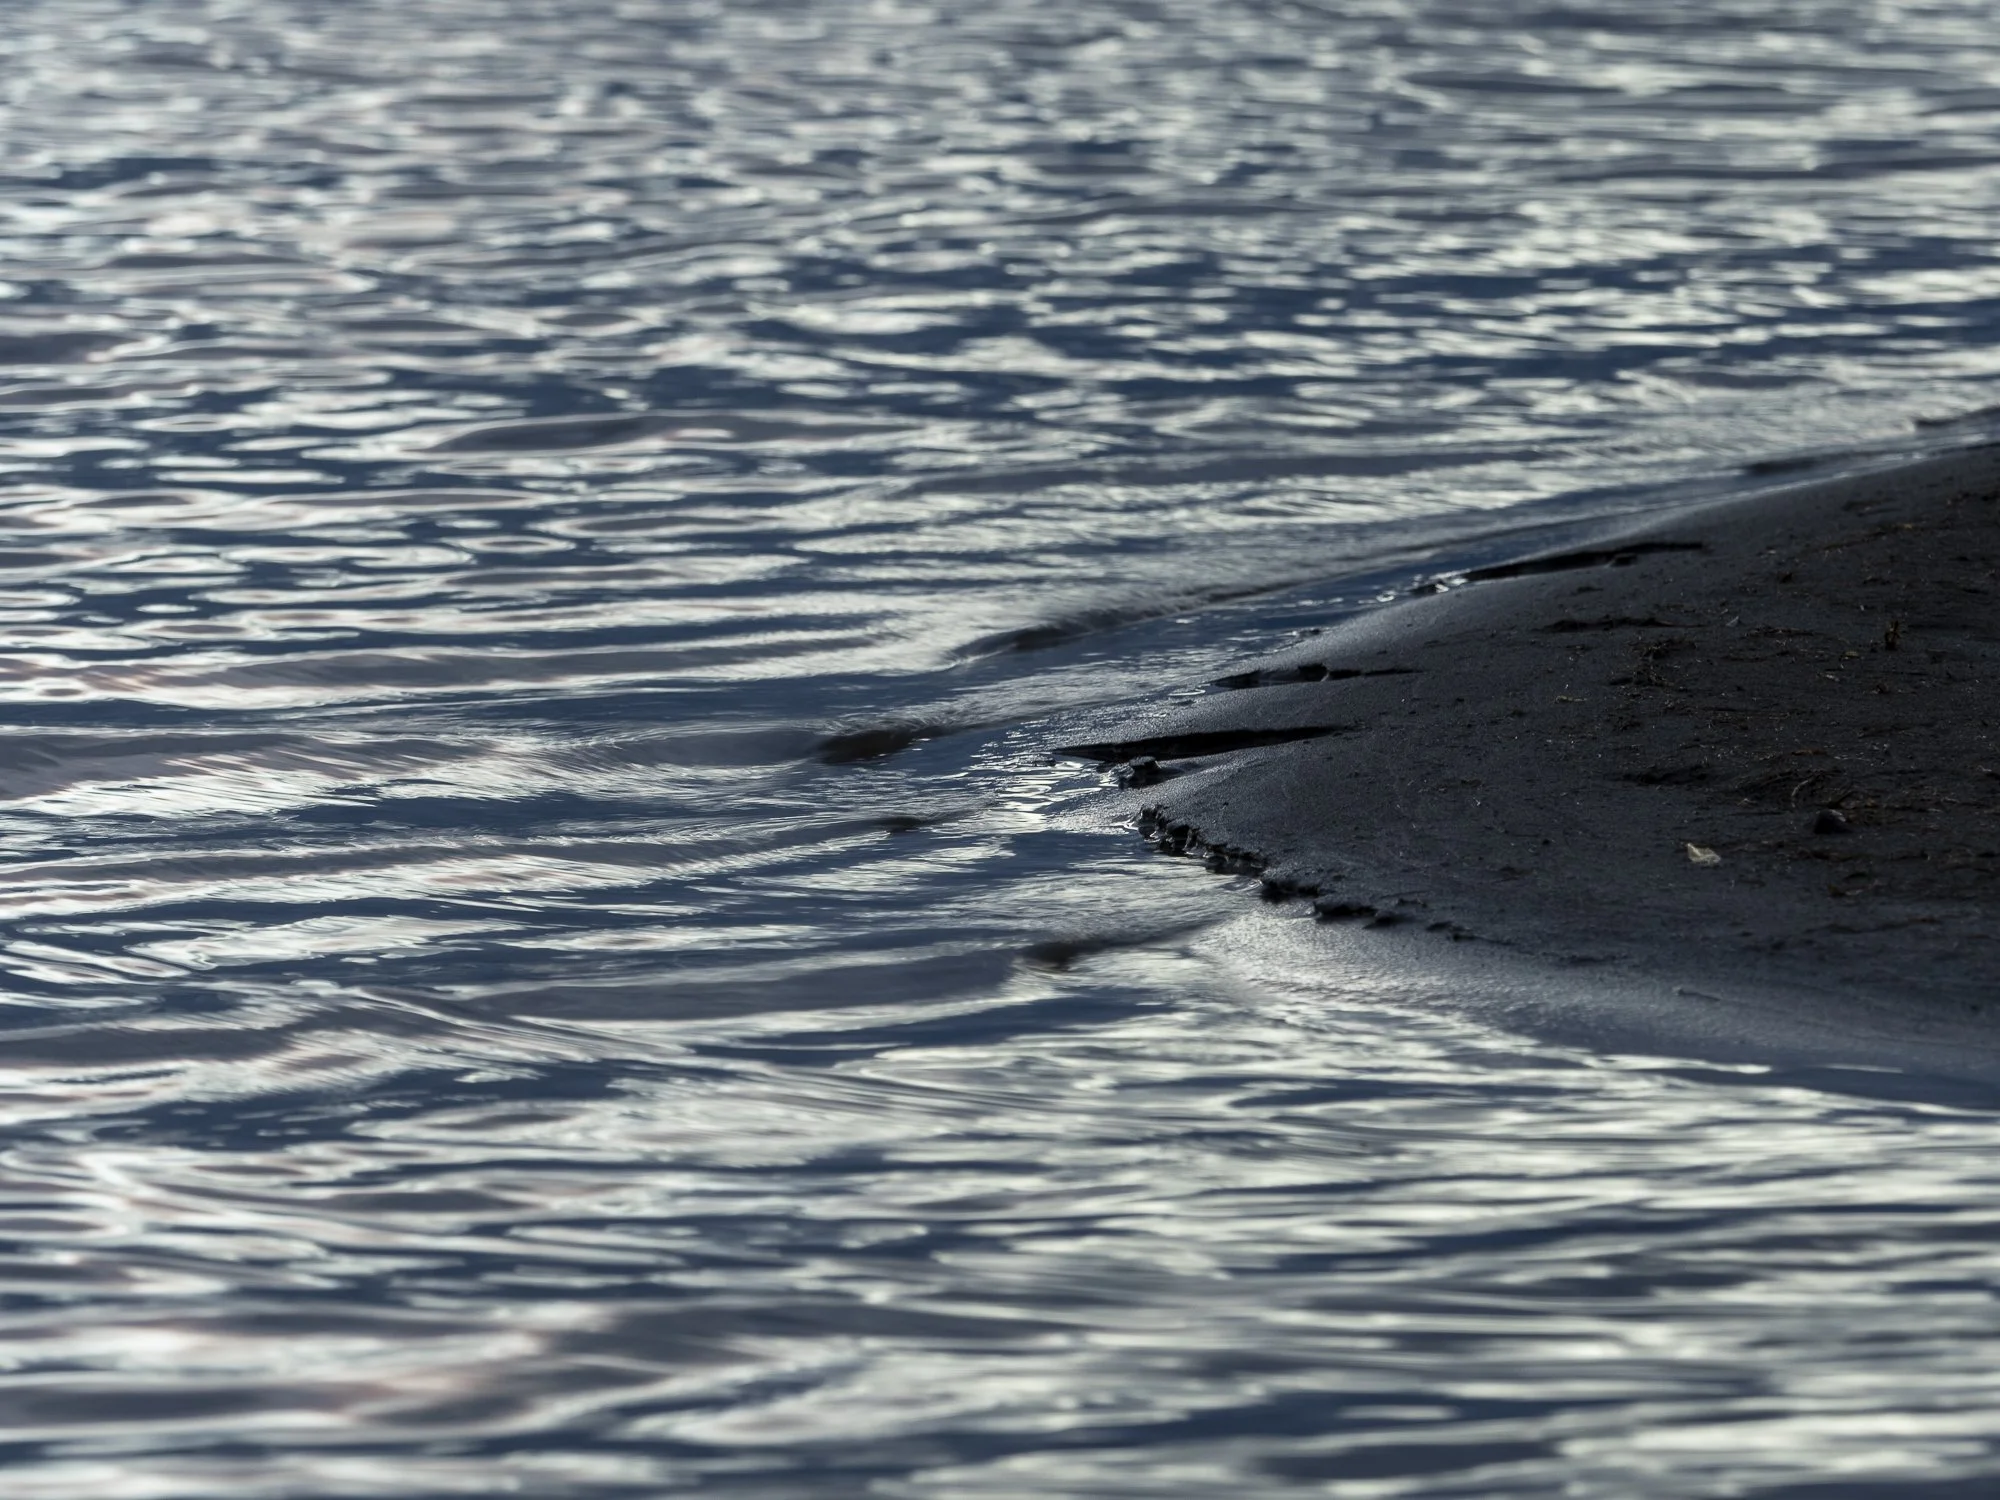
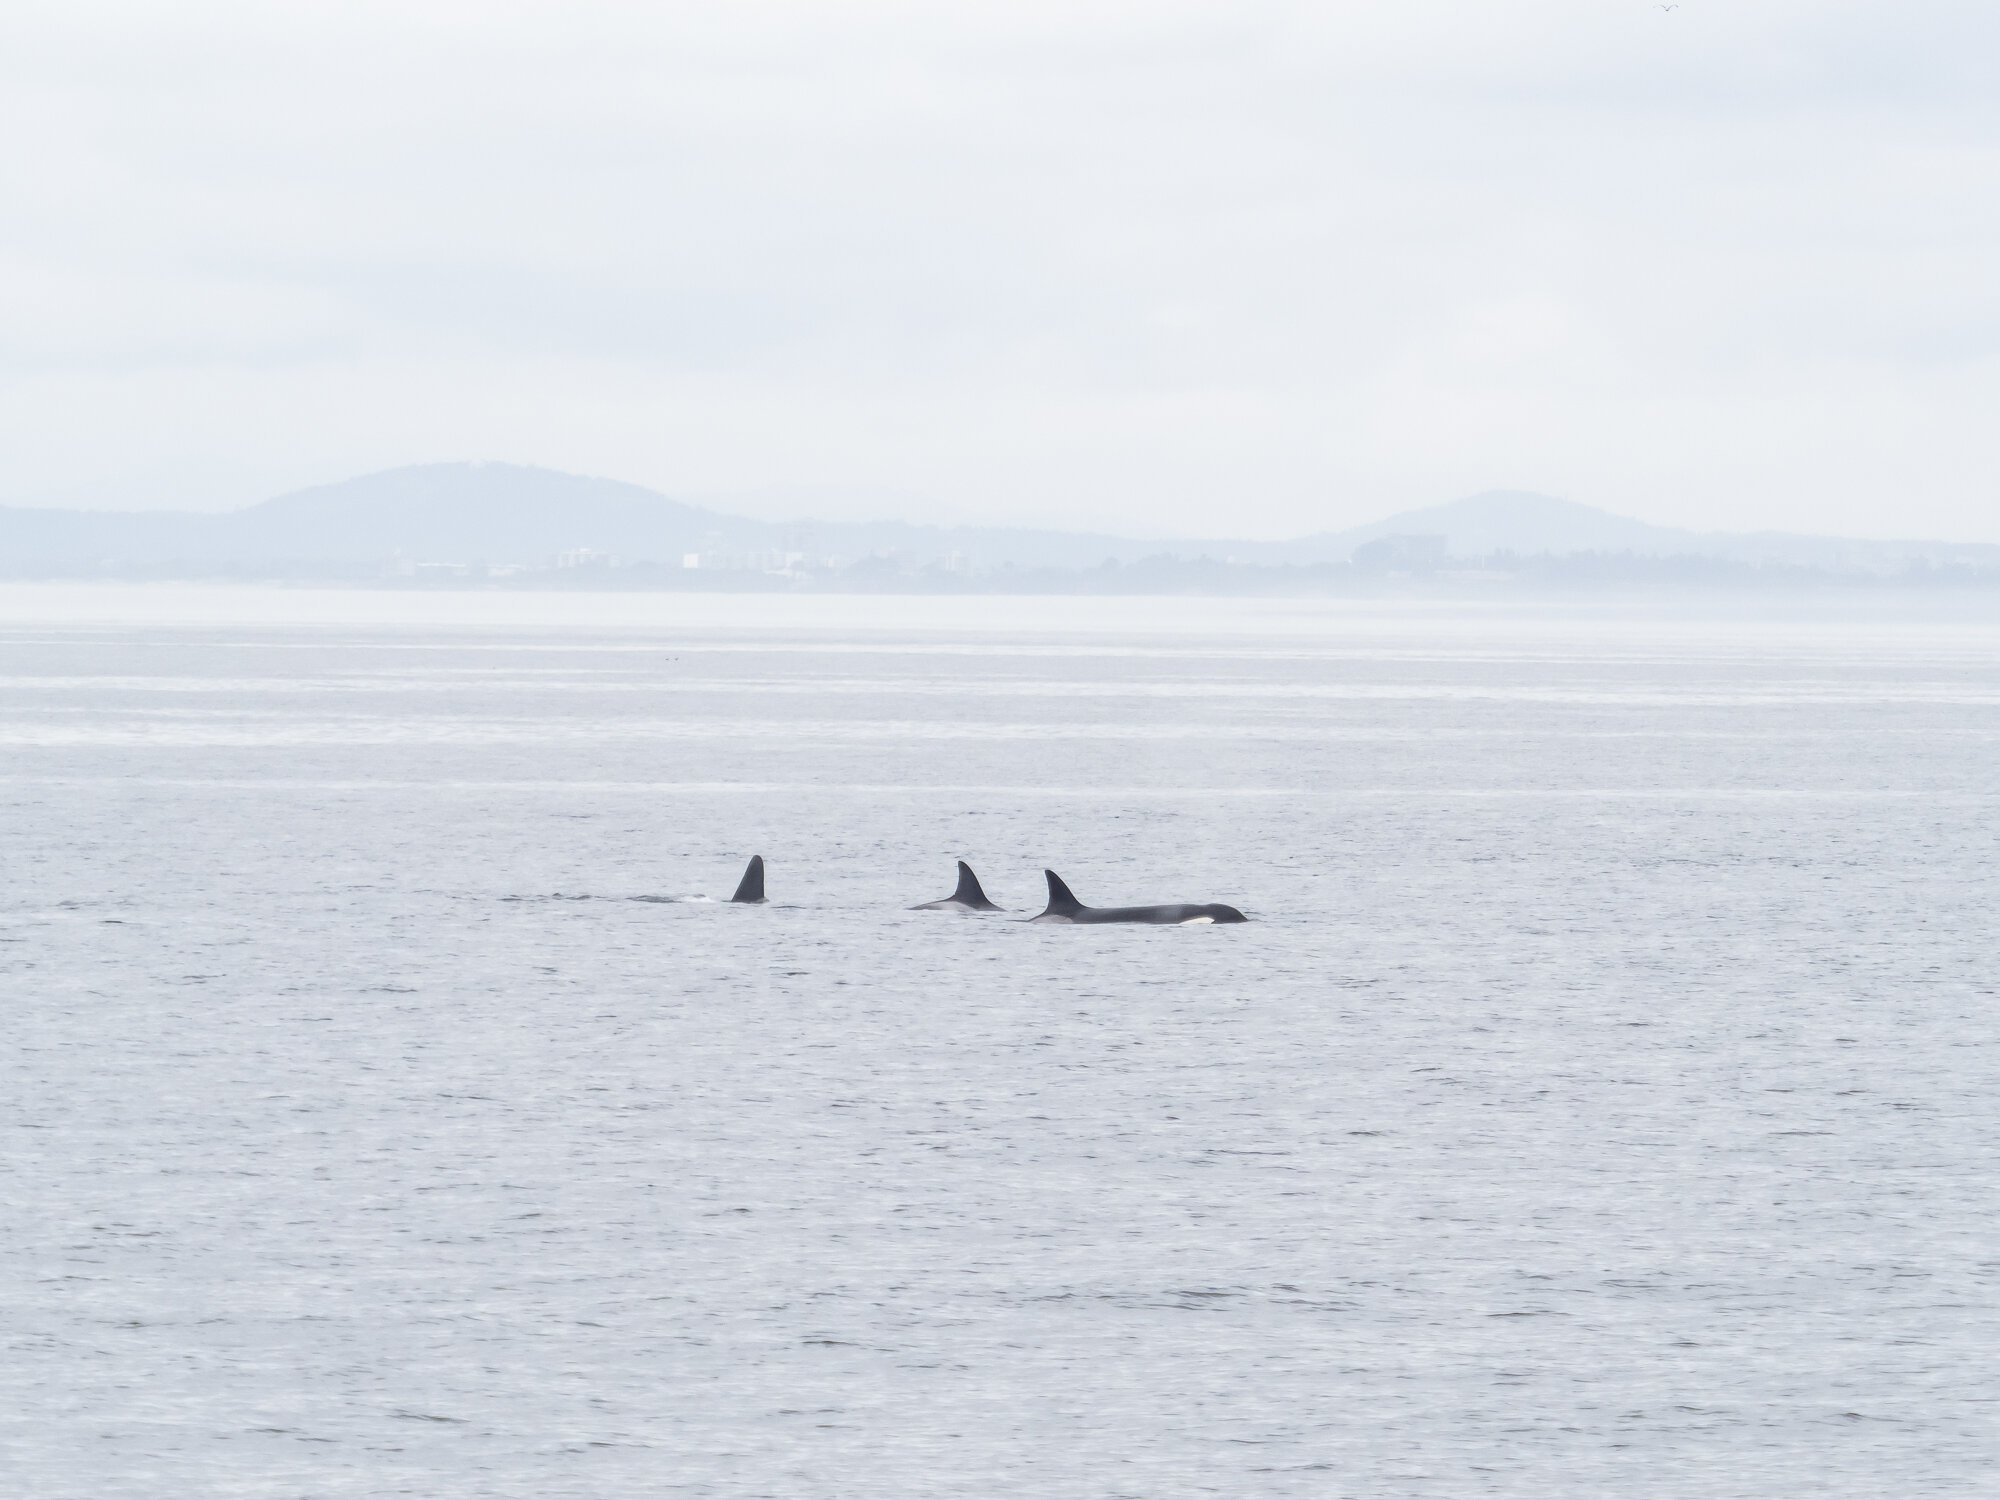
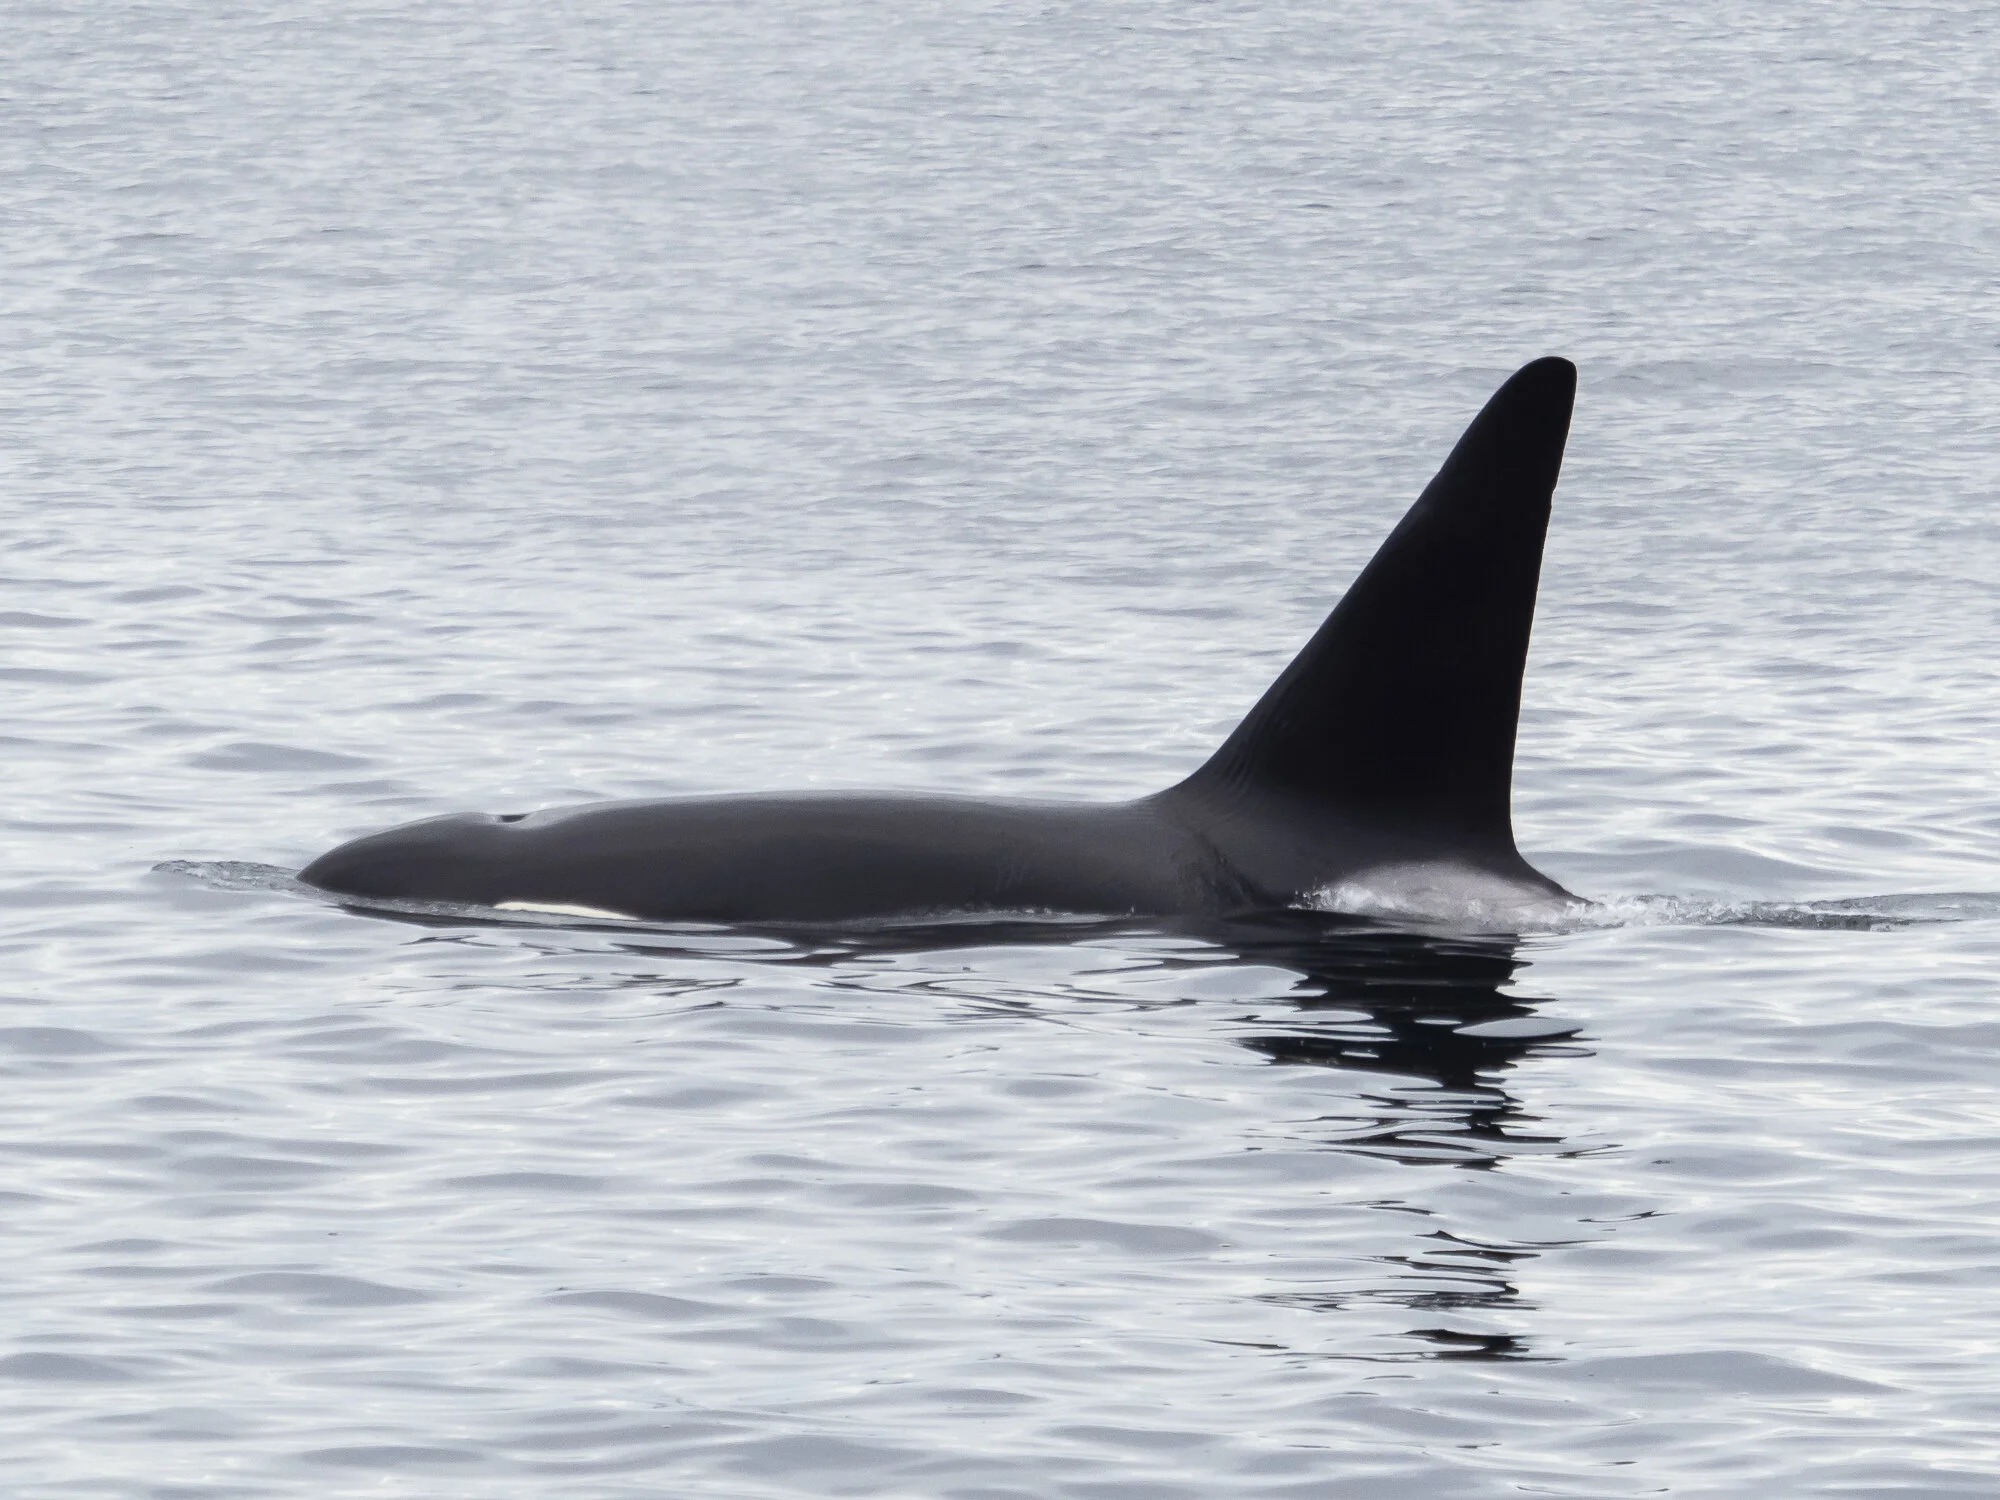
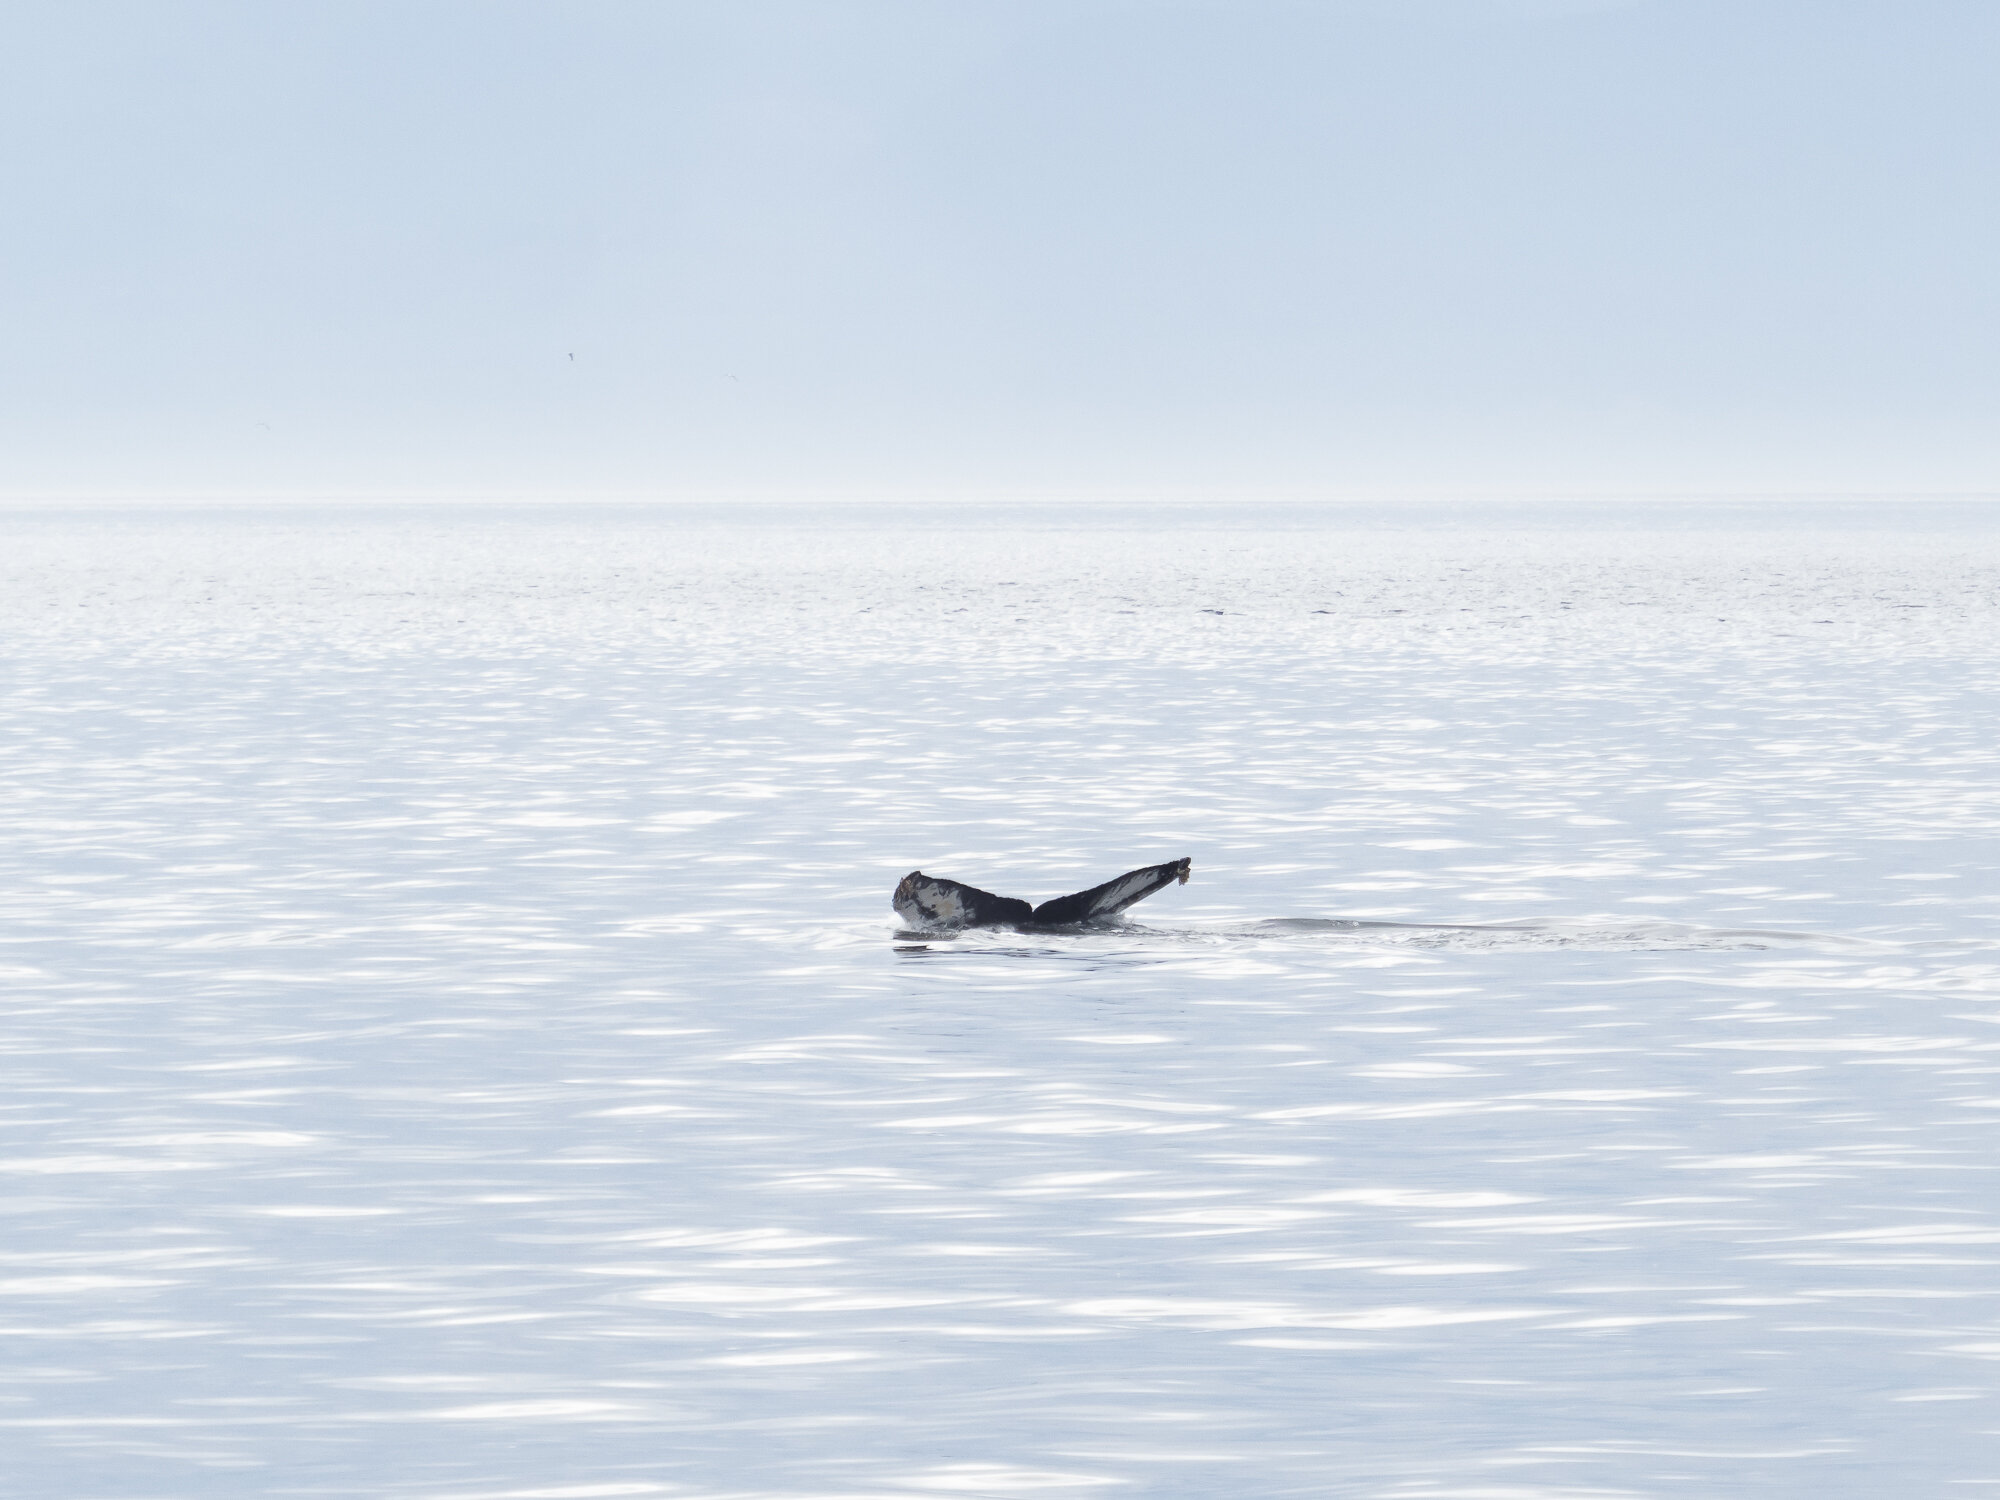
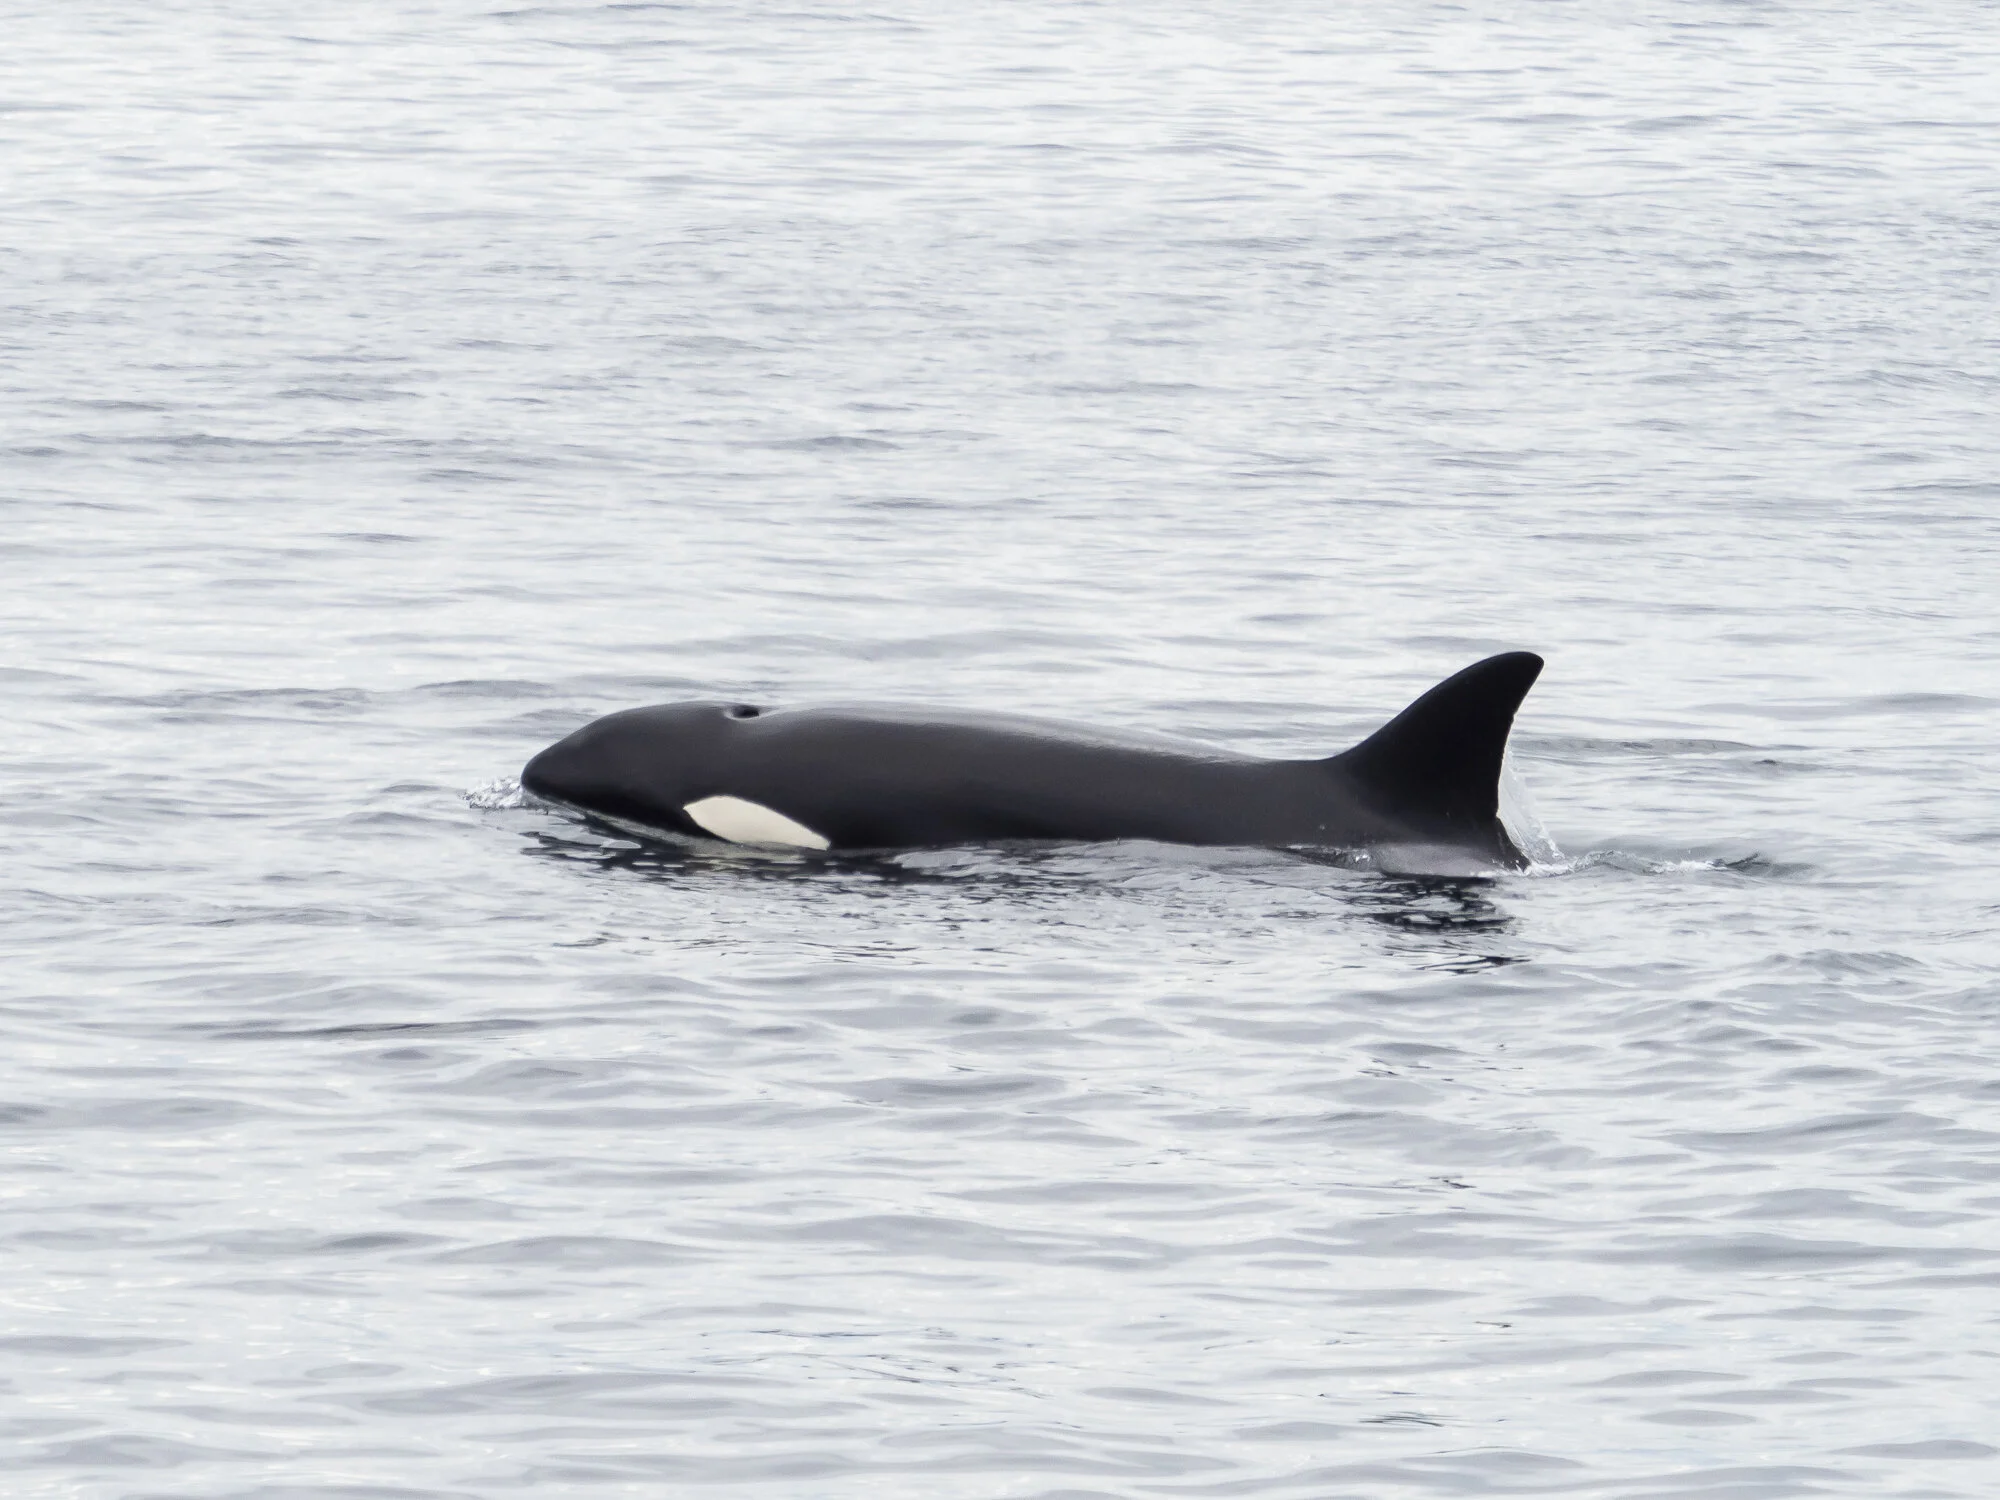
As for range, I like having a lot of the environment, the landscape in my wildlife photos. Capturing more of a “is it a wildlife photo or a landscape photo”. However, if you want a lens that can photograph every scratch on an Orca’s body or every barnacle on the Humpback Whale then you might want to consider a different lens that will provide that reach.

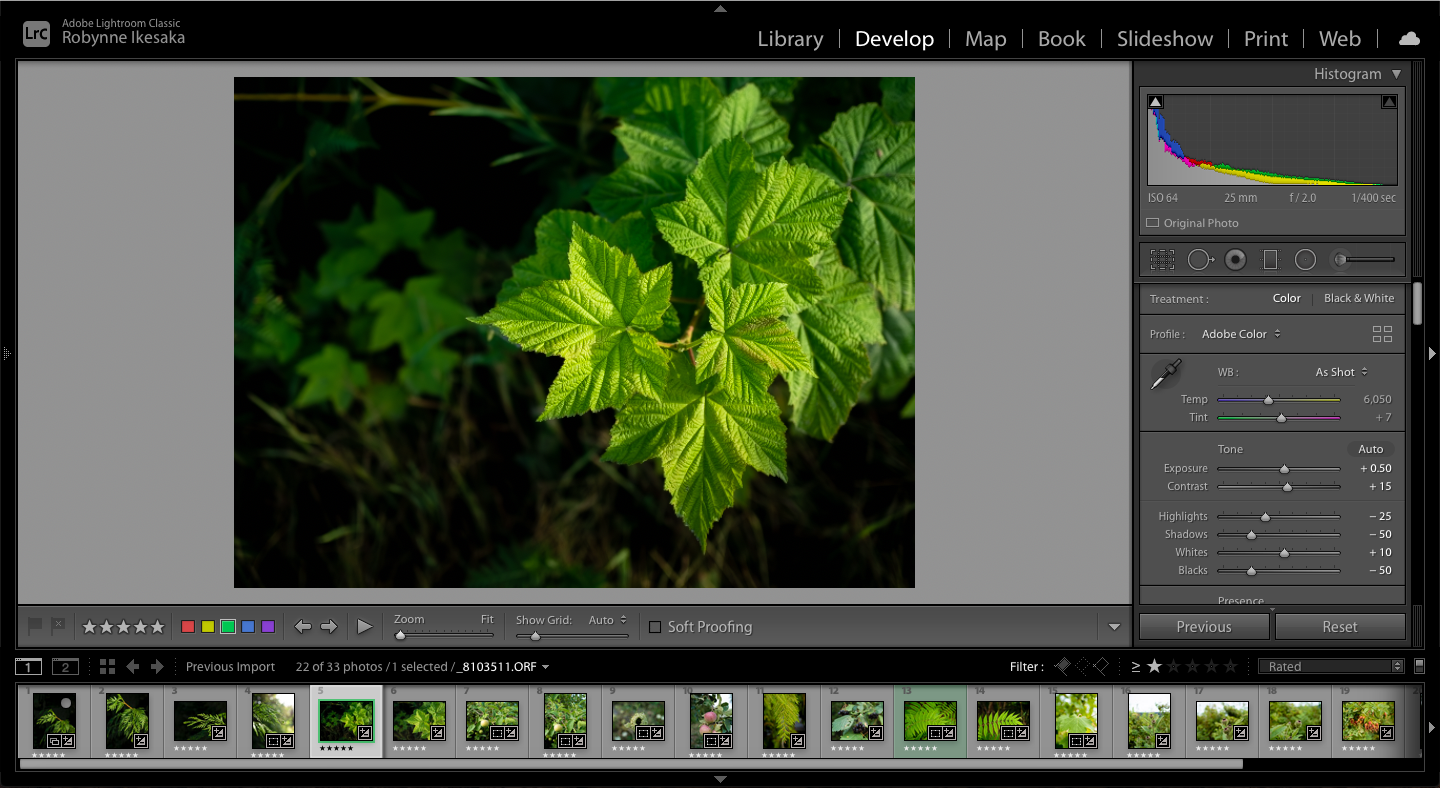
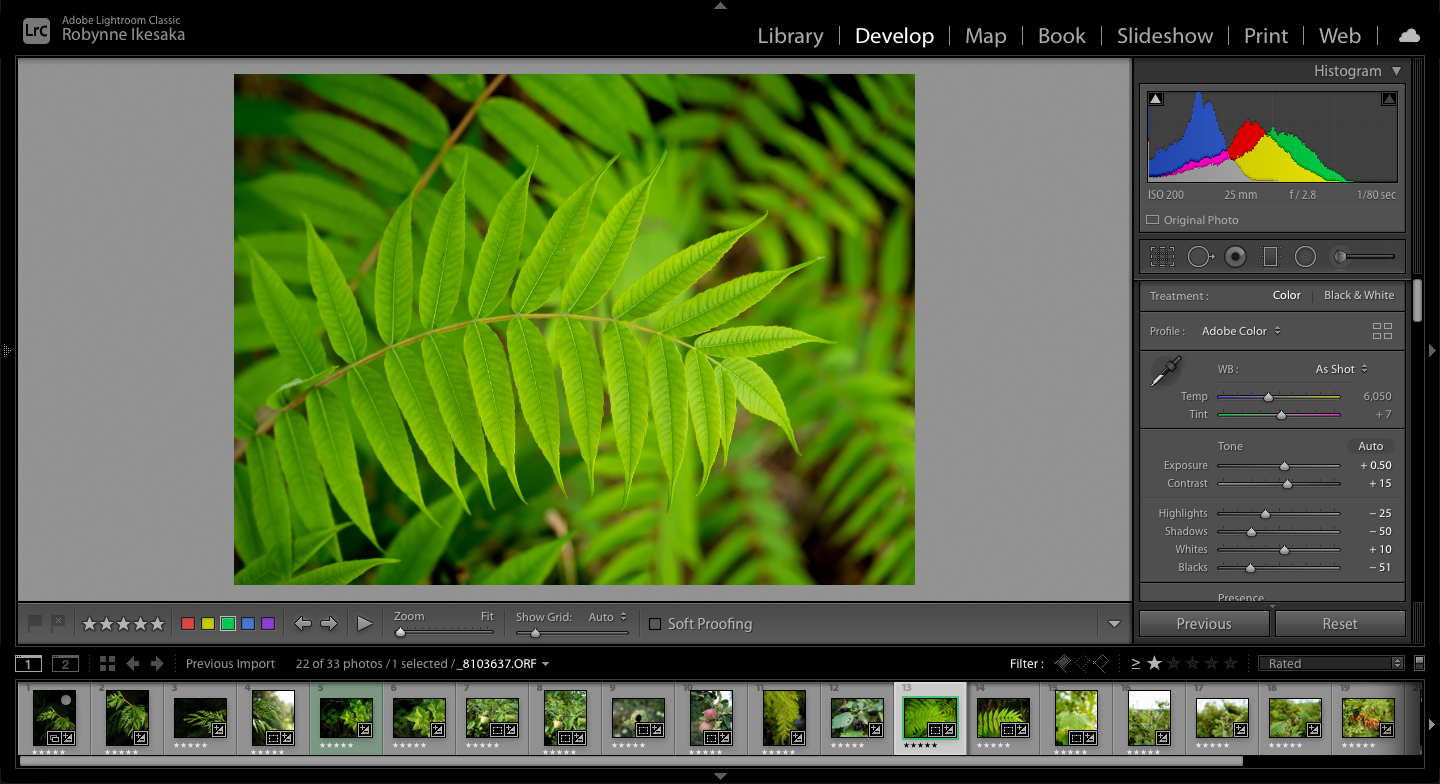
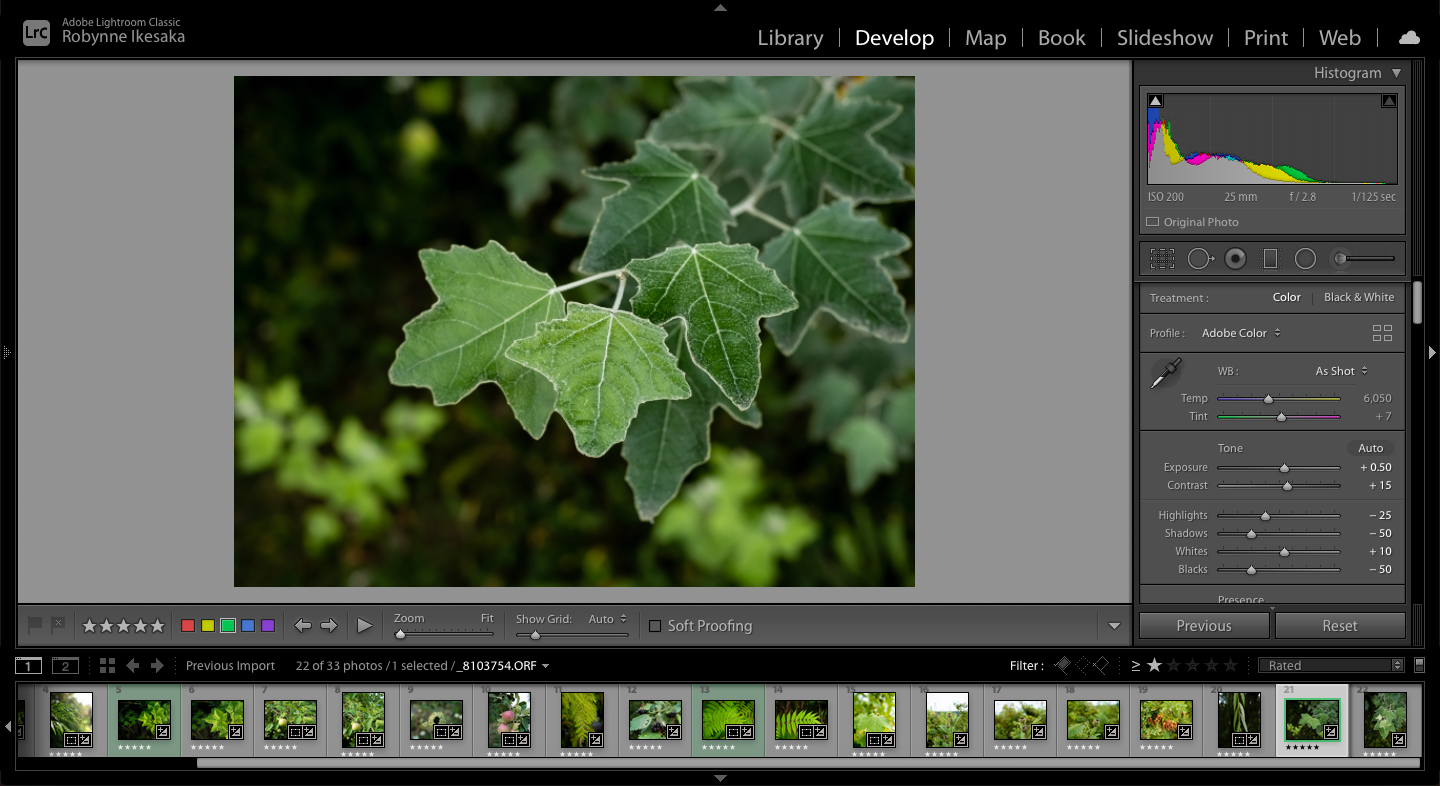
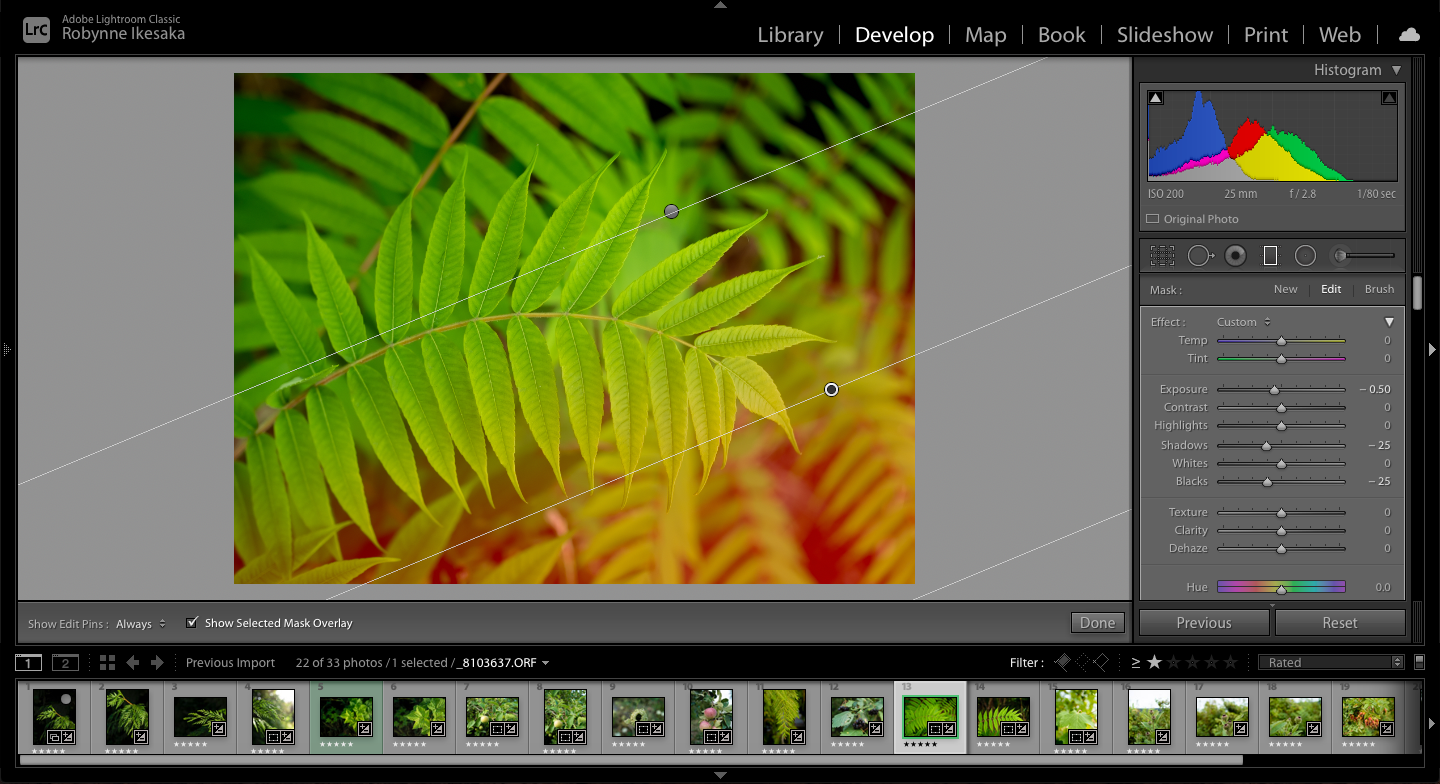
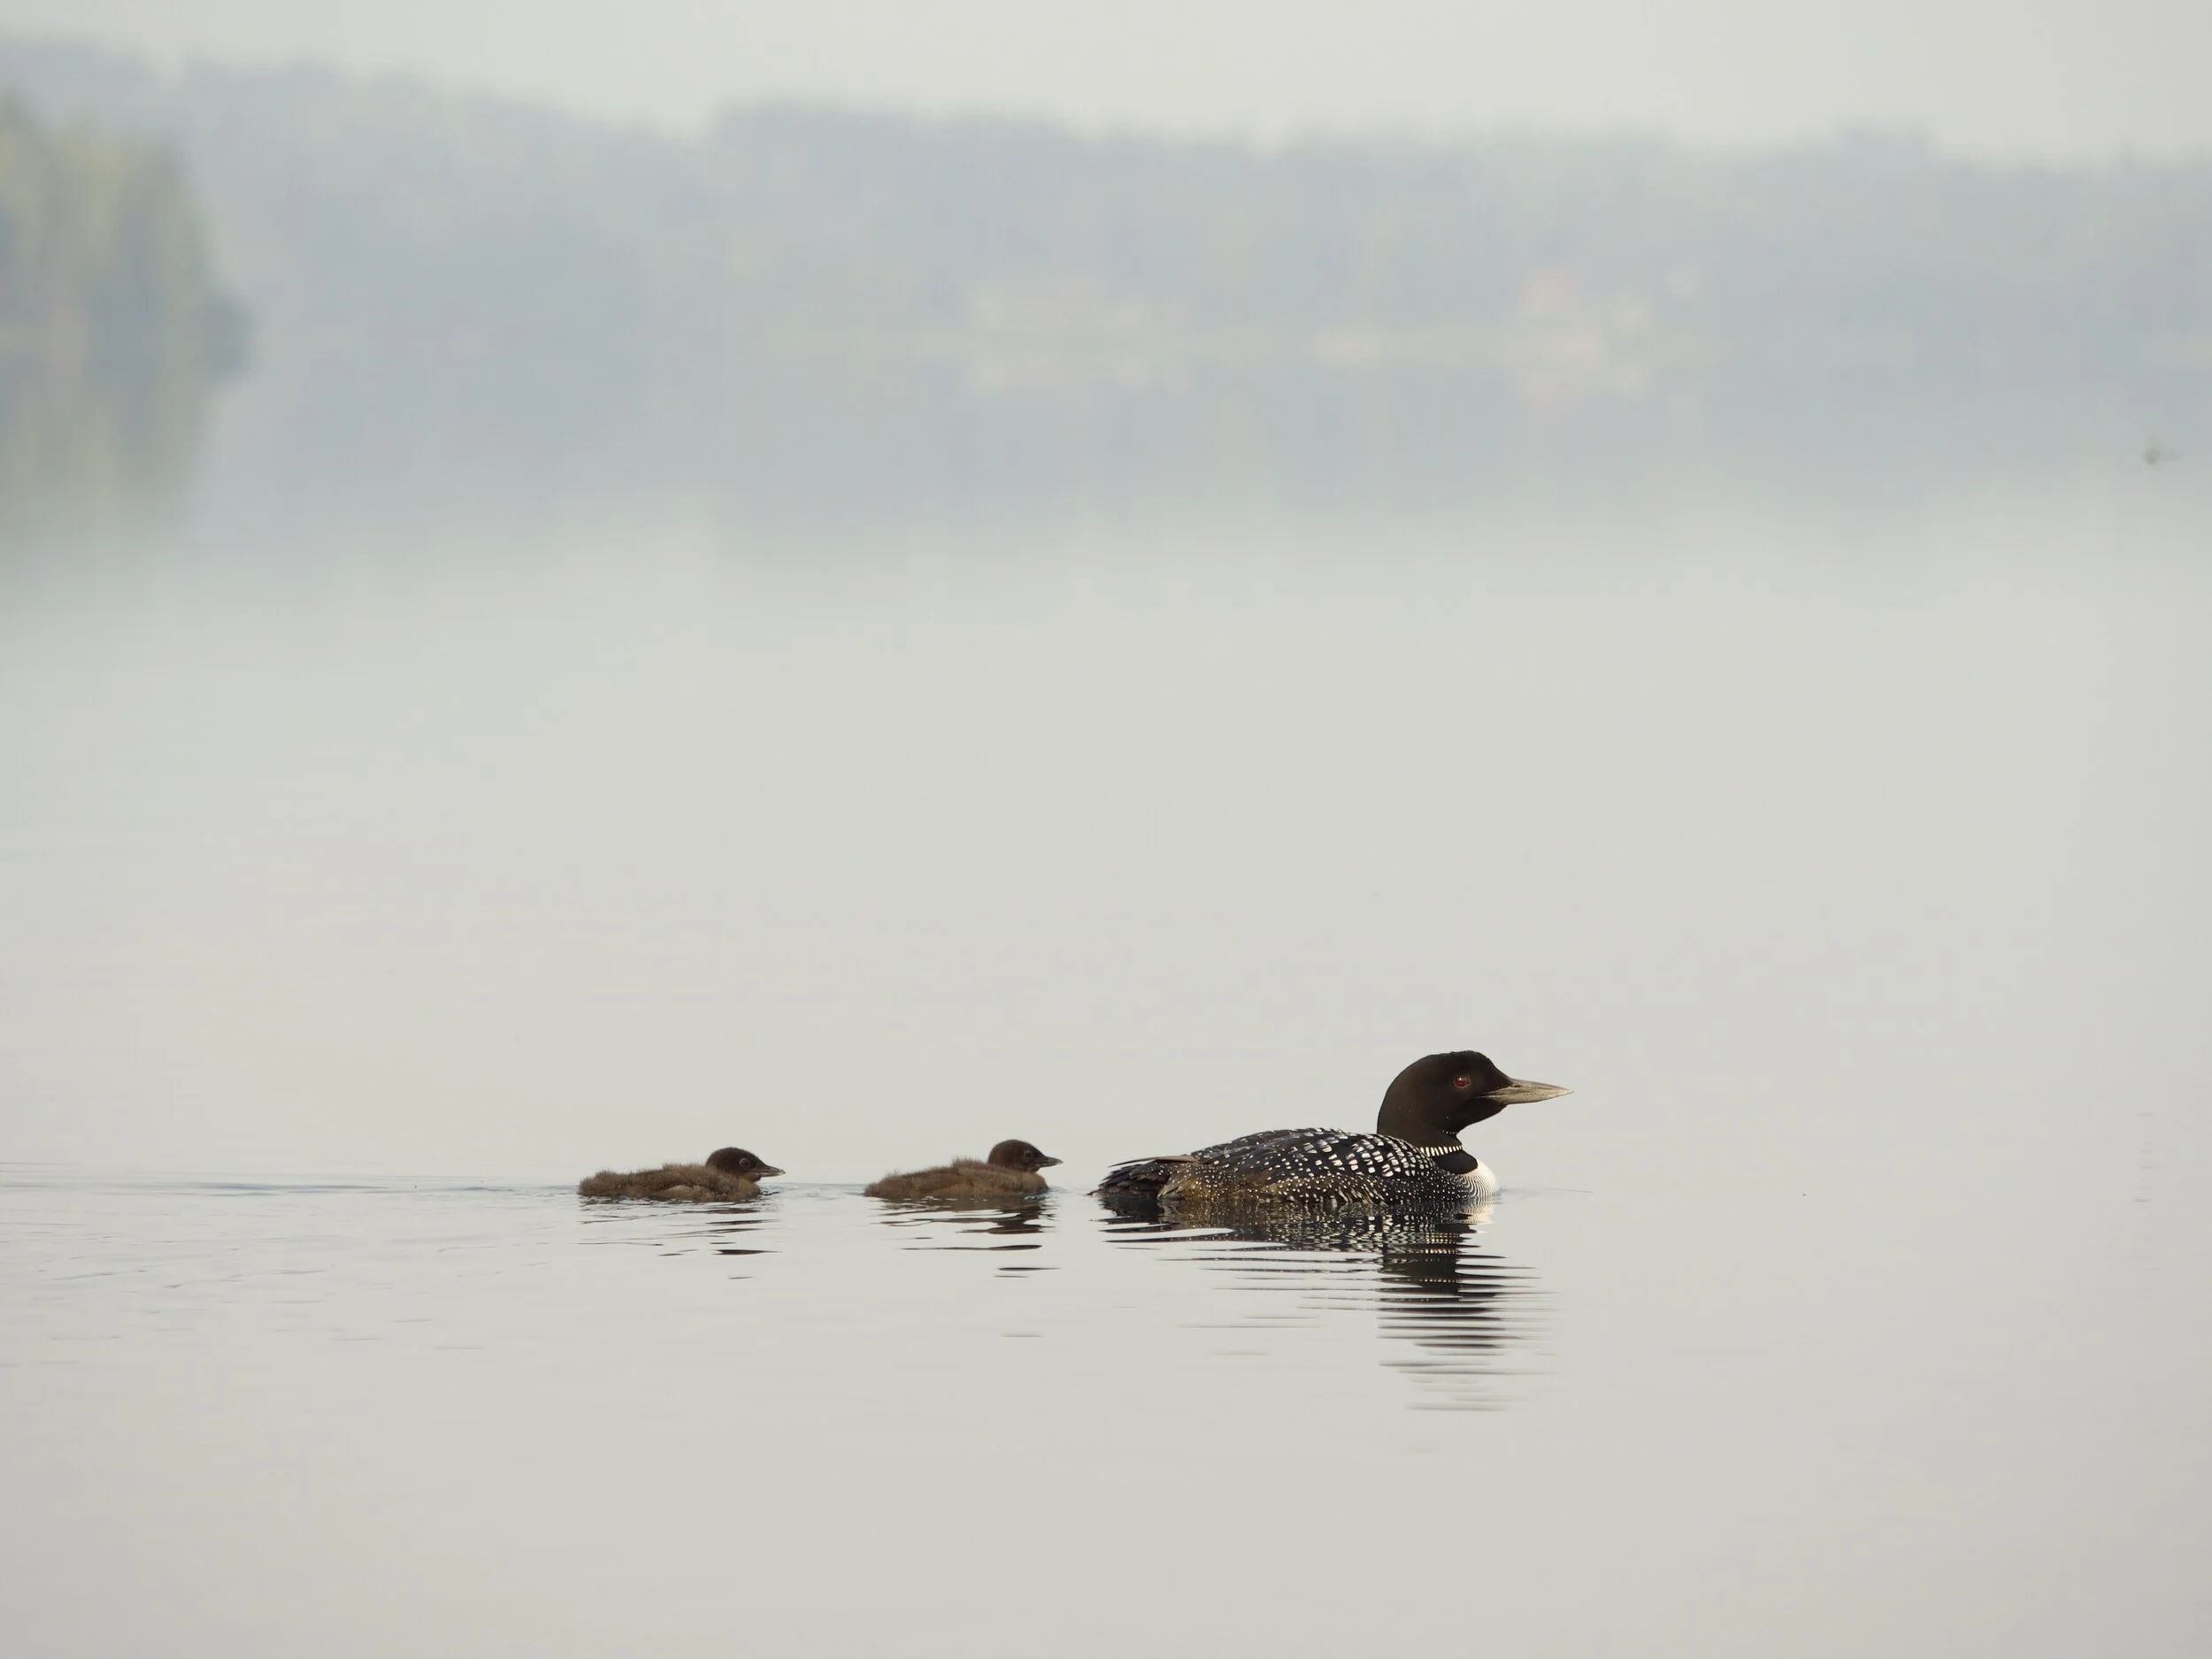
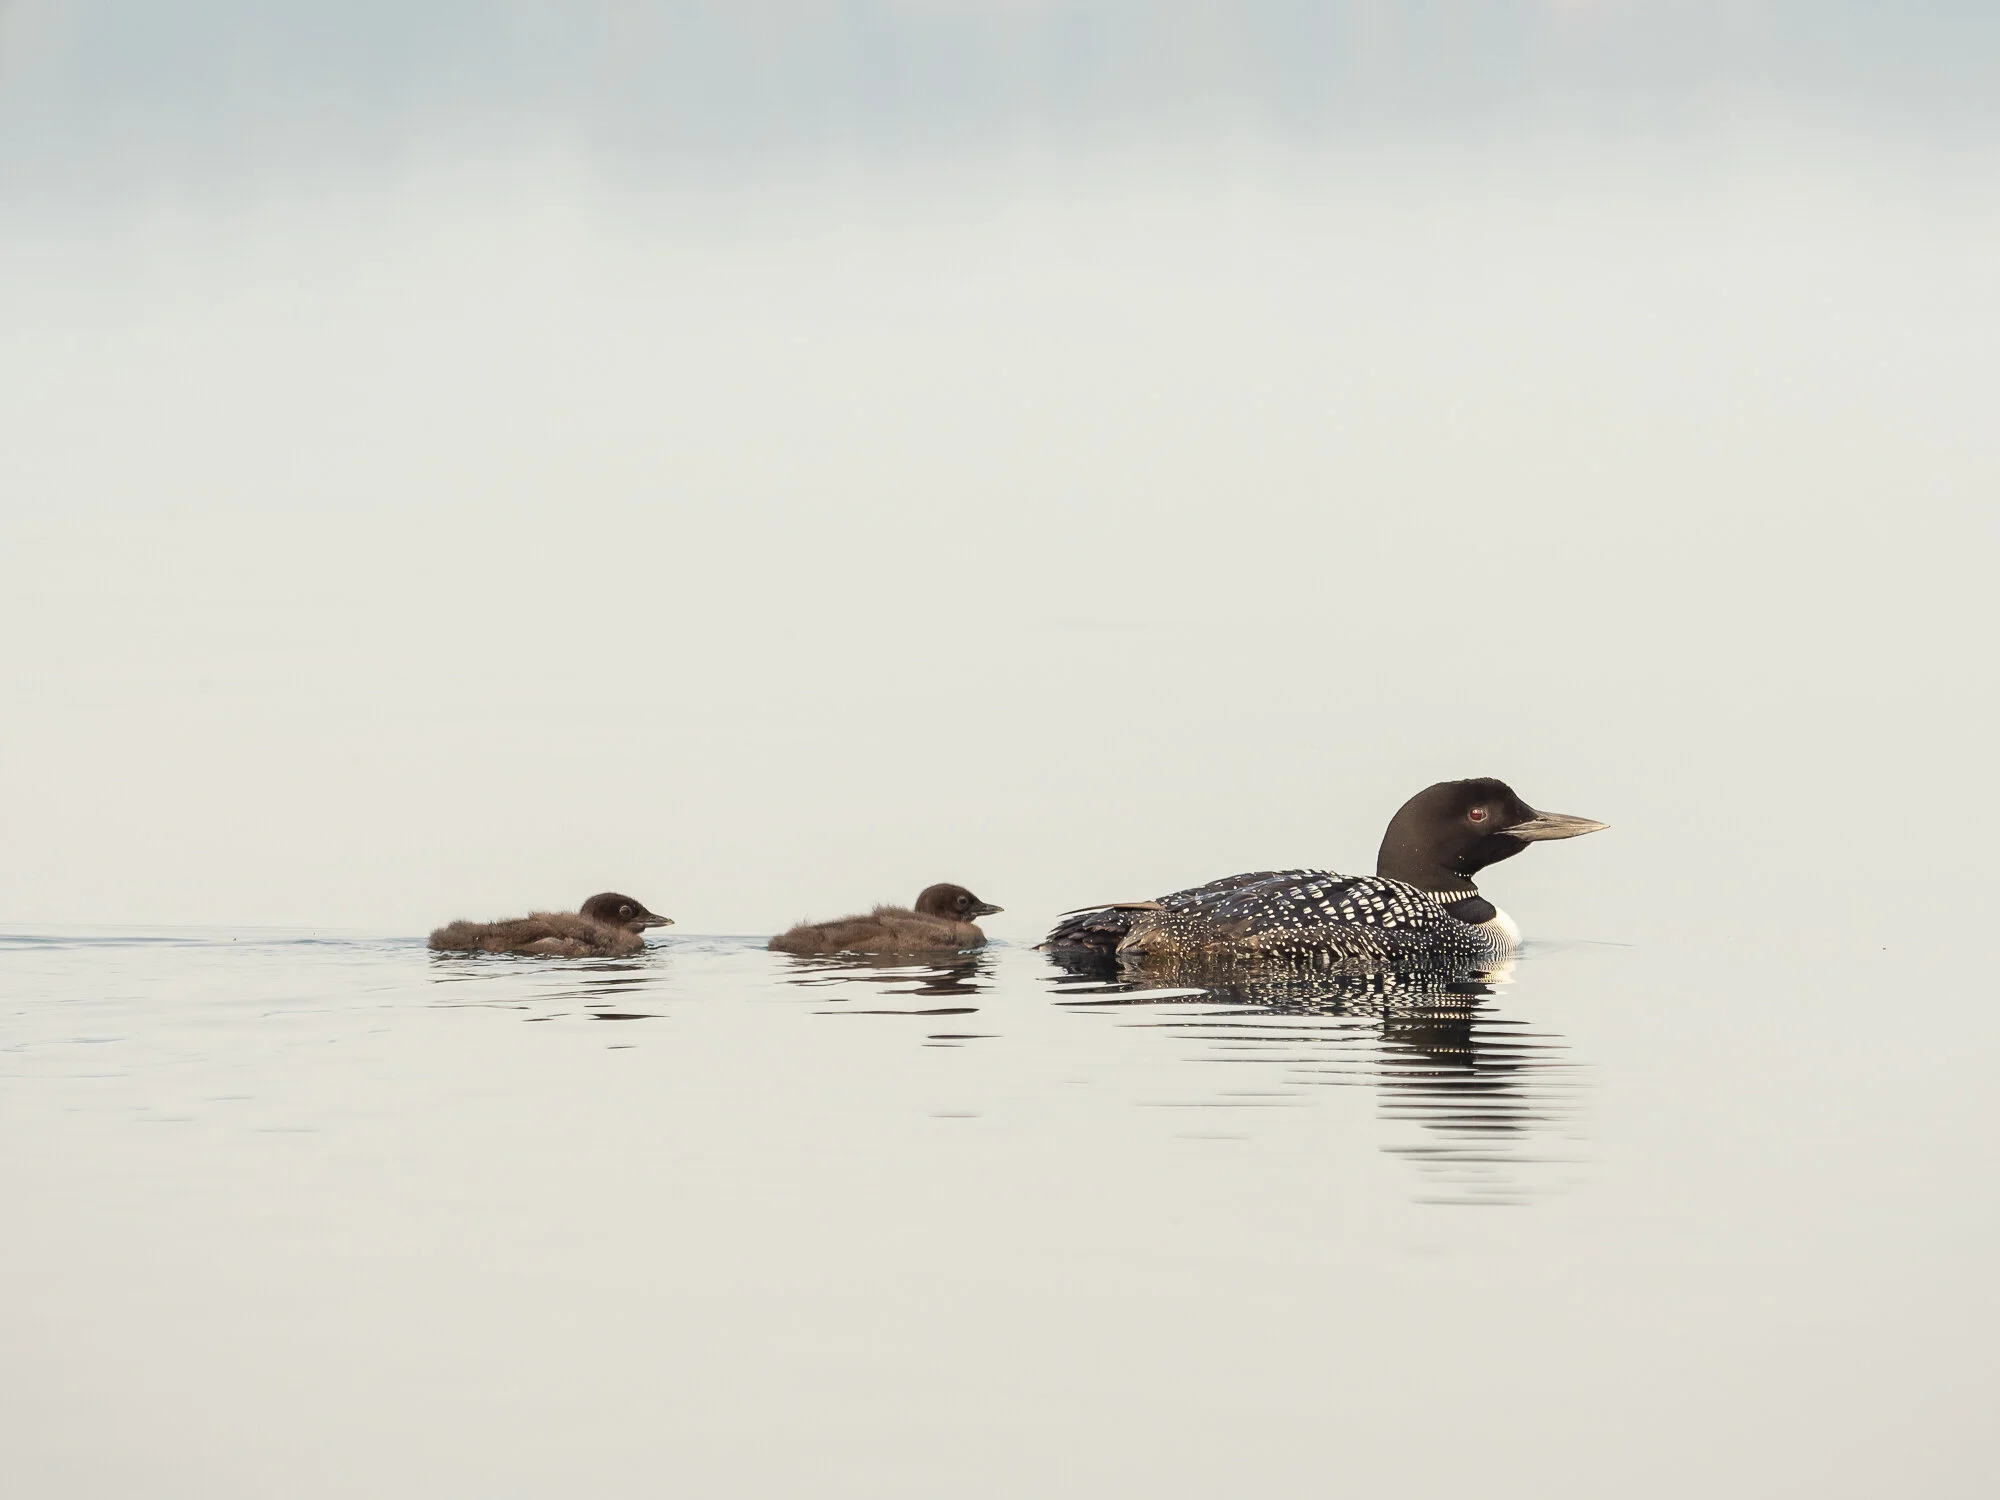
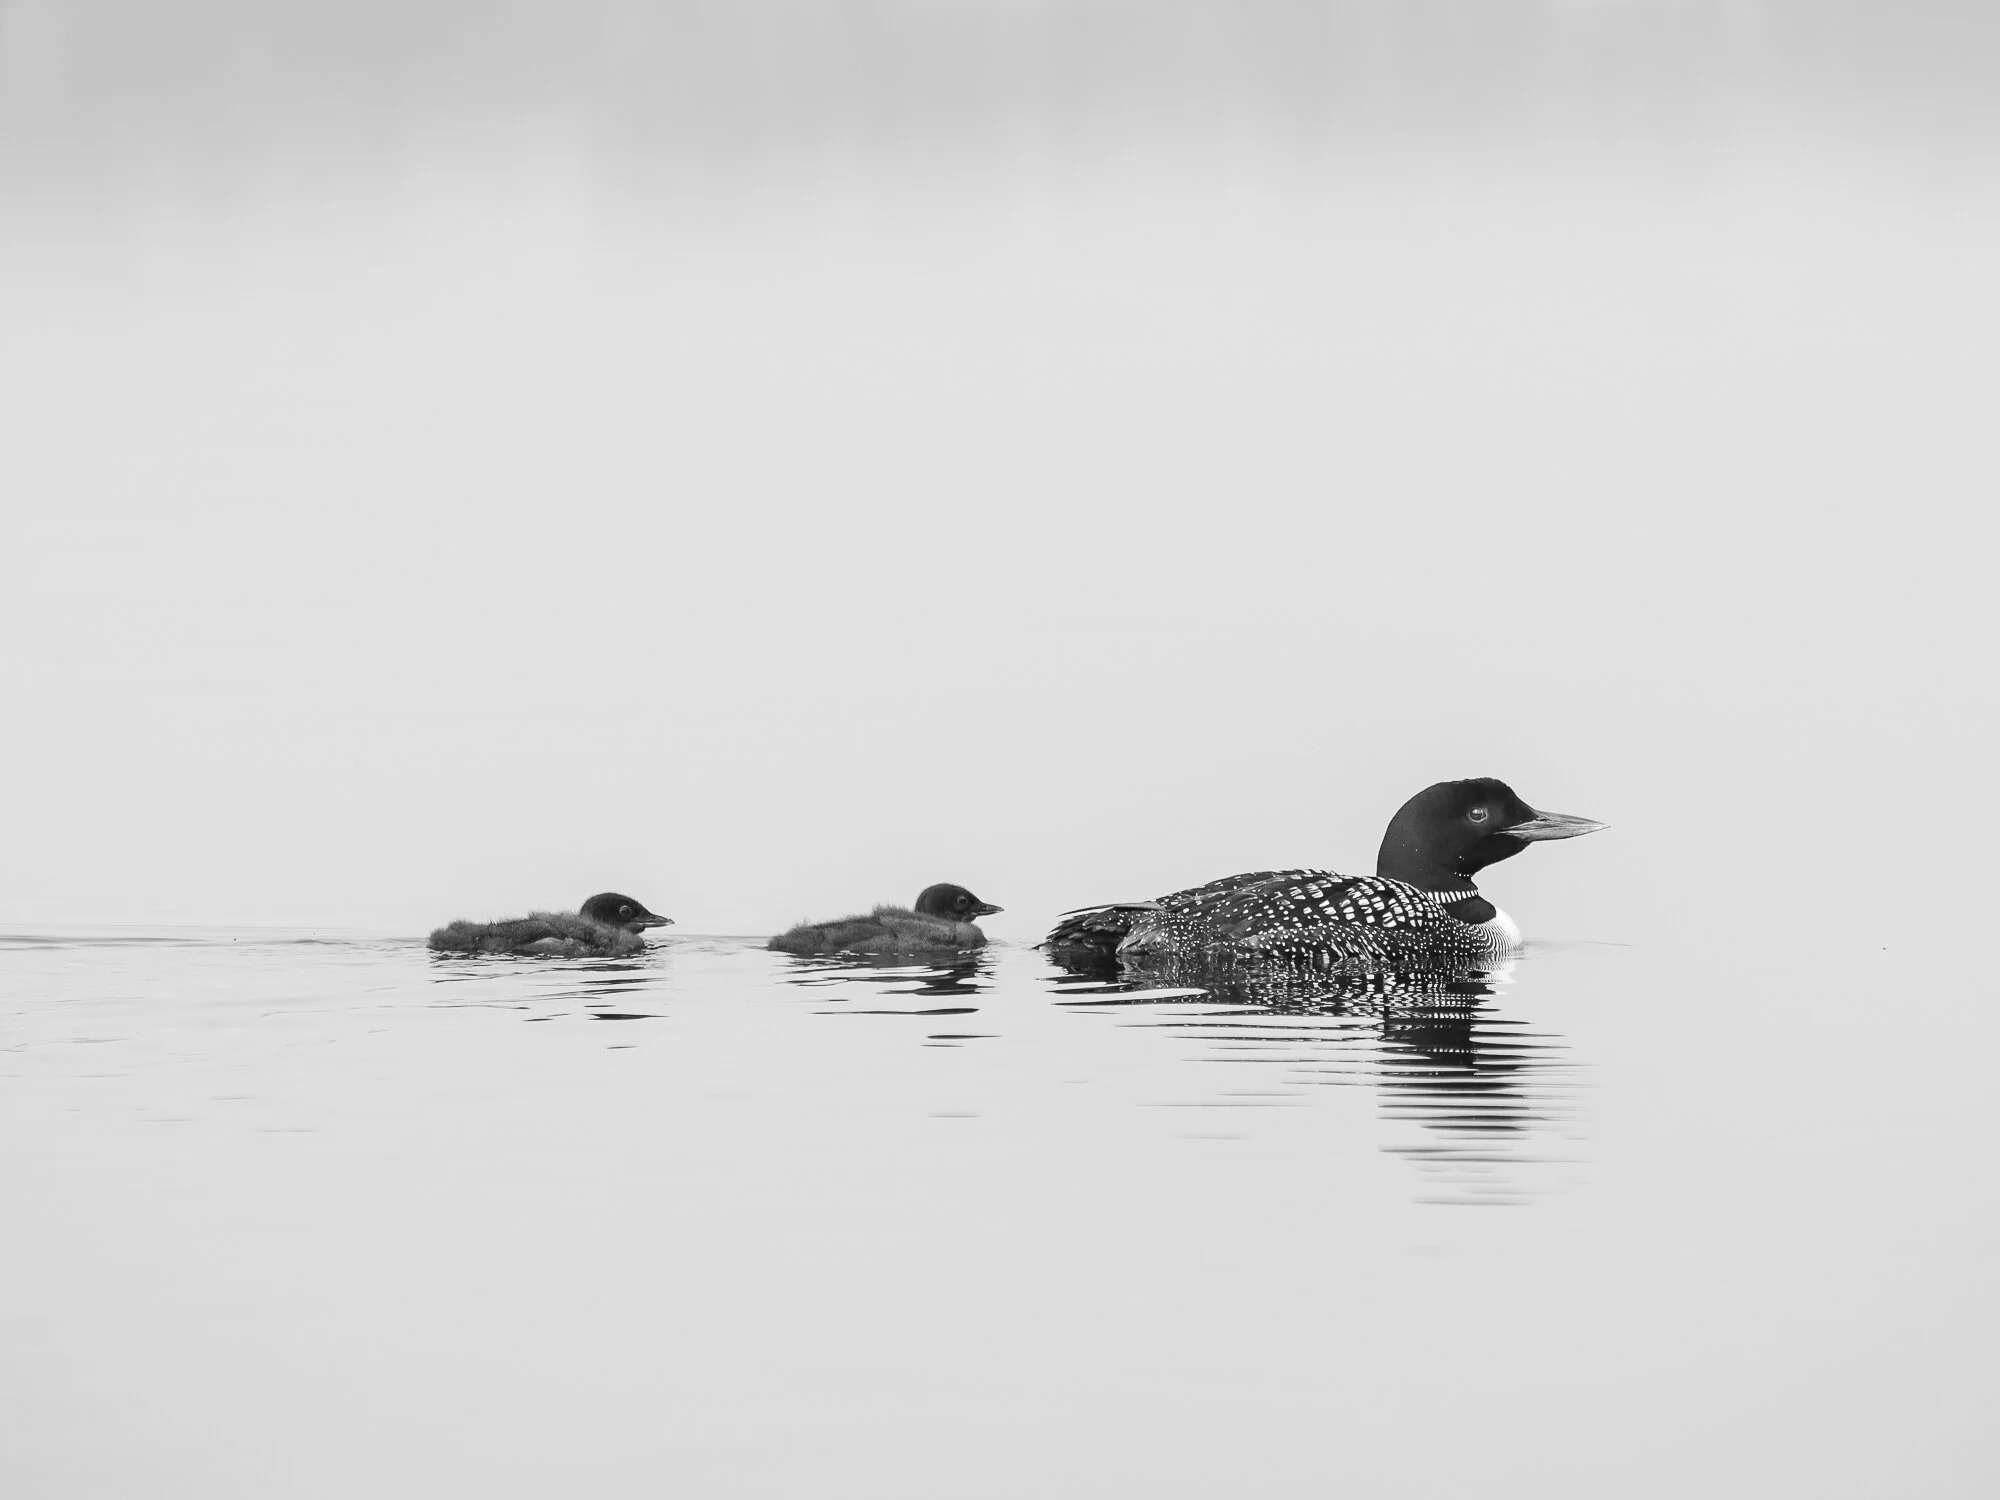
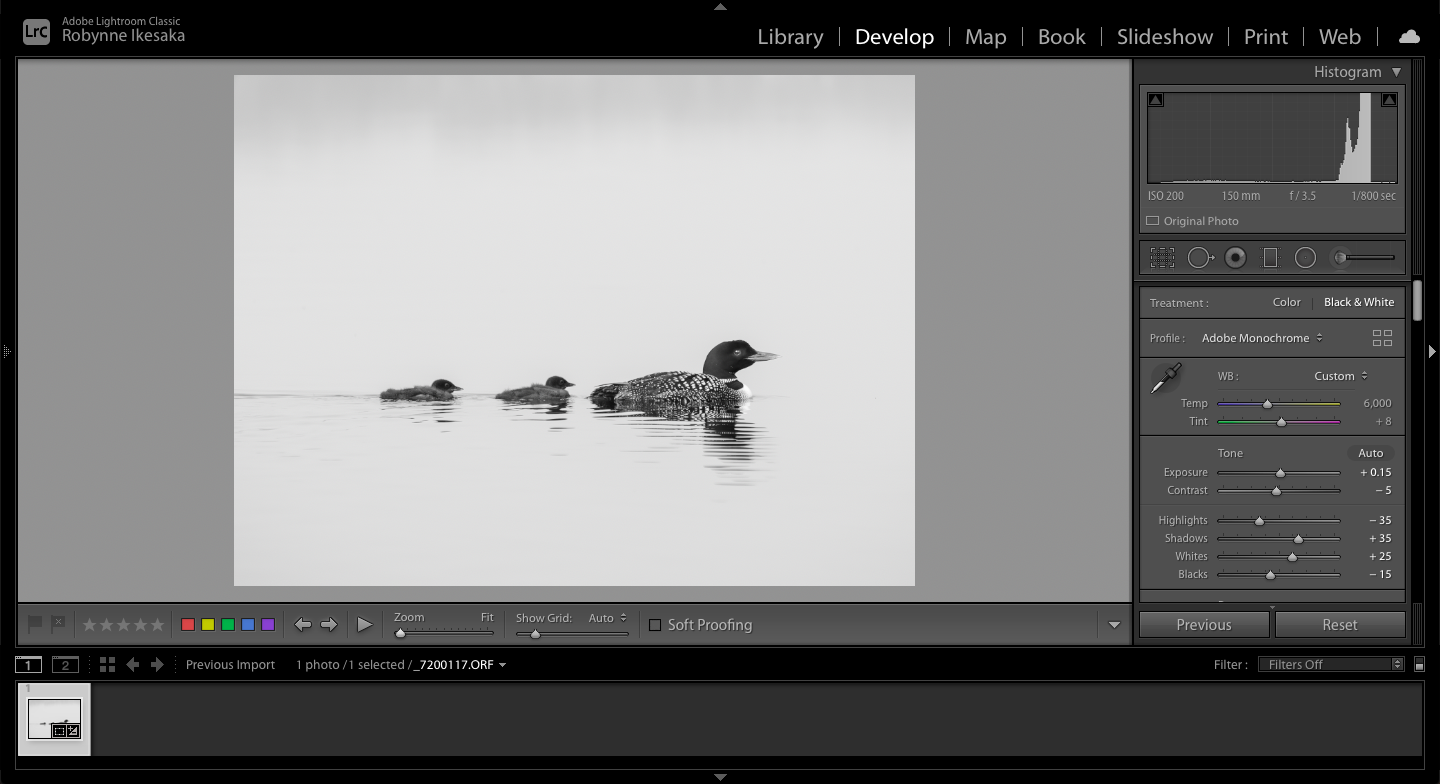
For reference below are some photos that I took on the tour, keep in mind they are post-processed.

victoria-287.jpg
victoria-278.jpg
victoria-284.jpg

POSITIONING

Where to Stand on the Boat

I found the tricky part while photographing the whales was where to stand on the boat. After experimenting and moving around a while I finally found a spot that worked for me - the stairs/top of the stairs.

I’m a short person so standing on the front deck doesn’t work the greatest for me, even when I got a spot at the railing I still struggled because other people were leaning over trying to take a photo themselves. The shoulders of the front deck could work but if the whales go to the other side then you’re stuck.

The top of the stairs/on the stairs is perfect because you’re not in the way of other people (mostly), you have a clear vantage point of the whales at the front and both sides of the boat, and you have places for extra stabilization.

Stabilization

Stabilization is important because while you’re on the boat I don’t recommend using a tripod because it could get in the way or someone could trip over a leg but if you’re going handheld then you might need to find some extra stabilization on the boat. I found the best for me was bracing my back against a part of the boat, or bracing my legs on a seat or part of the boat (railing). This just adds a little extra stabilization than what you would experience with your two feet planted on a moving boat.

OTHER TIPS

When to Go Whale Watching

Before we booked our whale watching tour I googled when a good time to go whale watching was on Vancouver Island and the response I got was between May and October so since we were going in August I thought it was a fairly good chance of seeing some whales.

I also thought about the time that we were going. Most cases when I’m photographing wildlife I like to go out early but the tour operator only offered an afternoon or sunset tour. We opted to go for the afternoon tour for two reasons:

  1. If we didn’t see any whales on our trip than we had a second opportunity to go the same day by going on the sunset tour

  2. I was worried about the evening light and that it would get dark really fast so I opted for afternoon light instead (it ended up being perfect, because of the overcast, cloudy weather the lightening was really even and softer)

Learning About the Whales

Before the trip I took some time to learn about the whales. I watched a number of nature documentaries on Netflix and Disney+. I also read several articles about whales and photographing them.

The best thing we did that I wish we had done before our tour was visit the Victoria BC Museum that had a special Orca Exhibit. The Exhibit was so interesting and informative we learned so much about the Orca Pod in the area, facts about the Orca’s, impacts, etc.,

Finding the Right Company

I wanted to find the right company to go whale watching with, one that cared about the whales and promoted responsible whale watching. After some digging I found Prince of Whales that I really loved. Prince of Whales Catamaran Tour has 2-3 naturalists on board that give you facts about the whales that you are seeing, they adhere and go above and beyond whale watching guidelines, and they have a custom-built Catamaran specifically for whale watching that reduces their impact on the ocean (jet propulsion engine so sea life doesn’t get caught in it, catamaran style so less of the boat is in the water, etc.,)


I really enjoyed our whale watching tour. I hope I get other opportunities to photograph them. Being on the boat, listening to the naturalists talk about them, seeing them with my own two eyes, you feel close to them and I think that feeling trickles into other aspects of your life that we’ll get into in another episode.

Beautifully Wander | Robynne MacLeod

Limiting My Time on Social Media | Helpful Tips, Why, Realizations, Alternative Sources for Inspiration

For the month of August I’ve been limiting my time on social media and in todays episode I wanted to chat with you about my experience - why I decided to take a social media break, things that helped me reduce my time, realizations I came to, and how I’ve been finding alternative sources for inspiration.

Taking a Social Media Break

At the beginning of August I decided to take a little break from social media. It’s not a complete social media sabbatical because I still check my Instagram and Facebook here and there, I still watch some YouTube videos and post YouTube videos but I have DRASTICALLY reduced my overall time on the platforms.

Tips that Helped Me Reduce my Time on Social Media

Moving some apps on my phone: My Instagram app was the biggest app that I found myself aimlessly scrolling on during the day so I decided to completely move the app off my main screen and into a folder on the next page so it was harder to access.

Deleting the apps: Before I got my new phone I used to spend HOURS in the evening aimless scrolling on Tik Tok. When I got my new phone I didn’t re-download the app and I haven’t been on Tik Tok since! Just deleting the apps off your phone helps too.

Carve out specific time to be on the platforms: I’m rarely on Facebook but I still love watching YouTube videos so to reduce my time and prevent myself from scrolling during the day is to create some time in the evening to be on the platform.

Discovering when and why I start scrolling: I brainstormed when and why I start scrolling on social media and I discovered it’s when I am between tasks, when I am losing focus on a task or I’m trying to find “inspiration” for my photography, newsletter, YouTube channel, etc.,

Why I Took a Social Media Break

I’ve wanted to take a break from social media for a while but I wasn’t sure when a good time to do it was. In July I read David Duchemin’s book about taking a social media sabbatical and I thought maybe August was a good month to do it.

I also took a social media break because I started to see how much social media was affecting/influencing my photography and my personal life - what I should be doing, what I should be photographing, how I should be editing, what my life should look like. So I wanted to create space and time to discover my photography and life in greater depth without outside influences.

Lastly, I often turn to social media to find “inspiration” and I wanted to challenge myself to find alternative sources for inspiration.

My Biggest Realization

Since taking a break from social media I have discovered how much I scroll on social media. I used to think it wasn’t that bad, I wasn’t on very often. However, I was finding myself on the platform more often than I thought (even if it was very short stints of time). I discovered this because I noticed I was getting these ‘social media scrolling impulses’.

I’ve also started to notice that my internal compass is starting to be driven more by me rather than outside influences (what I think I should be doing because of what other people are doing).

Finding Alternative Sources for Inspiration

Because I haven’t been on social media as much I have to find alternative sources for inspiration. I have found these to be great alternative sources for inspiration (personally):

Magazines, books and podcasts: I have found a lot of inspiration flipping through physical magazines, reading old books that I have and listening to a wide array of podcasts.

Getting out in nature: I have really loved getting out in nature, especially in the mornings. My favourite lately has been camping. Every week I was trying to make my way for at least a day or two to the Thompson Okanagan for some camping because it’s so lush, green and calming there!

My morning routine and internal reflection time (journaling): At the start of August I started up my morning routine again, for at least 30-minutes to an hour I like to sit down, drink my tea or coffee and either brain dump whatever is on my mind or journal. I find this gives me my greatest inspiration!

Final Thoughts

I was originally going to do this social media break for a month (August only) but I’m considering remaining with this social media break until I’m ready (my internal compass is being driven fully by me).

Let me know over on the channel if you’ve ever taken a social media break and what benefits you found!


Happy Photographing!

Beautifully Wander | Robynne Ikesaka

Experimenting with Photo Editing | Summer Foliage Dark and Poppy + Playing with Black and White

I’ve been back and forth between Kelowna and the Thompson Okanagan a lot in the past few weeks. Every time I’ve been coming back I have a photo where I edit it naturally (as I do) and it doesn’t sit well with me. Then, the other day I was listening to a video by Alister Benn that talked about how during post-processing it is our opportunity to convey what we were feeling or a feeling through our edits. Thus, in todays episode I wanted to take you through a set of photos that I recently took on my last trip to the Thompson Okanagan where I edited them differently than I typically would. We also do an editing experiment together in an attempt to turn a photo that I took on my first trip to the Thompson Okanagan into something that sits better with me.

Summer Foliage - Dark and Poppy

My typical post-processing workflow includes keeping everything fairly natural to the eye, but I really wanted to make my summer foliage dark and poppy because I wanted to emphasize in many cases the light hitting the foliage and the lush, green-ness of the Thompson Okanagan.

The three in particular I wanted to chat about were these three:

intimate-landscape-photography-12.jpg
intimate-landscape-photography-17.jpg
intimate-landscape-photography-22.jpg

In all these photos I intentionally darkened my shadows and blacks to make the background really “dark”, in order to make my summer foliage “pop”.

Screen Shot 2021-08-16 at 6.13.09 PM.png
Screen Shot 2021-08-16 at 6.13.21 PM.png
Screen Shot 2021-08-16 at 6.13.36 PM.png

In some cases I used the Graduated Filter to create further emphasis.

Screen Shot 2021-08-16 at 6.13.59 PM.png
Screen Shot 2021-08-16 at 6.16.56 PM.png

Editing Experiment - Loon Photo

The photo we’re going to experiment with is this Loon photo that I took on my first trip to the Thompson Okanagan. I was on the boat with my dad when this Loon family swam by us.

When I edited this photo “naturally” like I usually do it didn’t sit well with me. It wasn’t until a week later that a thought dawned on me that maybe black and white would fit the image better.

Below on the left is a “unedited/raw” photo, the photo in the centre is a “natural edit” and the one on the right is a “black and white” edit.

_7200117.jpg
loone-2.jpg
loone-1.jpg
Screen Shot 2021-08-16 at 6.19.11 PM.png

I’ve become pretty mechanical with my editing workflow, always striving for natural edits to deliver consistency. However, expressing the moment, the feeling I was having when I took the photo and the feeling I want to convey changes.

It’s fun to experiment and I hope this inspires you to experiment with your editing!


Happy Photographing!

Beautifully Wander | Robynne Ikesaka

What's in my New Camera Bag ft. Peak Design Everyday Sling 6L

A few videos ago I mentioned that I was in need of a new/additional camera bag that was smaller than my camera backpack but more versatile than my Ona for outdoorsy activities that I do - hiking, going out on a boat, outdoor excursions. After some researching I decided to pick up the Peak Design Everyday Sling and today episode I wanted to do an updated what’s in my camera bag and chat about my first impressions of this bag!


Happy Photographing!

Beautifully Wander | Robynne Ikesaka

Intimate Landscape Photography | Olympus 25mm and Photographing Nature’s Small Scenes

I’m back in the Thompson Okanagan and I’m very happy to be camping for a couple nights. Unlike last time the smoke has cleared out a little and it’s a beautiful day to go for a photo walk and do some intimate landscape/small scenes photography!

Intimate Landscape / Small Scenes Photography

Since the first time I came out to the Thompson Okanagan for camping in July I have been drawn, inspired by nature. Thus, in todays photo walk I was focusing more on intimate landscape/small scenes photography.

I have a different post dedicated to what Intimate Landscape Photography is which you can read here.

In short, I focus on photographing elements or characteristics of the environment. If I was at a beach it might be how the water rolls up on the sand, logs that surround the area, wildlife of that area, the patterns of the trees, etc.,

In this particular area I had noticed there were tons of different vegetation, berries, fruit, and wildflowers.

I find it interesting because back in June I visited Osoyoos (South Okanagan) and it was very dry, hot and desert-like. I live in Kelowna (Central Okanagan) which is in the middle of forested but still dry and the North Okanagan is very lush and green. It’s always something that I notice when I drive this way.

Green is definitely a characteristic of this place!

intimate-landscape-photography-10.jpg
intimate-landscape-photography-9.jpg
intimate-landscape-photography-3.jpg
intimate-landscape-photography-14.jpg

Olympus 25mm F1.8

Evening strolls like this are good for my physical and mental health and sometimes I like to bring my camera with me. When I do my lens of choice has been the 25mm, combined with my Mark II it’s small and compact. I can swing it over my shoulder and pretty much forget it’s there.

Typically, if I’m at home and I’m going for an evening stroll I will just carry my 25mm but because I was camping I had also brought with me my 12-40mm and my 40-150mm. However, all these photos were taken on the 25mm.

intimate-landscape-photography-17.jpg
intimate-landscape-photography-5.jpg
intimate-landscape-photography-7.jpg
intimate-landscape-photography-8.jpg
intimate-landscape-photography-12.jpg

Photography Improvement

A tip I picked up from Sarah Marino when composing your photos is seeking balance (breaking the photo down into quarters and making sure it’s balanced). It’s a mental exercise that I’ve been trying to do to improve my photography.

intimate-landscape-photography-20.jpg
intimate-landscape-photography-16.jpg
intimate-landscape-photography-22.jpg

I hope this episode inspires you to get outside in nature and do some intimate landscape / small scenes photography!

Happy Photographing!

Beautifully Wander | Robynne Ikesaka

Flower Photography | Create with Me, Olympus 12-40mm, My Fear Revealed, Soft & Dreamy Flower Photos

I love a beautiful flower, however, most times I don’t intentionally venture out specifically to do flower photography. The only time was when I was Chasing Arrowleaves in the Okanagan. Recently I was inspired to do some intentional flower photography and in todays Create with Me I bring you along with me in my adventure of creating soft, dreamy, calming flower photos!

Lens for Flower Photography

Many photographers use macro lenses for flower photography, however, I do not have a macro lens so I use what I have. Today I focused on using the M.Zuiko 12-40mm F2.8 PRO. I did bring along the M.Zuiko 40-150mm just in case I wanted to experiment with it.

For the most part I used the 12-40mm at its full focal length (40mm).

Next time I will try experimenting with the 40-150mm!

flower-photos-1.jpg
flower-photos-2.jpg
flower-photos-5.jpg

Experimenting with Effects

I saw in a video a nature photographer use a plastic bag and plastic wrap to create different effects in the photo. So I thought I would give that a try! I added the additional item of parchment paper.

Out of the three that I tried my favourite was the plastic wrap or the plastic bag. The plastic wrap gives it a very subtle effect to the photo, but if you want something a little more opaque but not too harsh then the plastic bag is a good choice.

Parchment paper

Parchment paper

Plastic bag

Plastic bag

Plastic wrap

Plastic wrap

Here are some more photos using the plastic wrap to create the effect:

flower-photos-14.jpg
flower-photos-15.jpg

Creating Soft, Dreamy, Calming Flower Photos

My aim was to create soft, dreamy, calming flower photos. To do that I focused on:

  • Singling out specific flowers

  • Shooting at F2.8 to create that bokeh

  • When able, shooting through other flowers

  • Focusing on either the pedal closest or the center of the flower

flower-photos-23.jpg

Listening to Music

Majority of the time I don’t listen to music when I’m doing nature photography. If I am photographing birds I want to hear the sound of the birds! However, I read an article in Photo News that discussed meditation for better photography. Loosely translated for me it gave to the idea that what you are feeling, what your current vibe is transfers to your photo.

Thus, today I thought I would try listening to some relaxing music while I was out. At first I kept on ear bud off to hear my surroundings but I quickly discovered that by keeping my headphones both on I drowned out the sound of the bees, wasps, grasshoppers that were freaking me out.

The music did help calm myself, focus on the flower, focus on the photo.

flower-photos-6.jpg

My Fear of Bugs

I have a fear of bugs. I didn’t even think about bugs when I thought of doing some intentional flower photography. However, within minutes of being at the park photographing the flowers I realized I was in trouble. Every flower arrangement had bees, spiders, beetles around them.

Thus, doing intentional, specific flower photography stretched me outside my comfort zone.

flower-photos-17.jpg
flower-photos-18.jpg
flower-photos-19.jpg

I hope you found this episode inspiring to do some flower photography and experiment!

Happy Photographing!

Beautifully Wander | Robynne Ikesaka