PHOTOGRAPHY

Making Shaped Bokeh | Holiday Edition with the Olympus EM1 Mark II

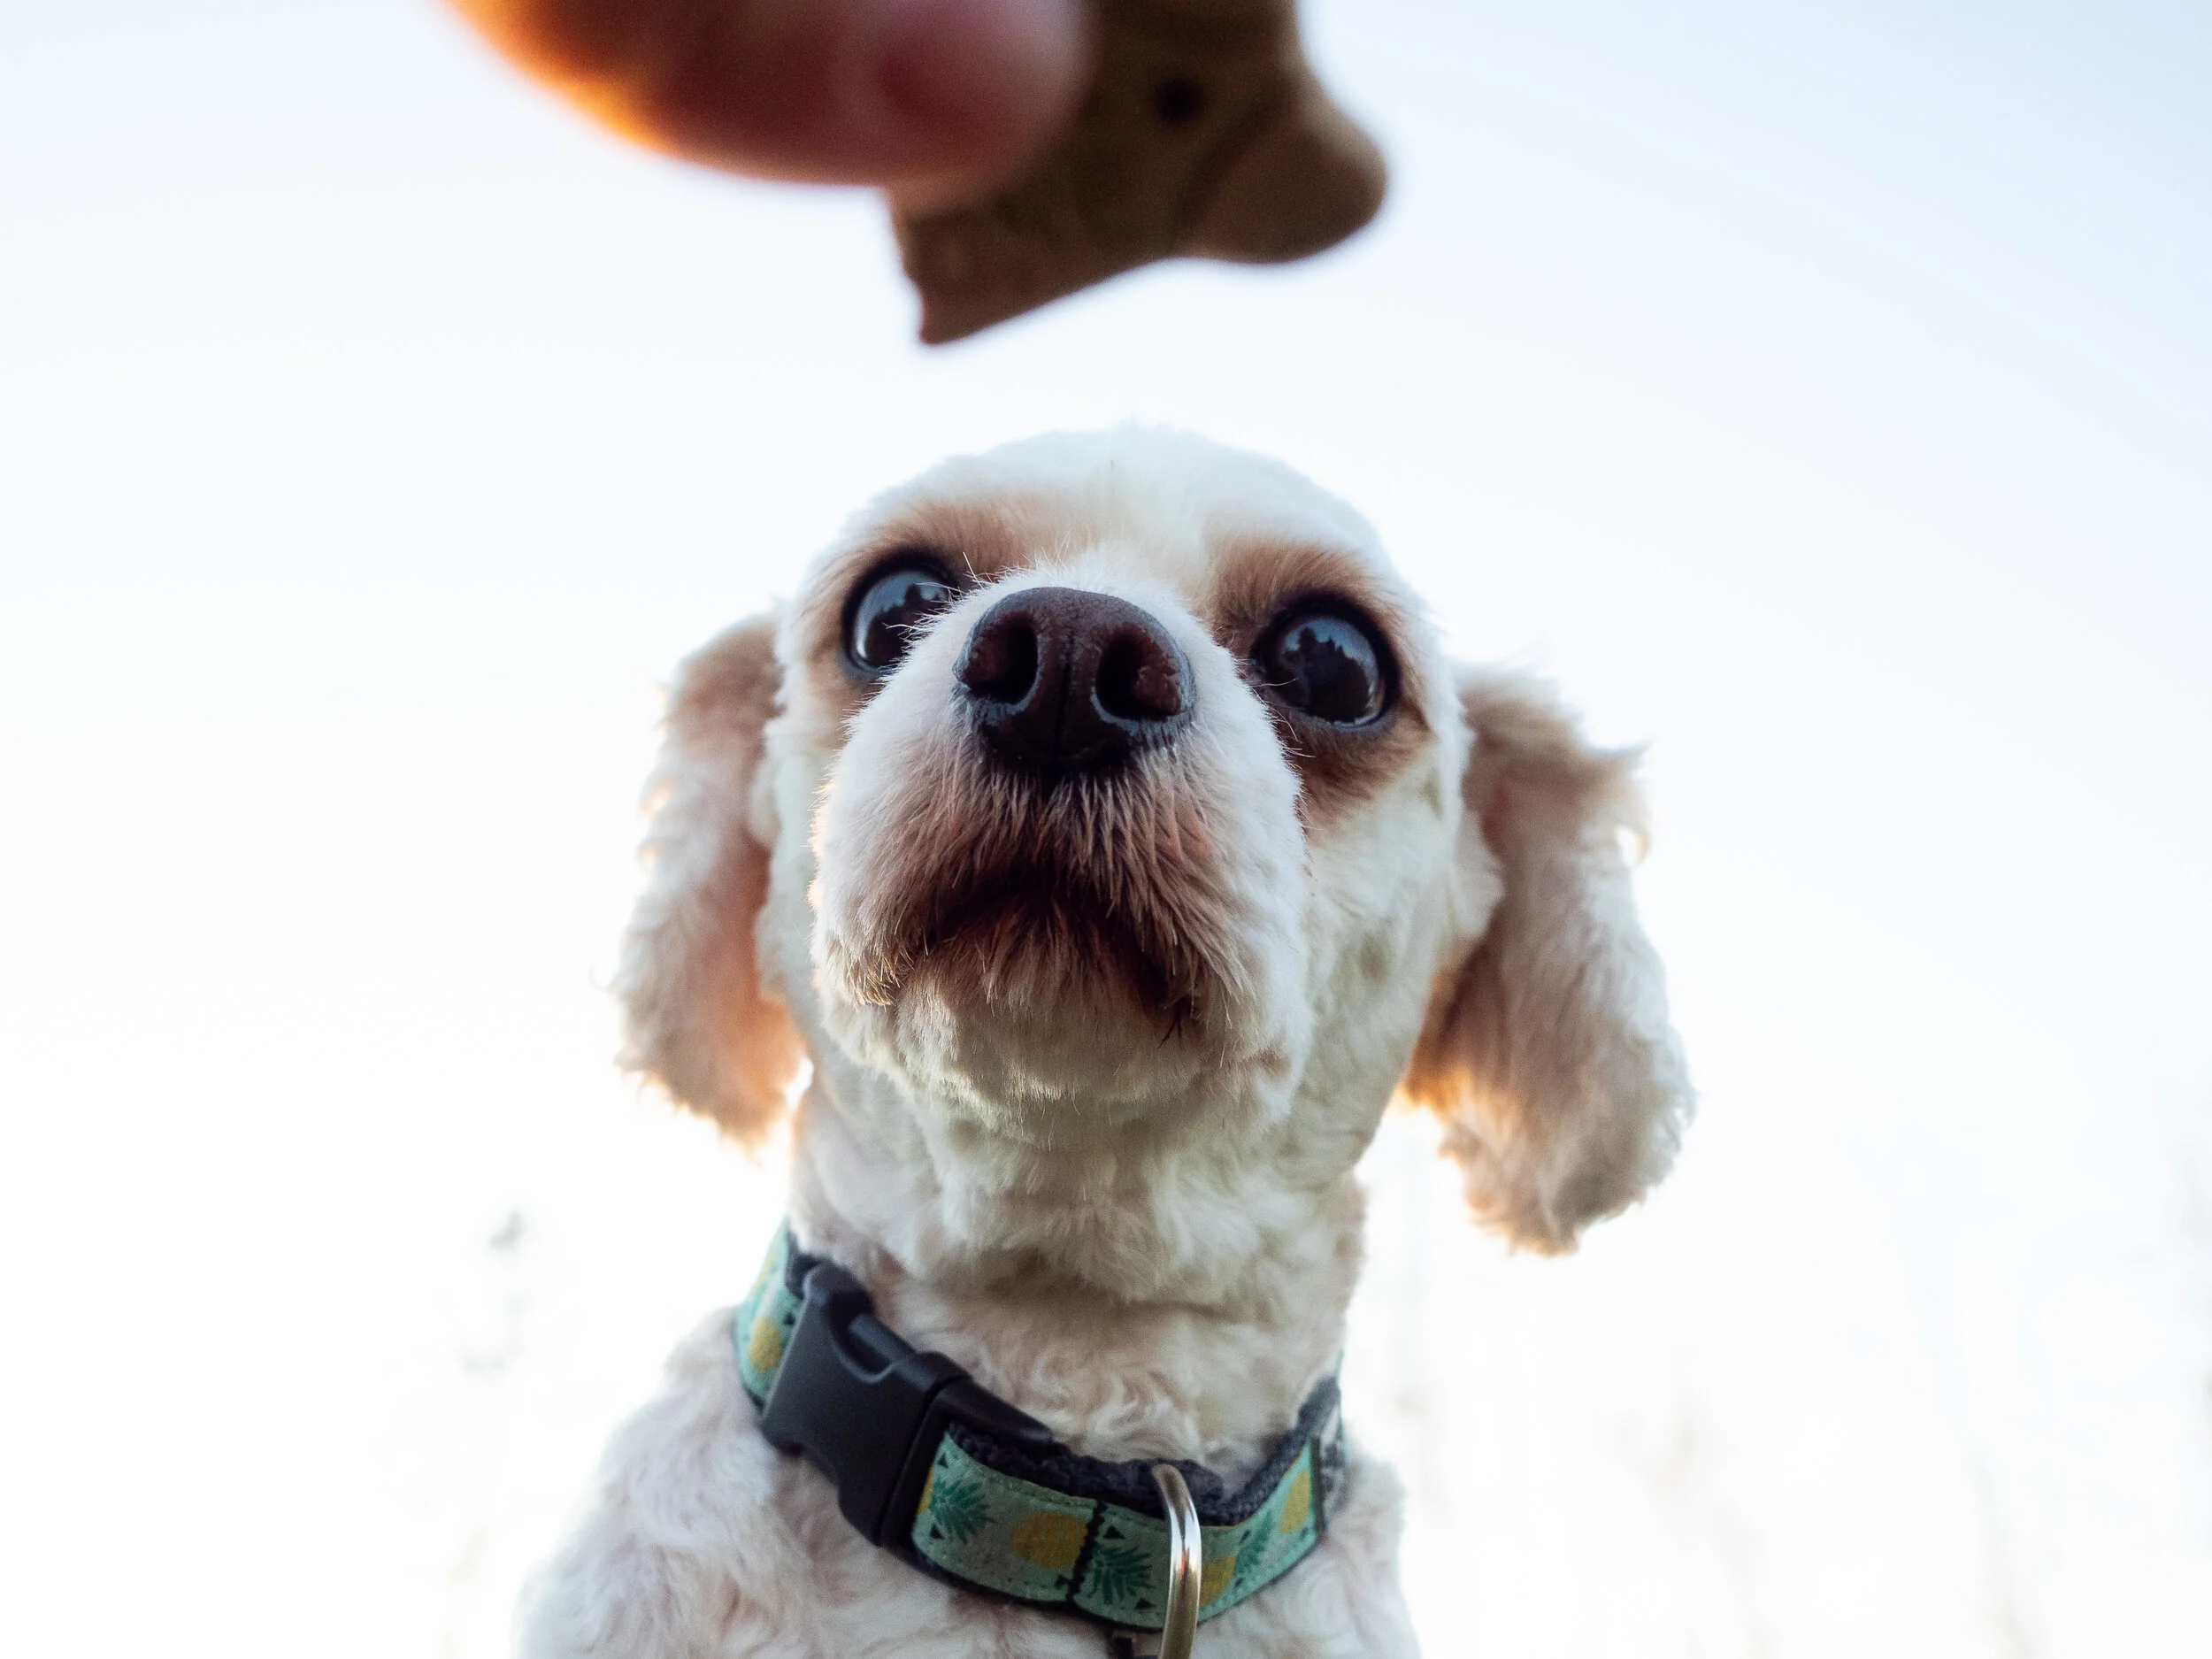
Have you ever seen photos with the beautiful bokeh in the background in shapes like hearts?

That’s what we make in todays episode, however, holiday edition!

How to Make

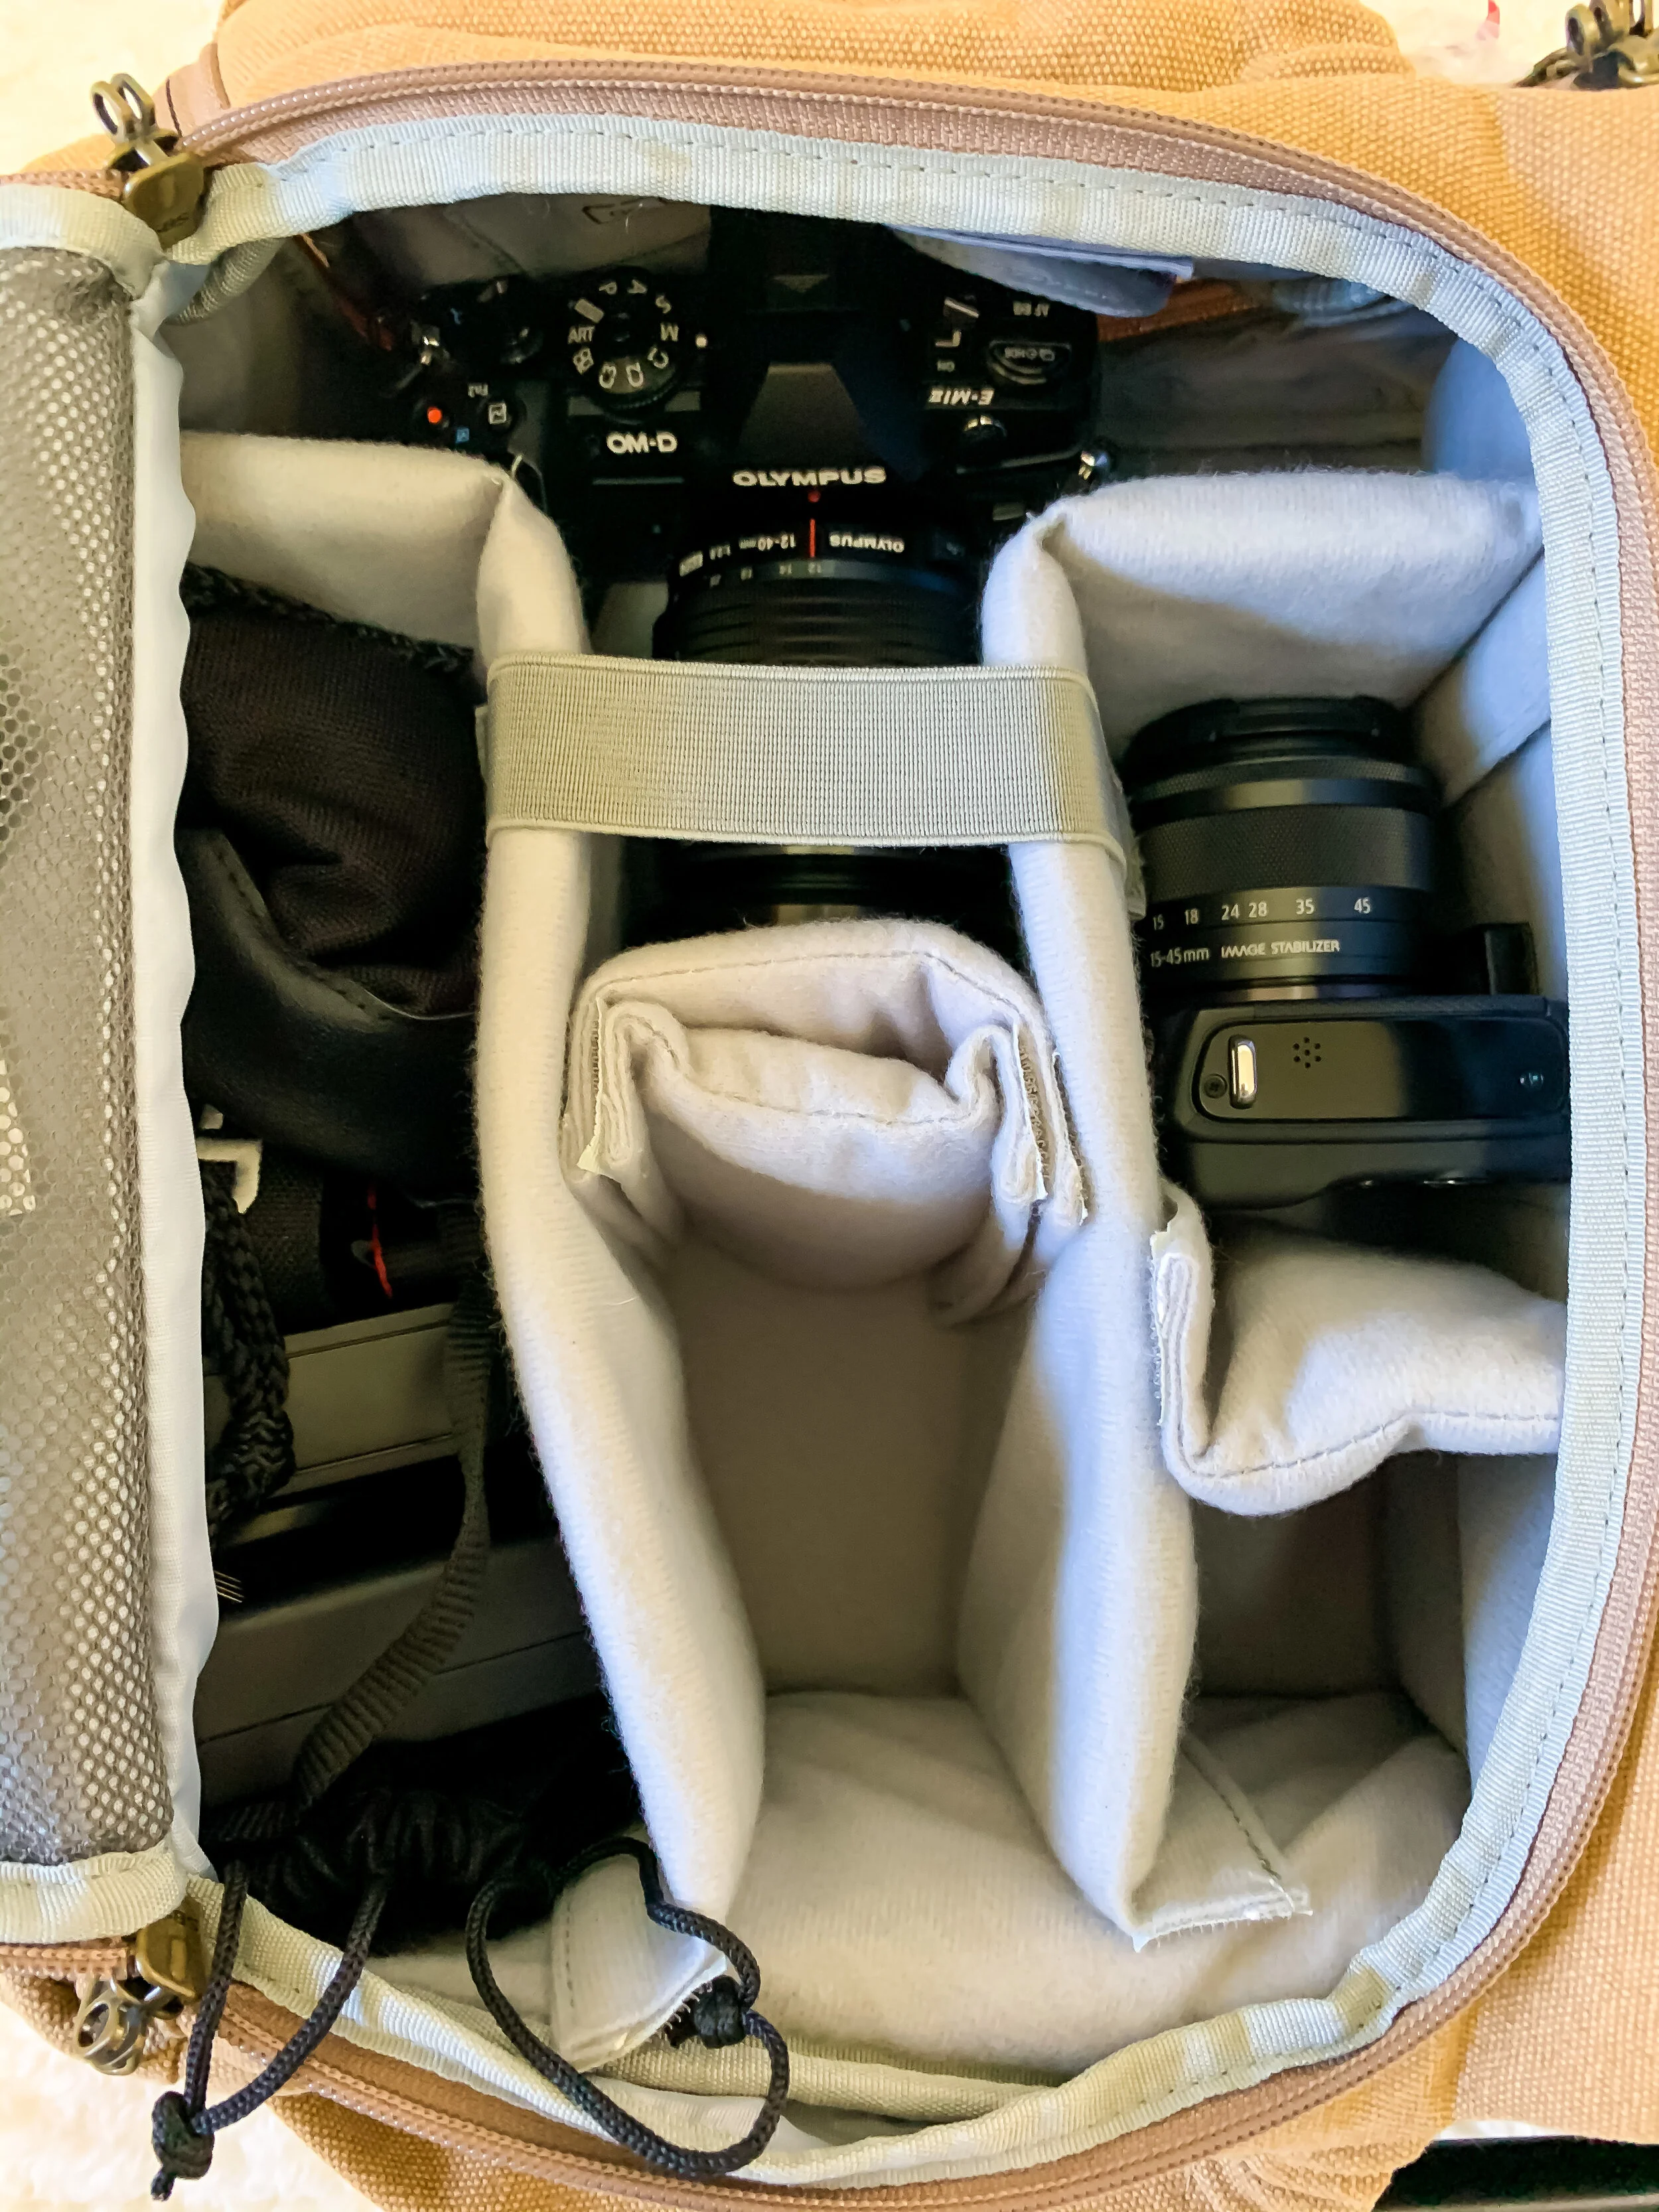
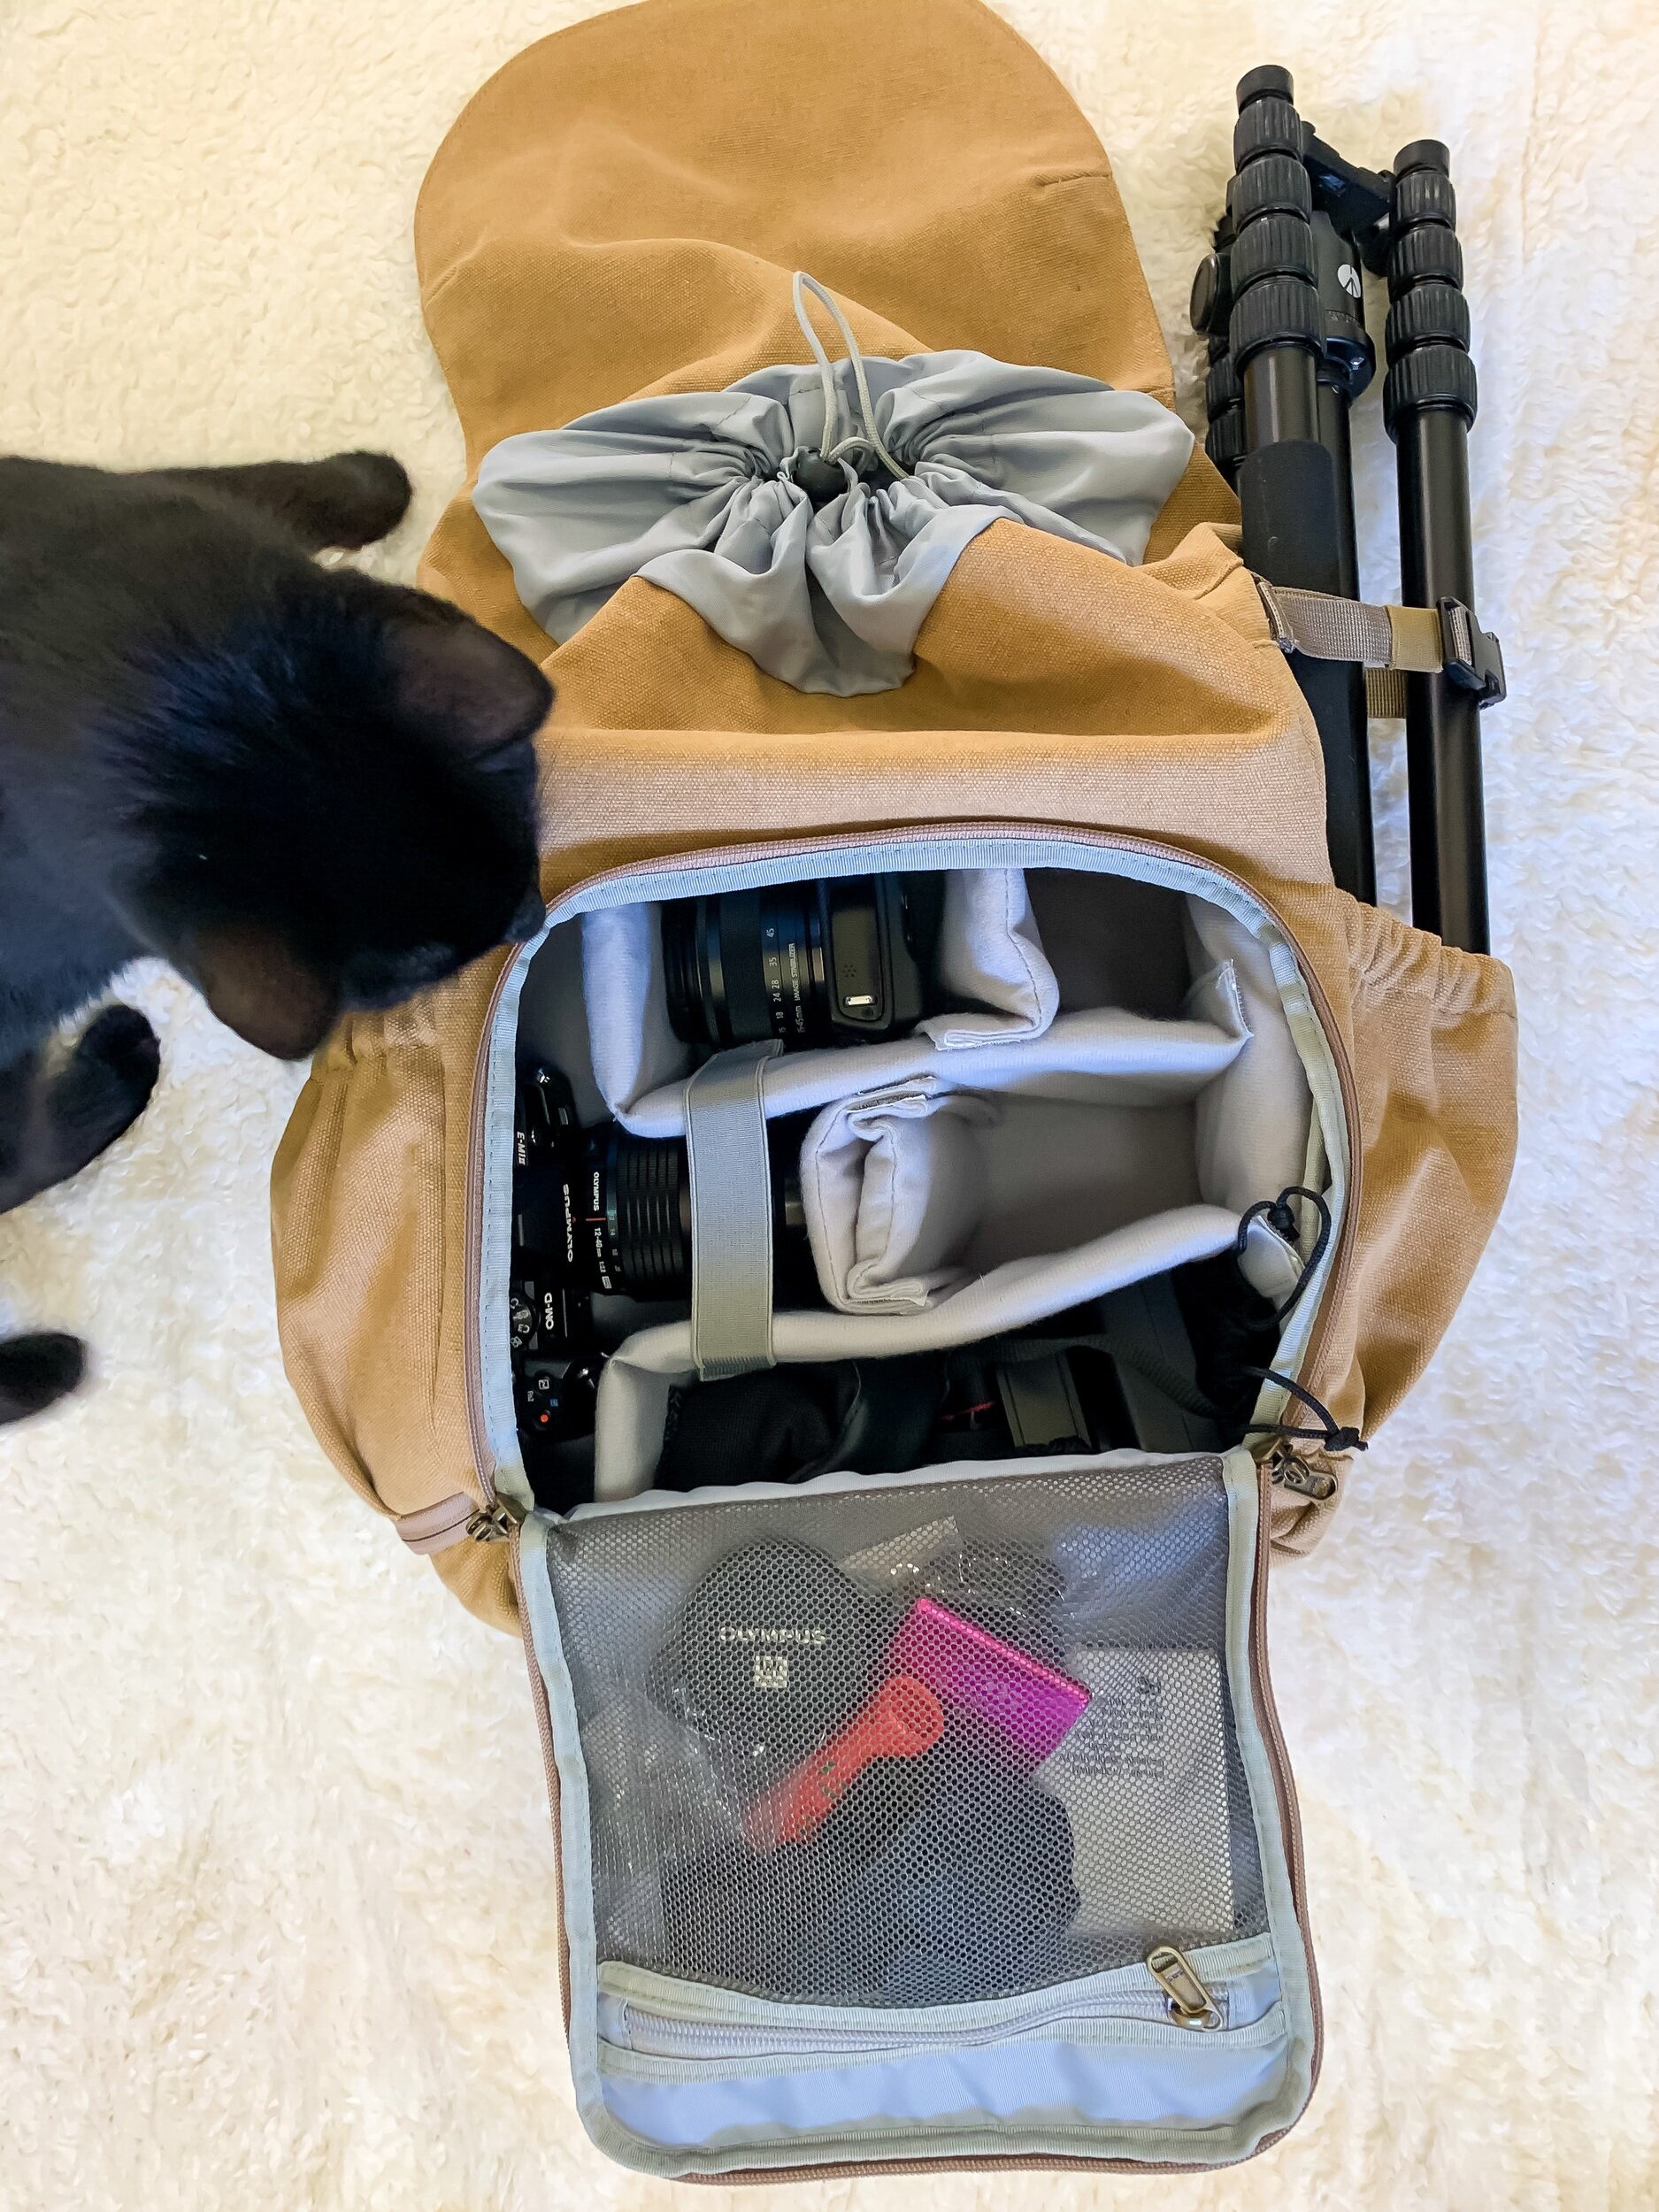
To make these DIY lens filters you need some paper or cardboard, and either a pair of scissors or exacto knife (depending on what you are cutting).

Step 1: Take your lens cap and trace a circle that you will eventually tape onto the outside of your lens

Step 2: Outline the shape that you’re going to cut

Step 3: Cut (if you’re using cardboard you might want to use an exacto knife instead)

I’ve seen other variations where people create sleeves to go on the outside of the lens then attach their shape cut-out, I’ve also seen people create legs that get taped to the outside of the lens. I went super simple and just taped the DIY filter to the outside of the lens.

Putting your Filter in Action

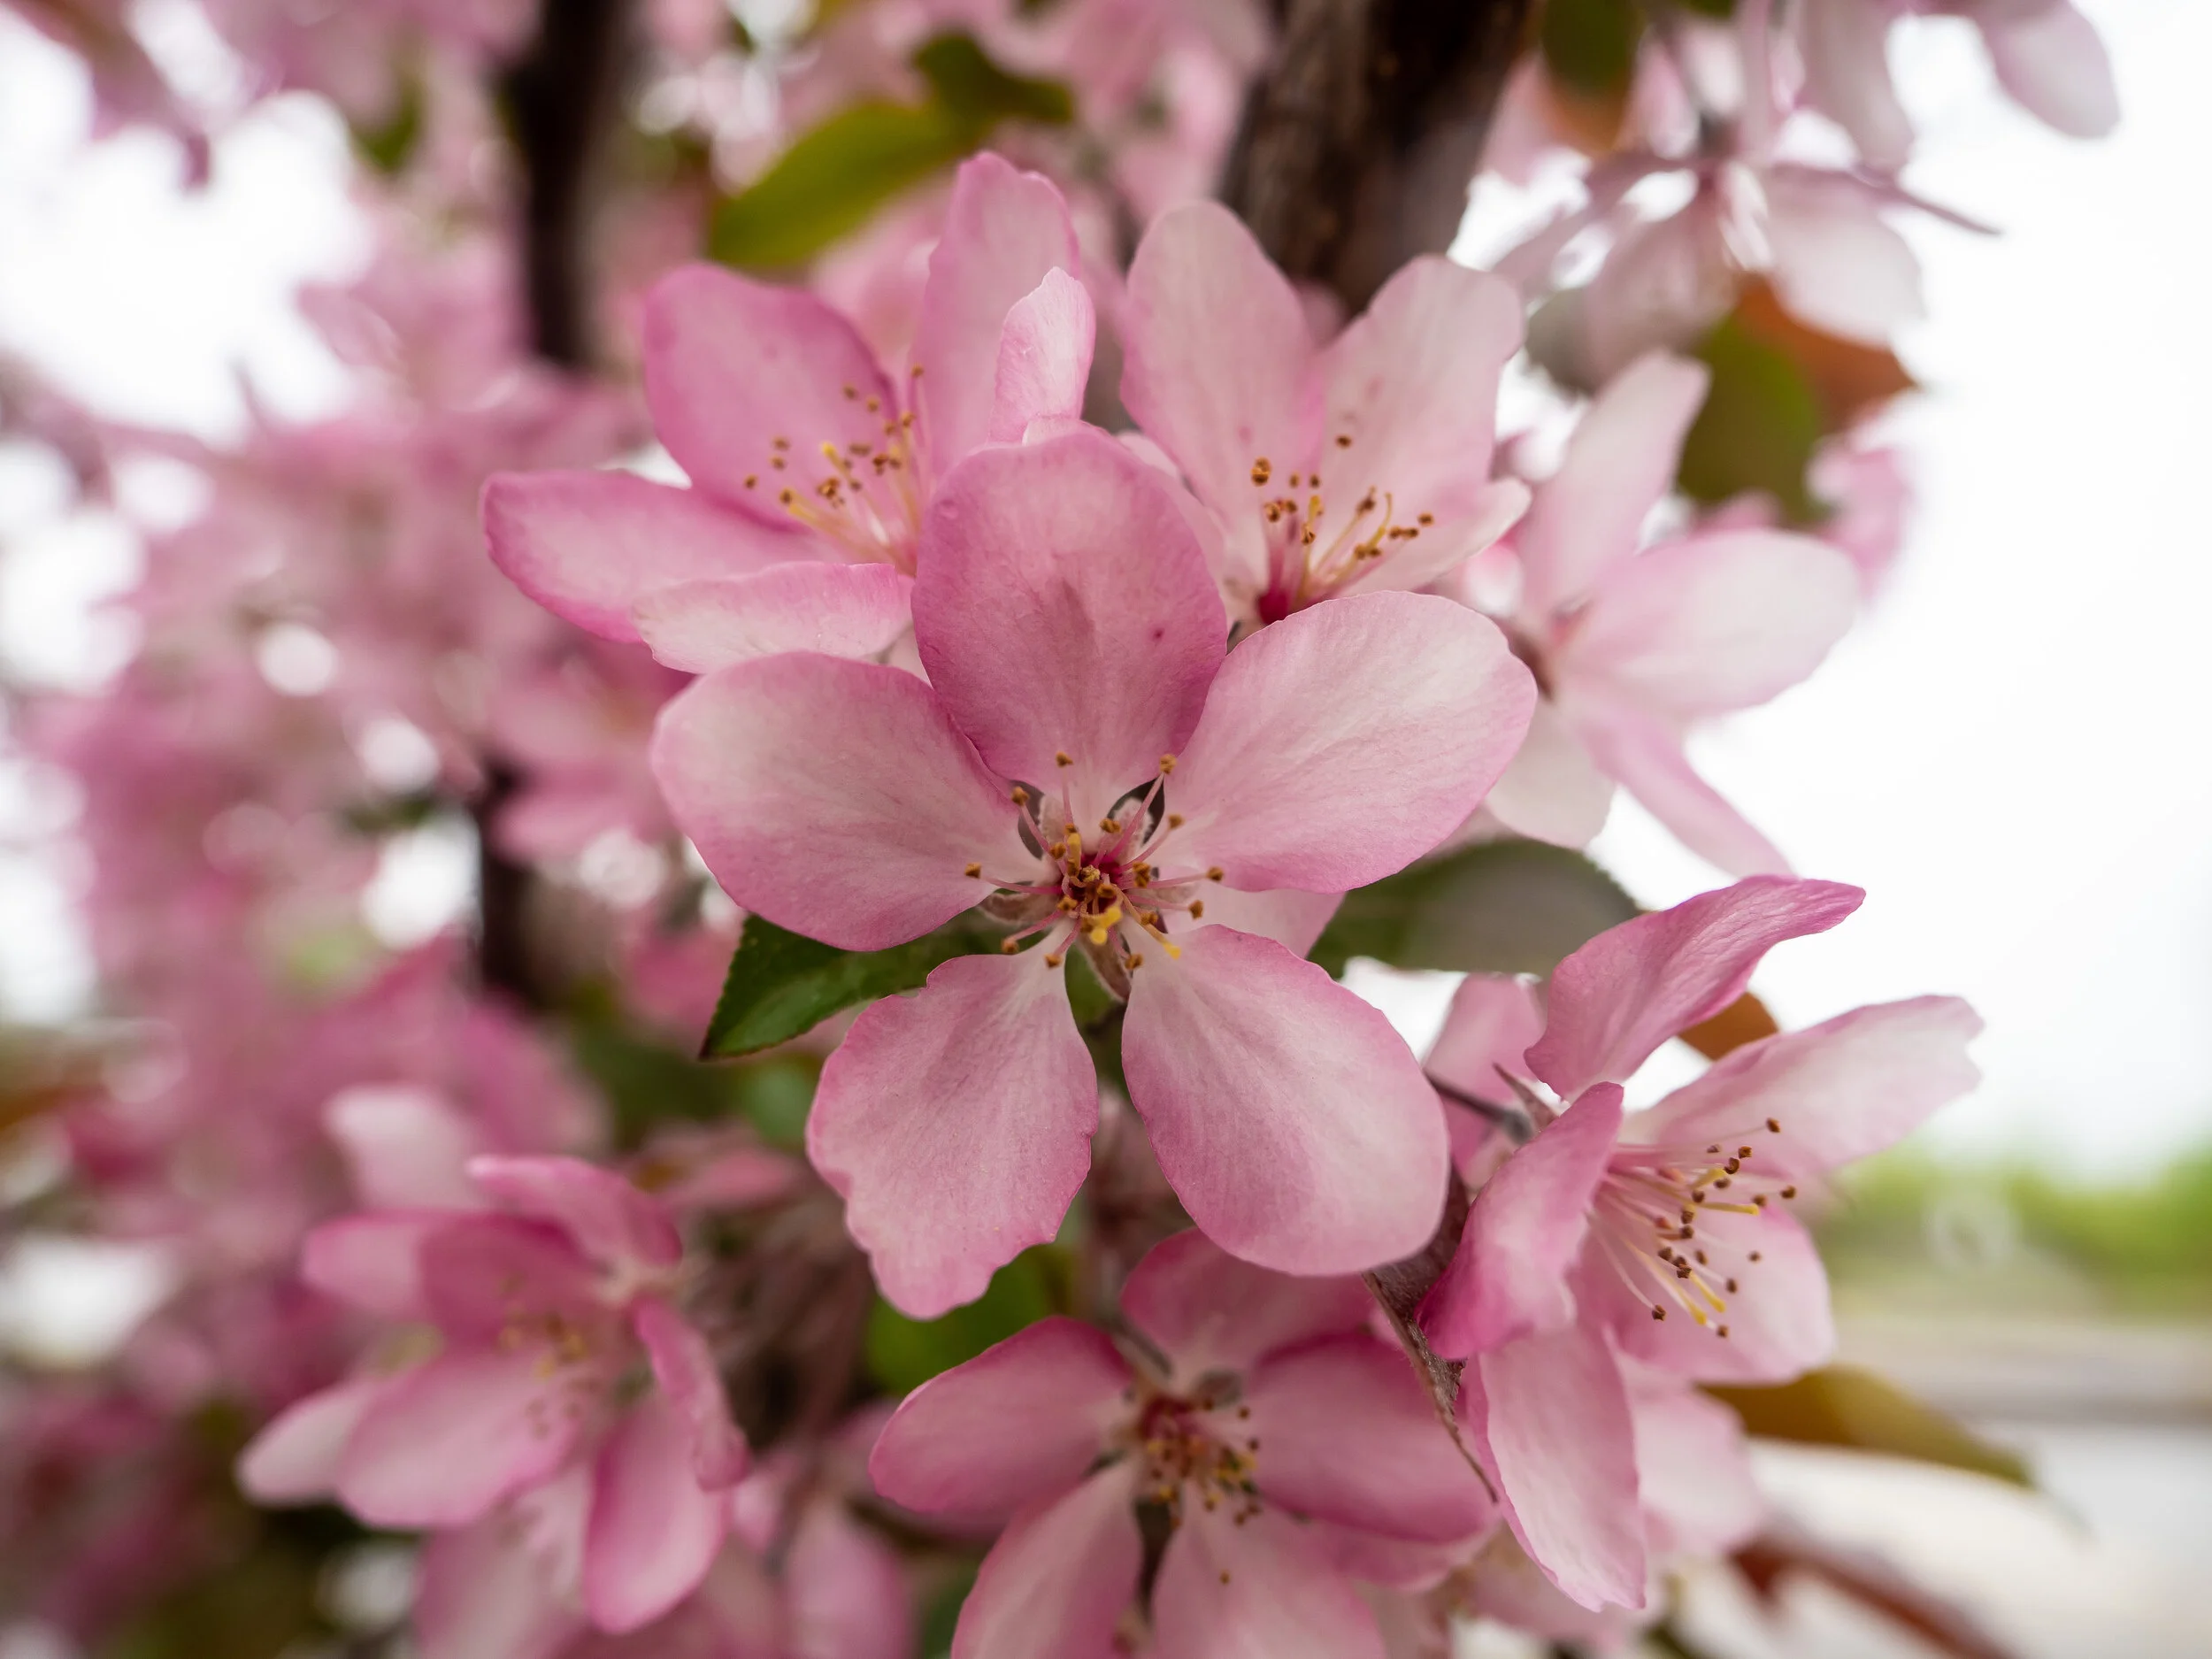
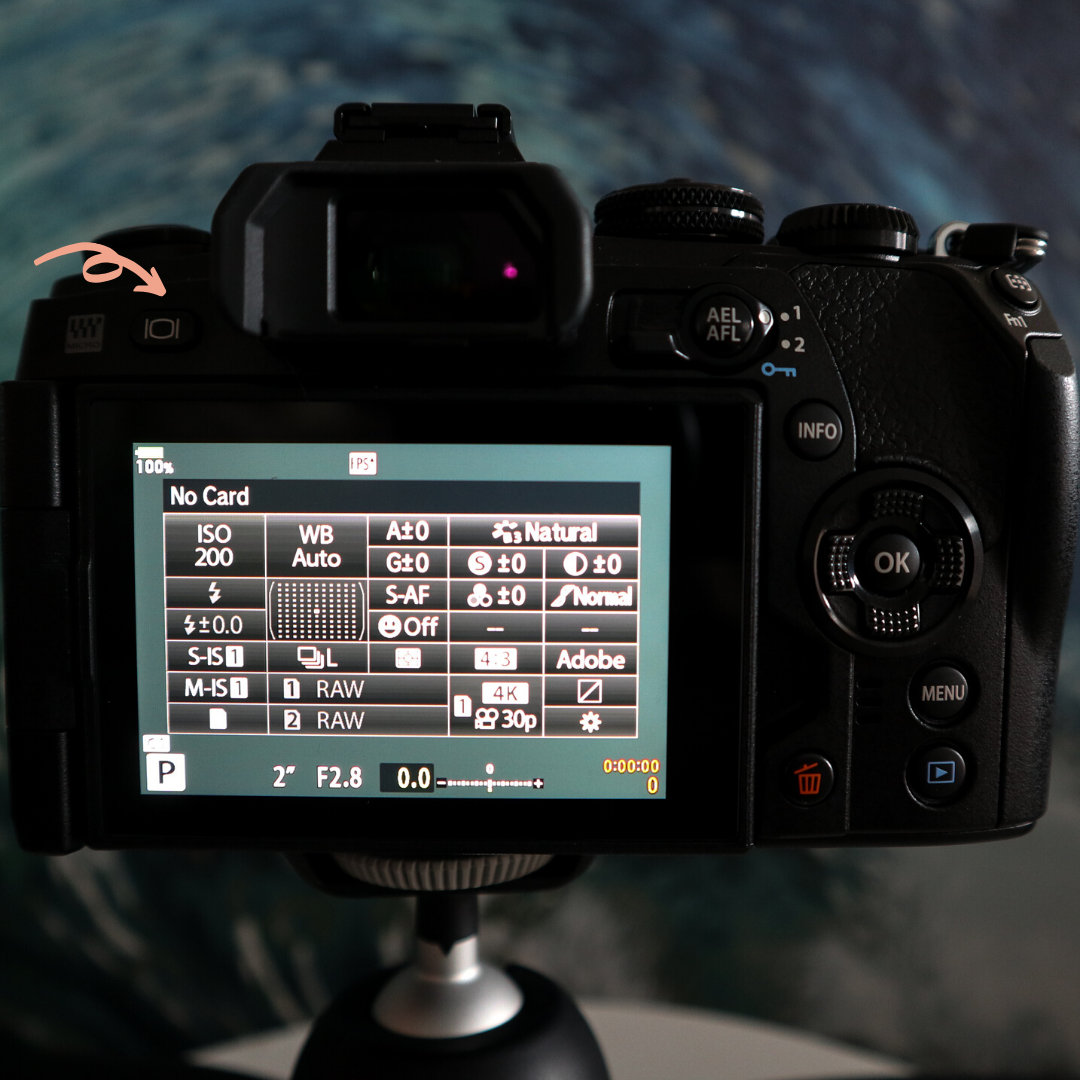
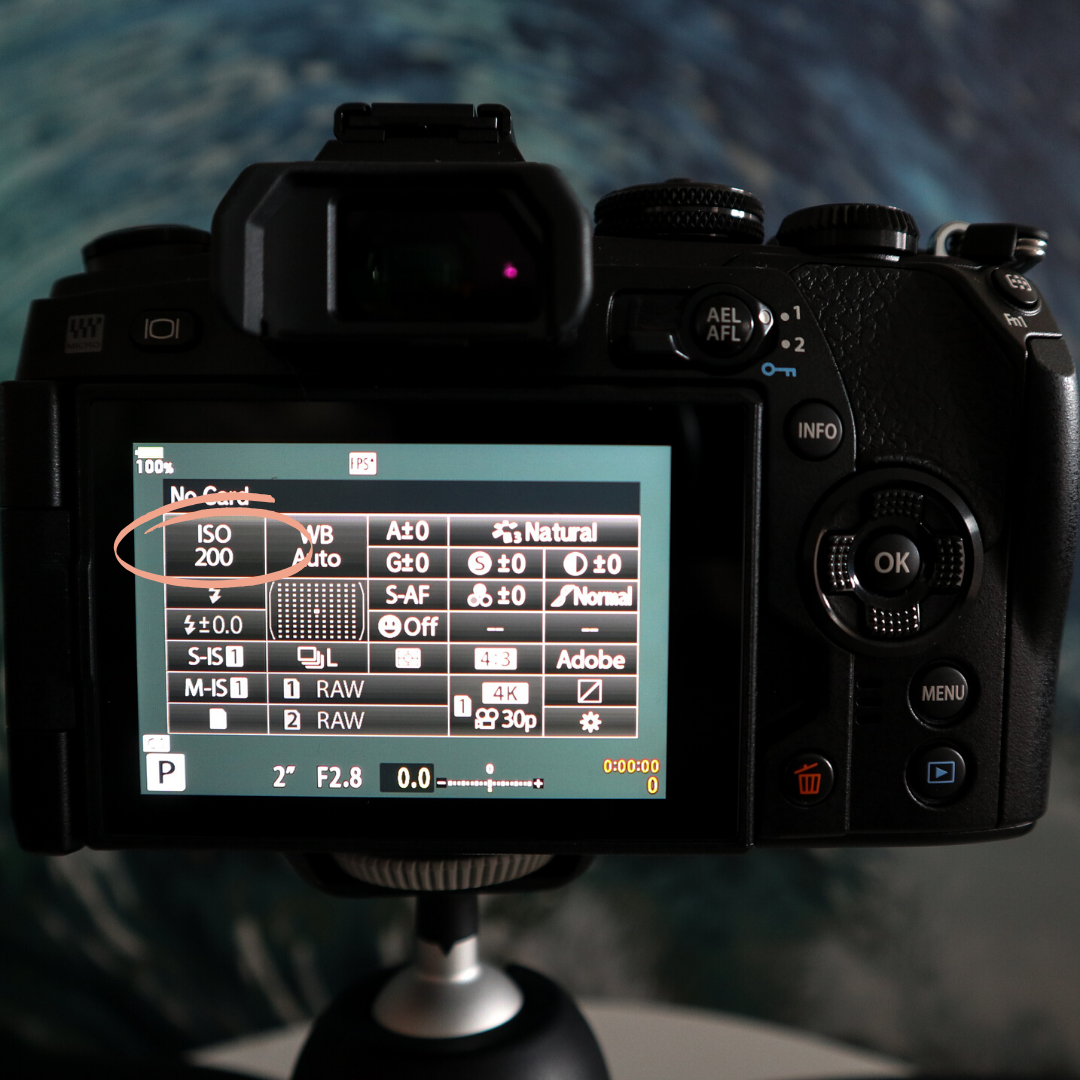
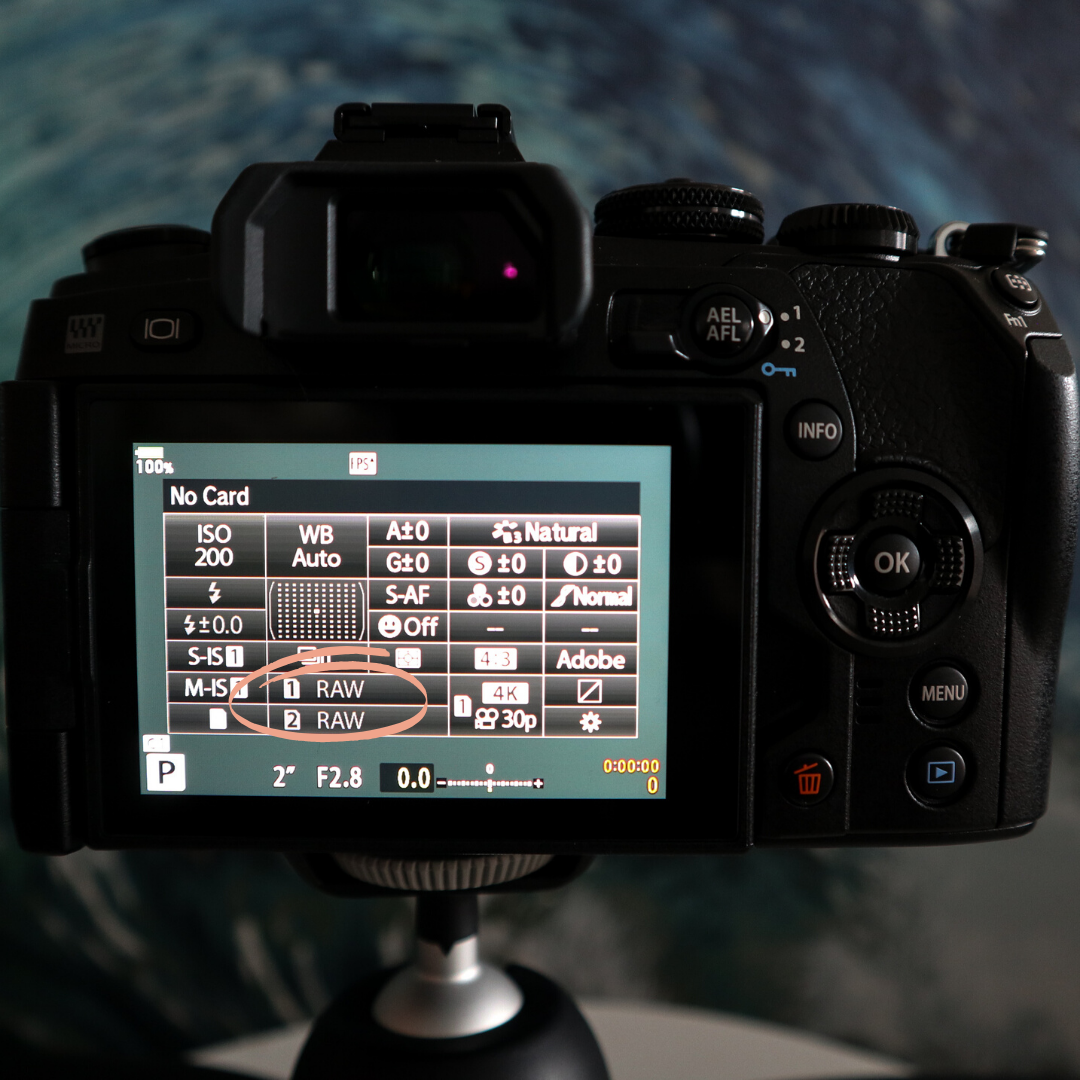
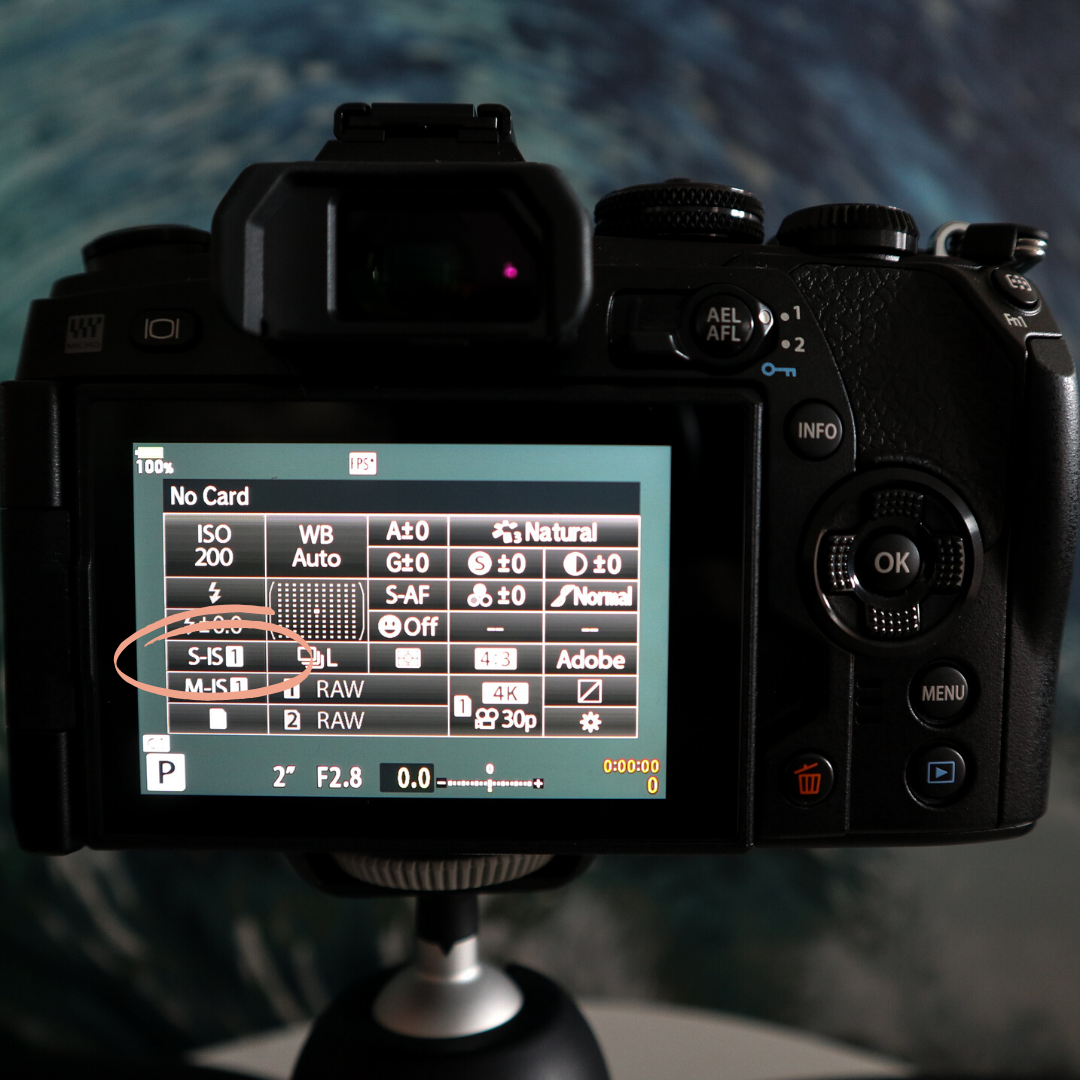
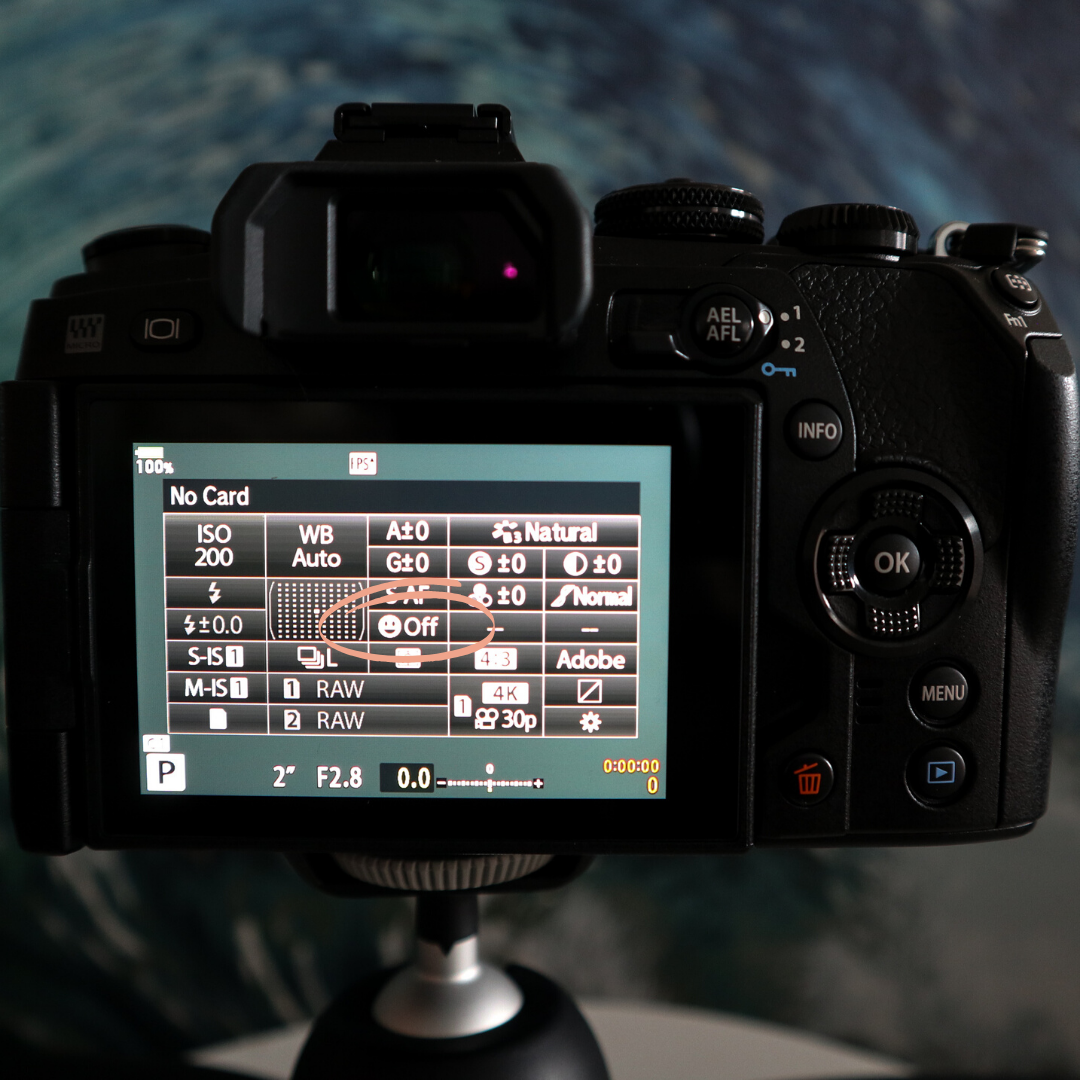
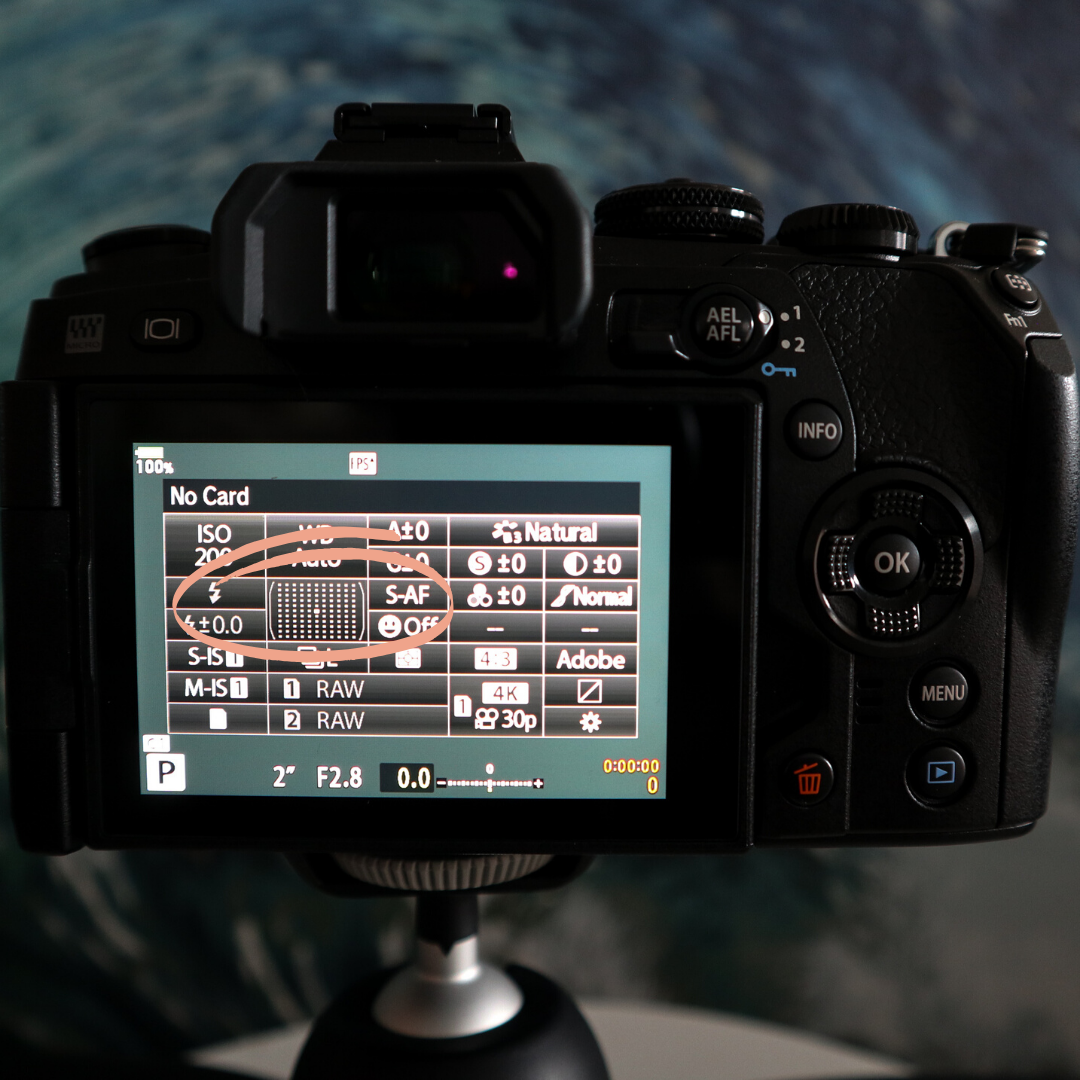
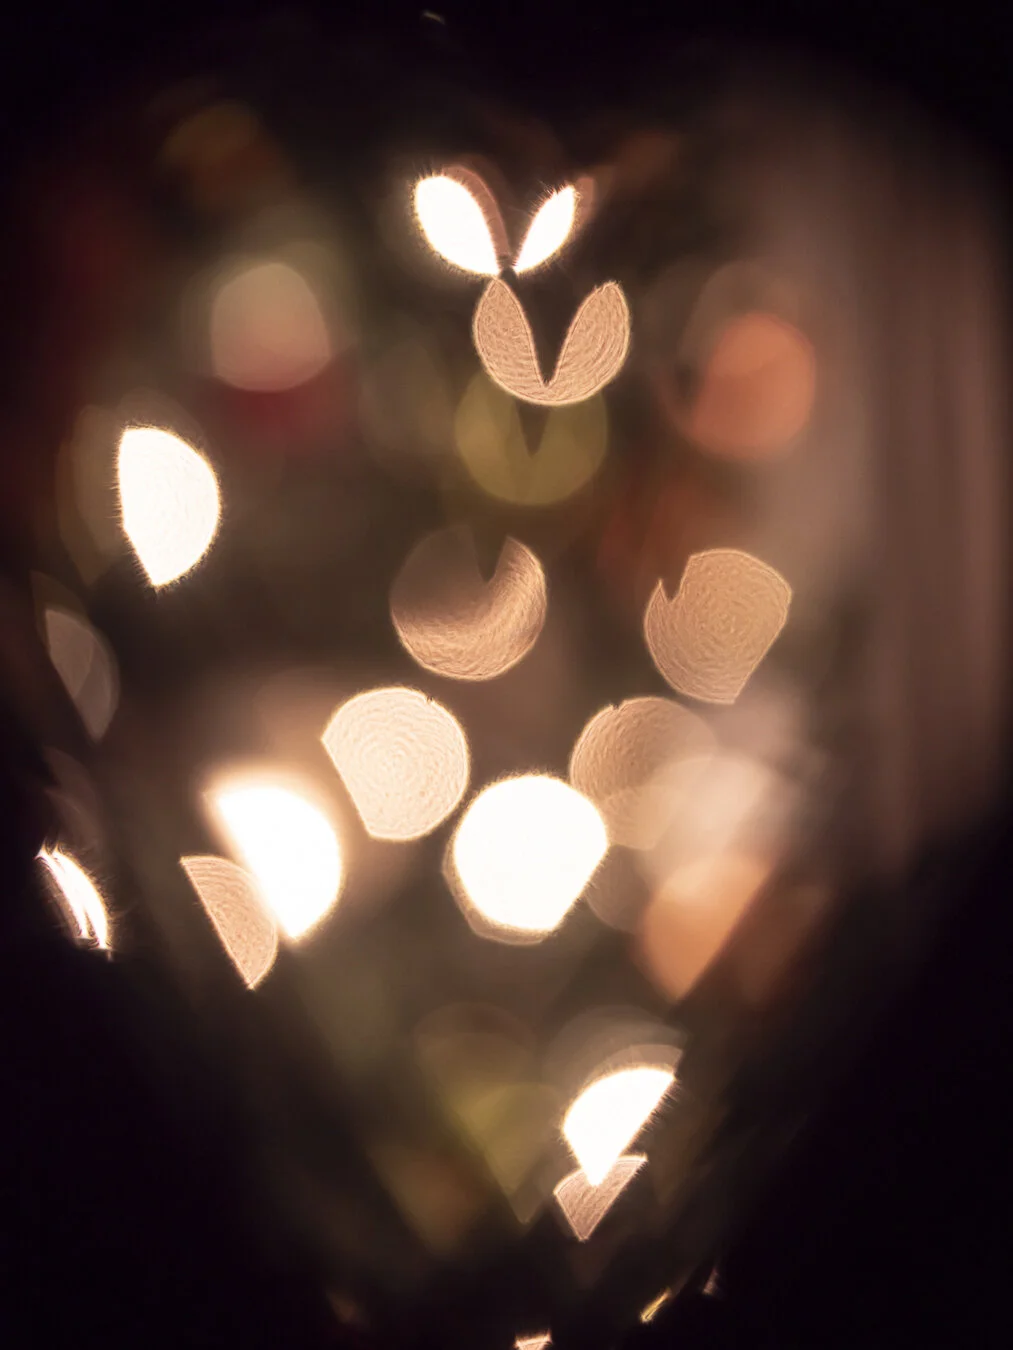
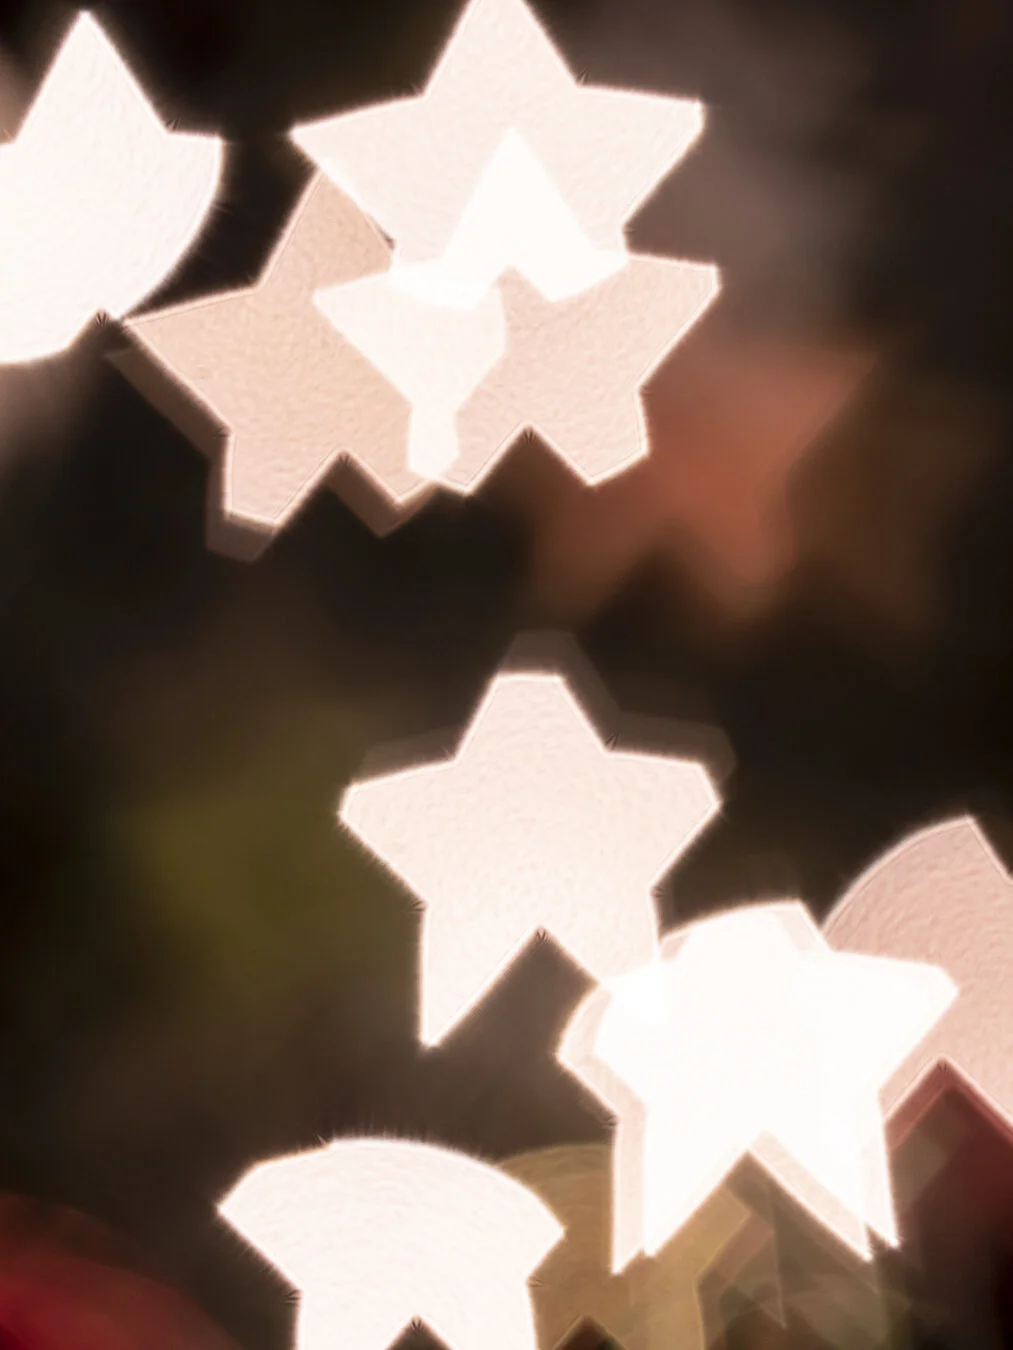
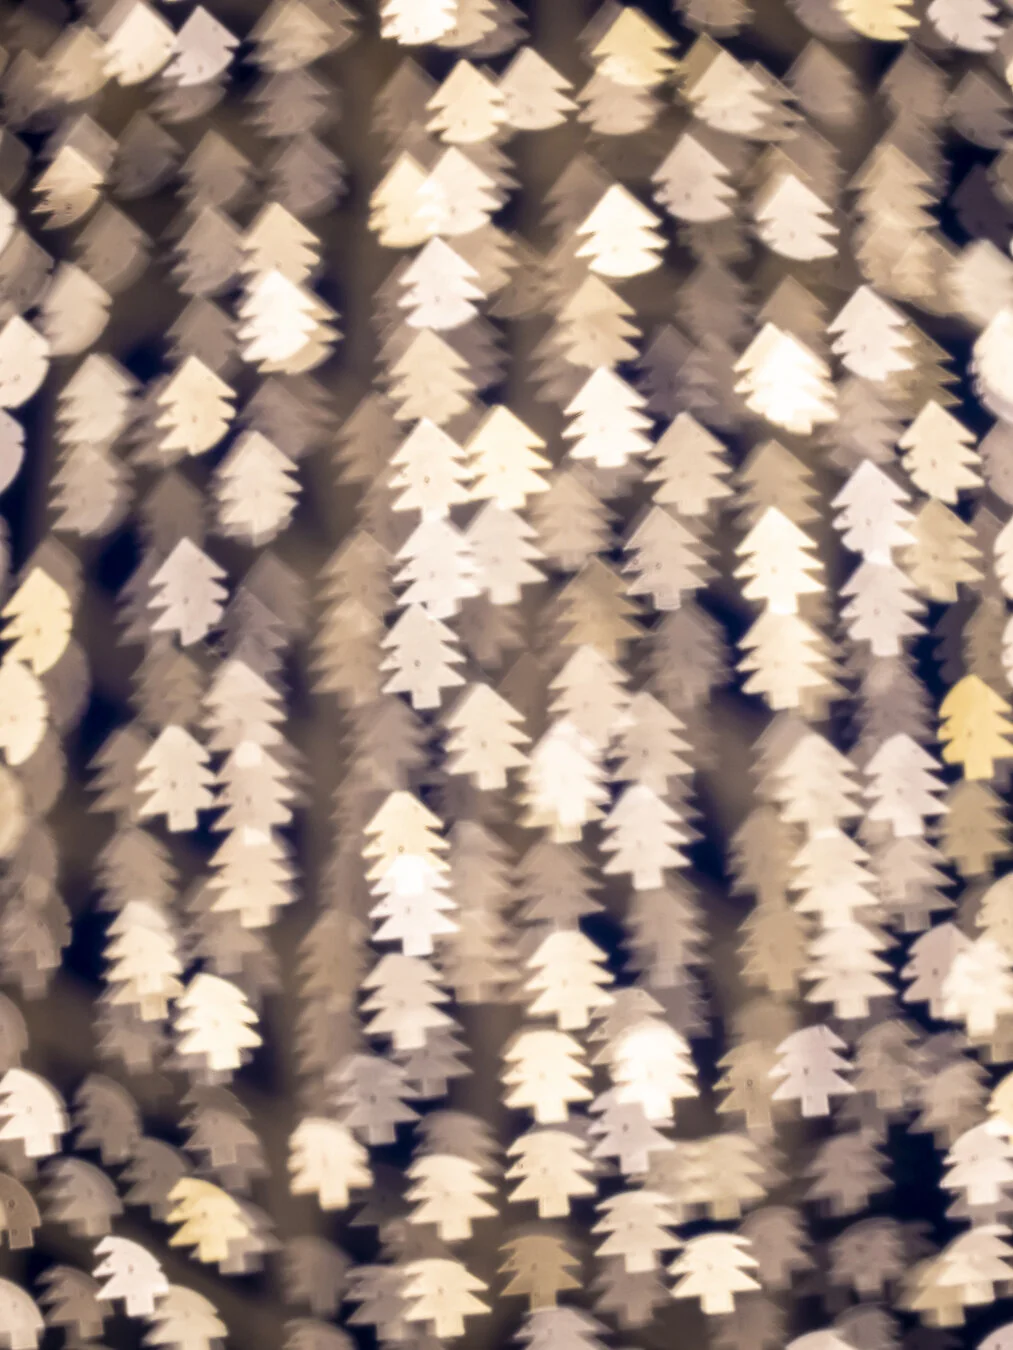
Before I went out to the Tree of Hope I did do some test shots at home in front of my Christmas tree. I discovered that it took a number of attempts before I got the right SIZE of shape for my lens.

cool-bokeh-shapes-22.jpg
cool-bokeh-shapes-24.jpg
cool-bokeh-shapes-23.jpg

Once I fiddled around with the filters/stencils I finally found the size that worked for the M.Zuiko 40-150 F2.8 PRO.

I did a mix of shots - manually focus and putting a subject in focus.

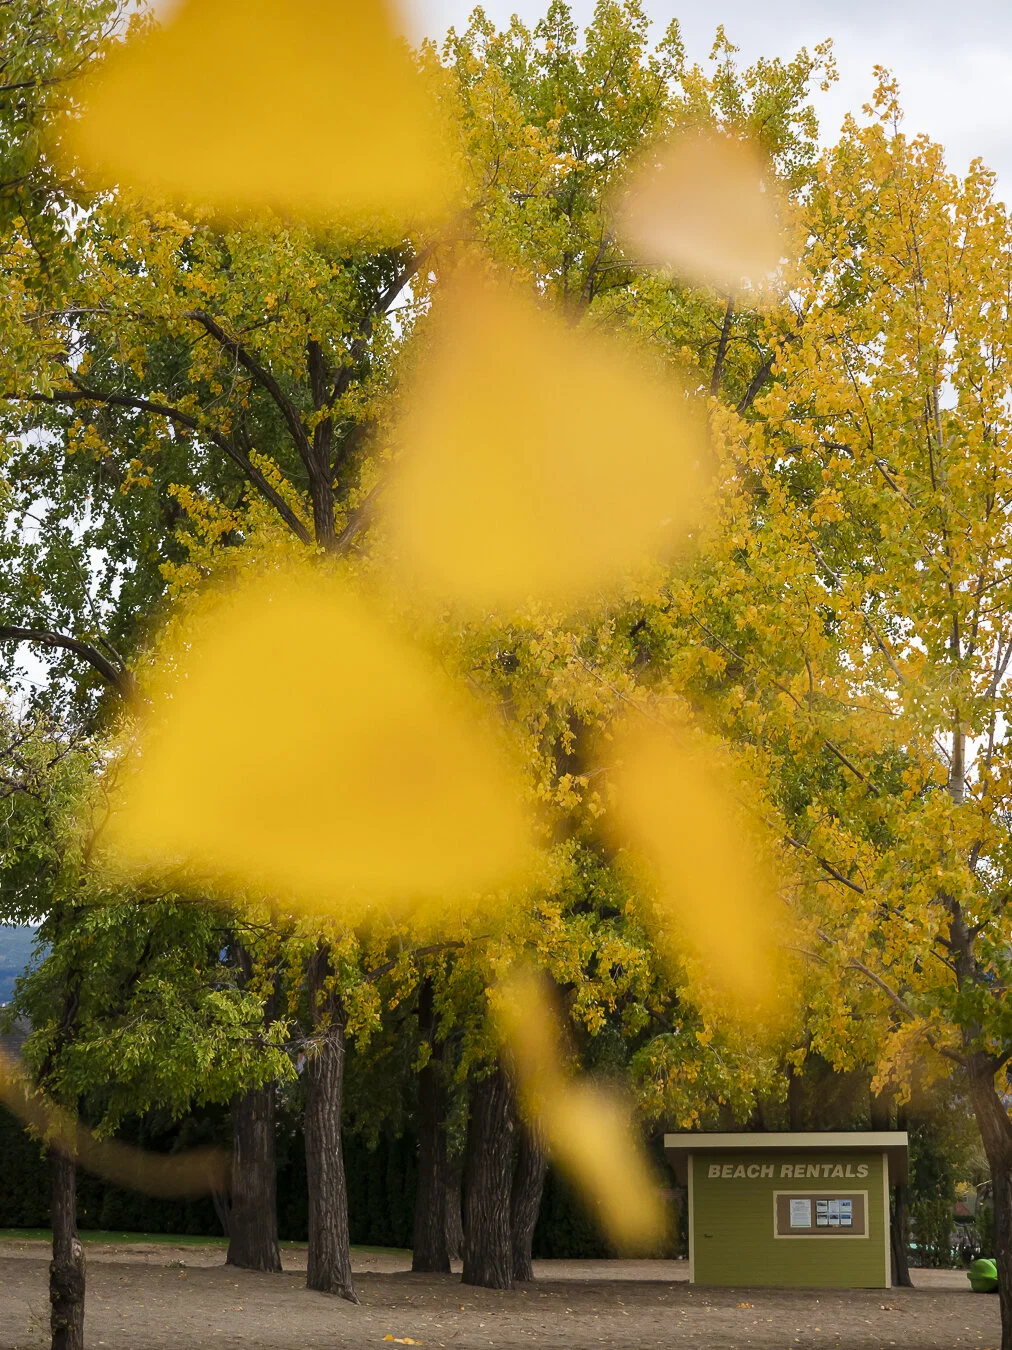
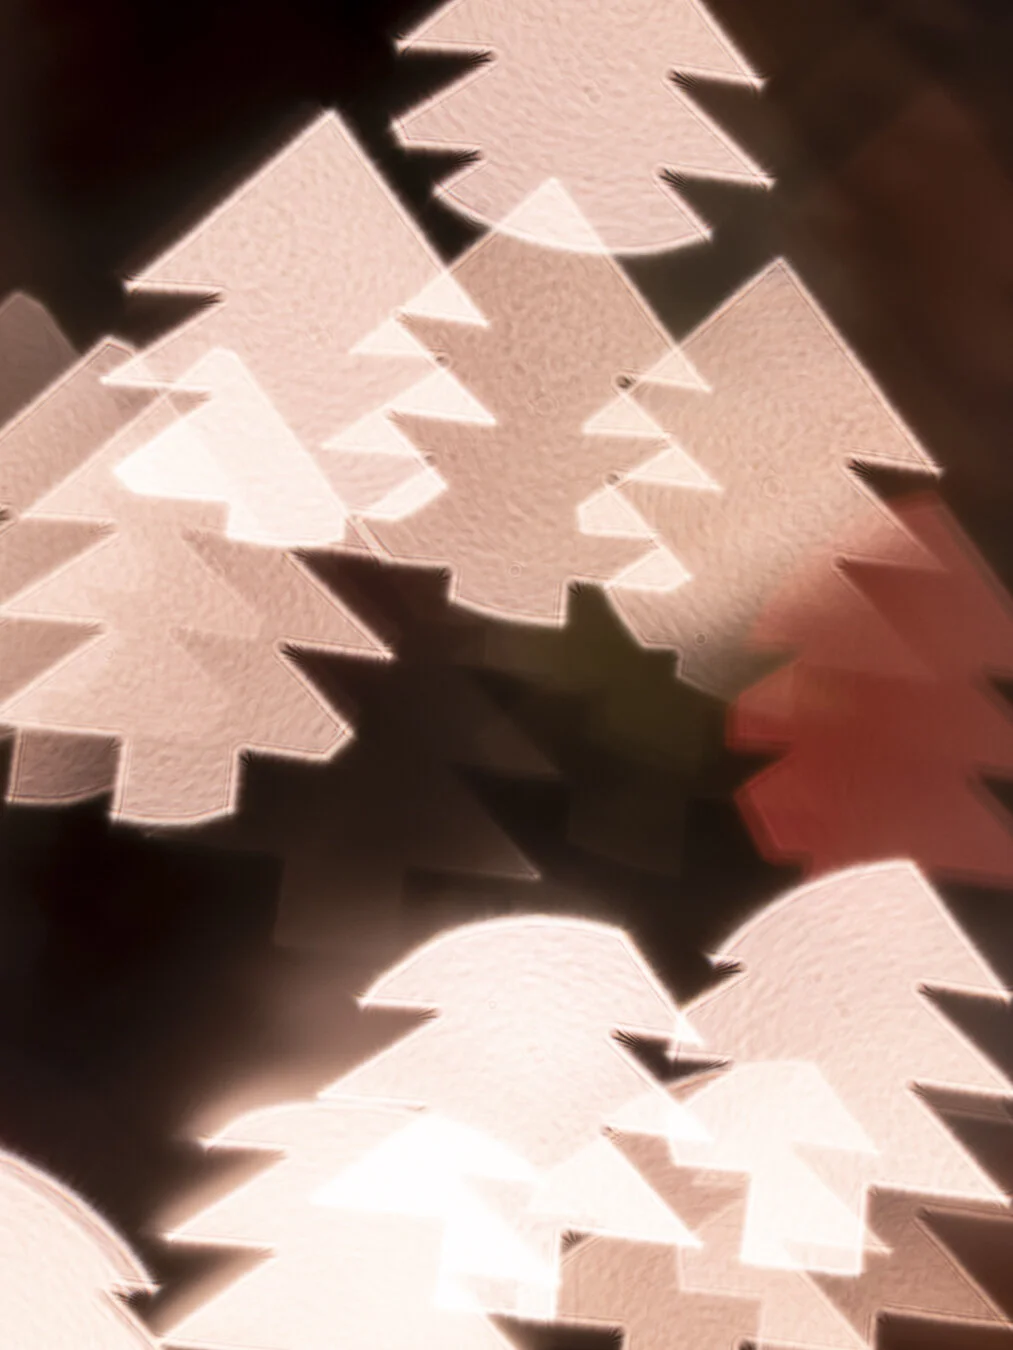
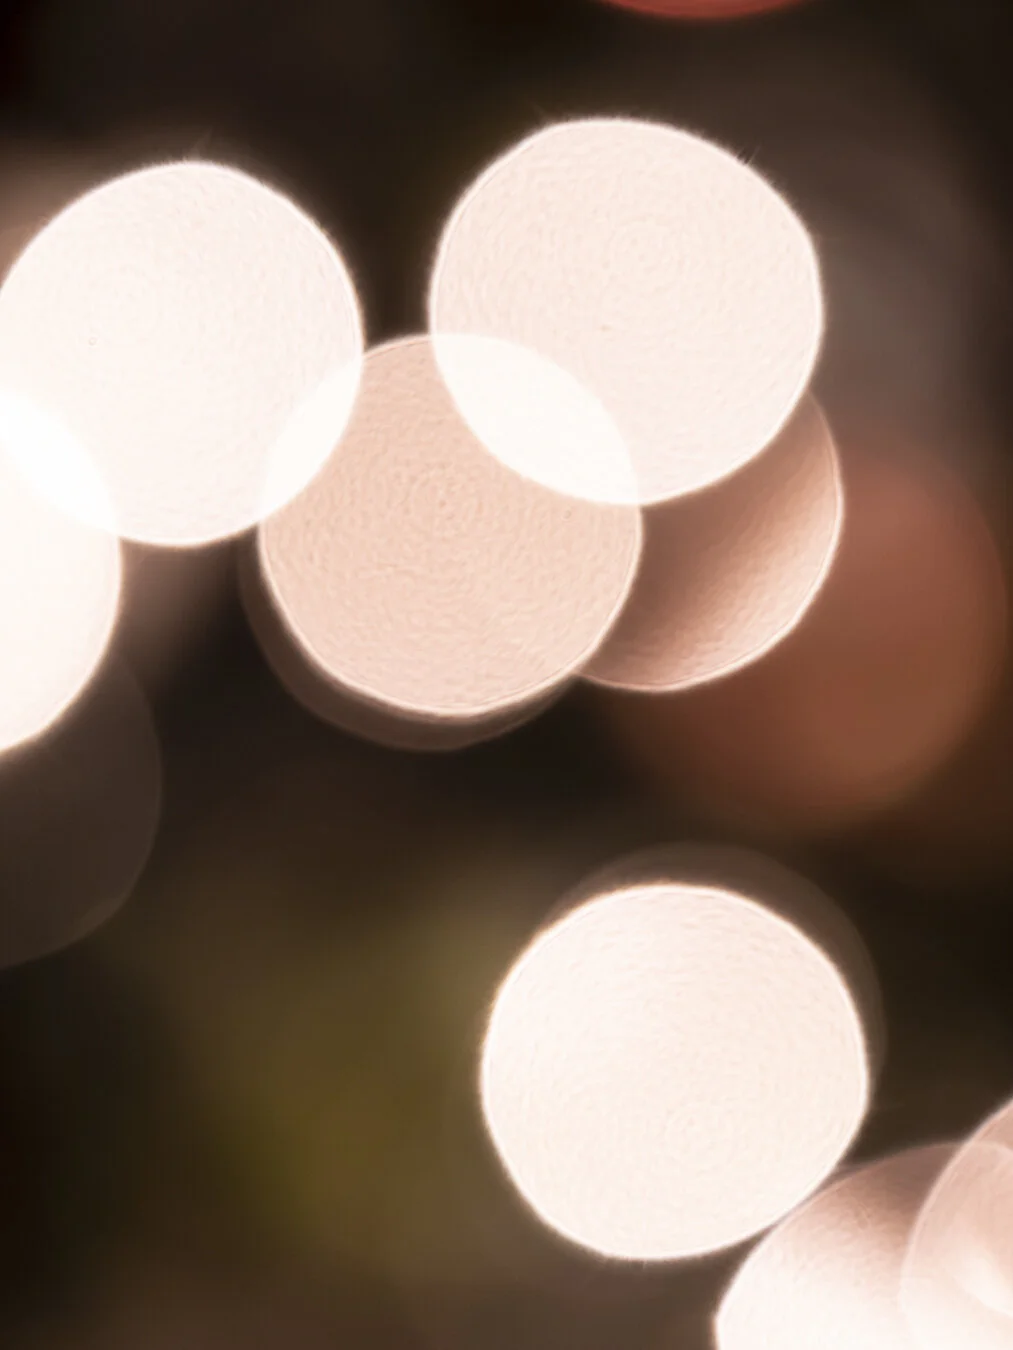
The following are manual focus shots where I didn’t put a subject in focus:

cool-bokeh-shapes-15.jpg
cool-bokeh-shapes-1.jpg
cool-bokeh-shapes-13.jpg
cool-bokeh-shapes-5.jpg
cool-bokeh-shapes-3.jpg
cool-bokeh-shapes-4.jpg

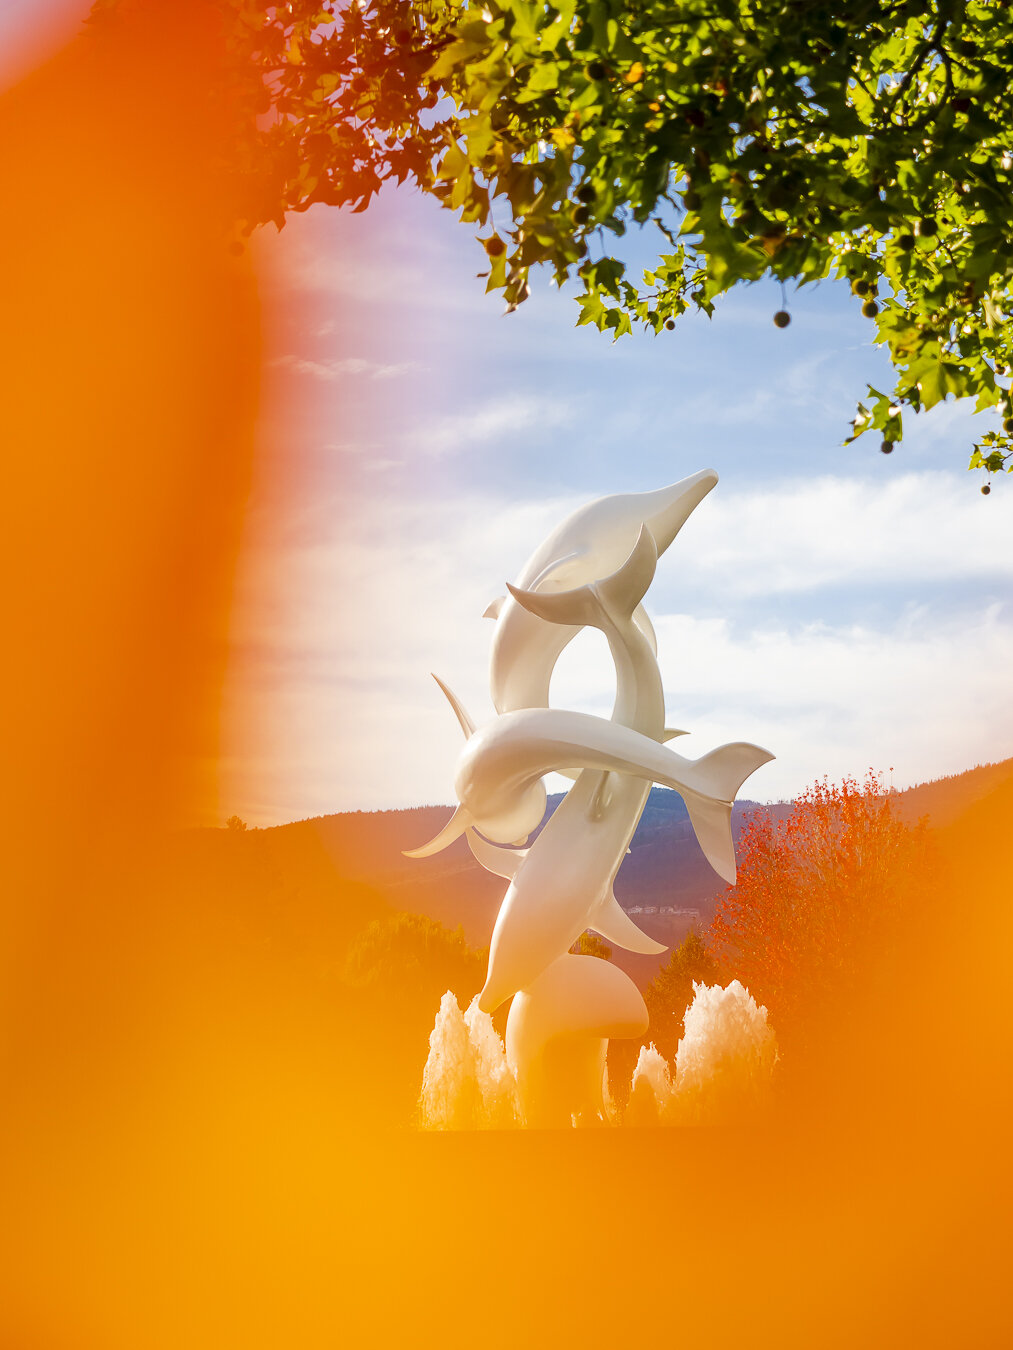
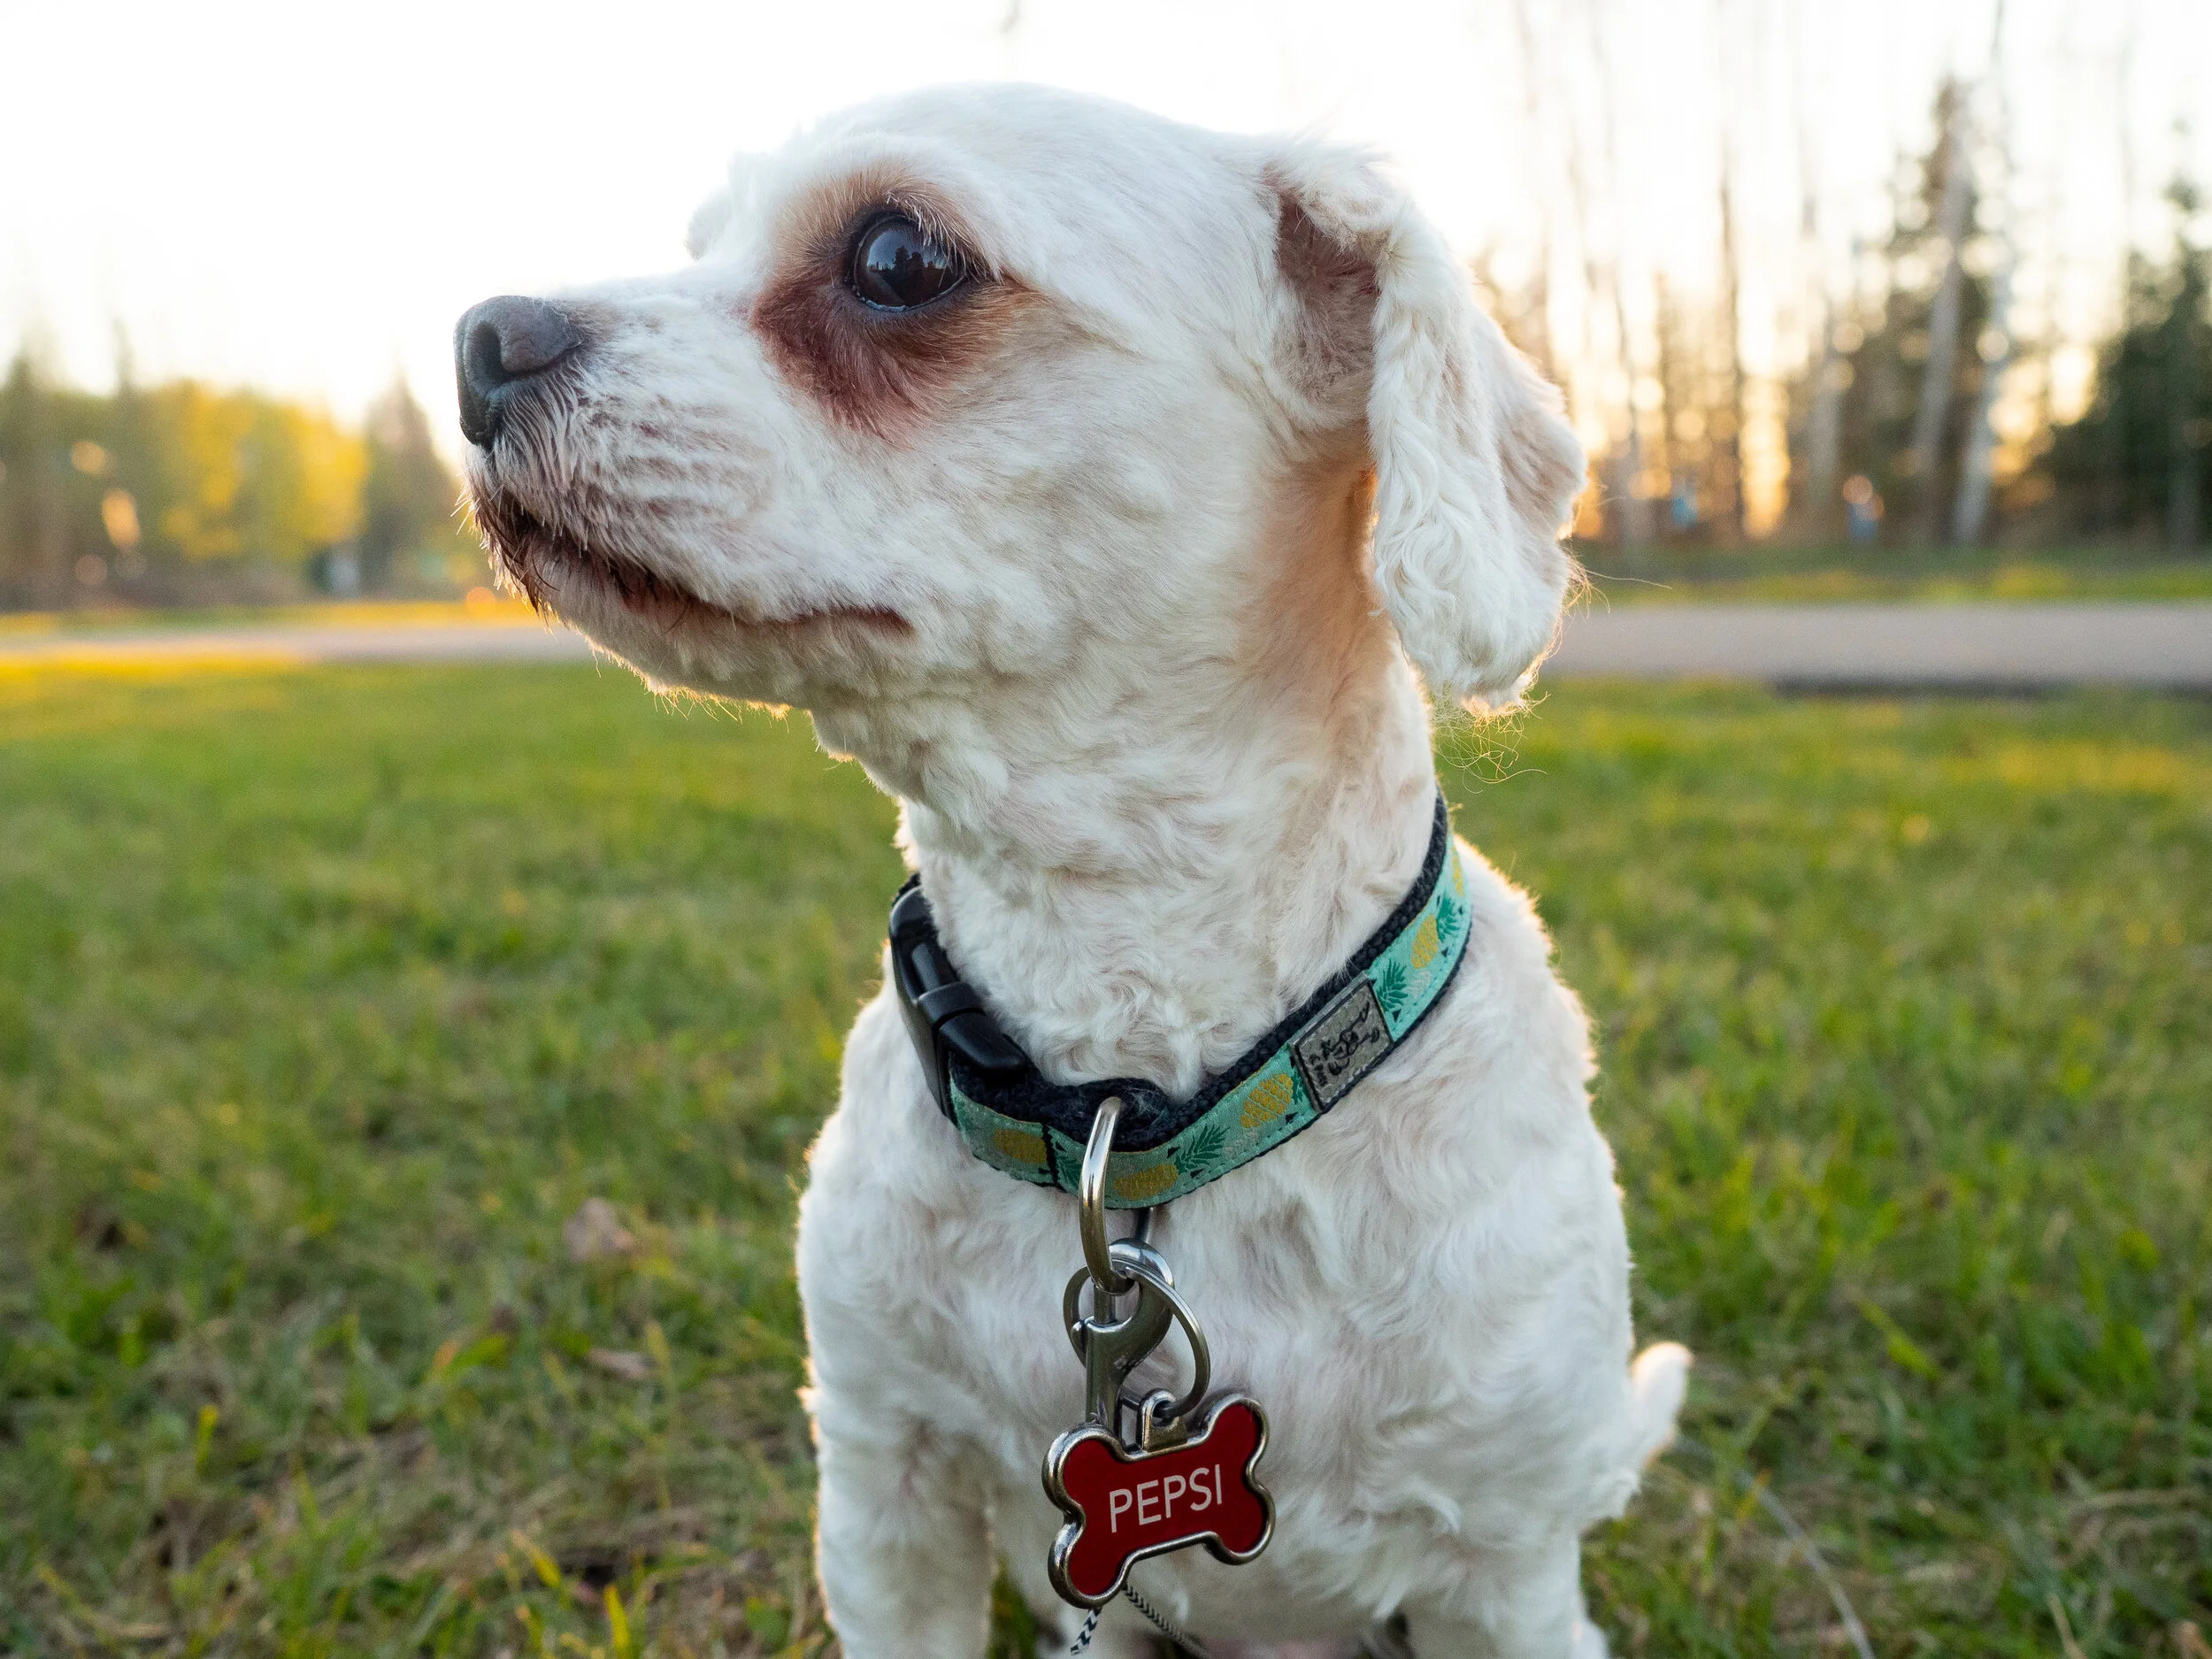
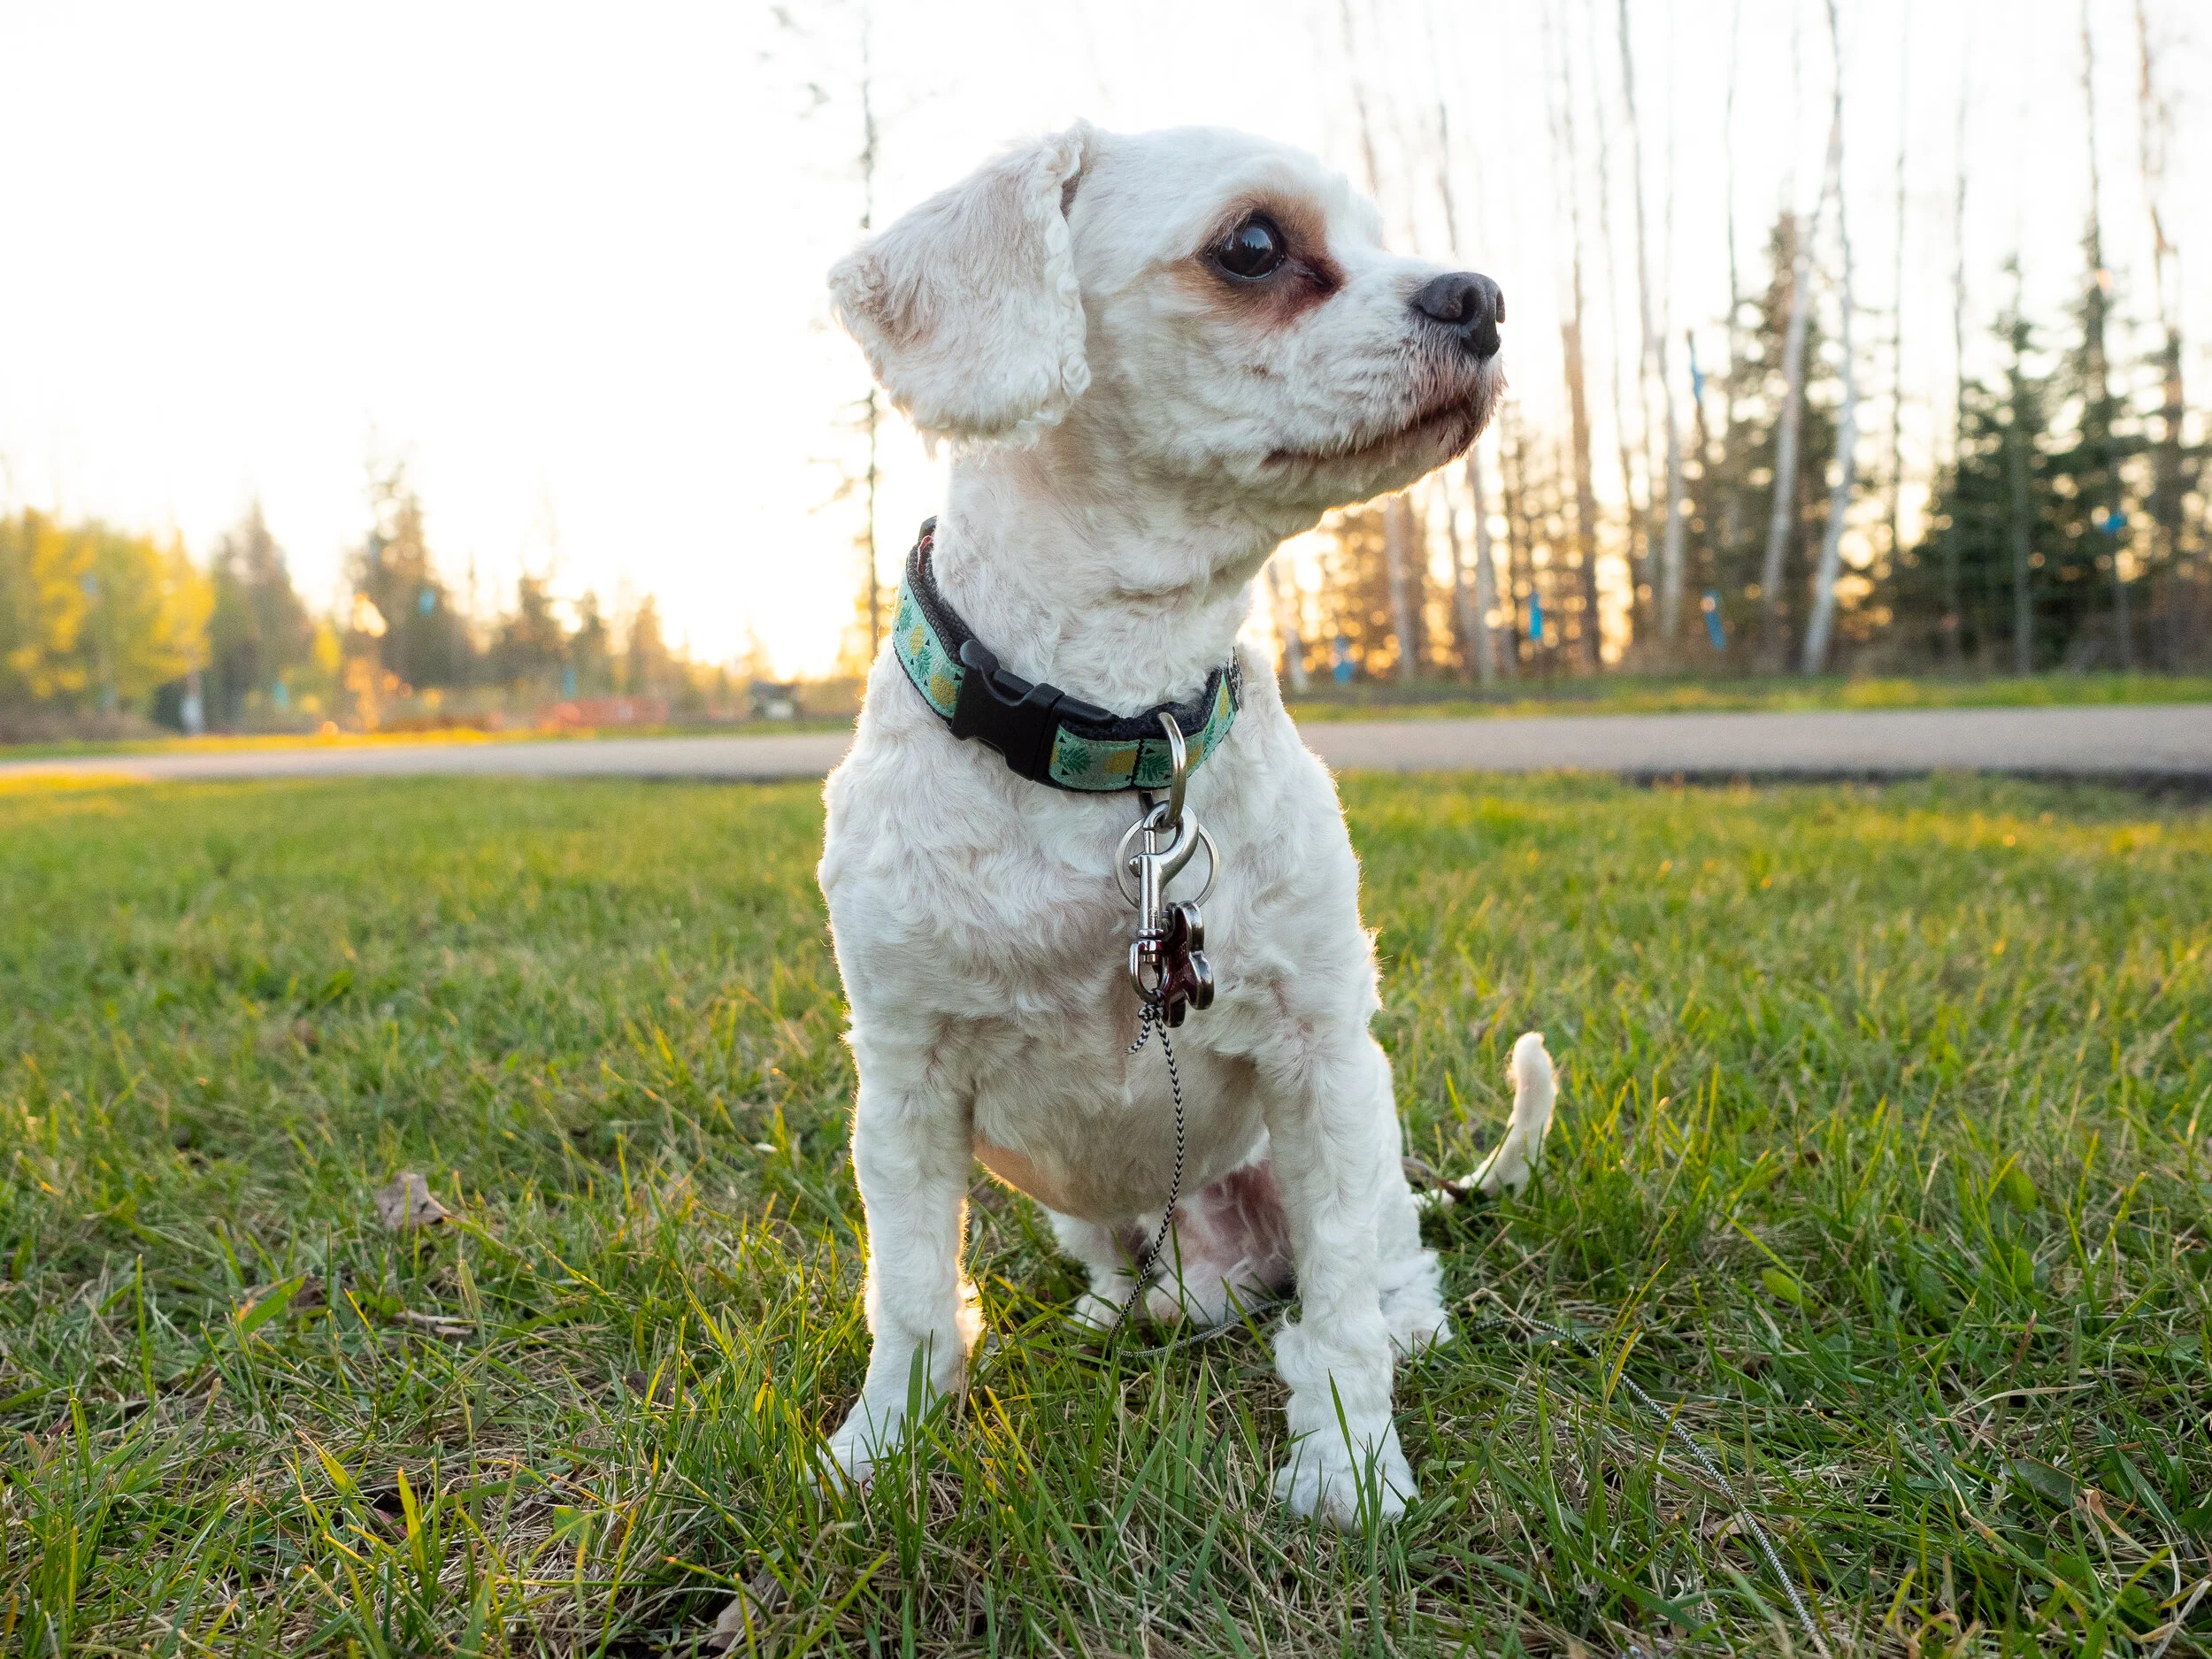
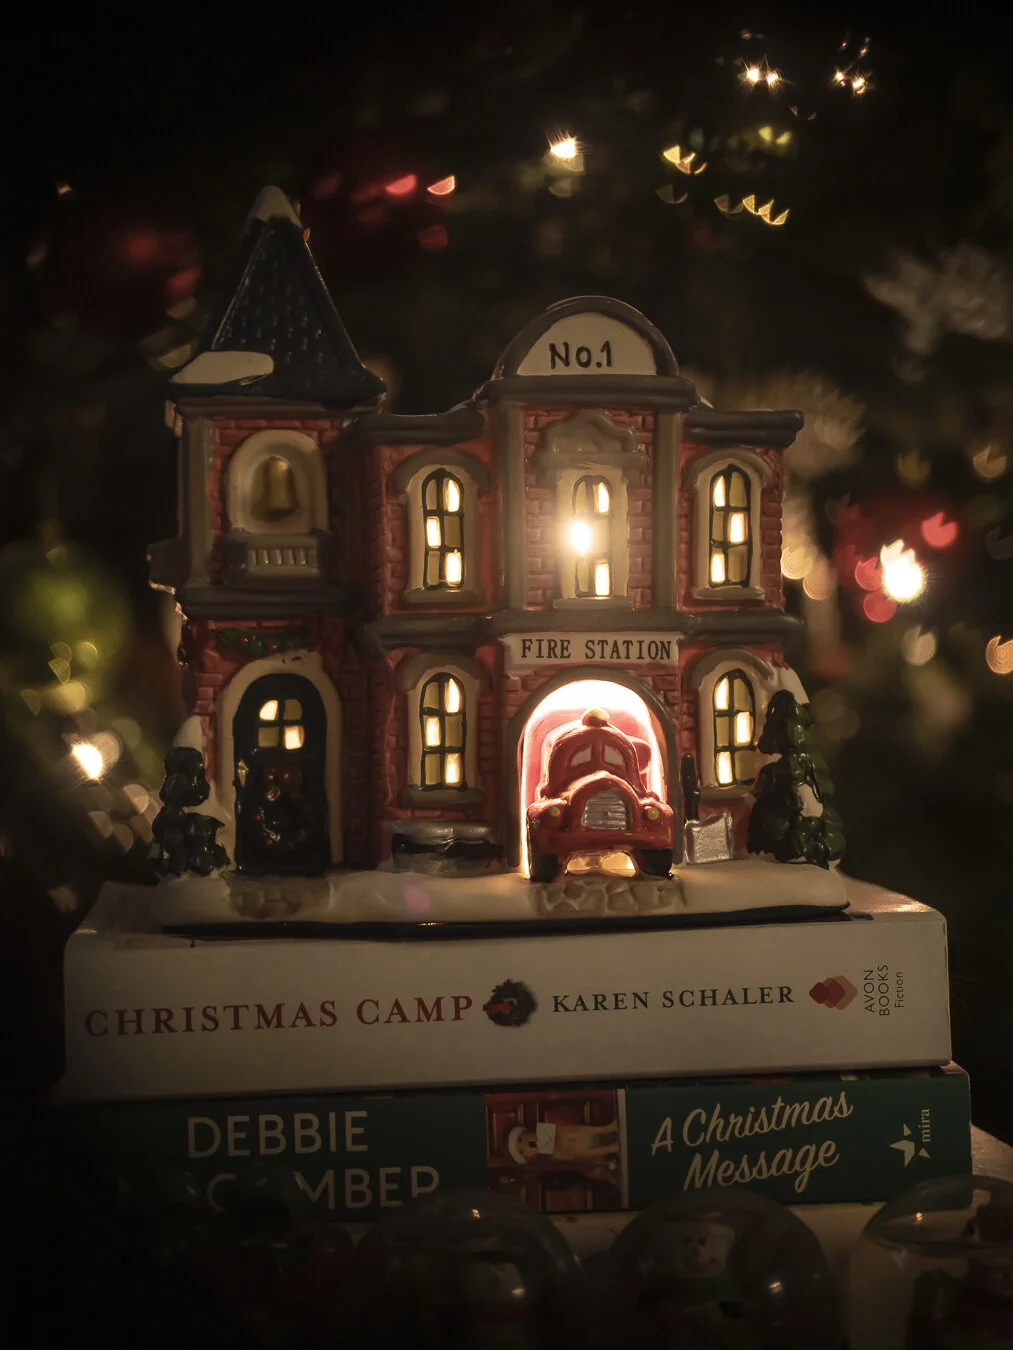
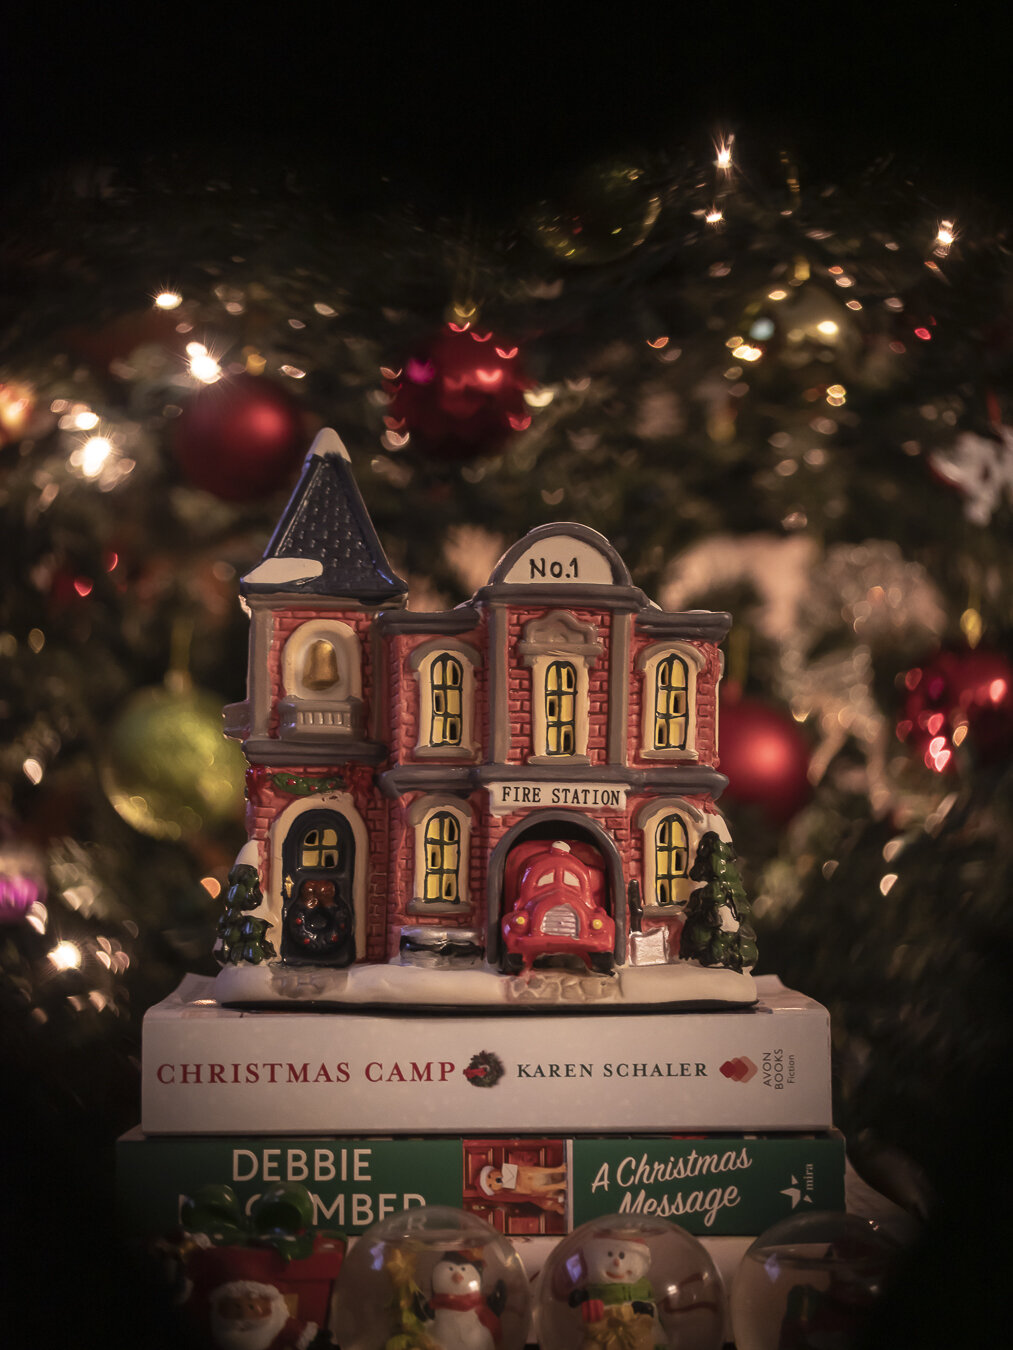
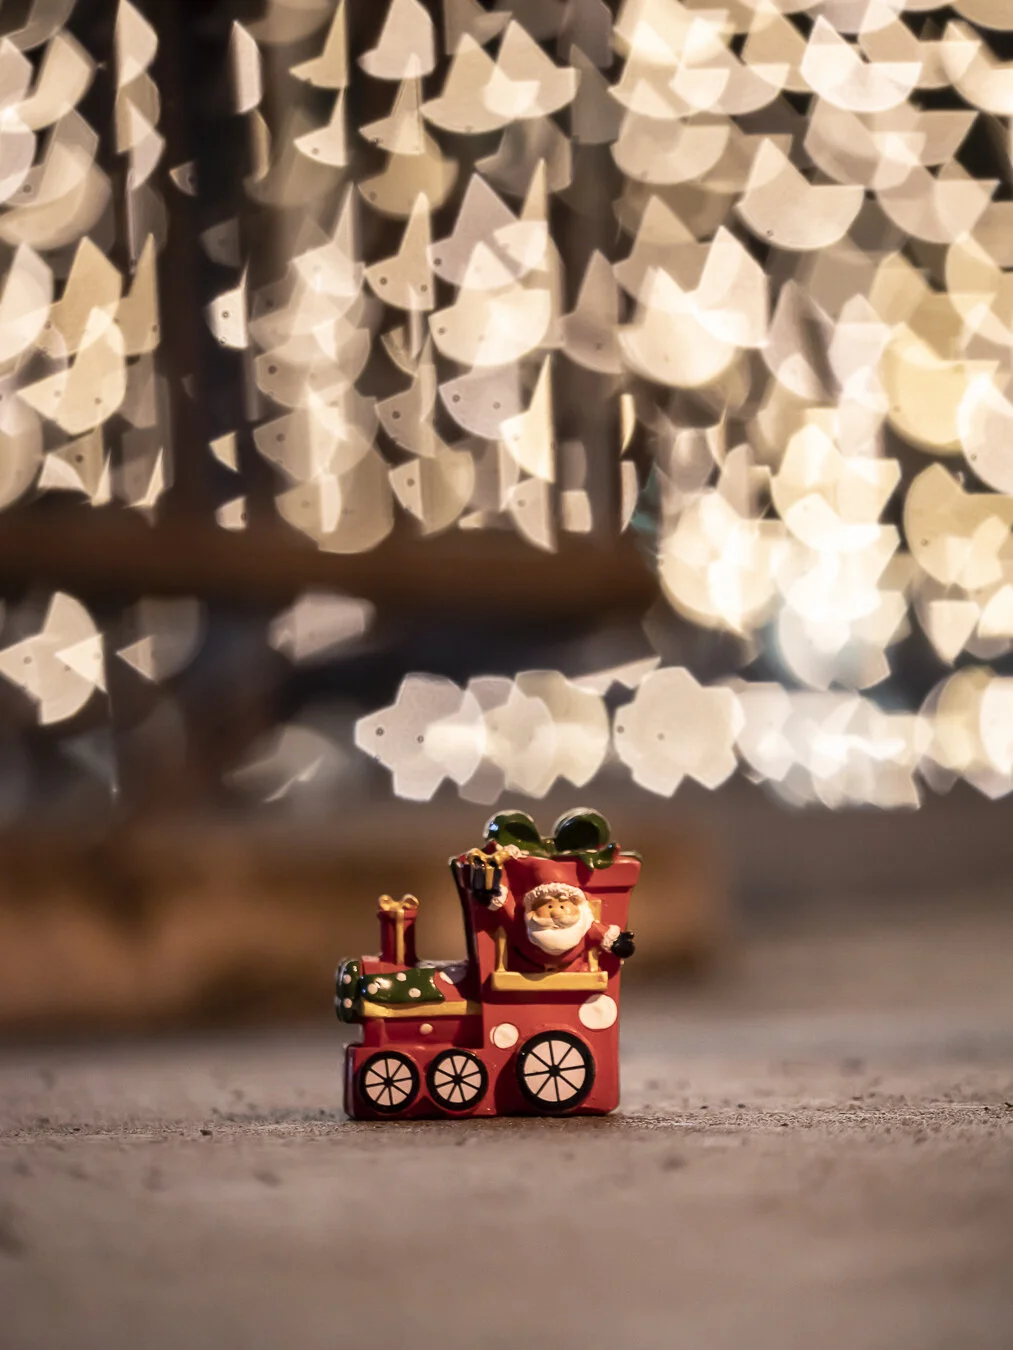
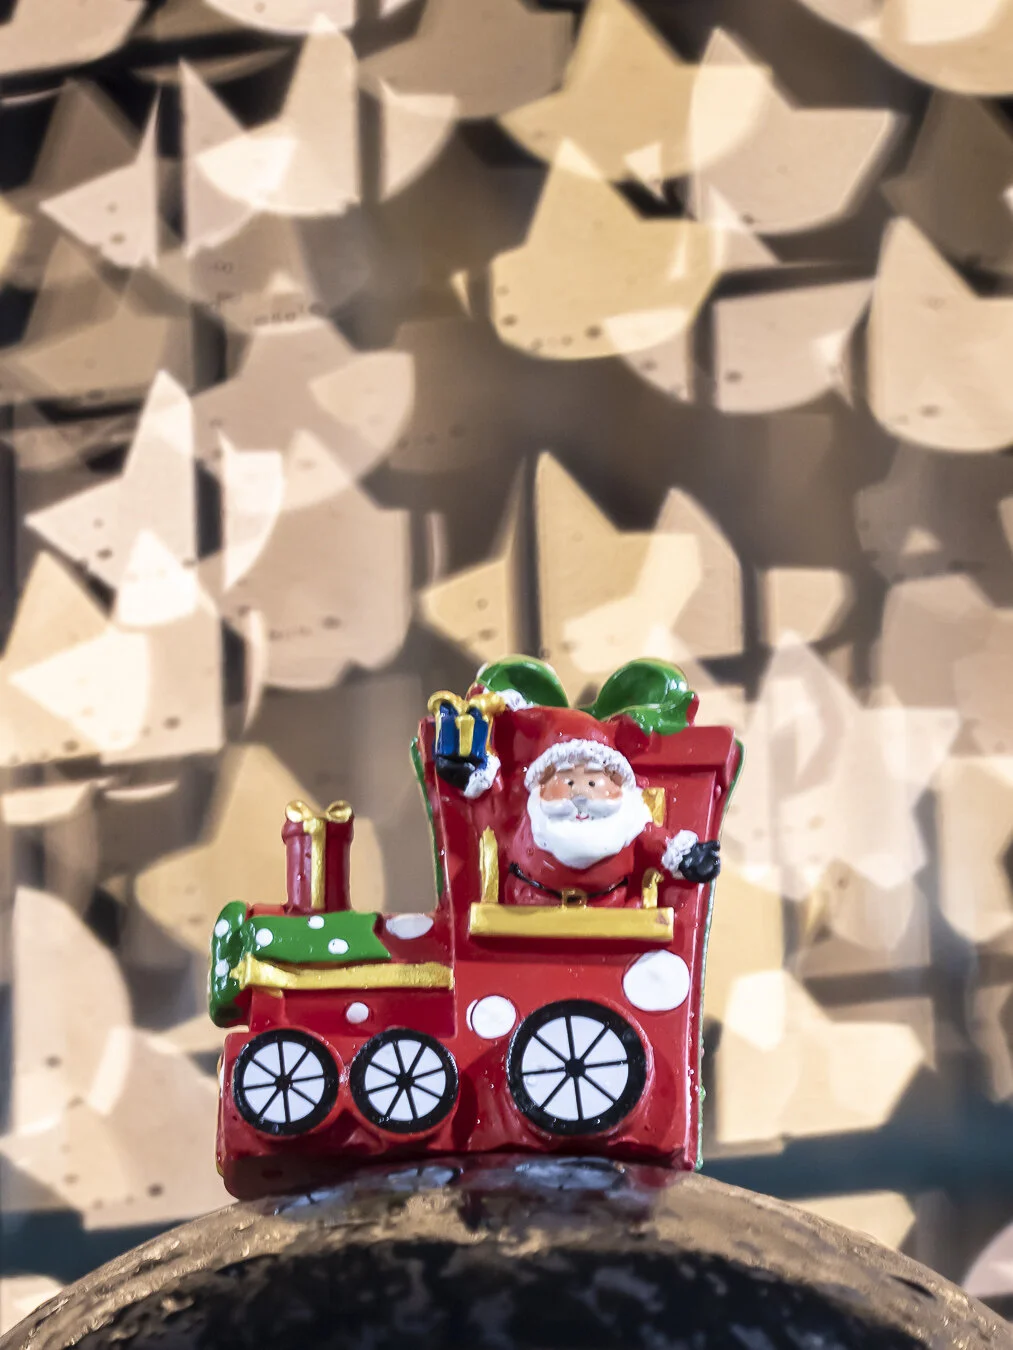
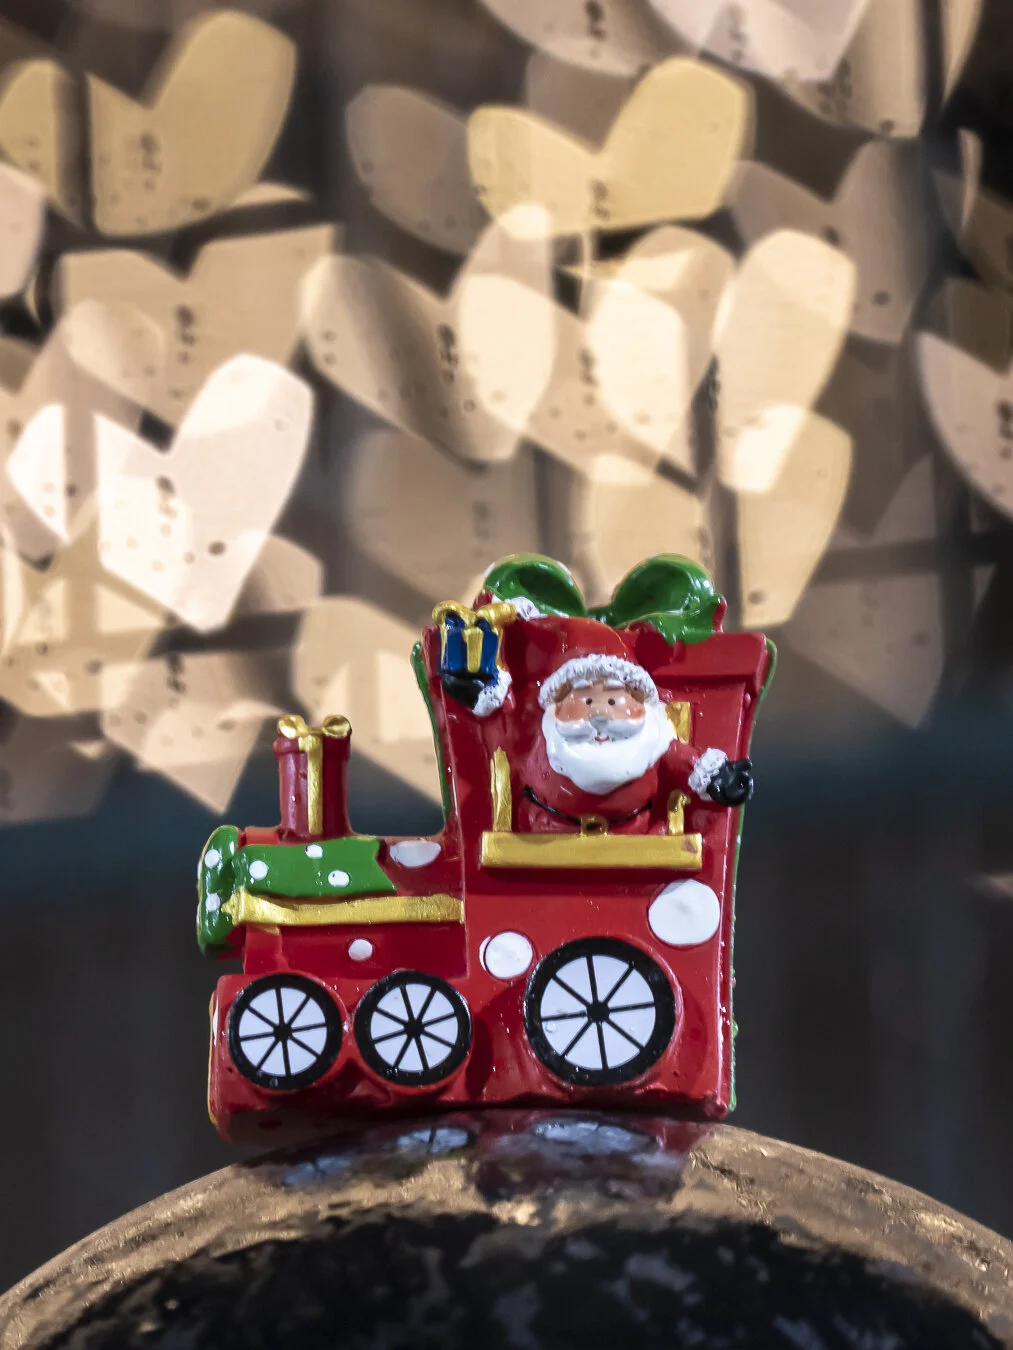
I then brought this toy Christmas decor with me to get some sample photos of putting an object in focus!

cool-bokeh-shapes-6.jpg
cool-bokeh-shapes-19.jpg
cool-bokeh-shapes-20.jpg

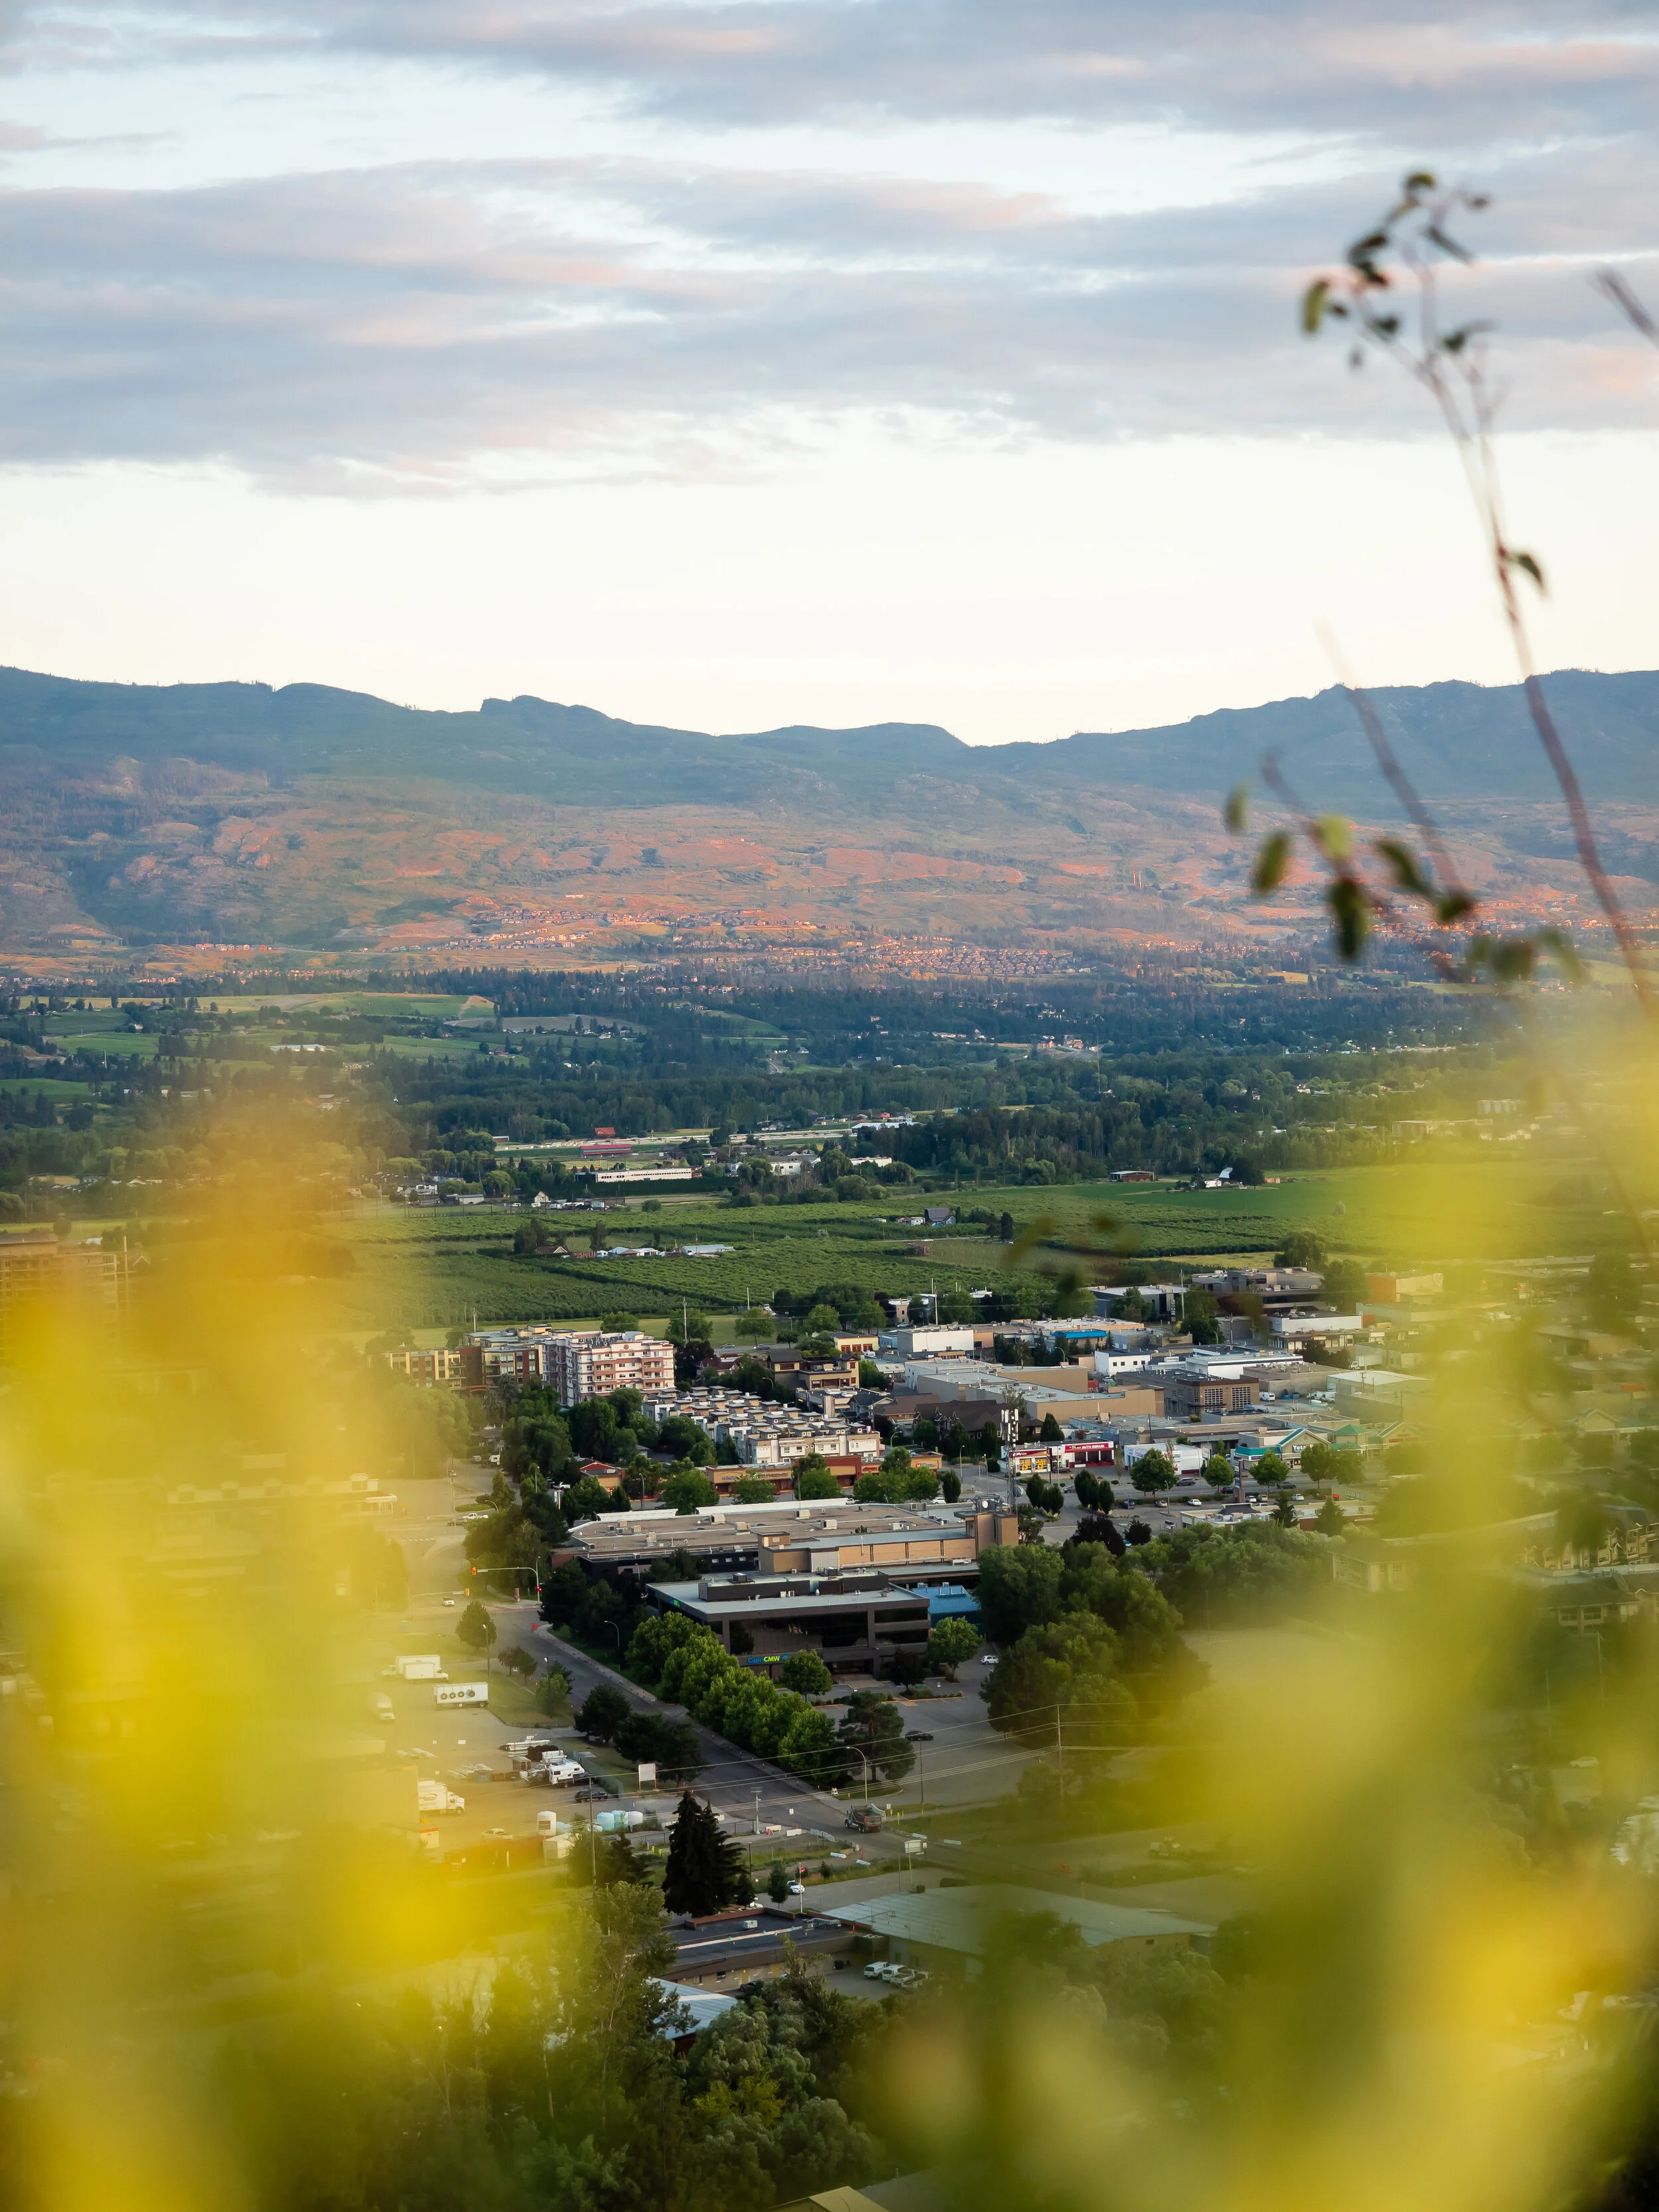
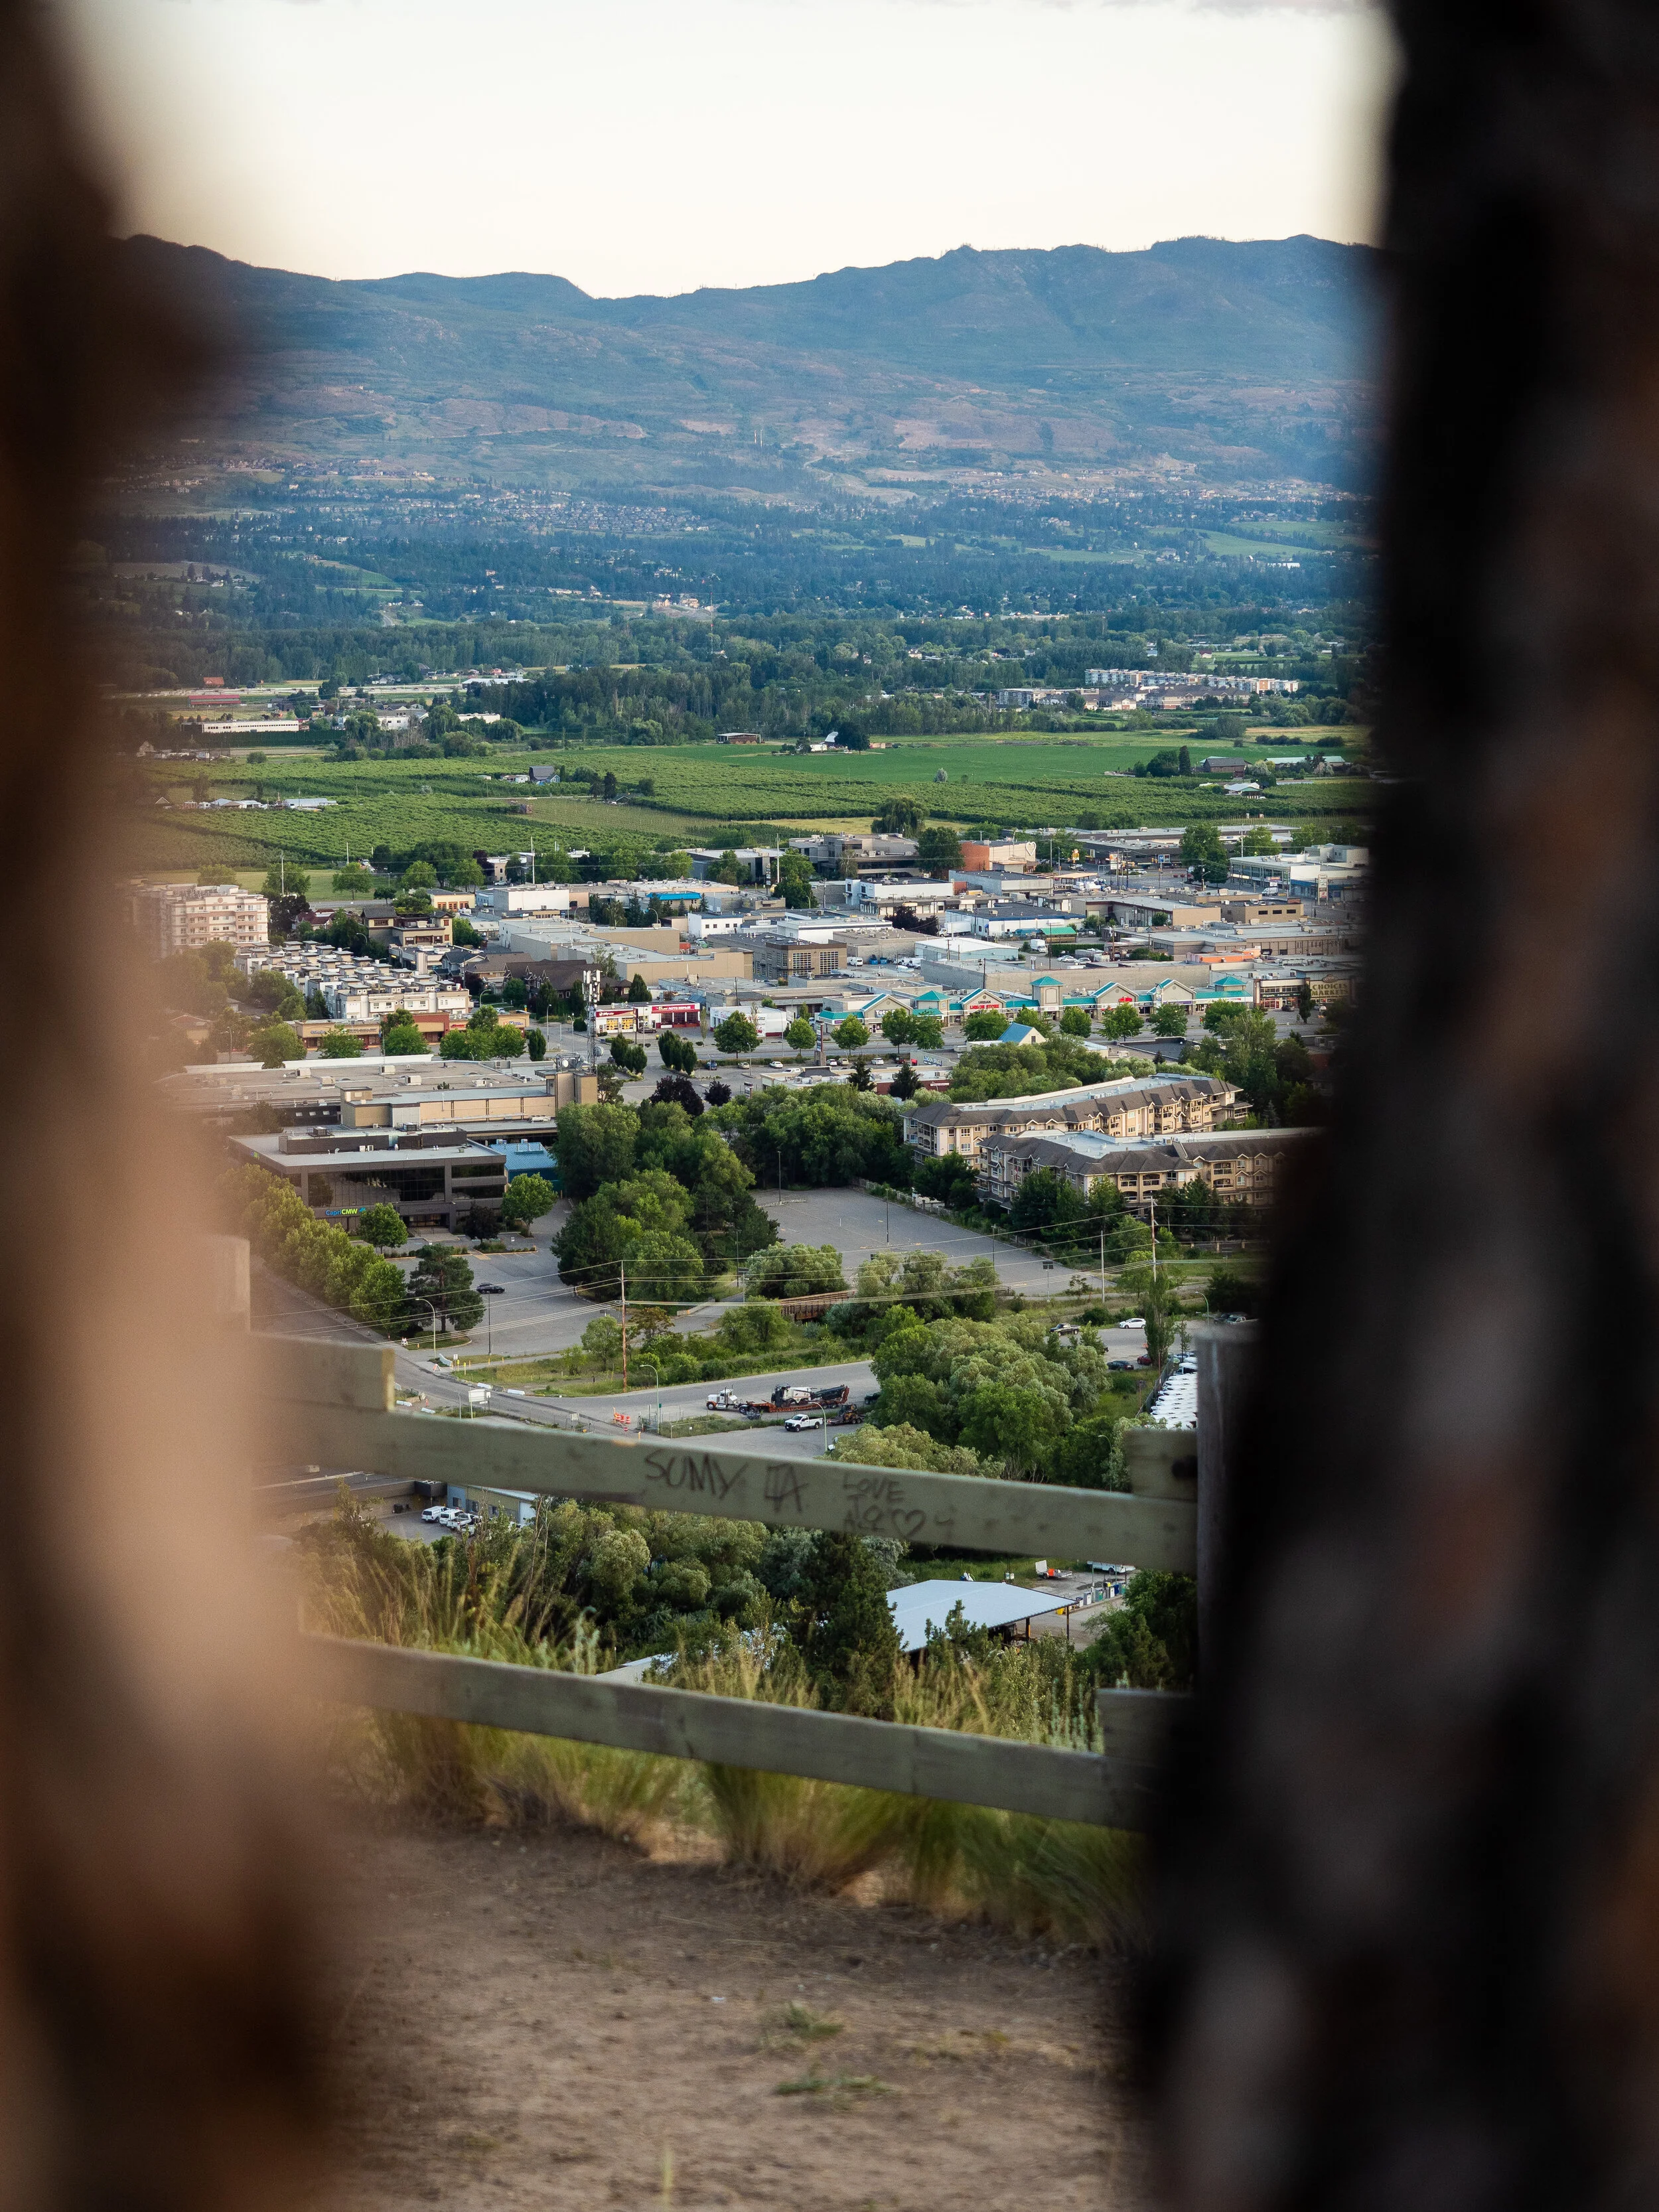
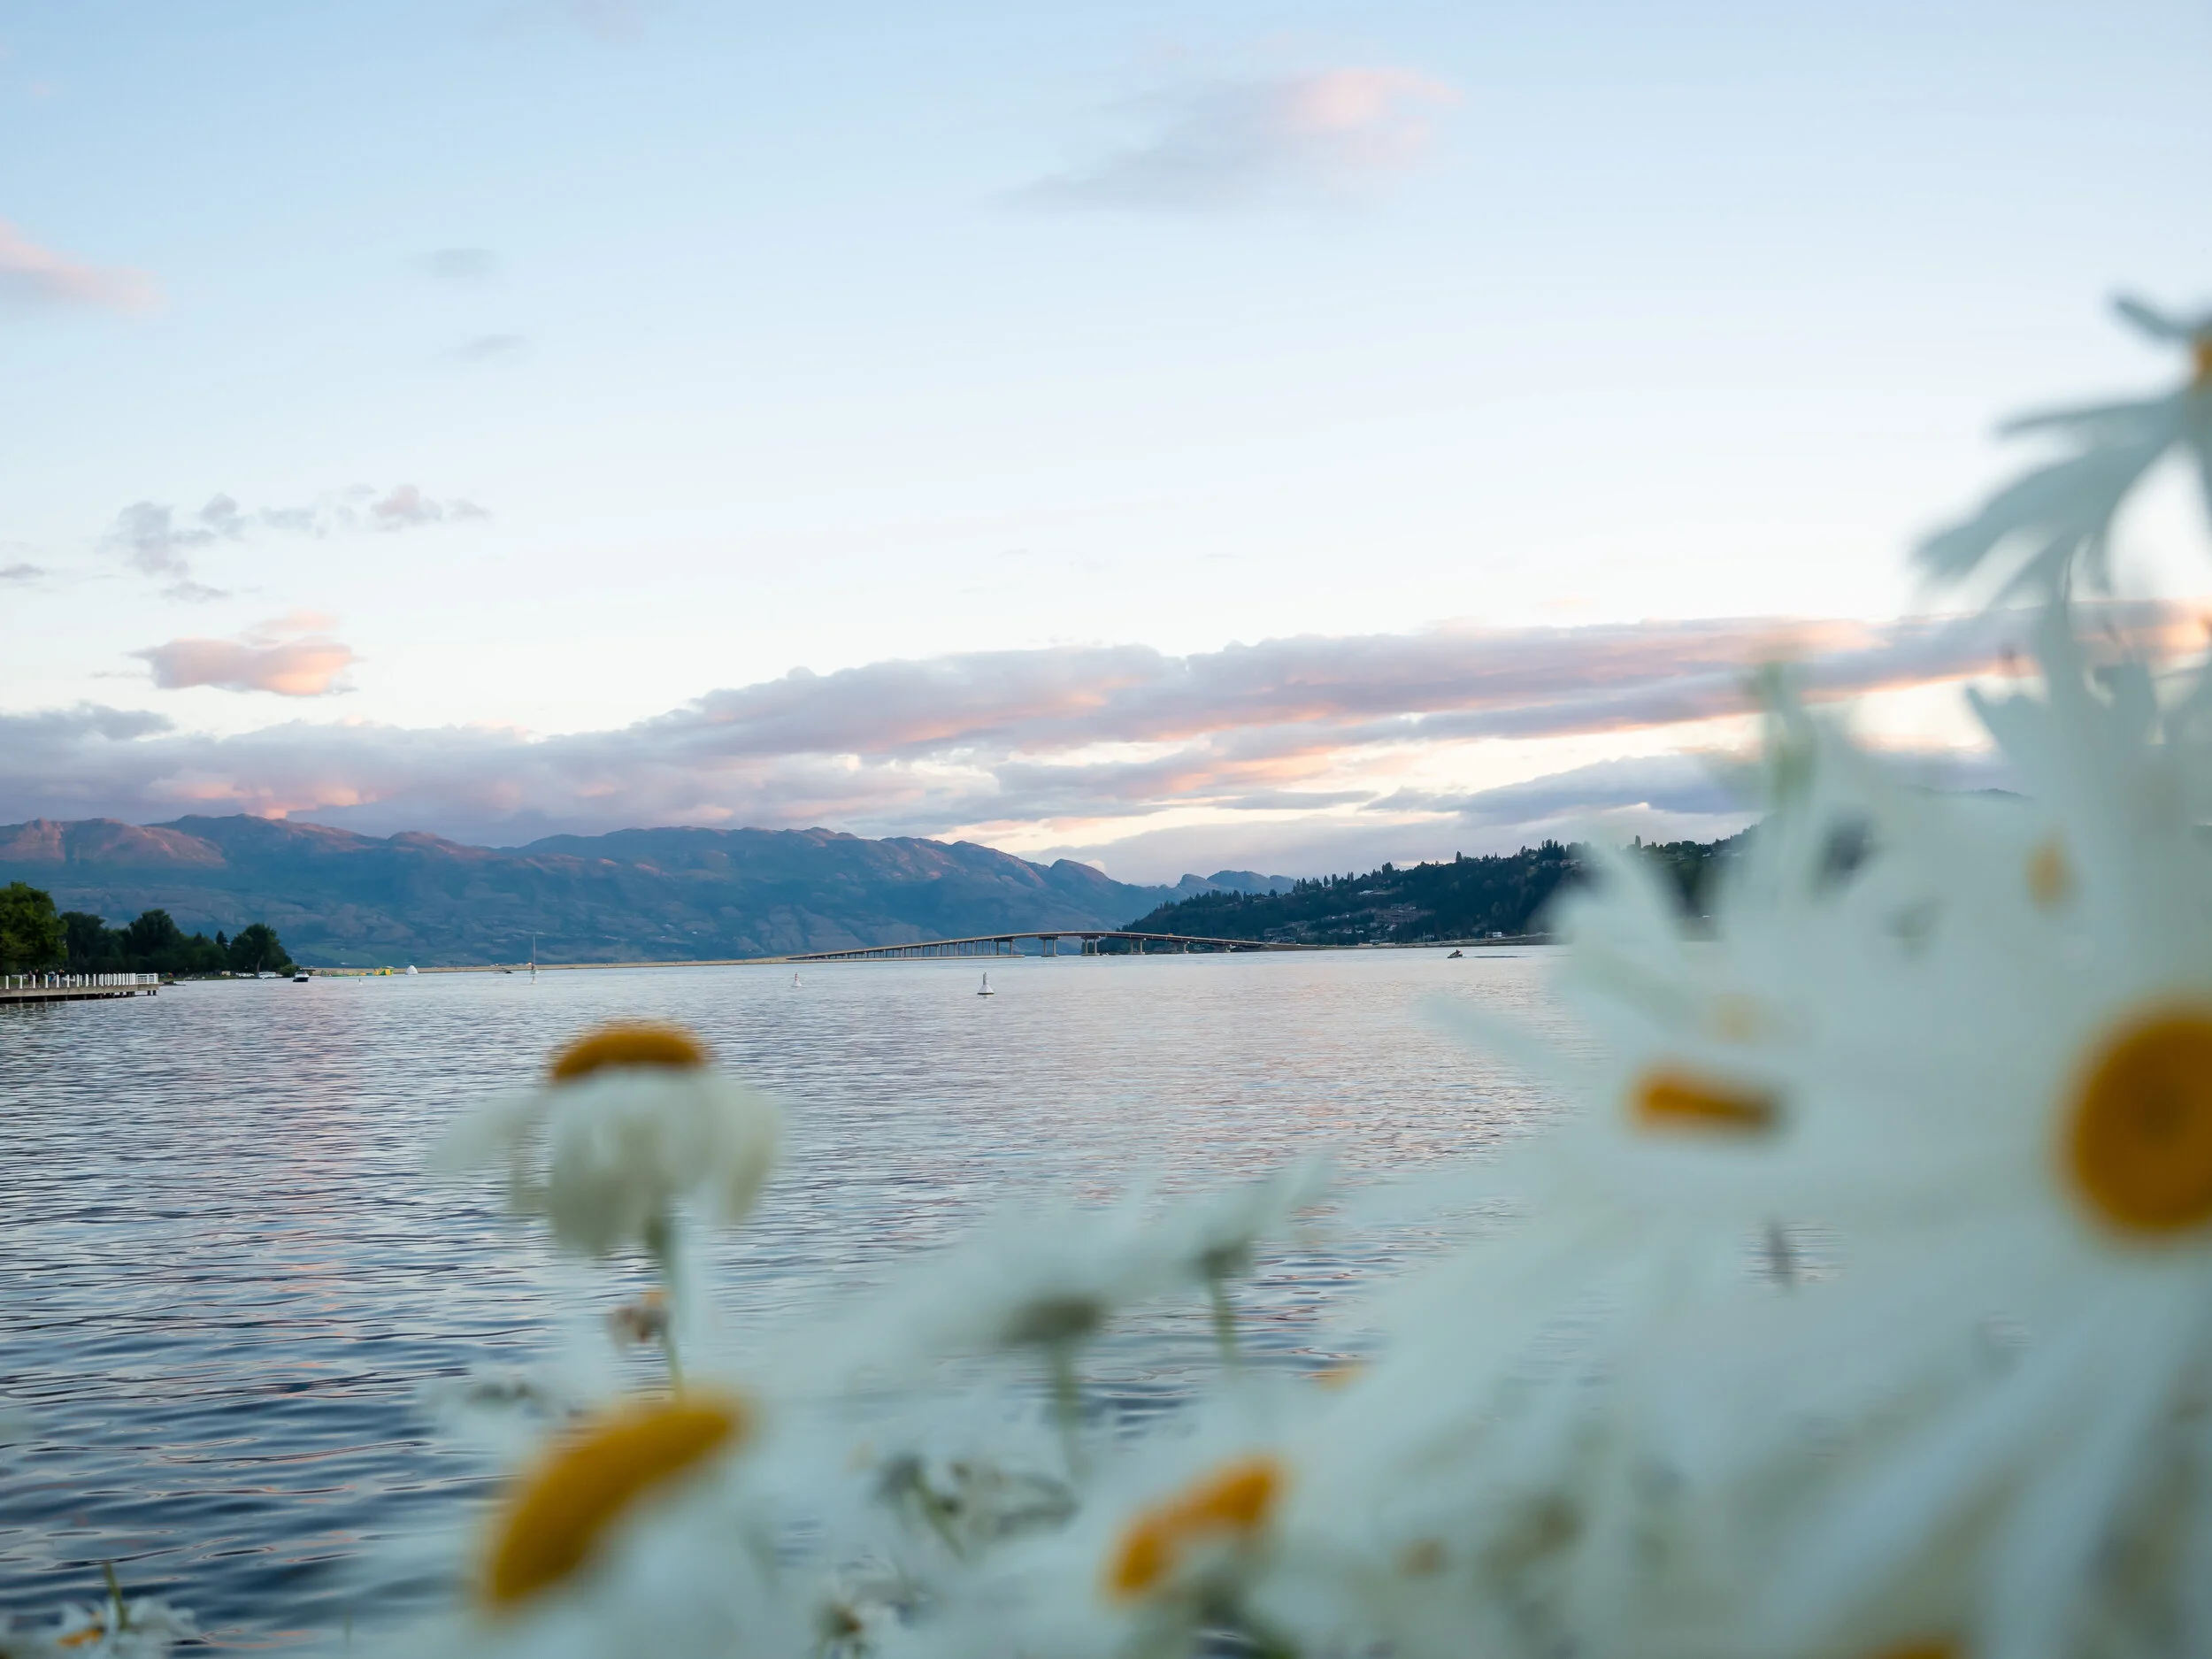
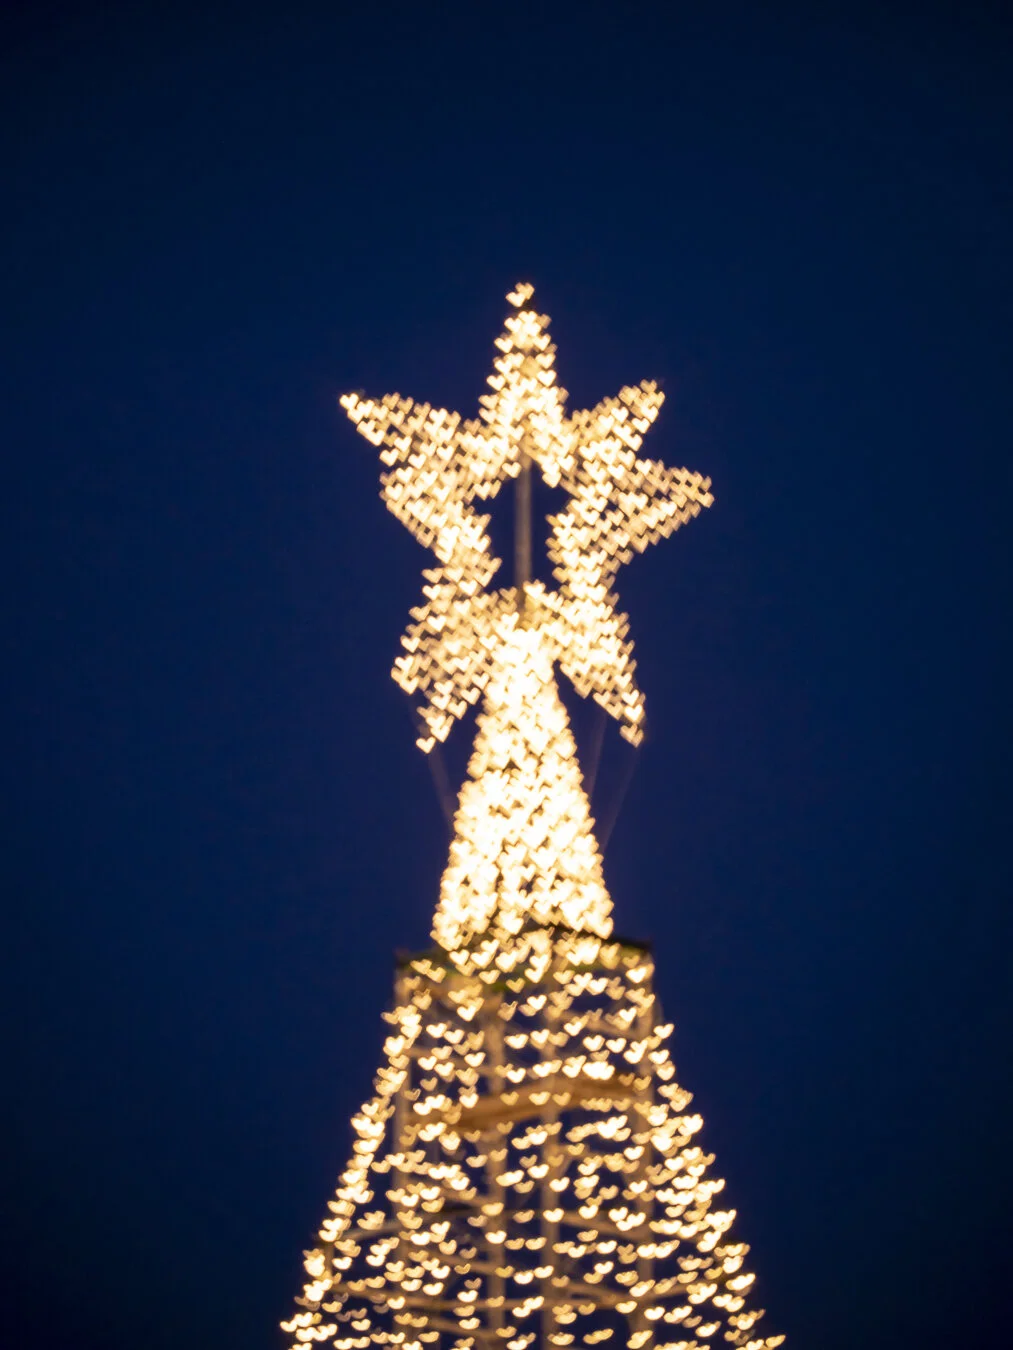
I then wanted to try finding a location where I can elevate the subject and get an unobstructed view of the tree but there was fencing everywhere so the best I could find was this post:

cool-bokeh-shapes-9.jpg
cool-bokeh-shapes-11.jpg
cool-bokeh-shapes-10.jpg

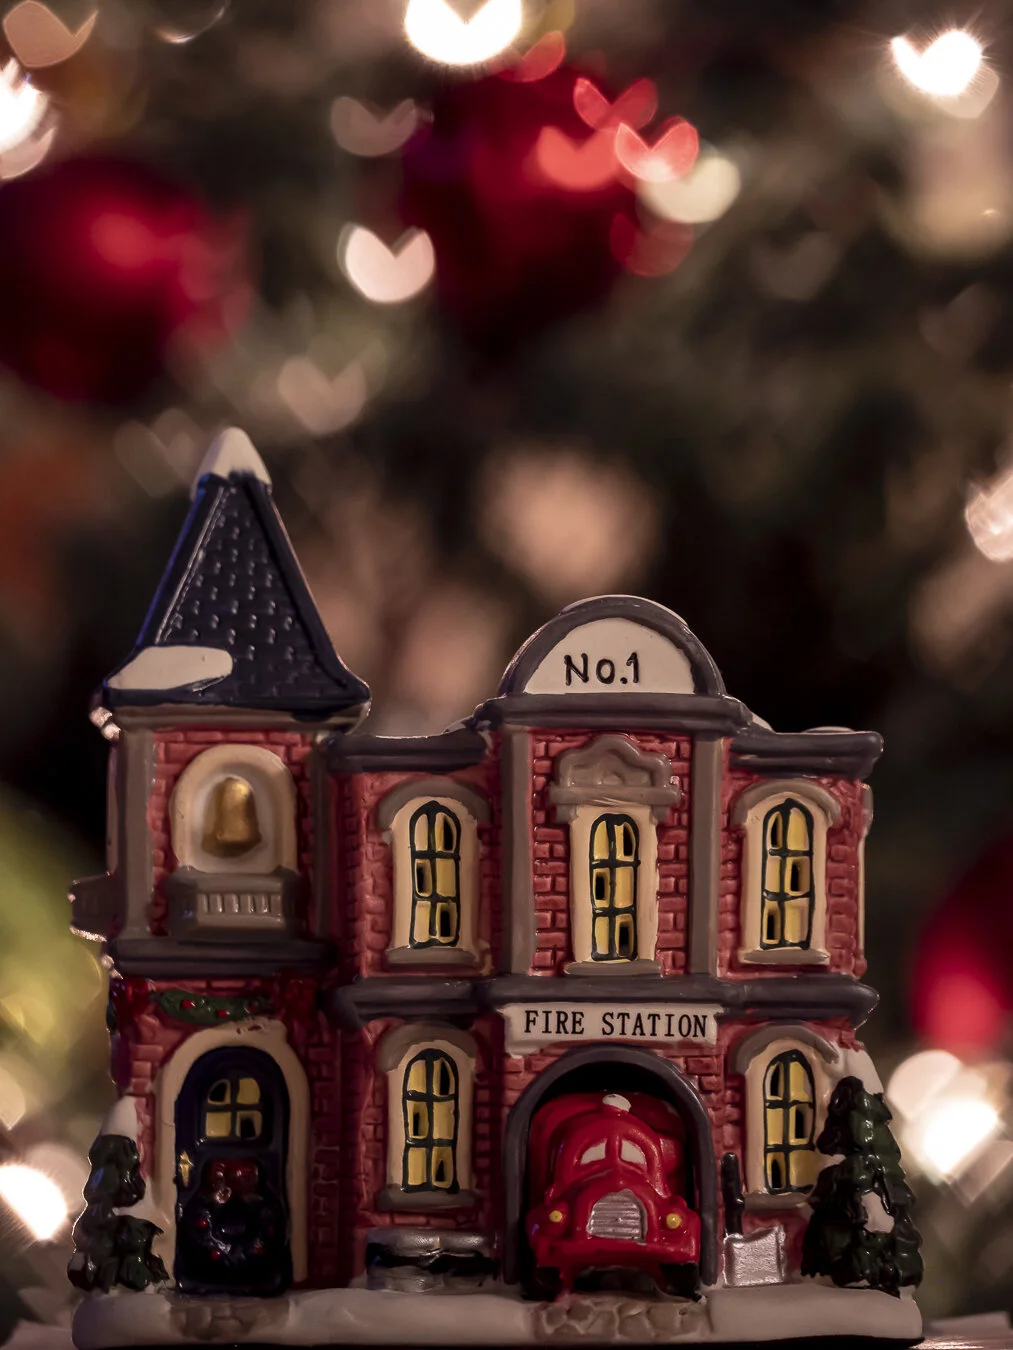
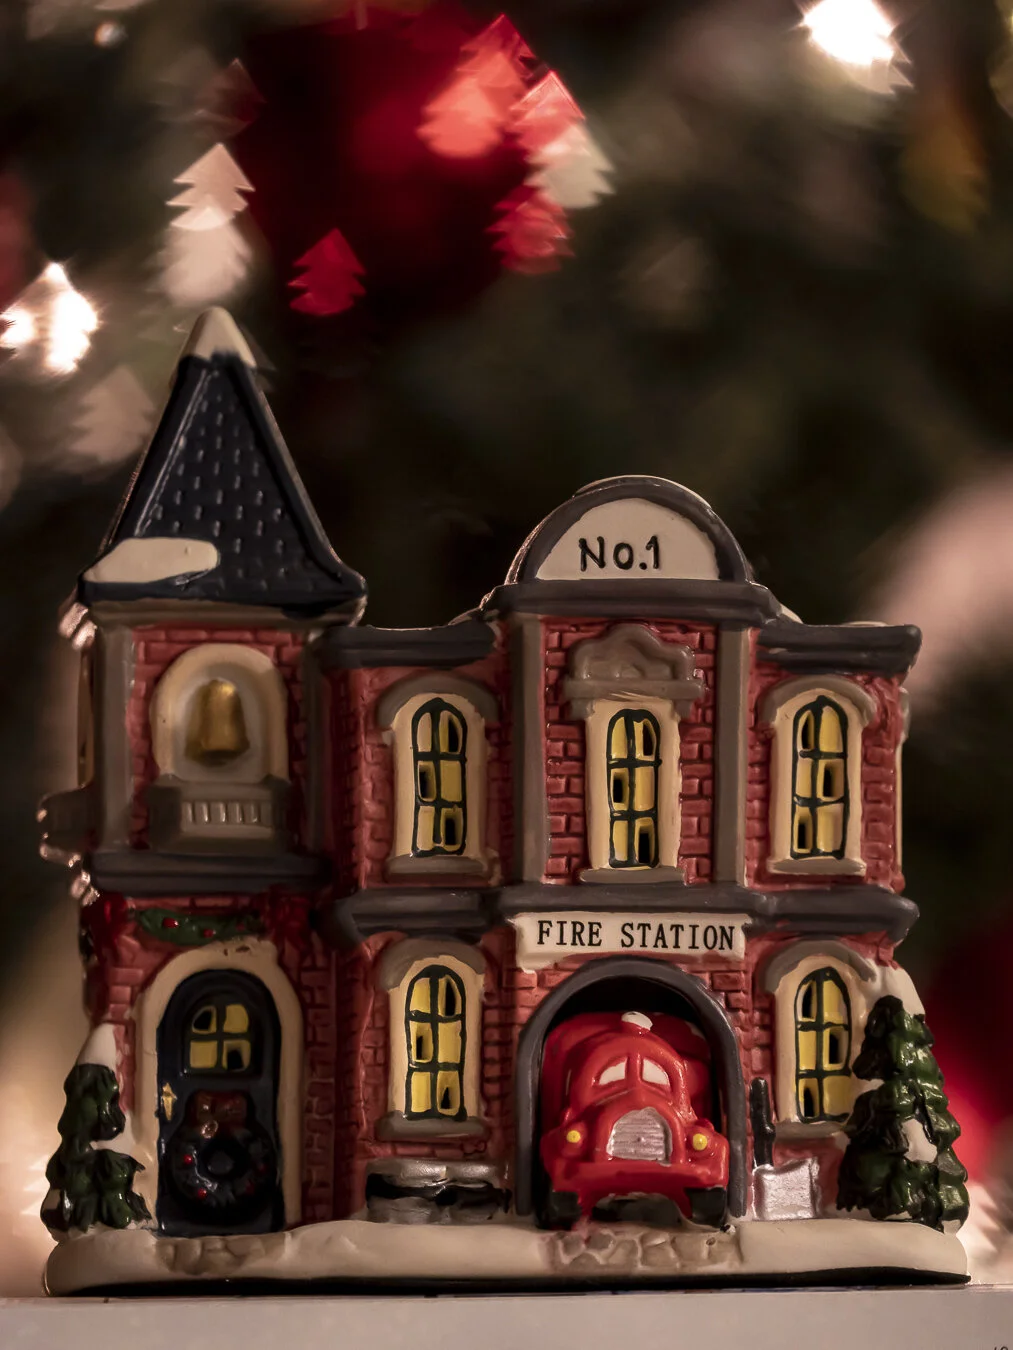
It was pouring at the Tree of Hope so I decided to come back home and do some more test shoots in front of the Christmas tree:

cool-bokeh-shapes-2.jpg
cool-bokeh-shapes-12.jpg
cool-bokeh-shapes-14.jpg

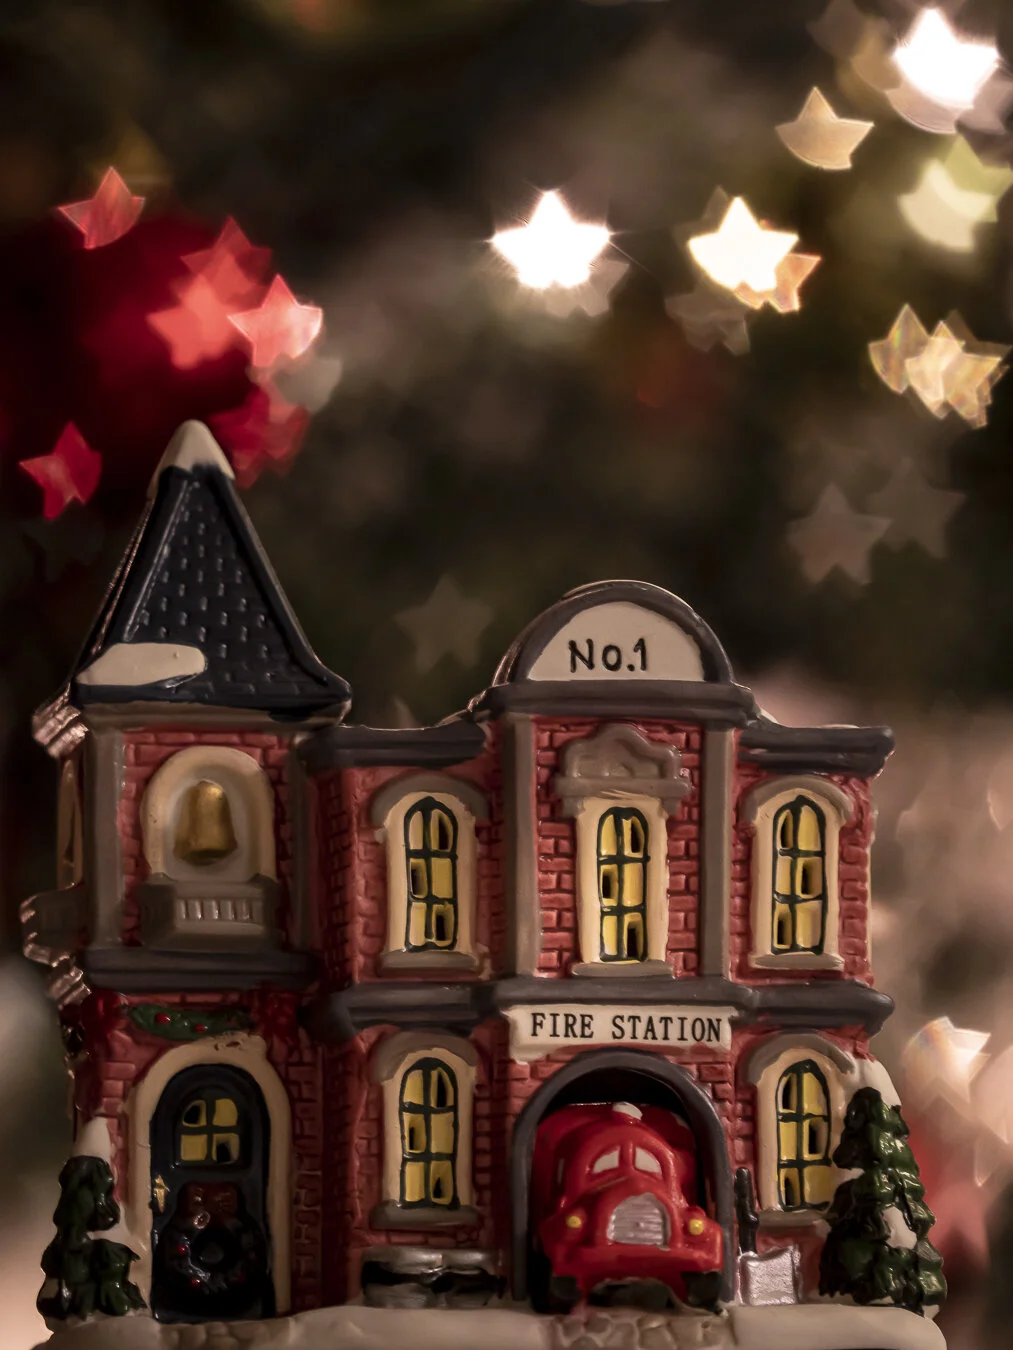
Today we went from regular bokeh to shaped!

cool-bokeh-shapes-16.jpg
cool-bokeh-shapes-1.jpg

Final Thoughts

The concept of making these DIY filters is quite simple, however, the tricky part is getting the SIZE of the shape right for the focal length and lens you are using.

You can definitely get creative and try some different shapes - letters, numbers, icons, etc.,

Have fun with this and if you do your own creation and share on Instagram tag @beautifulywander so I can see your creation - I would love to see them!

Christmas Food Photography with the Olympus EM1 Mark II and the iPhone | Photography Experiment

Lets experiment with some festive food photography and Christmas baking!

Right now over on Instagram Olympus has been releasing a series called the 12 Days of Christmas and one of the days was a video with Gavin Hoey featuring festive food photography and I was so inspired to try it out!

So in todays episode we made Christmas Bark and experimented with 5 tips in food photography on both my Olympus EM1 Mark II and the 12-40 F2.8 PRO lens and my iPhone XR!

After I photographed the Christmas Bark I edited all images in Lightroom (both EM1 Mark II and the iPhone).

Tip #1 : Lighting

In the video they discuss the concept of lighting (flat light vs. adding intentional shadow). Thus, I decided to do this photoshoot by my kitchen window primarily using natural light.

With the placement of my tray and the window it created a natural shadow to the left, adding more dimension and interest to the photo.

Olympus EM1 Mark II // M.Zuiko 12-40 F2.8 PRO// ISO 500 f/8 1/15Edited: Lightroom

Olympus EM1 Mark II // M.Zuiko 12-40 F2.8 PRO// ISO 500 f/8 1/15

Edited: Lightroom

Taken on the iPhone XREdited: Lightroom

Taken on the iPhone XR

Edited: Lightroom

Tip #2 : Styling

They also discuss in the video the concept of styling your food with festive props that add interest to the overall image. In my photo I used what I had in my home and styled the bark with some leftover red and green M&M and crushed candy canes.

Olympus EM1 Mark II // 12-40 F2.8 PRO // ISO 500 F2.8 1/100Edited: Lightroom

Olympus EM1 Mark II // 12-40 F2.8 PRO // ISO 500 F2.8 1/100

Edited: Lightroom

Taken on iPhone XREdited: Lightroom

Taken on iPhone XR

Edited: Lightroom

Tip #3 : Continuity in Shape but Different Sizes

My intention was to create star shapes with the Christmas Bark but due to their thickness and fragility I wasn’t able to, so I selected like-shapes with different toppings.

This would have been better had I worked with cookies in different sizes with different patterns and colour (but when I made cookies last year they were hard to make and turned out really ugly!)

Olympus EM1 Mark II // 12-40 F2.8 PRO // ISO 500 F8 1/20Edited: Lightroom

Olympus EM1 Mark II // 12-40 F2.8 PRO // ISO 500 F8 1/20

Edited: Lightroom

Taken on iPhone XREdited: Lightroom

Taken on iPhone XR

Edited: Lightroom

Tip #4 : Use a Container

Another tip that I found about photographing baked treats was putting them into a container (while also creating layers). I had this old gingerbread house Christmas tin from last year and I put all my Christmas Bark inside and styled the lid to the side.

Olympus EM1 Mark II // 12-40 F2.8 PRO // iSO 800 F8 1/20Edited: Lightroom

Olympus EM1 Mark II // 12-40 F2.8 PRO // iSO 800 F8 1/20

Edited: Lightroom

Taken on iPhone XR Edited: Lightroom

Taken on iPhone XR
Edited: Lightroom

Tip #5 : Incorporate a Person

For this I set my Olympus EM1 Mark II on a tripod and set it to continuous shooting at 5 frames with 5 seconds in between. I picked up the tray and held it in front of the camera and chose my favourite.

festive-food-photography-final-5.jpg

***Unfortunately, I did not have a way to capture this version of the photo with my iPhone XR. This does require you either have a tripod for your phone or another person to take the photo for you.

Final Thoughts

In todays experiment we tried 5 different techniques when photographing food. Out of the 5 I would say my favourite was just styling the food, incorporating a person takes it a step farther and the runner up would be putting your items in a container.

I’ll be carrying out this conversation about which was your favourite over on my Instagram!

If you try out some festive food photography tag @beautifullywander! I would love to see your creations!

Tripod vs. Handheld Photography | Why I DON'T Like Using a Tripod

I shoot 90% of the time handheld on my Olympus EM1 Mark II!

In this episode we chat about tripod vs. handheld photography:

  • Pro’s and con’s of using a tripod

  • Pro’s and con’s of going handheld

  • Why I don’t like using a tripod

  • 5 things to consider before purchasing a tripod

My Current Tripod

The current tripod I use is the Manfrotto Element Traveller Tripod Big. I purchased it when I was in Fort McMurray from Foto Source for about $130.

What I like about the tripod is it’s light and compact - it weights on average 2 pounds and when compact it’s only about 15-inches long. I can easily carry it around or I can slip it onto my backpack or onto my purse if I want to be hands free.

The main thing I dislike about the tripod is the clasps. This tripod has rotating clasps so you have to rotate the clasp to unlock and rotate again to lock and you have to do this for every single extension for every leg.

This setup makes it extremely cumbersome and time-consuming to setup, takedown or move.

Pro’s and Con’s of Using a Tripod

In my experience of using the tripod there has been three main benefits:

The first benefit is for long exposure photography. I find with the image stabilization in the Olympus I can go up to 2 seconds before camera shake becomes an obvious problem so having a tripod handy for moments that require a longer shutter speed is great!

The second benefit is for low-light photography. I don’t tend to do a lot of low light photography - the latest I am typically out photographing is 30-45 minutes after sunset and there is still some light in the sky. However, if you do a lot of low-light photography then a tripod is a must!

The third benefit is for capturing motion or movement. When I captured the picture below at Gyro Beach I used a tripod - I was on the beach for over an hour, sprinkling leaves in front of the camera so the tripod made the process easier than trying to do it handheld.

The biggest con I have experienced in using a tripod is its restriction on my movement and creativity. I find with a tripod I get anchored to one spot, and due to the fact that its cumbersome to setup and takedown I don’t like moving it a lot so I find I become very static with the use of the tripod and I’m the kind of photographer that likes to get low to the ground, get behind bushes and tree’s and really do some photography yoga to get the shot!

For this photo I stood at corner across from the Paramount Theatre sign in Kelowna. I wanted to get a motion shot of cars passing by - this was shot handheld at 1.3 seconds!

For this photo I stood at corner across from the Paramount Theatre sign in Kelowna. I wanted to get a motion shot of cars passing by - this was shot handheld at 1.3 seconds!

In this photo I opted to use a tripod - I positioned my tripod on the beach and sprinkled leaves in front of the camera until I got the shot. Because I was positioned there for over an hour using a tripod made better sense than going handheld.

In this photo I opted to use a tripod - I positioned my tripod on the beach and sprinkled leaves in front of the camera until I got the shot. Because I was positioned there for over an hour using a tripod made better sense than going handheld.

Pro’s and Con’s of Going Handheld

The biggest benefit of going handheld with my photography is it’s impact on my movement and creativity - like I said earlier I like to get low to the ground, change up my composition, get behind bushes and tree’s and using a tripod doesn’t work well for that. Without a tripod I can move around a lot more and get creative with my photos!

With this photo (bottom left) I had to get my camera extremely low to the ground (almost touching) and that would have been very difficult had I been trying to use a tripod.

The second benefit with going handheld is you’re carrying less equipment. I greatly despise carrying tons of equipment and I like feeling light so I can quickly move around. So if I don’t have to carry a tripod I won’t!

The biggest con I have experienced not having a tripod is the moments when I need one and I don’t have one. For this photo (bottom right) I used the park bench to stabilize my EM1 Mark II when its shutter was open past 2 seconds.

The restriction of a tripod on my movement and creativity is the biggest reason why I don’t like using a tripod.

downtown-kelowna-ii-11.jpg
kelowna-city-park-5.jpg

Other times when I went handheld with my photography:

pandosy-street-7.jpg
winter-at-gyro-7.jpg
big-white-1.jpg
mission-creek-greenway-2.jpg

5 Things to Consider Before Purchasing a Tripod

Here are 5 things to consider before purchasing a tripod:

  1. Size and Weight: If you’re backpacking around Europe then you’ll want to invest in a lightweight, compact tripod that can fit nicely on your backpack. If you are mostly photographing in a stationary place without too much movement then you can probably go for a heavier and larger tripod.

  2. Height: How tall do you NEED your tripod to be? When I purchased my tripod I thought I wanted the big version that had the extra height, however, I’ve actually never required it so I could have gone with the smaller version.

  3. Clasps: The tripod I use has rotating clasps that require me to rotate each extension to extend the leg and then rotate again to lock which makes setting up time-consuming and cumbersome. I have found since using my dads tripod which is also by Manfrotto that having the pop-up clasps makes setup so much easier.

  4. Sturdyness: Depending on your camera equipment you’ll want to consider the weight-bearing capacity of the tripod - can the tripod you are looking at hold your current setup and any future equipment you might purchase?

  5. Cost: What is the budget for your tripod? There are some expensive tripods on the market so really consider what your budget is for your tripod.

Final Thoughts

I hope you enjoyed todays article about tripod vs. handheld photography.

90% of the time I do handheld photography because I don’t like the restriction on my movement and creativity that a tripod imposes on me but of course, there are times that using a tripod makes my workflow easier.

Photography Books for Beginners | FAVOURITES

NOTE: None of the links in this blog post are affiliate links.


When I started my photography journey I scoured the internet for everything and anything photography related - I read blog posts, listened to podcasts and watched SO MANY YouTube videos!

In this episode I show you three photography books that are my favourite which I used to start my photography journey - the first two books are great for beginners and the last is a photo book that pumps me full of travel inspiration.

photography-book-photos-1.jpg

Read This If You Want to Take Great Photographs - Henry Carroll

The first book I ever picked up in my photography journey was Henry Carroll's Read This If You Want to Take Great Photographs. It's a short read at 125 pages but its packed with great information, quotes and 'photography philosophy'.

The books takes you through basic composition, exposure, working with light, the different kinds of lenses, and seeing not looking.

I was able to finish this book in one evening but it's a great read if you're a beginner photographer or you're looking to add to your photography book collection.

What I liked about the book was that it touches on photography composition and the technicals (i.e. Rule of Thirds, Leading Lines, Framing, etc.) but it focuses more on YOU.

Creative Vision - Lisa Michele Burns (The Wandering Lens)

The second book that I picked up in the summer was Lisa Michele Burns (The Wandering Lens) Creative Vision ebook. This book is also a short read at 60 pages but its full of great advice, journal prompts and exercises that you can try. I was able to read in a morning but it took me a couple days to complete some journaling and exercises.

Lisa also focuses more on your creativity and your creative eye than the technicalities.

It's a great book if you're a beginner to photography or you're looking to get serious into your photography career.

photography-book-photos-3.jpg
photography-book-photos-2.jpg

Dame Traveler: Live the Spirit of Adventure - Nastasia Yakoub

The last book that I want to show you is Dame Traveler's Live the Spirit of Adventure photo book.

This is a beautiful photo book full of travel photos from several different women travelers. It's split into four sections: Architecture, Water, Culture and Nature.

Along with absolutely beautiful photos you'll also read stories from these different women.

During the early parts of COVID-19 when it was just beginning to hit Canada I picked up this book because I couldn't travel but I wanted to consume travel inspiration. To this day I still flip through it when I need some travel inspo!


Final Thoughts

I bought the first and last book on Amazon (see the titles for links) and the second one off Lisa's website.

Other books on the horizon for me is Thomas Heatons Landscape Photography Photo Book and Renee and Matthew Hahnel Roaming Ameirca: Exploring All the National Parks.

As well, I wouldn't mind reading Use This if You Want to Take Great Photographs and Read This if You Want to Take Great Photographs of Places.

EXPLORING LOCAL | How I Find Photography Locations & Tips on Exploring Local

With COVID-19 in its current state and international travel even domestic being suspended for the unforeseeable future we all have to turn to more local travel.

In todays episode I wanted to shed some light on a section of the website I don’t talk about very often ‘The Okanagan’ where I document photography locations around the Okanagan, with details and photos! I also wanted to show you how I discover places to photograph and give some tips on how I became a tourist in my own city!

The Okanagan

I created The Okanagan section of my website because when I travel anywhere I always look for things to do but also great photography locations. I wanted to help serve other photographers or visitors to the Okanagan by giving them ideas on where to photograph.

The idea is that you can filter by what you are looking for - beach, park, viewpoint or garden. As I explore the Okanagan more I hope to add a city filter so you can toggle between Kelowna, Vernon, Lake Country, Penticton, etc.,

I’ve gone in and tweaked each post to add further details to each location such as the type of location, address, parking available, direction it faces, amenities and difficulty level.

I’ve barely scratched the surface when it comes to exploring locations but it’s definitely a start.

How I Find Photography Locations

I find most of my photography locations on Google Maps. If I am looking to explore a particular area of Kelowna like Southeast Kelowna, Mission, etc., then I will spend more time in those areas but I am generally looking for beaches, parks and light hikes that I can do.

If I want a different perspective I will turn on ‘Satellite’ or open up Google Earth.

I also like to open up the photos that people take and add on Google Maps to get an understanding of the area and if it interests me.

Screen Shot 2020-11-12 at 8.04.09 AM.png
Screen Shot 2020-11-12 at 8.05.04 AM.png

Other ways I will find photography locations is through Instagram or Pinterest.

Tips on Exploring Locally

Here are a couple tips that have helped me become a tourist in my own city:

Commit to Yourself (Make a Promise)

Before I moved away I didn’t appreciate Kelowna as I do now. I didn’t explore that often and I often said I was going to visit somewhere or do something and wouldn’t. So when I moved back to Kelowna, BC I made a promise to myself that I was going to explore more and live life more fully and so every week I try to explore a new location in Kelowna and do something new.

Make a List

I made a list of everything I wanted to do or explore in the Okanagan back in the Spring when I moved back. From there I just slowly tackled items on that list - being very specific in carving out time for myself and Max to spend time together and get out of the house!

Some of those items on my list were:

  • Visit the Kelowna Art Gallery

  • Visit Okanagan Wineries

  • Go to a Pumpkin Patch (I went to Davison Orchards and McMillans)

  • Get outside of Kelowna and visit other areas of the Okanagan

Create a Project

Make a project out of exploring so you can have a tangible end product that you can work towards!

I love my Instagram, my blog, my YouTube channel, and my photography as creative outlets to share what I discover and learn.

Final Thoughts

Documenting and sharing more local travel related content is something I would like to include more here, on my Instagram and YouTube.

Subscribe to Beautifully Wander on YouTube to get notified of my weekly videos and follow over on Instagram for regular updates!

Adding CREATIVITY to your Intimate Landscape Photography

Yay! We’re at my favourite part in intimate landscape photography - getting creative!

In today’s episode I share 3 ways that I like to add creativity to my photos.

If you haven’t seen already I have two previous blog posts about Intimate Landscape Photography:

Reflections

One of my first tips for adding creativity to your photos is utilizing reflections.

Often people look for reflections in water - a puddle after it rains or a calm lake. However, I don’t often have access to these calm waters all the time so I use my phone to create a reflection!

It can be time consuming and tricky because depending on the subject you are photographing you need to be the right distance away and achieve the right angle with the phone.

When creating reflections with your phone it is important to blend that phone line! I like to zoom in with my Olympus M.Zuiko 12-40mm f/2.8 PRO lens and use a wide aperture of f/2.8 to blend the edge of the phone line.

downtown-kelowna-4.jpg

Foreground Blur

The second way that I always use to add creativity to my photos (if you follow me on Instagram you know I use this technique all the time) but it is incorporating foreground elements.

I use a variety of objects to create this effect - branches, leaves, man-man structures, tree’s, bushes, etc.,

All you do is frame yourself/your camera behind your object (tree, leaf, branch, etc.,) and shoot with a wide aperture.

birthday-7.jpg
birthday-1.jpg
birthday-6.jpg

Double Exposures

Creating double exposures is a relatively new technique that I have added to my photography workflow.

I have an Instagram Reel over at Beautifully Wander on how I do a double exposure but increasingly I gravitate towards capturing these on two occasions - when I photograph a mountain range and when I overlay a pattern on another object.

On the Olympus Camera it’s called ‘Multiexposures’ under Camera 2.

cedar-creek-park-12.jpg

Motion

Adding motion to my photos is not something I do often but it is something I want to incorporate more of!

For the photos you see below I slowed my shutter speed down and waited for vehicles to pass - the vehicle on the right had lights on the top which added a cool effect!

I’ve always been intimidated about adding motion to my photos but it was a lot of fun to see the results!

downtown-kelowna-5.jpg
downtown-kelowna-6.jpg
downtown-kelowna-7.jpg

Sun Stars

If I am photographing at sunset I will always try to get a sun star! For this I change my aperture to anywhere between f/14 and f/22.

Sometimes I will try to create a sun star on the horizon when the sun is setting, sometimes I will create it by looking for an object like a tree to diffuse the light ray but still create the effect.

downtown-kelowna-3.jpg
harvest golf club-2.jpg

Final Thoughts

There you have it! Those are 3 ways (+2 extra’s) that I like to do to add creativity to my photos!

When I started photography I didn’t try tackling all these techniques at the same time. I focused on one technique at a time until I was comfortable with all in my workflow.

15 Minute Photography Challenge ft. Intimate Landscapes

Last week I posted a video about intimate landscape photography! In this week’s episode I thought we would try a 15-minute photography challenge also focusing on the topic of intimate landscape photography:

The Challenge

The idea here is to visit a new location (or one that you’ve been to many times) and give yourself 15-minutes to photograph anything.

With intimate landscape photography you don’t need sprawling landscapes you can photograph any beauty within a landscape - line, shape, colour, texture, light, etc.,

Look for details within a scene that you love, are interesting, catches your eye or tells a story about the characteristics of the land.

Why this Challenge?

An exercise like this I believe can help you train your eye and your mind to hunt for details within a scene - an activity that is good if you are trying to practice more intimate landscape photography!

The Photos

15-min-photo-challenge-8.jpg

From afar this area doesn’t look like much! But let’s look at what details we can find when we get closer!

I loved this lone tree off to the side of the beach. To make it more interesting I positioned the camera behind some leaves and used it as foreground blur.

I loved this lone tree off to the side of the beach. To make it more interesting I positioned the camera behind some leaves and used it as foreground blur.

On this day at the beach it was extremely windy so it was causing ripples in the lake.

On this day at the beach it was extremely windy so it was causing ripples in the lake.

On the side of the beach was this fallen tree. It had rough wood texture on the bottom of the tree and smoothe texture on the top that was interesting.

On the side of the beach was this fallen tree. It had rough wood texture on the bottom of the tree and smoothe texture on the top that was interesting.

On the other end of the log you it had this marble like pattern that was a detail I loved!

On the other end of the log you it had this marble like pattern that was a detail I loved!

All the tree’s on the side of the beach were slanted which I thought was interesting. To make the photo more creative I used some leaves that had fallen on the ground to add some foreground blur and further frame the slanted tree.

All the tree’s on the side of the beach were slanted which I thought was interesting. To make the photo more creative I used some leaves that had fallen on the ground to add some foreground blur and further frame the slanted tree.

This was the last photo I took in the 15-minute challenge. This view was from the beach and I liked the shading of the land masses and the clouds in the horizon. If I had a tighter zoom I would have used it but I only had my 12-40mm to work with.

This was the last photo I took in the 15-minute challenge. This view was from the beach and I liked the shading of the land masses and the clouds in the horizon. If I had a tighter zoom I would have used it but I only had my 12-40mm to work with.

Let me know over on the YouTube video if you’re going to try the 15-minute photography challenge!

Intimate Landscape Photography | Why I Love Photographing Intimate Landscapes

For a few months now I have been practicing intimate landscape photography (sometimes referred to or related to minimalism in photography).

In todays episode we delve into what is intimate landscape photography, why I love it, and how to practice it!

What is Intimate Landscape Photography?

Intimate Landscape Photography in a nutshell is when you don’t try to cram everything of the scene into the frame.

You focus on a specific element of the scene - line, shape, colour, texture, light, etc.,

Why I Love Intimate Landscape Photography?

I find with intimate landscape photography it forces me to slow down, focus and see the landscape differently.

Instead of trying to see everything I can pin point something specific about the scene that I love or catches my eye and focus on that.

You can also practice intimate landscape photography anywhere and anytime. I would love to photograph the epic sprawling landscapes of Iceland but with intimate landscape photography I can capture beautiful moments in my own backyard or hometown.

How to Practice Intimate Landscape Photography?

The next time you go out for a walk, visit a local park, or explore a new location try to pick out details that you love about that place and focus on that.

For example, a few times a week I go for an evening walk along Lakeshore Road and on my evening walks I always pass these houses that I especially love in the fall because the trees are this vibrant orange colour.

It’s the colour of the trees that catch my eye and make this scene beautiful to me so I’ve focused my frame on that.

chasing-fall-iii-2.jpg

Here are some more examples:

I took this photo at Gyro Beach in autumn. I wanted to focus on the juxtaposition of the beach hut against the autumn leaves.

I took this photo at Gyro Beach in autumn. I wanted to focus on the juxtaposition of the beach hut against the autumn leaves.

This photo was taken at Okanagan Mountain Park the site of the 2003 fire. Here I wanted to focus on the contrast between the regrowth and the charred tree stump.

This photo was taken at Okanagan Mountain Park the site of the 2003 fire. Here I wanted to focus on the contrast between the regrowth and the charred tree stump.

The following leaf photo I took at Mission Creek Park in Kelowna. I wanted to focus on the bleeding of the autumn colours from orange to yellow to green.

The following leaf photo I took at Mission Creek Park in Kelowna. I wanted to focus on the bleeding of the autumn colours from orange to yellow to green.

This photo was also taken at Gyro Beach and I loved the spherical bubbles that would sometimes form and the line that was drawn in the sand when the wave would come in.

This photo was also taken at Gyro Beach and I loved the spherical bubbles that would sometimes form and the line that was drawn in the sand when the wave would come in.

Lastly, this photo was taken at Kasugai Gardens in Kelowna, BC! A common feature in Japanese gardens are these stone lanterns so I decided to focus on this beautiful stone lantern for the photo.

Lastly, this photo was taken at Kasugai Gardens in Kelowna, BC! A common feature in Japanese gardens are these stone lanterns so I decided to focus on this beautiful stone lantern for the photo.

Intimate Landscape Photography can be really fun and creative!

I would love to hear if you ever tried intimate landscape photography and if you liked it or not - so comment on the YouTube video!

PHOTOGRAPHING FALL IN KELOWNA, BC

It’s fall here in the Okanagan! At the start of October the leaves were starting to change colour but every week it gets a bit cooler and the fall foliage appears even more!

In this episode I take you with me as I photograph fall foliage in a number of locations in Kelowna, BC!

Check out the photos from each location!

Gyro Beach

For this photo I collected a bunch of leaves that had fallen on the beach and sprinkled them in front of the camera. I like the blurred effect of the leaves so I kept my aperture to f/2.8 but I wanted to capture the placement of the leaves in the frame so my shutter speed stayed between 1/1000 and 1/2000 sec.

I think adding the falling leaves adds a creative element to the photo and I loved the juxtaposition of the beach hut against the fall foliage (photo on the right).

gyro-beach-fall-1.jpg

Tugboat Beach/Waterfront Park/Downtown Kelowna Area

I had a pleasant fall stroll from Tugboat Beach to Downtown Kelowna capturing all those autumn colours!

For this picture below I framed the dolphin statue with an orange leaf I found on the ground and the trees above. When you park in the parking lot this is the first picture-spot you’re going to want to capture!

fall-downtown-2.jpg

A little further down Waterfront Park is your second picture-spot! If you cross the pond you’ll see a gorgeous set of autumn coloured trees. To make the photo more interesting I used my phone to create a reflection!

fall-downtown-3.jpg

When you continue walking down the boardwalk to downtown Kelowna you’ll see more beautifully coloured fall trees! I just can’t get over how vibrant they look when the sun hits them!

fall-downtown-5.jpg
fall-downtown-7.jpg

I was looking for a perfect way to capture these fall trees and I’m so glad I found it! I loved these little boats in front of the fall trees and to capture it more interestingly I used my phone to create a reflection shot where the water was.

fall-downtown-6.jpg

Of course I couldn’t resist trying to get one double exposure shot! For this (photo on the right) I took a photo of the dolphins, then in my Olympus EM1 Mark II I went into Menu -> Camera 2 -> Multiple Exposures -> Set ‘Number of Frames’ to 2f -> Set ‘Overlay’ to ‘On’ -> Selected a photo from the library -> Took a close-up photo of a leaf.

fall-downtown-1.jpg
fall-downtown-8.jpg

Mission Creek Greenway

Mission Creek Greenway is suppose to turn this gorgeous yellow colour along the river and I was a bit too early to capture this. When I visited a couple weeks ago it was primarily green, about 40% of the trees have turned but I will visit again in a couple weeks (end of October) to see how the fall foliage is progressing!

mission-creek-fall-1.jpg

I hope you liked the vlog about chasing fall foliage in Kelowna! If you haven’t already please consider subscribing to Beautifully Wander on YouTube and following on Instagram!

Cheers to chasing fall foliage!

HOW TO ENJOY BAD WEATHER PHOTOGRAPHY

NOTE: Please at all times consider your own health and safety + practice at your own discretion.


Now that we're getting into fall in the Okanagan the weather is going to start changing.

About a week ago smoke covered the valley for 7-10 days, and now cloudy, overcast skies might start dominating.

The other day we had this storm pass through (there wasn't thunder or lightning) but there was some rain and high winds.

It gave me the idea to film a video about bad weather photography!

In today's episode I cover how I enjoy bad weather photography and provide 3 tips that might be able to help you!

Tip #1: Find some inspiration -> go out and try to recreate it -> and new ideas will come!

I was really loving these cool atmospheric shots of fog in the forest so when we had smoke fill the valley I thought it was perfect to try and get some atmospheric shots.

I had the intent that I would capture a line up of trees with the smoke atmosphere fading each tree but then when I went out I had the idea to do some comparison photos of what the valley looked liked before the smoke in the summer and now.

I posted these photos to my Instagram stories.

smoke in 2020 covering Kelowna
smoke in 2020 covering kelowna from dilworth
smoke covering the lake in 2020
smoke in 2020 covering the lake

On the stormy day I thought I would go out and get some choppy waves photos. I ended up being interested/inspired by the clouds in the sky - the different shapes, lines and shadows. As well, the lonely trees that I've recently been obsessed with.

storm at gyro beach

I often times get inspired by an image, go to recreate it with my own twist but then find other ideas to create!

Tip #2: Consider getting close/intimate with a part of the scene

For the past couple weeks I have been interested in intimate landscape photography. Getting close and personal with a part of the scene (focusing on a shape, line, texture, color of the scene).

Earlier this week I went to Cedar Creek Park in southeast Kelowna to hopefully get a stunning sunset.

By the time the sun was getting low in the sky some weird clouds had rolled in that added distraction to the image more than anything.

I switched focus and instead did some intimate landscape photography - this is one of my favourite images from the trip:

cedar creek park in kelowna

Yes, its of a rock! But I loved how the waves were crashing against the rock causing water droplets to spew upwards.

This is another image I like that I produced when the sky was super smoky - I liked how the water created lines in the sand and the little bubbles that would form.

smoke at gyro beach

When the weather is bad it's good to consider getting close to the subject and focusing more on lines, textures and color.

Tip #3: Try out abstract photography

Abstract photography isn't for everyone but it's fun to try - especially when the weather is bad!

Here's a photo that I posted a few weeks ago on my Instagram which was a camera pan of the sunset. I used a long shutter speed and swung the camera side to side.

gyro beach pan-1.jpg

I did it again when I visited Cedar Creek Park.

camera pan at cedar creek park in kelowna

Here are some abstract photos that I haven't posted yet - the first one is at Cedar Creek Park of the lake and the second is the clouds on that stormy day at Gyro.

abstract photo of Okanagan Lake
abstract photo of the sky on a cloudy day

Your Camera System

It can be tricky to do bad weather photography if your camera can't handle it.

I use an Olympus EM1 Mark II which is dust-proof, splash-proof and freeze-proof so I don't worry too much if the weather is bad.

This however, is completely up to your own discretion and what you feel comfortable doing with your gear.

Niche & Voice

I have also found that narrowing down on my photography niche, finding my photography voice and doing photography more for myself and what I'm interested in has also helped in my creativity and motivation.


I hope you were able to take something away from this post on bad weather photography and I'll see you in the next time!

Robynne | Beautifully Wander

5 LESSONS I LEARNED THIS SUMMER IN PHOTOGRAPHY

In this episode I share 5 lessons I learned this summer in photography.

This episode doesn't discuss learning composition, learning fine camera details like shutter speed, aperture or ISO, it doesn't discuss camera tech.

This episode takes a deep dive into the other side of photography.

Lesson #1: Action Brings Clarity

When I was contemplating leaving Fort McMurray in the Spring and pursuing photography I was unsure about it. So for the months I was there I pursued photography on the side (in the evenings and weekends). When it came actually time to make a decision I decided to go for it because I knew I would never find out if this was the right path unless I TRIED IT!

Then in the summer when I was trying to figure out which niche I wanted to focus on action continued to help bring clarity. I tried portrait photography, pet photography, product photography. I trialed any niche that peaked my interest.

Now I knew from the beginning there were some niche's that didn't interest me - newborn photography, maternity photography, birthing photography, wedding photography.

The one thing that has always brought me joy, that I have always loved doing - travel and landscape photography.

It was through action that I found clarity in what I really wanted to do.

Lesson #2: Every Photographer is Unique

One of the limiting beliefs I had when I started and sometimes still fight with is that there is no room for me in photography, I couldn't produce a different image, I can't be unique when the market is this saturated.

I picked this up from Marie Forleo but anytime I have a limiting belief like this I...

  1. Take out my journal and write what the belief is

  2. Draw a line through what I had just written

  3. Write b******* next to it

  4. Below it write why they are b******

To give an example this is an actual limiting beliefs I wrote down on February 22, 2020.

"It's already been done/there's tons out there so nobody would be interested" B******

Every human is different. Every person has a different story to tell. Every soul has a different perspective. because of our differences there is always room for us in the creative world.

YOUR different perspective, YOUR different life story, how YOU interact with the world, how YOU interact with your subject is going to be completely different than how someone else does. YOU are different. YOU are unique.

Lesson #3: Build Community Over Competition

Similar to the limiting belief about the saturated market of photography is competition.

I would scroll on Instagram and think to myself "there is no way I could produce a beautiful image like that".

I would compare my photos to other photographers that have been doing this for years and I would get stressed.

I would think how am I suppose to compete, be unique and be seen?

How do I get from this "bloody red ocean to a clean blue ocean"?

It wasn't until I started seeing photography through the lens of community and showing up to social media and the world as authentically me that everything changed.

Now I strive every day and every week to put the community first over myself, be part of the community, help build each other up, and provide inspiration.

Lesson #4: Understanding Why I Click the Shutter and Why I Compose

In photography there are tons of rules...

  • Rule of Thirds

  • Balance out your elements

  • Direct the eye with leading lines

  • Offset the subject

However, when was the last time you stopped and emotionally thought why you clicked the shutter?

gyro beach in kelowna at sunset

I clicked the shutter in this photo for a couple of reasons:

  1. I loved the setting sun in the background

  2. I loved the orange, pink and purple colors in the sky

  3. I loved the little waves the Lake was creating

When I click the shutter it has to look and feel right to me, I need to be in tune with my emotion and feelings and feel my most creative.

I think that is why this last session at the beach was the best session I have felt in a long time! I was overwhelmed with happiness and emotion.

At the beginning I used to point my camera at whatever caught my eye. Eventually I started to photograph more what I thought people would want to see and like.

I've recently started to gravitate towards photographing with my emotion first.

Lesson #5: Importance of Creating your own Photography Values

What values do you have as a photographer? Do you have them written down somewhere? Do you try to embody those values in your work?

Earlier in the summer I started drafting what values I want to embody as a photographer.

  • What is important to me?

  • What do I want my work to stand for?

  • What guides my photography?

  • What attracts me to other photographers?

  • What drives me on how and why I do things?

Coming up with these values has helped provide clarification on my content and who I want to be as a photographer.


If you learned any lessons about photography this past summer leave a comment on the YouTube video!

Thanks everyone for reading and have yourself an amazing day!

xoxo

Robynne | Beautifully Wander

OLYMPUS 12-40MM F2.8 PRO - AWESOME VERSATILE LENS

NOTE: These are my own thoughts. This not a sponsored post. I just love my Olympus!


In this episode we discuss why the Olympus 12-40mm f/2.8 is a great overall lens! I love this lens for food, street, landscape and portrait photography! 

Technical Details

  • 12-40mm (24-80mm equivalent)

  • Weather resistant 

  • Durable

  • Made from high quality material

  • Maximum aperture is f/2.8

  • Constant aperture of f/2.8 throughout the zoom range

  • Minimum aperture of f/22

  • Approx. $1350 CAD (before taxes)

  • 382 grams 

If you want more technical details on the lens go check out Olympus website! 

Travel Friendly!

The Olympus M.Zuiko 12-40mm f/2.8 PRO is extremely lightweight weighing at 382 grams. Due to its lightweight and compact size it makes the camera pretty discreet for travelling around the city and eating in restaurants. 

I’ve taken this camera lens (and body) everywhere with me! 

Versatile Lens!

The 12-40mm focal length makes it also super versatile. I can easily capture delicious food shots, streets, landscapes, portraits and close ups!

Food Photography:

food-2.jpg
food-6.jpg
food-3.jpg

Street Photography:

street-photography-1.jpg

Landscape Photography:

landscape-photography-2.jpg
landscape-photography-3.jpg

Portrait Photography:

portrait-photography-3.jpg
portrait-photography-1.jpg
portrait-photography-2.jpg

Close-up:

close-up-1.jpg
close-up-3.jpg
close-up-2.jpg

If you enjoyed this post, please be sure to subscribe to Beautifully Wander on YouTube and follow on Instagram

BIRDS EYE VIEW OF KELOWNA || DILWORTH MOUNTAIN PARK

Do you want a beautiful birds eye view of Kelowna but don’t want to hike or have the time? Visit Dilworth Mountain Park!

Dilworth Mountain Park is about 15 minutes from downtown Kelowna.

You will need a vehicle to get to the park because if you don’t you could be looking at a 1.5 hour walk uphill.

It has a small parking lot, playground, a few trails and benches spread out. It’s a light “hike” compared to Knox Mountain.

It’s a perfect spot for a picnic date!

  • Grab takeout from White Spot at the base of Dilworth Mountain (I love getting the Legendary Burger with fries and a side of mayo to dip)

  • Drive to Dilworth Mountain Park (5 min drive)

  • Walk to one of the many view points (a nice one is to the far left of the park)

If you’re a photographer the view point to the far left of the park is nice. There is another trail that leads to an even higher peak (if you’re interested in a little more of a hike). The right side of the park has a nice view of the golf course below.

dilworth mountain park-1.jpg
dilworth mountain park-2.jpg
dilworth mountain park-05.jpg
dilworth mountain park-18.jpg
dilworth mountain park-20.jpg
dilworth mountain park-04.jpg
dilworth mountain park-24.jpg
dilworth mountain park-01.jpg

KASUGAI GARDENS, KELOWNA BC - A STROLL THROUGH A JAPANESE GARDEN

Kasugai Gardens is a beautiful, peaceful and serene location in downtown Kelowna. It features lush plants, a koi pond, stone lanterns and a waterfall.

It was created to demonstrate the friendship between Kelowna and its sister city in Kasugai, Japan.

In the summer months The Garden is open from 9:00 AM to 8:00 PM.

It’s a wonderful place to get away from the bustle of a city and relax.

When you first walk into the garden and follow the signs one of the first little bridges you cross has this little creek running underneath it. To get this shot I got the camera real low to the water.ISO 2000 / 1/1600 sec f/2.8

When you first walk into the garden and follow the signs one of the first little bridges you cross has this little creek running underneath it. To get this shot I got the camera real low to the water.

ISO 2000 / 1/1600 sec f/2.8

Throughout the garden you will find these stone lanterns that is a traditional element found in Japanese Gardens. ISO 640 / 1/320 sec / f/2.8

Throughout the garden you will find these stone lanterns that is a traditional element found in Japanese Gardens.

ISO 640 / 1/320 sec / f/2.8

The largest bridge in the garden is found in the center and overlooks the Koi Pond. On the left side of the bridge you have the gazebo that also overlooks the Koi Pond and on the right the waterfall. ISO 640 / 1/800 sec / f/2.8

The largest bridge in the garden is found in the center and overlooks the Koi Pond. On the left side of the bridge you have the gazebo that also overlooks the Koi Pond and on the right the waterfall.

ISO 640 / 1/800 sec / f/2.8

Because the garden is full of plants and flowers it was the perfect location to play with depth of field and foreground blur! ISO 640 / 1/400 sec / f/2.8

Because the garden is full of plants and flowers it was the perfect location to play with depth of field and foreground blur!

ISO 640 / 1/400 sec / f/2.8

At one point during the evening this beautiful reflection of the gazebo showed. Because I love foreground blur I combined this with a reflection! ISO 640 / 1/400 sec / f.2,8

At one point during the evening this beautiful reflection of the gazebo showed. Because I love foreground blur I combined this with a reflection!

ISO 640 / 1/400 sec / f.2,8

Here is another stone structure in the garden creatively composed with foreground blur to make it more interesting. ISO 640 / 1/400 sec / f/2.8

Here is another stone structure in the garden creatively composed with foreground blur to make it more interesting.

ISO 640 / 1/400 sec / f/2.8

To get this shot I setup my Manfrotto Tripod at the end of the bridge and set my Olympus EM1 Mark II to continuous. It was set to 10 frames every .5 seconds but I could have bumped it down to 5 frames. ISO 640 / 1/640 sec / f/2.8

To get this shot I setup my Manfrotto Tripod at the end of the bridge and set my Olympus EM1 Mark II to continuous. It was set to 10 frames every .5 seconds but I could have bumped it down to 5 frames.

ISO 640 / 1/640 sec / f/2.8

Tips for visiting Kasugai Gardens:

  • It is not pet-friendly

  • Come early in the morning when it opens or right before it closes (Kasugai Gardens is located in downtown Kelowna so even though the garden isn’t overwhelmed with people the downtown core can be)

  • Respect all signage before entering the garden and inside

TUGBOAT BEACH & ROTARY MARSH PARK // Beautiful Location for Sunsets by the Water

Last week I visited Tugboat Beach a few times to relax, photograph Pepsi on the boardwalk and capture sunset images by the water.

It’s a beautiful location with many different spaces - you have Rotary Marsh Park, Tugboat Beach, the Boardwalk, and the Waterfront Park.

I love coming for picnics here. We typically do take out at one of our favourite restaurants and sit on the boardwalk, enjoying the lake!

Earlier in the week I took my pup Pepsi to the boardwalk for a dog photoshoot!

tugboat beach-03.jpg
tugboat beach-09.jpg
tugboat beach-10.jpg
tugboat beach-11.jpg
tugboat beach-13.jpg
tugboat beach-14.jpg
tugboat beach-07.jpg
tugboat beach-08.jpg
tugboat beach-05.jpg

Later in the week I went by myself to capture some sunset images by the water! On this day the sunset left behind these beautiful pastels in the sky.

tugboat beach-06-2.jpg
tugboat beach-09.jpg
tugboat beach-12.jpg
tugboat beach-07-2.jpg
tugboat beach-11.jpg
tugboat beach-10.jpg
tugboat beach-08-2.jpg

WHAT'S IN MY CAMERA BAG (JULY 2020) | Bagsmart Camera Bag

NOTE: These are not affiliate links to products or paid promotion. I don’t get paid to include or promote these products. These are my genuine thoughts that I like to share and make easy for you.

‘What’s in my Camera Bag’ are some of my favourite videos to watch on YouTube! I love seeing what camera bag other people have, what accessories they’re carrying, and if there is anything I should buy (because I have a shopping habit).

I knew after I received my Olympus EM1 Mark II I wanted to purchase a professional camera bag. I needed something that:

  • Didn’t look like a camera bag

  • Had room for non-camera essentials (glasses, wallet, miscellaneous bag, re-useable bag, snacks, etc.,)

  • Could carry my tripod

  • Had easy access into the bag but had security as well

  • Customizable inside

  • Can carry my 13” Macbook Air

I found this Bagsmart Camera Backpack on Amazon for $80 CAD and it’s been a great purchase! I took it on my road trip to Banff and Lake Louise and it was nice to have all my camera gear and essentials in one place. I don’t like travelling with several bags, I like to keep it to 1-2 bags (3 if I am travelling with Pepsi).

Two of my favourite features about this bag is one, it has a simple security deterrent on the bag that makes pick pocketing the inside contents challenging - it clasps the 3 zips together. The second feature I really like that was a bonus was that it can slide onto my rolling carry-on if I’m travelling with it.

I like to use this camera bag to store all my equipment in, take on road trips, or take hiking.

It can get significantly heavy when you load it with your camera gear, laptop and tripod. However, it’s only that heavy if I’m travelling to a destination. If I’m out exploring I’ll leave behind some equipment so it’s not terribly heavy on my back.

whats-in-my-camera-bag-01.jpg
whats-in-my-camera-bag-08.jpg
whats-in-my-camera-bag-09.jpg

If I am travelling into the city to try a new cafe or restaurant and I want to bring my camera equipment but I don’t want the large backpack with the tripod I’ll take the inserts from my main camera bag and I’ll insert it into my everyday backpack (also from Amazon) which is lighter and more compact.

It can fit my Olympus EM1 Mark II with the 12-40mm f/2.8 lens, my miscellaneous bag that I keep odd bits and ends in, my glasses, a small tripod, and my wallet.

It also has two side pockets that I can keep my phone in, a water bottle, or some sanitization material. It has a front pocket that zips that I will keep my phone battery packs in. As well, it zips in the back (so again it makes it challenging for pick pocketers).

Photo from MY TRAVEL ESSENTIALS .

I don’t have a ton of photography equipment but its nice that I can grow with the bag.

Even though these bags have been great so far I do have my eye on the Lo & Sons Claremont or the Ona Bowery Camera Bag (but again, I have a bit of a shopping habit).

I hope you enjoyed and I’ll see you next time :)

5 TIPS FOR PHOTOGRAPHING IN BORING PLACES | How I Find Inspiration

I am a huge believer that your eyes are the most valuable part of your kit and it’s about how you compose a shot and not how fancy or techy your camera is.

I mentioned this in my previous post but I love travel photography - food, landscapes, architecture, bodies of water and color.

However, I currently live in northern Alberta (Fort McMurray) and this place doesn’t quite jive with my photography style.

So, in this episode I shed some light on 5 tips that has helped me and will hopefully help you photograph in boring locations!

Tip #1 - Details, Patterns & Textures

Look for any details, pattern or textures. This can be the centre of a flower, the texture of a tree, the lines in an object. It could be any bump or groove.

ISO 200 / 1/250 / f/2.8

ISO 200 / 1/250 / f/2.8

Tip #2 - Lines

Look for any leading lines.

I love the the lines in this picture. The green trees and dark brown wood on the left and the pink trees and green grass on the right with the paved path right down the middle.

ISO 200 / 1/500 / f/2.8

ISO 200 / 1/500 / f/2.8

Tip #3 - Color

I like to look for any pops of color that I can fill the frame with. Some of the flowers right now are this beautiful vibrant pink (probably because of all the rain we're getting).

ISO 200 / 1/80 / f/2.8

ISO 200 / 1/80 / f/2.8

ISO 200 / 1/160 / f/2.8

ISO 200 / 1/160 / f/2.8

Tip #4 - Perspective

Change your perspective. Get low, get high and change your angle.

If there is any texture on the ground like rocks, grass, or wood I love to get low and incorporate more foreground elements.

The image on the left was shot at eye level. The image on the right was shot low from a different perspective with the rocks more in the foreground. Same setting but different composition.

ISO 200 / 1/320 / f/2.8

ISO 200 / 1/320 / f/2.8

ISO 200 / 1/400 / f/3.2

ISO 200 / 1/400 / f/3.2

Tip #5 - Subject + Foreground Blur

This is my absolute, hands down, go-to favorite composition technique. Framing your subject with foreground blur. You shoot with a really wide aperture and through something. Every time I go out I look for a plant, tree or flower to do this with.

ISO 200 / 1/250 / f/2.8

ISO 200 / 1/250 / f/2.8

ISO 200 / 1/250 / f/2.8

ISO 200 / 1/250 / f/2.8

ISO 200 / 1/250 / f/2.8

ISO 200 / 1/250 / f/2.8

Thanks for tuning into todays episode! Please be sure to follow Beautifully Wander on Instagram and YouTube!

IMPROVE YOUR PHOTOGRAPHY | Photo walk #1 at Lions Park, Fort McMurray

At least once a week I try to go for a photo walk or excursion! I typically choose a location and photograph whatever catches my eye. This weeks photo walk was at Lions Park in Fort McMurray.

I go for these photo excursions to practice my photography, relax and just get out of the house.

I did find myself agreeing with Chris Sale’s a landscape photographer from England in that filming YouTube videos can be a distraction when you’re trying to practice your photography. For me, I’m trying to film myself, film b-roll, and compose my shots and it can be hard. So in this try I wanted to focus less on filming myself and more on my photography all while still telling a story. Check below to see what I was able to produce!

When I get to a location I always look for a couple shots:

  • Shot that will set the scene

  • Detail shots

  • Patterns or textures

  • Something to shoot through

All images taken on the Olympus EM1 Mark II :)

ISO 200 | 1/200 | f/2.8

ISO 200 | 1/200 | f/2.8

ISO 200 | 1/200 | f/3.2

ISO 200 | 1/200 | f/3.2

ISO 200 | 1/200 | f/3.2

ISO 200 | 1/200 | f/3.2

ISO 200 | 1/200 | f/3.2

ISO 200 | 1/200 | f/3.2

This mural can be found at Lions Park in Fort McMurray (3 Tolen Drive). It was painted by Daniel J. Kirk and Ivan Ostapenko and was unveiled on September 18th, 2015.

ISO 250 | 1/125 | f/2.8

ISO 250 | 1/125 | f/2.8

If I’m struggling to compose a shot I like to do one of the following things:

  • Fill the frame

  • Look for patterns or textures

  • Get low

ISO 200 | 1/80 | f/3.2

ISO 200 | 1/80 | f/3.2

ISO 250 | 1/60 | f/2.8

ISO 250 | 1/60 | f/2.8

ISO 250 | 1/250 | f/2.8

ISO 250 | 1/250 | f/2.8

ISO 250 | 1/250 | f/3.2

ISO 250 | 1/250 | f/3.2

ISO 250 | 1/250 | f/2.8

ISO 250 | 1/250 | f/2.8

ISO 250 | 1/200 | f/2.8

ISO 250 | 1/200 | f/2.8

Towards the end of my photo walk I thought I would try some self-portraits!

ISO 400 | 1/200 | f/2.8

ISO 400 | 1/200 | f/2.8

ISO 400 | 1/200 | f/2.8

ISO 400 | 1/200 | f/2.8

ISO 400 | 1/200 | f/2.8

ISO 400 | 1/200 | f/2.8

I found I was able to create significantly more photos in this try than I have in the past. This could be because of the location but it could be because I was dedicating more time to photography than filming.

Follow Along!

In this week’s video I take you to Lions Park in Fort McMurray!

FAVORITE PHOTOGRAPHY APPS | Editing, Planning & Creating

I split a lot of my photography workflow between my Macbook and iPhone. Typically, when I am posting images to my instagram account @beautifullywander I edit and plan on my phone and if I post on my website or YouTube I create on my laptop. Follow along to see what my favourite photography apps are!

Lightroom

I used to edit on VSCO for the specific reason that you could copy your edits and paste onto other images for free. However, a few months ago I started using Lightroom and recently purchased the paid version so I can edit images on my laptop and have the copy-paste version on my phone.

In the video I take you through how I edit my images in Lightroom to be posted on @beautifullywander.

IMG_7499.JPG
Copy of Untitled.png

Planoly

After I edit the images I want to upload to my Instagram I use Planoly to plan out my feed. I look for what images will allow me to keep a consistent and coherent feed.

You can schedule your posts in Planoly but I mostly use it to plan my feed.

IMG_7576.PNG
IMG_7577.PNG

Caption Kit

I used to put periods when I wanted line breaks on my instagram captions until I discovered Caption Kit! With this app I can copy my text from my notes app and paste it into the app, when you hit generate it will copy the text into your clipboard and when you paste into Instagram it will copy over.

IMG_7578.PNG
IMG_7579.PNG

Unfold

I love Unfold to create my Instagram layouts! I have a few favorites that I like to use (Ripped Paper and Northwell text). Like my Instagram feed I wanted to create a form of branding with my Instagram stories and this makes it possible!

IMG_7580.PNG
IMG_7581.PNG

Other Apps

Camera Connect Apps (Canon & Olympus)

I typically use the camera connect apps for transferring images wirelessly. I LOVE this capability now with cameras! I don’t always carry my laptop with me so it’s nice if I want to only transfer a few images to be able to do that and not have to wait until I get home.

You can remotely control your camera with these connect apps which I don’t use too often but I want to definitely try and use it more on our future travels!

Canon Mini Printer

I bought a Canon Mini Printer last Christmas so I can print photos for my journal and I love it! It connects to my phone so I can print any photo on my phone onto mini polaroid paper.

Squarespace App

I don’t use the Squarespace app too often on my phone - I mostly create my website content on the laptop but it’s nice having the capability to create or make quick fixes on the go!

Follow Along!

You can follow along on how I edit, create and plan my content for Beautifully Wander on YouTube!

Samples Images from the Olympus OM-D E-M1 Mark II

Unfortunately, the Buffalo’s weren’t out when I went to the Buffalo View Point here in Fort McMurray so here are some adorable pictures I took of my pup Pepsi!

ISO 640 | 1/500 | f/2.8

_5230023.jpg
_5230016.jpg
_5230015.jpg
_5230012.jpg

Those are my favorite photography apps on my iPhone for editing, planning and creating! I hope you enjoyed and see you next time! :)

OLYMPUS EM1 MARK II | MY SETUP + CUSTOMIZATION

I LOVE how much you can customize your setup in the Olympus system! There are so many buttons that you can map so when you’re shooting the camera feels natural to you! Feel free to follow along by playing the video where I walk you through the following steps and check out the actual images I have taken with this camera at the bottom of this page!

Untitled design (1).png

SHOOTING CONTROL PANEL

By clicking on the top left button it will bring up your entire shooting control panel where you can change your ISO, white balance, card slot reading, image stabilization, face auto detect, etc.,

I liked where this button is mapped right now so I have left it where it is.

1.png

ISO

You can change your ISO in the shooting control panel by going to the top left of the screen but I mapped ISO to the AEL/AFL button by:

-Clicking MENU

-Scrolling to the CUSTOM MENU (GEAR ICON)

-Down to B

-Over to BUTTON FUNCTION

-Down to AEL/AFL FUNCTION

-Selecting ISO/WB (where the back dial changes the ISO and the front dial changes white balance)

2.png

MEMORY CARD

The EM1 Mark II has dual slot memory cards that you can map as well by:

-Scrolling down to the MEMORY CARD 1 AND 2

-Selecting your preference

3.png

IMAGE STABILIZATION

Your Image Stabilization helps reduce the amount of camera shake when you’re shooting in low light or with high magnification and you can do this by:

-Scrolling down to the IMAGE STABILIZER ON THE LEFT HAND SIDE

-Selecting S-IS1 for all direction shake (if you want specifically vertical or horizontal shake you can select S-IS2 or S-IS3)

If you would rather you can also change the Image Stabilization by:

-Clicking on MENU

-Scrolling down to CUSTOM MENU (GEAR ICON)

-Scrolling down to C2

-Clicking on IMAGE STABILIZER and switching it to S-IS1, S-IS2 or S-IS3

6.png

FACE AUTO-DETECT

I have been primarily shooting landscapes and travel photos with not a lot of people so I turned my face auto-detect off by:

-Scrolling down to the SMILEY FACE icon

-Clicking OFF

8.png

AUTOFOCUS (AF) AREA

Out of the gate if you scroll to the AF Area it is by default set to cover the entire area but you can change it by using the back dial button to change your AF area.

10.png

SINGLE AF | CONTINUOUS AF | MANUAL FOCUS

Switching between the different modes of focusing is super simple by:

-Clicking on the AF BUTTON on the top left of the camera

-Scrolling to choose SINGLE AF, CONTINUOUS AF OR MANUAL

By default this button is mapped to do this function and I like where it is currently so I have left it alone.

If you would rather you can also change your autofocus in the MENU by:

-Scrolling to the CUSTOM MENU (GEAR ICON)

-Selecting A1

-Selecting the AF MODE and changing it to single, continuous or manual focus

11.png

MANUAL FOCUS CLUTCH

I do like switching between single autofocus and manual focus so I have left the manual focus clutch as operative. The Manual Focus Clutch is the feature on the lens of the camera that you can switch on and off between auto focus and manual. You can disable or enable it by:

-Clicking on the MENU

-Scrolling down to the CUSTOM MENU (GEAR ICON)

-Scroll down to A3

-Click on MF CLUTCH and switch it to OPERATIVE or INOPERATIVE

12.png

RESETTING CUSTOMIZATIONS

If you want to reset your camera to start fresh you can reset by:

-Scrolling to SHOOTING MENU 1

-Clicking on RESET/CUSTOM MODE

13.png

SHOOTING SETTINGS

You can change your shooting settings such as to self-timer, sequential, interval by:

-Scrolling to SHOOTING MENU 1

-Scrolling to the very bottom and select the mode you want

14.png

ANTI-SHOCK

Your Anti-Shock will help you prevent any small vibrations that occur when you press the shutter, you can set it by:

-Clicking on SHOOTING MENU 2

-Scrolling to ANTI-SHOCK

-Setting it to 0

15.png

AF AREA POINTER

If you want to display your frame while the shutter button is half pressed :

-Scroll down to CUSTOM MENU (GEAR ICON)

-Toggle over to A1

-Scroll down to AF Area Pointer

-Change it to On2

16.png

AF TARGETING PAD

By enabling the AF Targeting Pad you can use the viewfinder and use your fingers on the screen to change where you’re focusing, to do this in the CUSTOM MENU:

-Toggle over to A2

-Scroll to the AF Targeting Pad

-Switch to ON

17.png

AF ILLUMINATOR

To turn off the AF Illuminator:

-Scroll down to the AF Illuminator

-Switch to OFF

18.png

BUTTON FUNCTIONS

You can change a lot of the buttons on the Olympus and make it perfect for you!

Scroll down to B

-Toggle over to BUTTON FUNCTION

-From here you can go in and really change and map your buttons (I changed the AEL/AFL Button on the back of the camera to change my ISO and White Balance)

19.png

LIVE BOOST MODE

By turning off Live Boost Mode you can see the exposure settings and the image you see is the same as that of the final product, to do this:

-Scroll down to D2 in the CUSTOM MENU

-Turn the Live Boost Mode OFF

20.png

EQUALLY VALUE

I set my Default Setting to Equally Value so when I preview my image and zoom in it directly goes to 1:1 ratio, to do this:

-Scroll down to Default Setting

-Set it to Equally Value

21.png

AF CONFIRMATION BEEP

When you are shooting and your autofocus is confirmed it will by default beep, to turn it off:

-Scroll down to D4 in the CUSTOM MENU (GEAR ICON)

-Toggle over to the first selection (AF CONFIRMATION BEEP)

-Turn it OFF

22.png

NOISE REDUCTION

You can change the amount of noise reduction performed at high ISO sensitivity by changing the Noise Filter - I don’t shoot a lot right now in high ISO so I’ve turned mine off:

-Scroll down to E1 in the CUSTOM MENU (GEAR ICON)

-Toggle down to NOISE FILTER

-Turn it OFF

JPEG IMAGE QUALITY MODE

I’ve switched my JPEG Image Quality Mode to superfine by:

-Scrolling down to G in the CUSTOM MENU (GEAR ICON)

-Toggle down to JPEG Image Quality Mode

-Set the first image (second box) to SF (superfine)

24.png

KEEP WARM COLOR

I also turn my Keep Warm Color Off and change the color space to Adobe RGB by:

-Scrolling down KEEP WARM COLOR

-Switching it OFF

-Scrolling down to COLOR SPACE

-Switching it to ADOBE RGB

26.png

EVF AUTOSWITCH

When you are using the Olympus camera you have a viewfinder and a screen that you can see what you are capturing, by default it is set to automatically switch when you put your eye to the viewfinder and when you bring it down it will switch to the screen, to turn this off:

-Scroll down to I

-Toggle over to EVF AUTOSWITCH

-Turn it OFF (I like this feature so I leave mine ON)

27.png

PICTURE VIEWING

To save battery I have heard that you can turn the image viewer off - I do this when I am travelling and its important to conserve battery, to do this:

-Scroll down to the SETUP MENU on the left hand side (TOOL ICON)

-Scroll down to REC VIEW

-Scroll and choose what you would prefer - 0.5 seconds, 0.3 seconds, OFF, etc.,

29.png

SAVE CUSTOMIZATIONS

To save any of your customizations that you make on the camera for next time:

-Click on the SHOOTING MENU 1

-Toggle over to RESET/CUSTOM MODES

-Scroll down to ASSIGN TO CUSTOM MODE

-Select which CUSTOM MODE you want to set it to C1, C2 or C3 on the top dial (I’ve set mine to C1)

Follow along!

Feel free to follow along with my video on how I setup my camera!

Sample Images from the OM-D E-M1 Mark II

_5100014 2.jpg
_5100001.jpg
_5100015 2.jpg
_5100019.jpg