I started the ‘Create with Me’ series over on my YouTube channel because I wanted to experiment with other kinds of photography. Instead of just posting the result to Instagram I decided to document the journey, the process, and share it on my YouTube.
Today, I get back to the reason I started this series and bring you along with me as I create another cloud timelapse.
What is a Timelapse?
You can create a photo or video timelapse but essentially your footage/photos are taken over a long period of time but are shown quite quickly. Thus, something that takes a long time like the clouds moving in the sky, the sun setting, etc., are shown as a short clip.
Setting Up for My Timelapse
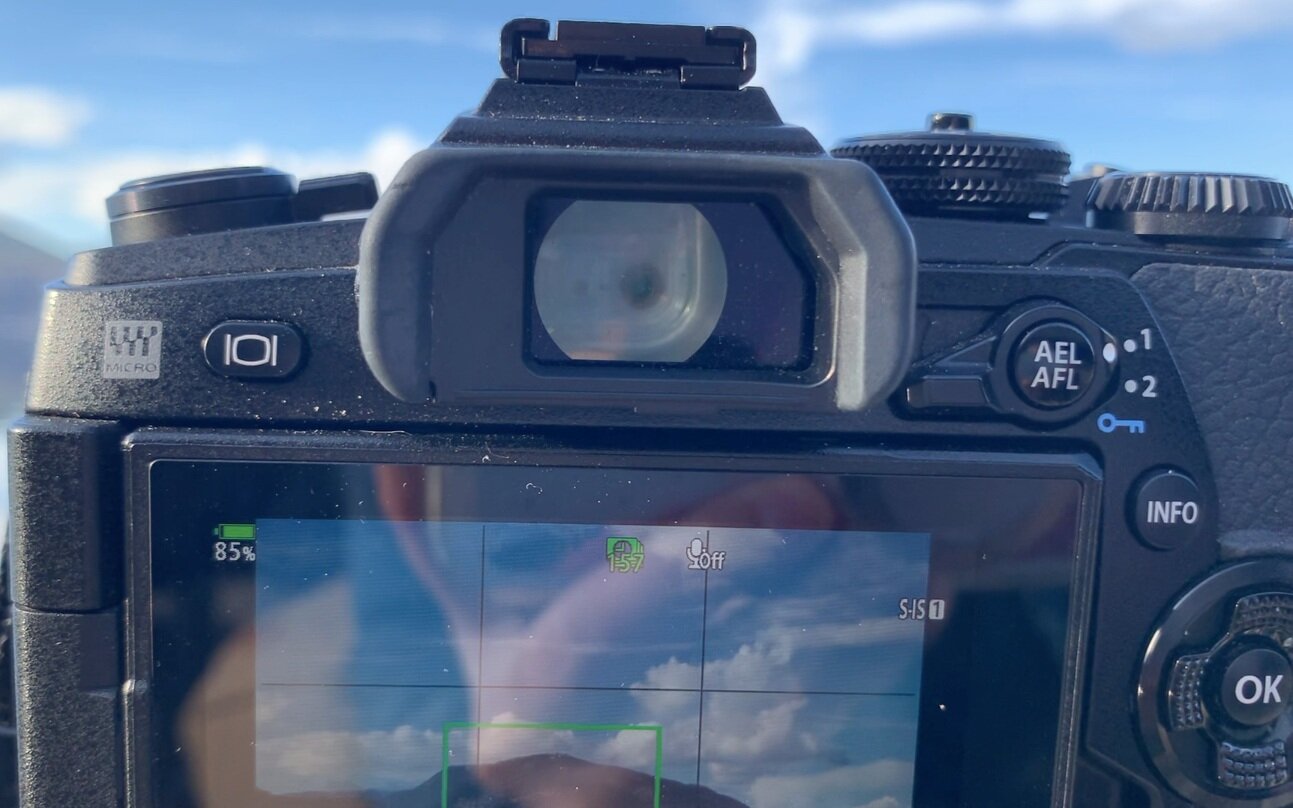
To setup for my timelapse I have my Olympus EM1 Mark II with the M.Zuiko 12-40mm F2.8 PRO lens setup on my tripod. I set my in-camera settings to an ISO 200, 1/50 and an aperture of F22
To enable the timelapse setting on my camera:
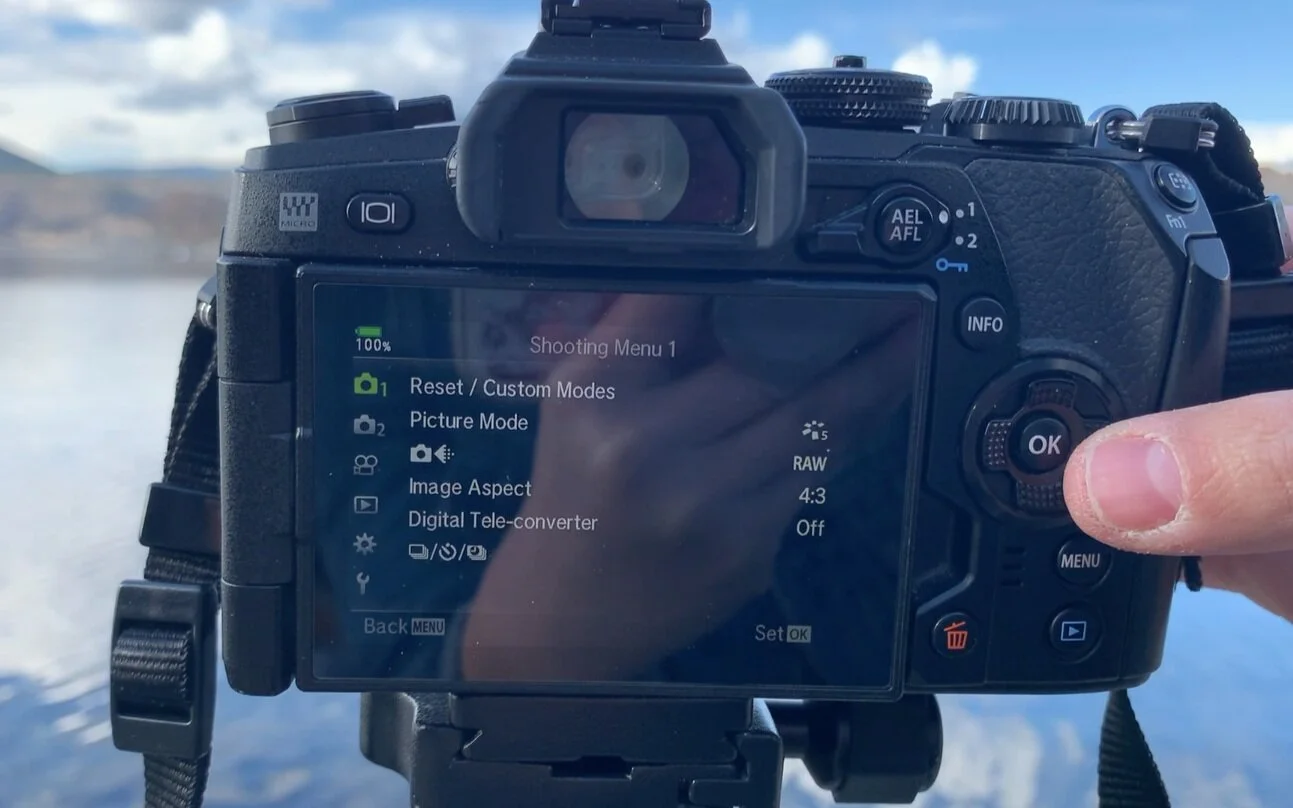
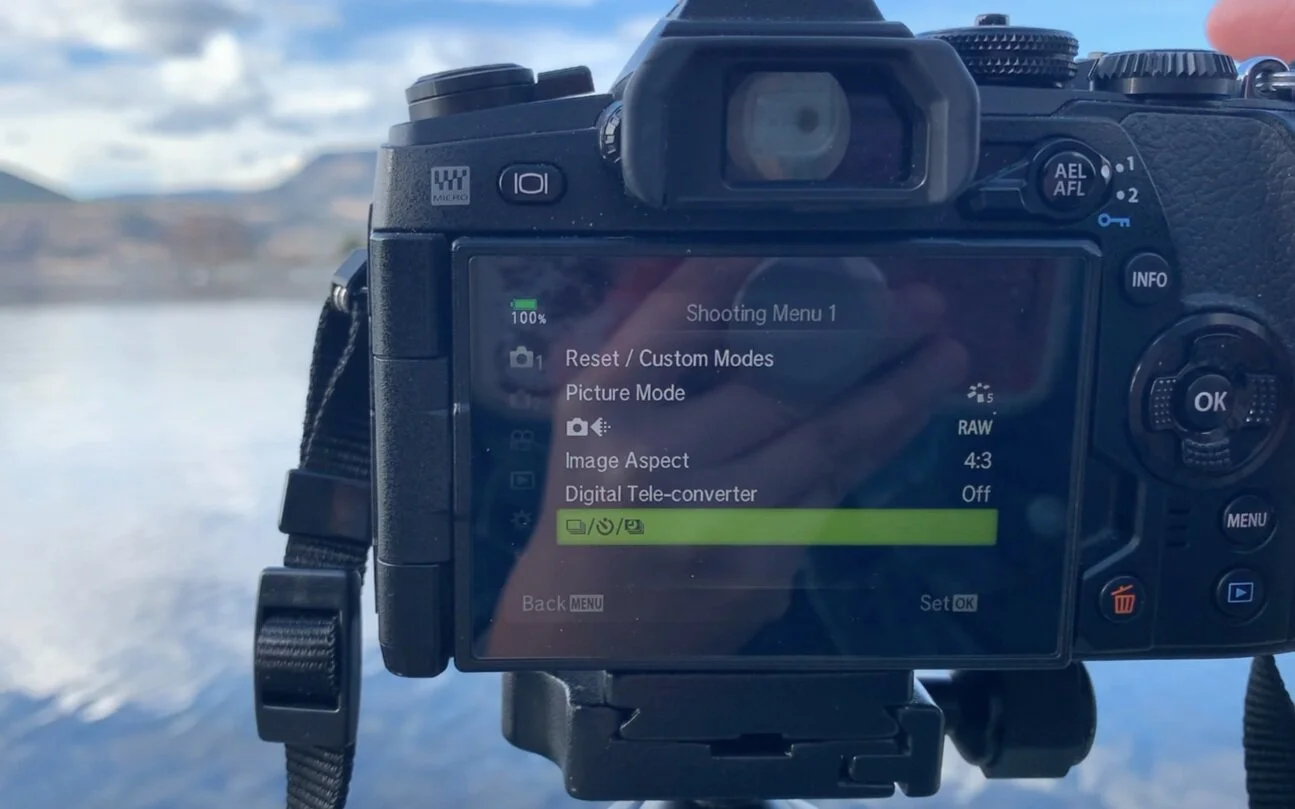
Select MENU
Go to CAMERA 1
Go all the way down to the bottom
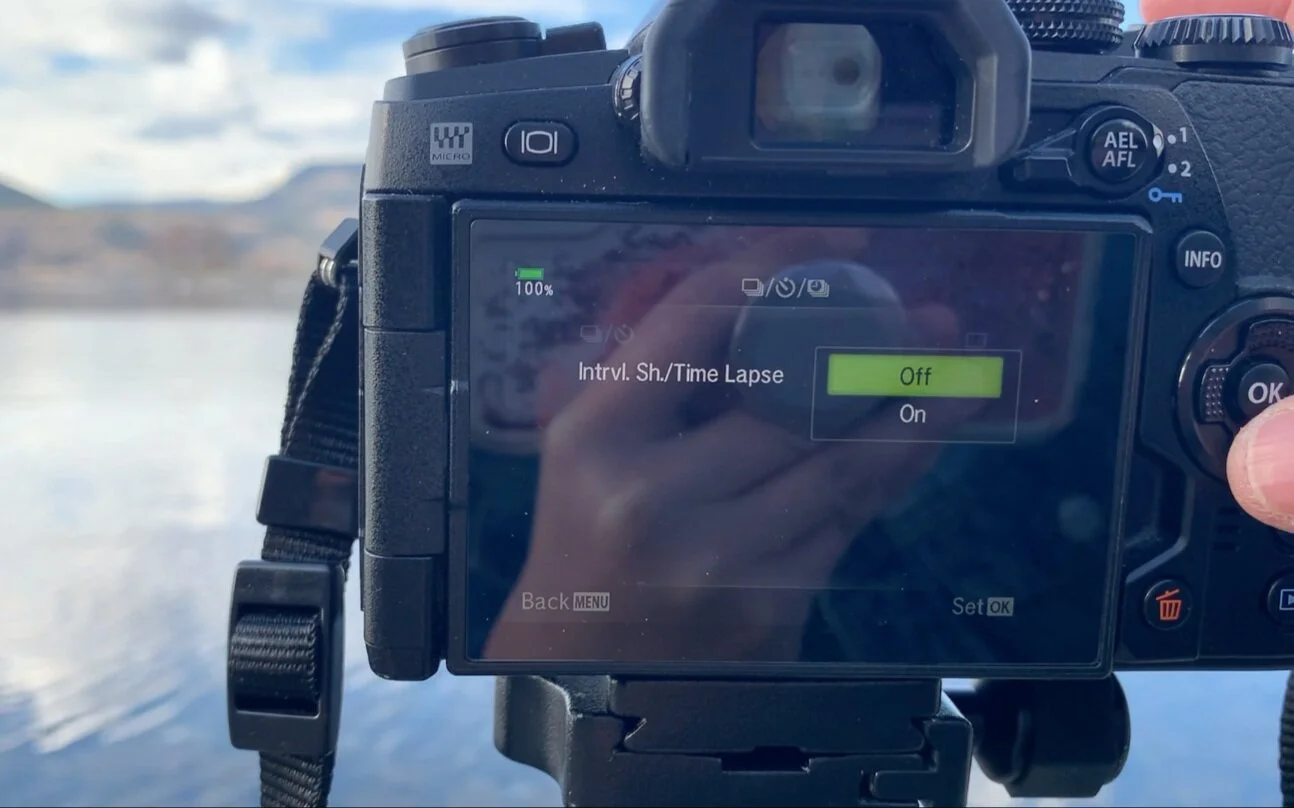
Turn the timelapse setting ON
To change my timelapse setting I went further into the timelapse menu and adjusted my frame count and interval length. I ended up with a frame count of 540 frames, a start waiting time of 2 seconds and an interval length of 5 seconds.
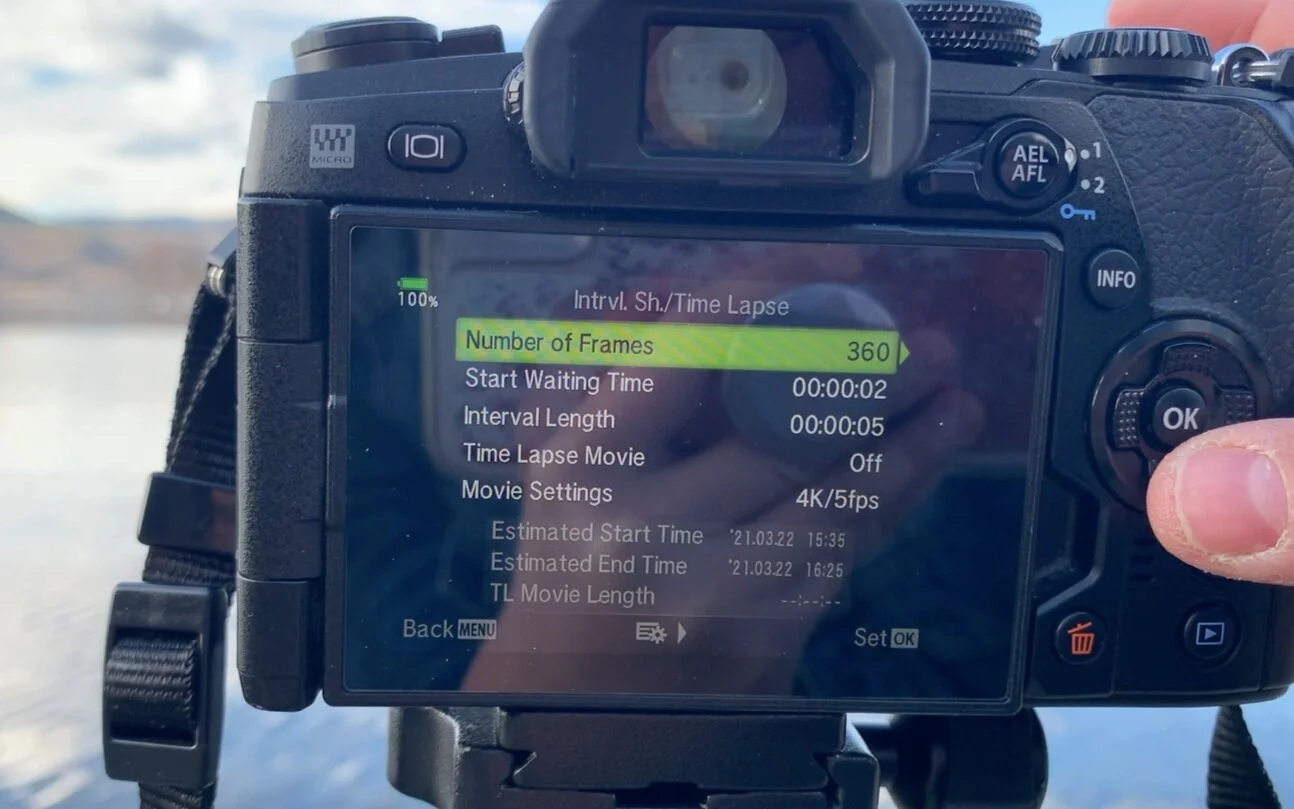
I forgot to mention that I heard if you turn your TIMELAPSE MOVIE to ON instead of OFF your camera will capture both still photos and .AVI. However, I haven’t fully experimented with this or creating a timelapse in camera.
You’ll know your timelapse is ON because on your camera screen a number with your frame count will appear in white at the top of the screen. Once it is going the frame count will go green and start counting down.
Of course, this entire process might differ if you are using a different camera.
What’s Interesting About Timelapses
Up until a few weeks ago I wasn’t interested in doing timelapses, however, I’ve enjoyed the pursuit of creating and experimenting with timelapses. I love the essence of capturing something slow and seeing the magic when it comes together. I think it offers something different to the eye and the mind.
Editing Workflow
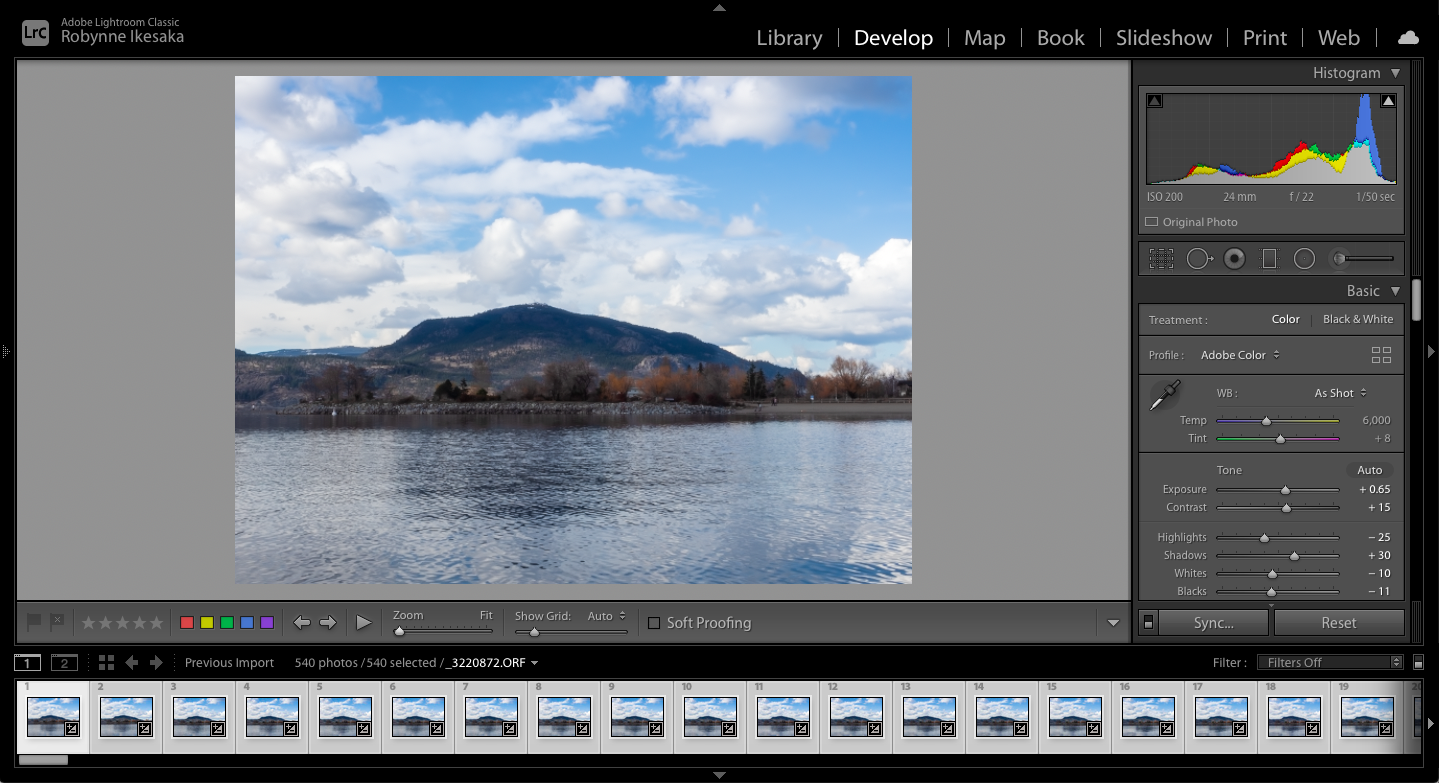
To edit my timelapses I have been manually editing them. I pull the photos into Lightroom and do some light post-processing. To make this process easier I edit the first photo to how I like and sync the edits to the rest by selecting them all and hitting sync. The pastings of the edit takes a while but after it is done I go in and check to make sure the edits are how I like.
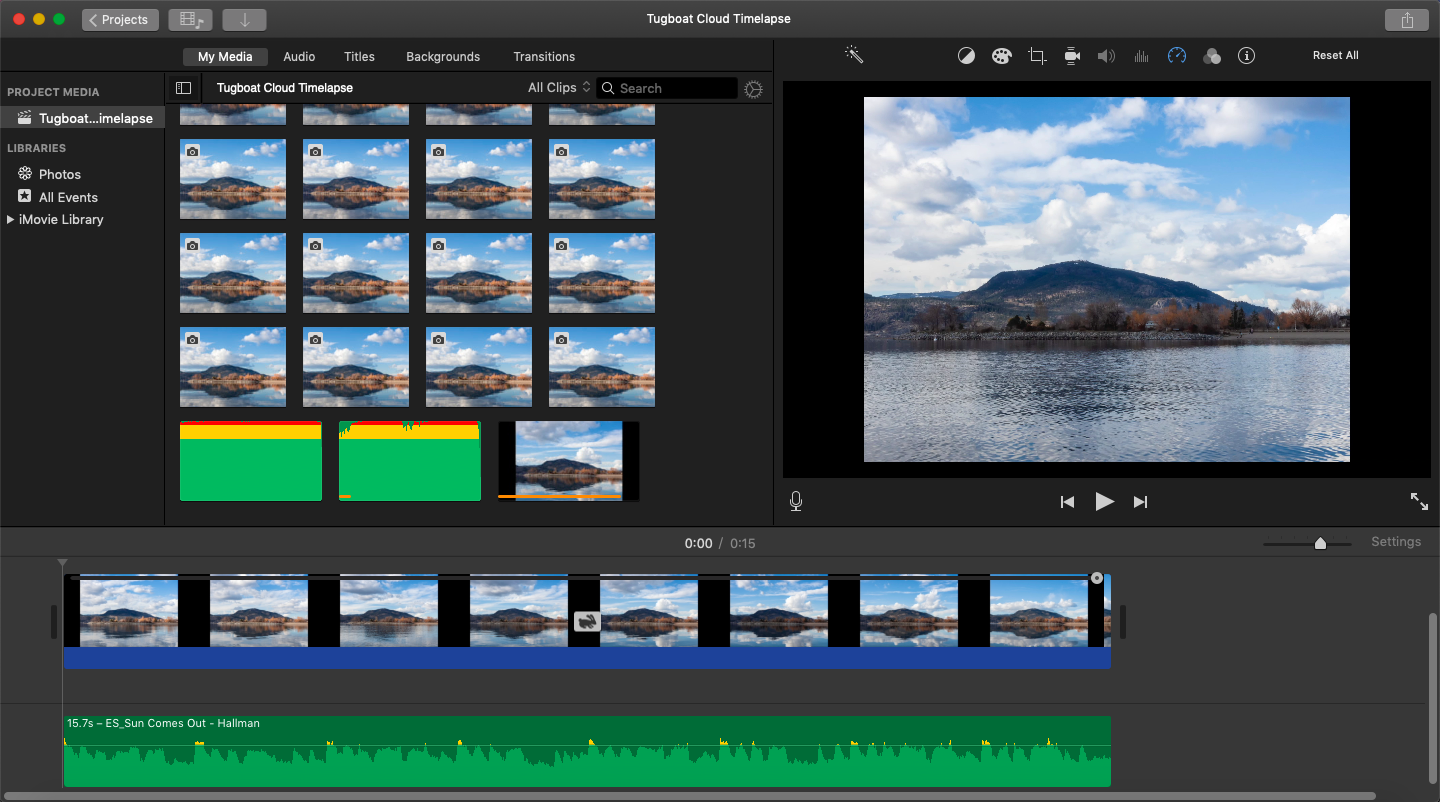
After the photos are all edited and exported I pull the images into iMovie to do some manual control of stringing the photos together. Similar to how I edit my stop motions in iMovie I shorten each clip to its shortest length - .10 seconds. .This clip length is still too slow for my liking of a cloud timelapse so to get around this limitation I further export the whole thing and re-import it into the timeline. Once it’s re-imported I can adjust the speed of the timelapse. Depending on the timelapse I have played around with a custom speed of 250-400%.
For this timelapse I settled with a custom speed of 400%.
The last step was to add music! I find all my music for my YouTube videos, stop motion and timelapse clips on Epidemic Sound. For this timelapse I selected the song Sun Comes Out.
After the music is added it’s finished!
Manual vs. In-Camera Timelapses
I personally haven’t experimented with in-camera timelapses yet. I’ve manually created the timelapses so far by capturing still photos, editing in Lightroom and stringing together in iMovie. I love the manual control to change the speed of my subject.
Final Thoughts
I love the result of a timelapse! Cloud timelapses have been my favourite with sunset timelapses being a close second. However, sitting around for 45-minutes and waiting for the timelapse to finish is kind of boring. The post-processing of the timelapse manually does take a long time but I have yet to try creating a timelapse in camera.
I hope you enjoyed todays Create with Me! If you have any tips on creating timelapses leave a comment on the video!